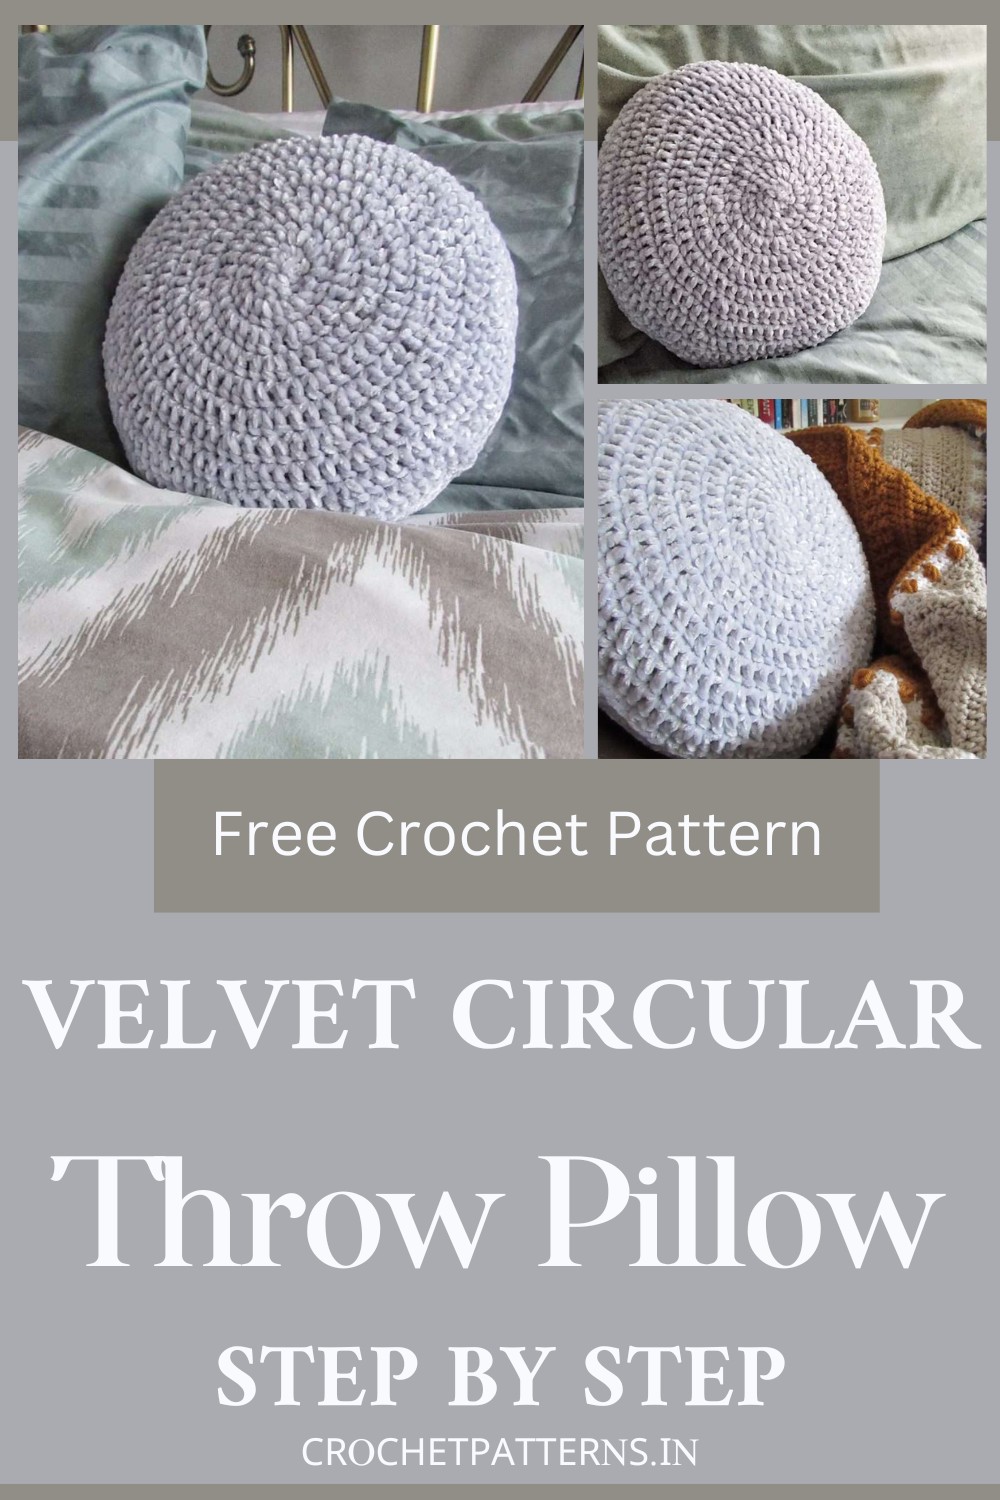
Elevate your home decor with this stunning Retro Velvet Circular Throw Pillow crochet pattern. It's amazing how the tactile charm of Bernat Velvet Yarn combines with the mesmerizing circular design to create an absolute masterpiece. Its softer-than-cloud texture rendered by the velvet yarn not only looks elegant but also invites you to sink in your fingers or rest your head.
Crochet Velvet Circular Throw Pillow
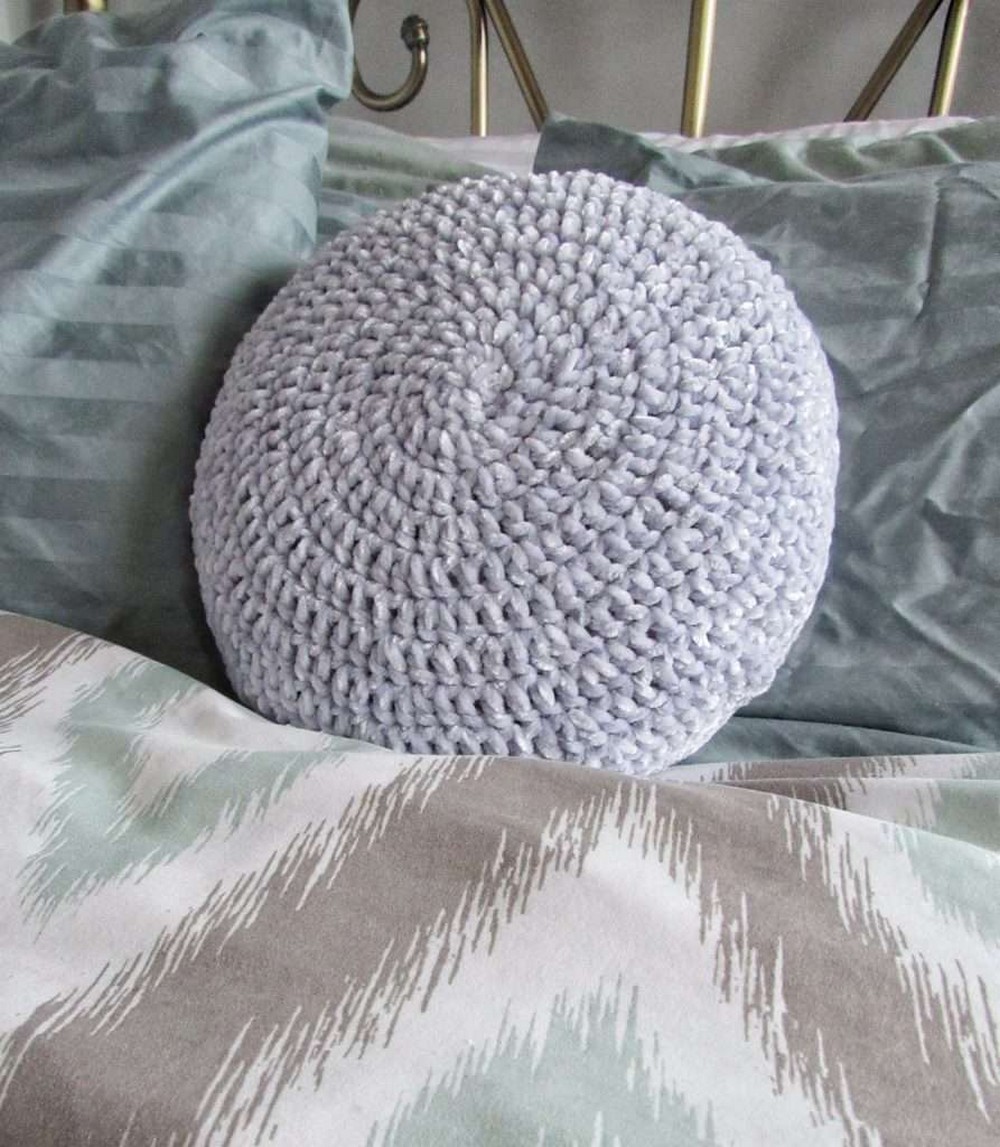
Moreover, the enduring charm of the vintage yet contemporary style accentuates the aura of any setting. This pillow pattern is a clever mix of aesthetics and comfort, prompting everyone to appreciate the creator's skill and passion for crochet craft. Indeed, it is a marvelous addition to any crochet enthusiast's collection!
Materials Required
- 12″ Circular Pillow Form
- 7.0mm Crochet Hook
- Yarn Needle
- Scissors
- Bernat Velvet Weight 5 Bulky (100% Polyester, 315 yd/ 288m, 10.5 oz/ 300 g)
- Color: Softened Blue
- Yardage: 1 skein – used approximately 172 yds in this project
Abbreviations
- Ch – chain
- St(s) – stitch(es)
- MR – magic ring
- Sl st – slip stitch
- Sc – single crochet
- Dc – double crochet
- Rnd – round
- [] – Repeat the instructions inside these brackets.
Crochet Pattern
Begin with two crochet circles:
- Make a magic ring (MR).
- Round 1: Ch 2, make 10 dc in MR. Join with a sl st. (10 dc)
- Round 2: Ch 2, make 2 dc in each st around. Join with a sl st. (20 dc)
- Round 3: Ch 2, [1 dc in first st, 2 dc in next st] around. Join with a sl st. (30 dc)
- Round 4: Ch 2, [2 dc in first st, 1 dc in next 2 st(s)] around. Join with a sl st. (40 dc)
- Round 5: Ch 2, [1 dc in first 3 st(s), 2 dc in next st] around. Join with a sl st. (50 dc)
- Round 6: Ch 2, [2 dc in first st, 1 dc in next 4 st(s)] around. Join with a sl st. (60 dc)
- Round 7: Ch 2, [1 dc in first 5 st(s), 2 dc in next st] around. Join with a sl st. (70 dc)
- Round 8: Ch 2, [2 dc in first st, 1 dc in next 6 st(s)] around. Join with a sl st. (80 dc)
- Round 9: Ch 2, [1 dc in first 7 st(s), 2 dc in next st] around. Join with a sl st. (90 dc)
- Round 10: Ch 2, [2 dc in first st, 1 dc in next 8 st(s)] around. Join with a sl st. (100 dc)
- Round 11: Ch 1, [1 sc in first 9 st(s), 2 sc in next st] around. Join with a sl st. (110 sc)
Fasten off, making sure to leave a long tail (about 20″), and weave in the rest of your ends (excluding the long tail).
Repeat this process to make a second circle!
Sewing Your Circular Pillow Together
- Place the circles on top of each other, making sure that the right sides are facing outward.
- Thread the yarn needle with the long tail you left (about 20″), and begin to whip stitch around the circle.
- When you have sewn halfway around your circle, insert your pillow form.
- Continue to whip stitch around your circle.
- When you've sewn your last pair of stitches together, work your remaining tail through your work.
- Make a knot before you cut your yarn tail; this ensures your work security and stops it from unraveling between washes.
Now, you have your complete Velvet Circular Throw Pillow!