
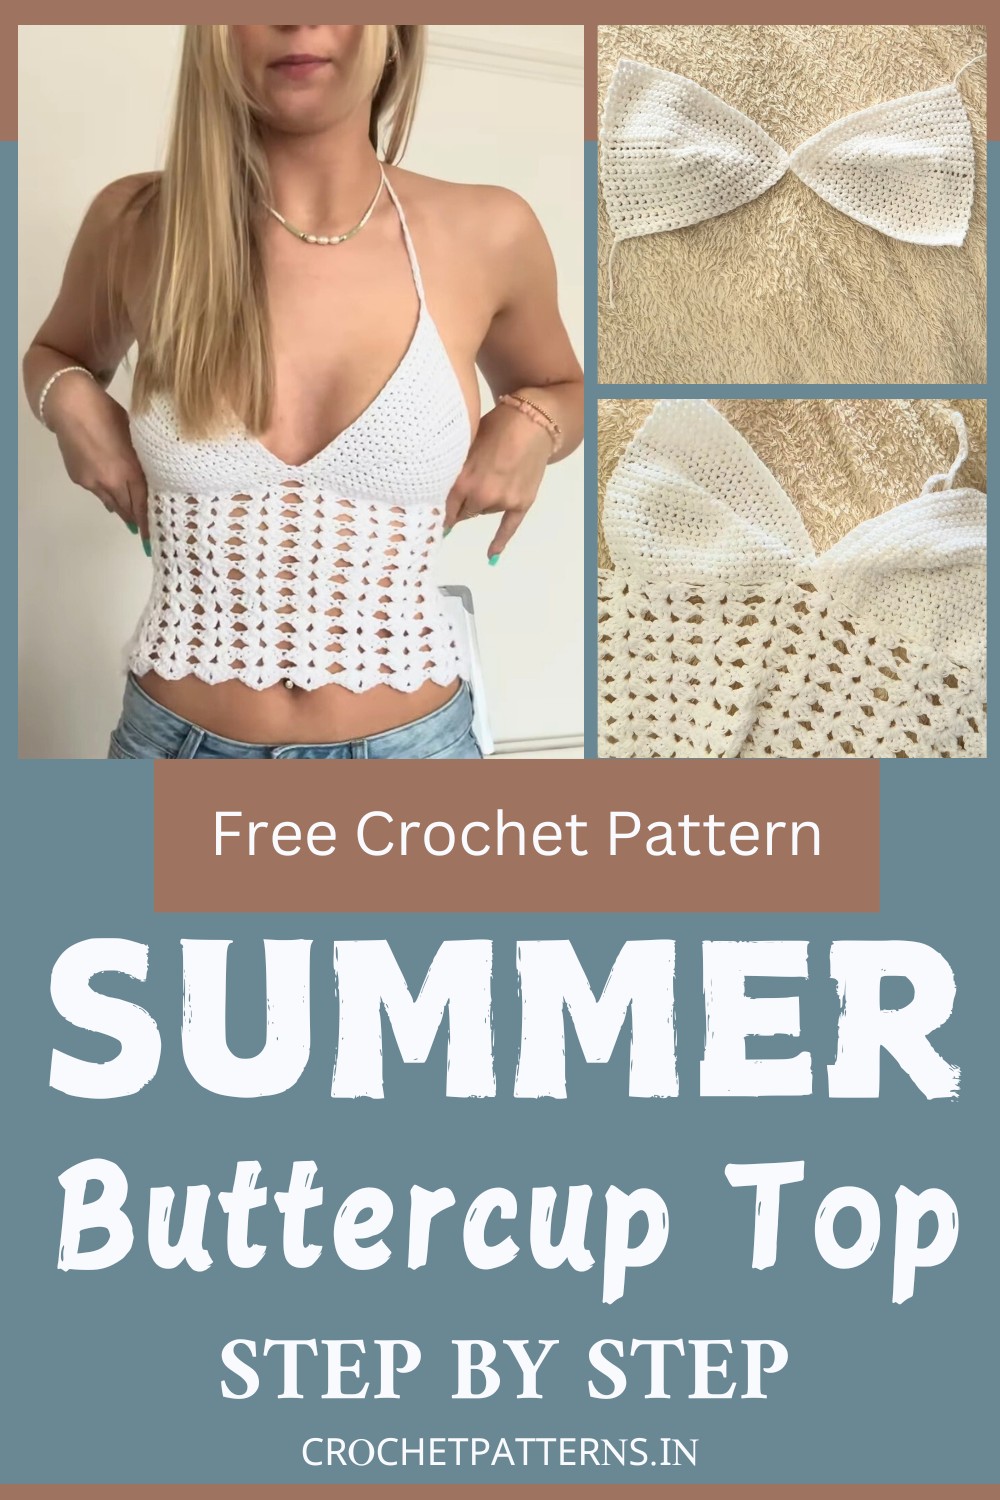
The crochet Buttercup top is a charming, hand-made garment that's perfect for sunny days! Using soft cotton yarn, you craft a lovely piece by crocheting small, tight loops from the bottom up. The top features cute cups that gently cover the chest and are joined by delicate straps crossing gracefully at the back.
Crochet Buttercup Top Pattern
This amazing project not only allows you to create a bespoke wardrobe piece perfect for beach outings or casual wear. But also offers a joyful way to relax as you loop and weave the yarn with your own hands. Whether you're new to crocheting or a seasoned expert. Making your own Buttercup top is a delightful project that adds a touch of handmade charm to your clothing collection.
Materials Needed:
- Drops Paris uni color 100% cotton in color 19 (or similar yarn for the demonstration)
- King Cotton Aran yarn 100% cotton in white (for the actual project)
- 4.5 mm crochet hook
- Scissors
- Stitch markers or earrings
Cup Construction:

Start the Cup: Make a slip knot and chain the length from where the cup should sit on the outer edge of the chest to the center. (For a size small, chain 14, where one is for turning, thus the count is 13 + 1 for turning).
- Skip the first chain, then single crochet in each chain until the end.
Create Rows: Turn work, chain one for turning, and single crochet over the initial row for a total of two rows with 13 stitches each.

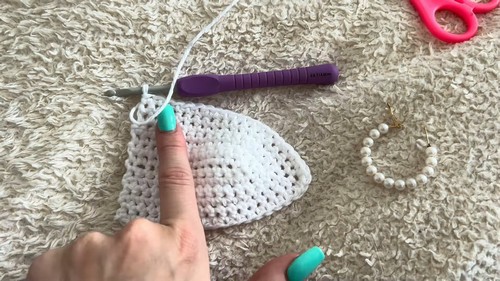
Begin Shaping Cup: In the last stitch of row two, place three single crochets, marking the second one with your stitch marker. This begins the curve of the cup.
- Turn work, chain one, and single crochet back down, then repeat the increase at the curve point marked by the stitch marker, repositioning the stitch marker each time to the second increase stitch.
- Continue increasing at the curve of the cup to create a semi-circle shape, until the cup is large enough to cover comfortably.
Joining Cups and Adding Straps:
Join Cups Side by Side: Make sure cups are facing the same direction, attach them together by chaining the length for the back strap, and doing one row of single crochet along the bottom of the cups.
Create Chain for Back Strap: Chain 90 (or desired length).
- Attach the chain to the other side by starting on the outer edge of one cup, then single crochet along the bottom edge of the cups making them sturdier.
- Secure the middle more by slip stitching on the inside edge of the cups to bring them closer together.

Bottom Part of Top (Cluster Stitch Pattern):
Start Base Chain: Chain 14 for the base, then work in sets of seven for symmetry.
- Cluster Formation: Perform clusters of three double crochets, chain two, and three more double crochets, all in the same stitch space, while skipping six stitches between clusters.
- Expansion: Continue with subsequent rows by placing each new cluster into the chain two space from the previous row's cluster.
- Repeat: Keep layering rows until desired length, aiming for symmetry across the bottoms of the cups.

Finishing Touches:
- Halter Straps: Create foundation chain straps with 60 chains (or to your measurement), attaching one end to the top of each cup and weaving in loose ends.
- Edging: Single crochet around the edges if desired for a neater finish.
- Tie-Back Strap: Weave in the back straps criss-cross through the stitches at the back for extra support.
- Closure: Your top closes by tying in the back and behind the neck with the straps you've created.
Final Note:
- The creator of the video at one point mentions considering doing "granny square bags" for a future project.


