Dress up your wardrobe with this free crochet blouse pattern that guides you to sew stylish and attractive top you’ll love to wear every day.
Even the most thoughtfully chosen outfits can sometimes miss that unique touch a crochet blouse provides. Subtle yarn colors and delicate stitches add personality and style, ensuring any look stands out in all the right ways. Step-by-step patterns guide the process, revealing gentle curves, decorative edges, and floral details that result in a blouse with both beauty and comfort.
Free Crochet Blouse Pattern for a Perfect Fit
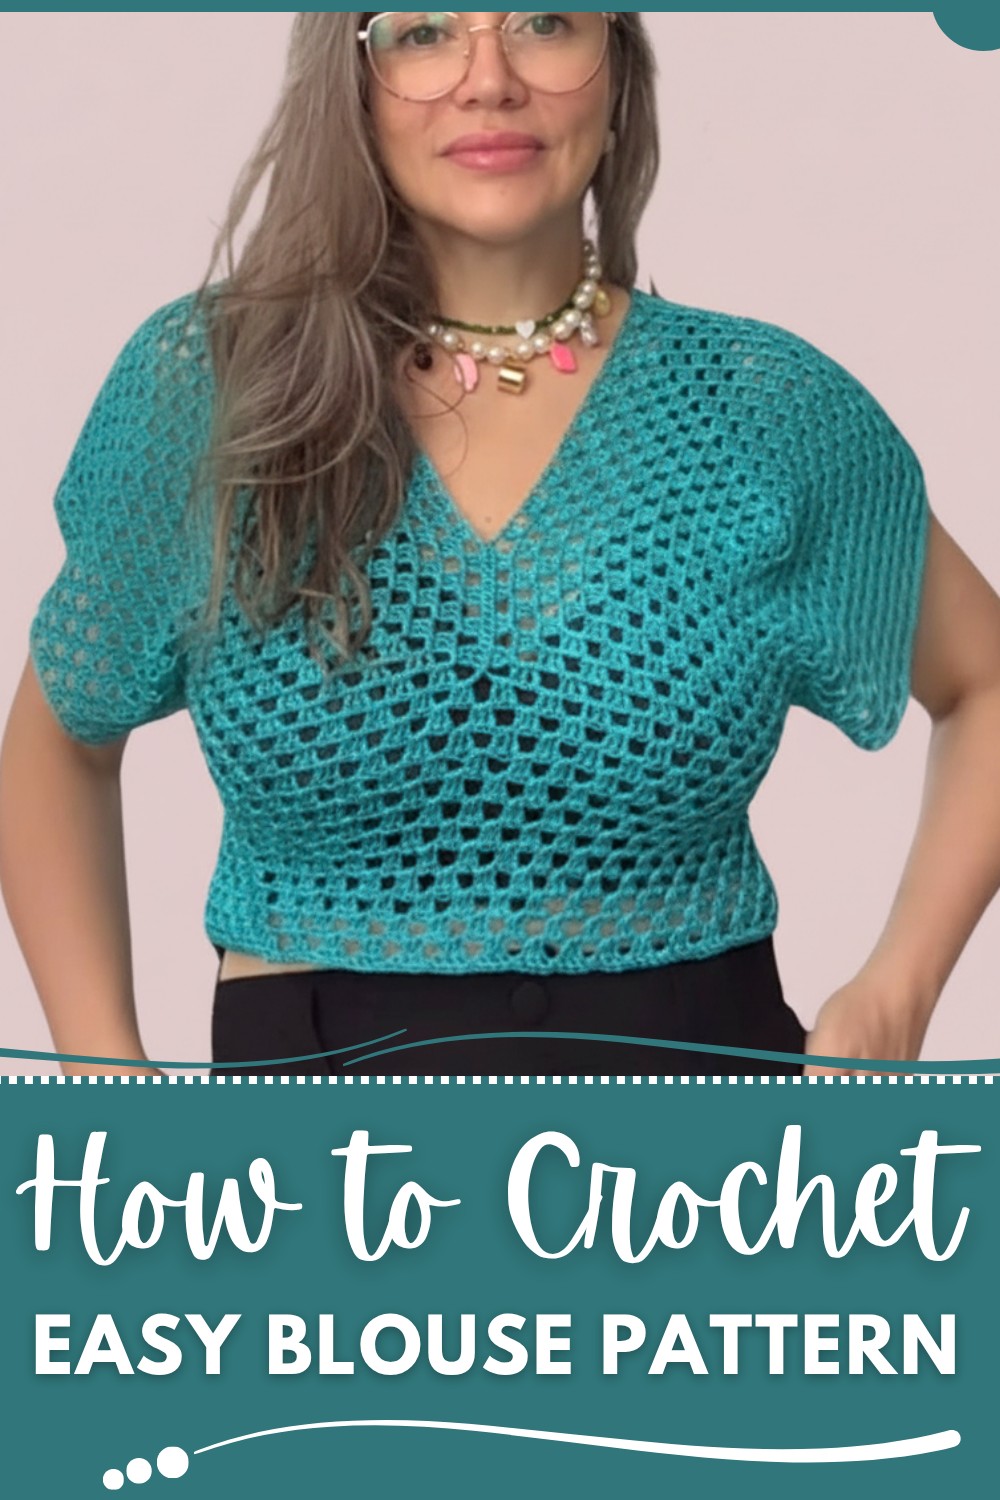
A blend of tradition and personal flair emerges in every finished piece, making the garment both practical and stylish. Choosing favorite shades brings a sense of satisfaction, while the process offers a relaxing way to save money and expand a wardrobe with something truly special. The result is a blouse that brings everyday elegance to ordinary moments.

Quick & Economical Granny Square Blouse
Materials
- Yarn: Raíza 100% polypropylene yarn, or any similar DK/light worsted weight yarn; approx. 500m used (color: Java green in sample)
- Hook: 2.5 mm crochet hook (for squares and body), plus a smaller hook (2.0mm) for neat edging (optional)
- Tapestry Needle: for sewing and weaving in ends
- Scissors
- Measuring Tape
- Stitch Markers (optional)
- Lighter: for finishing polypropylene yarn ends (optional, see Notes)
Key Abbreviations (US Terms)
| Abbreviation | Meaning |
|---|---|
| ch | chain |
| sc | single crochet |
| dc | double crochet |
| sl st | slip stitch |
| sp | space |
| st(s) | stitch(es) |
| rep | repeat |
Special Notes
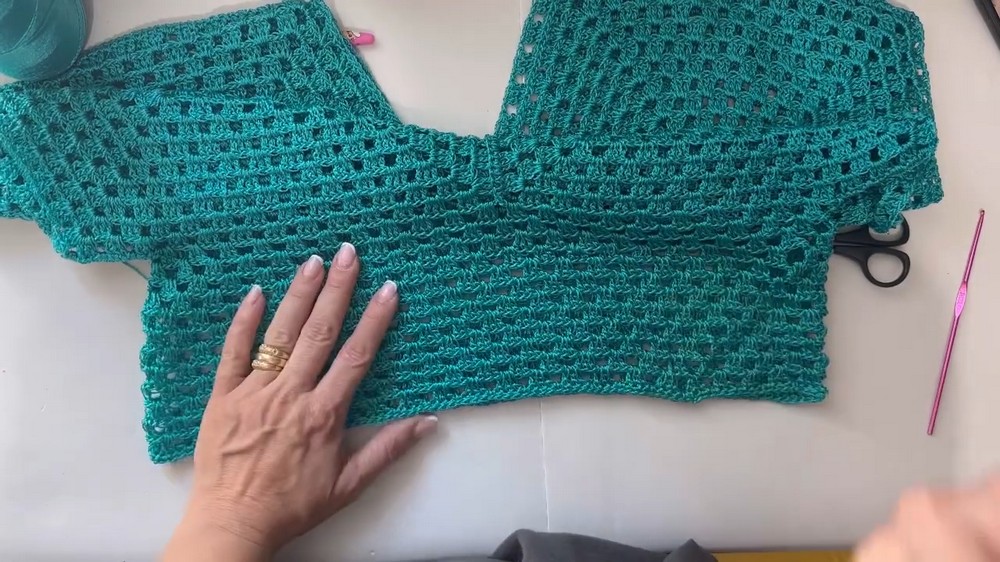
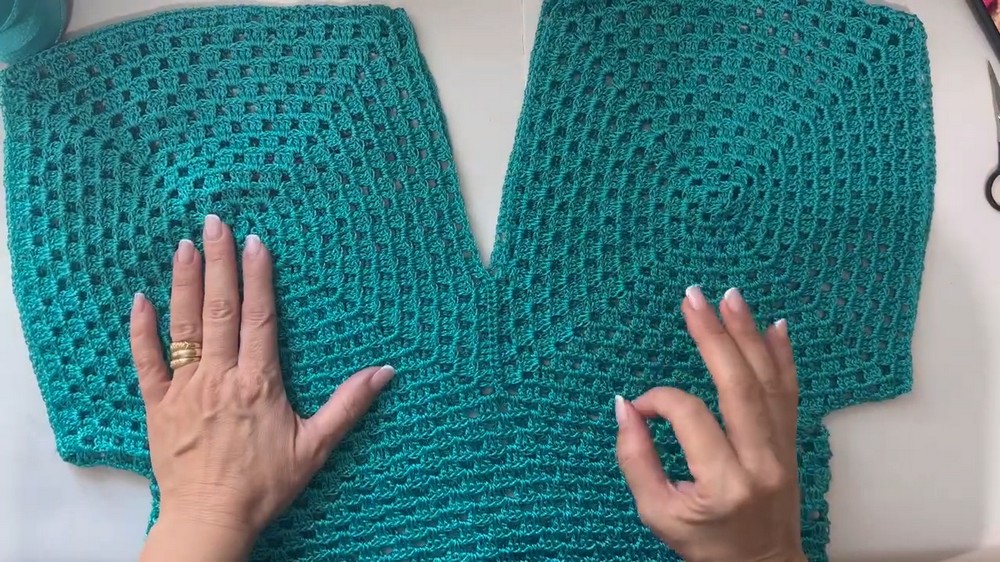
- Sample size: Each square is 30 x 30 cm (adjust to your bust/shoulder measurement).
- Constructed from four squares: two for the front, two for the back.
- Finished with a row of sc at the bottom edge for a polished look.
- Use a smaller hook for tighter sc edging if desired.
- For best fit, measure bust and adjust square size accordingly.
Pattern
Step 1: Crochet Four Traditional Granny Squares
Make 4 identical squares.
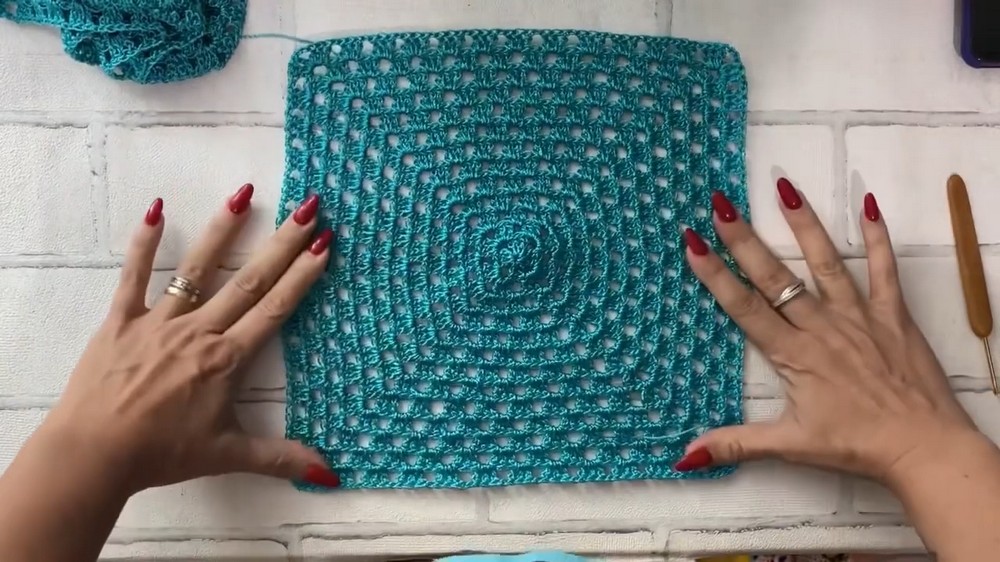
Round 1:
- Start with a slip knot, ch 4, join with sl st to form a ring.
- Ch 3 (counts as 1 dc), 2 dc into ring, ch 2.
- (3 dc, ch 2) repeat 3 times into the ring. (You will have 4 groups of 3 dc, separated by ch-2 corners)
- Join with sl st to top of initial ch-3.
Round 2:
- Sl st to next ch-2 corner, ch 3 (counts as dc), 2 dc in same corner space, ch 2, 3 dc in same space (first corner made).
- (ch 1, 3 dc in next ch-2 corner, ch 2, 3 dc in same corner) repeat 3 times.
- Join with sl st to top of ch-3.
Round 3 and Beyond:
- Sl st to next ch-2 corner, ch 3, 2 dc in corner, ch 2, 3 dc in same sp.
- (ch 1, 3 dc in next ch-1 sp; ch 1, 3 dc in next corner, ch 2, 3 dc in same corner); rep around.
- Continue increasing in this pattern, always working corner: (3 dc, ch 2, 3 dc) in each corner, and filling sides with 3 dc clusters in each ch-1 space, until your square measures about 30 x 30 cm (or half your bust/back width).
Fasten off, weave in ends.
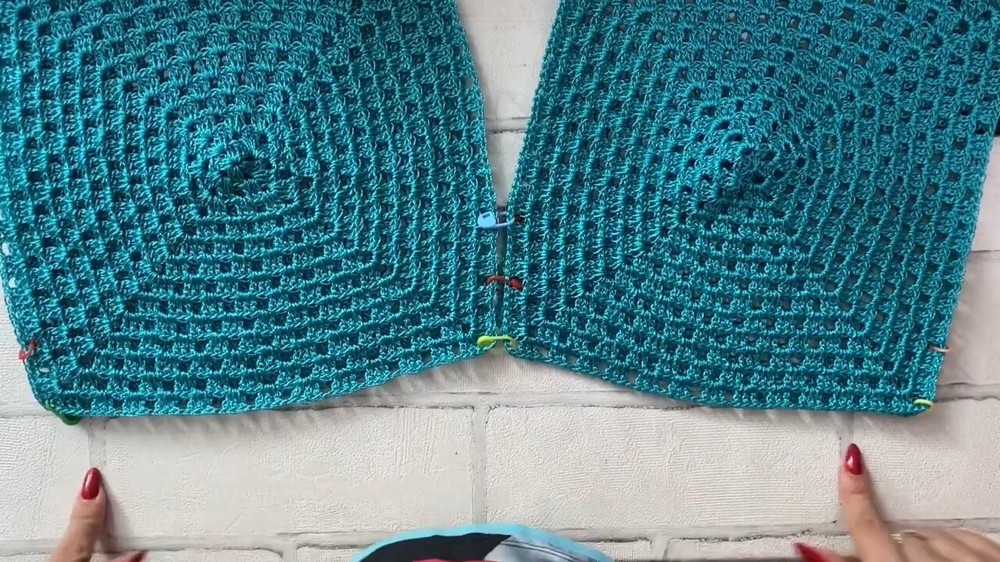
Step 2: Joining the Squares
- Lay out squares: two for front, two for back, forming a rectangle.
- With wrong sides together (WS facing), sew squares in pairs along their sides with single crochet (sc) for a decorative seam (or use your preferred join).
- Repeat for both the front and back pairs.
- Then, place front and back together (again WS facing).
- Mark and join shoulder seams with sc across desired shoulder width on each side.
- Join side seams (leave space for armhole). Try on or measure: standard armhole opening is 22-25cm, but adjust as needed for your fit.
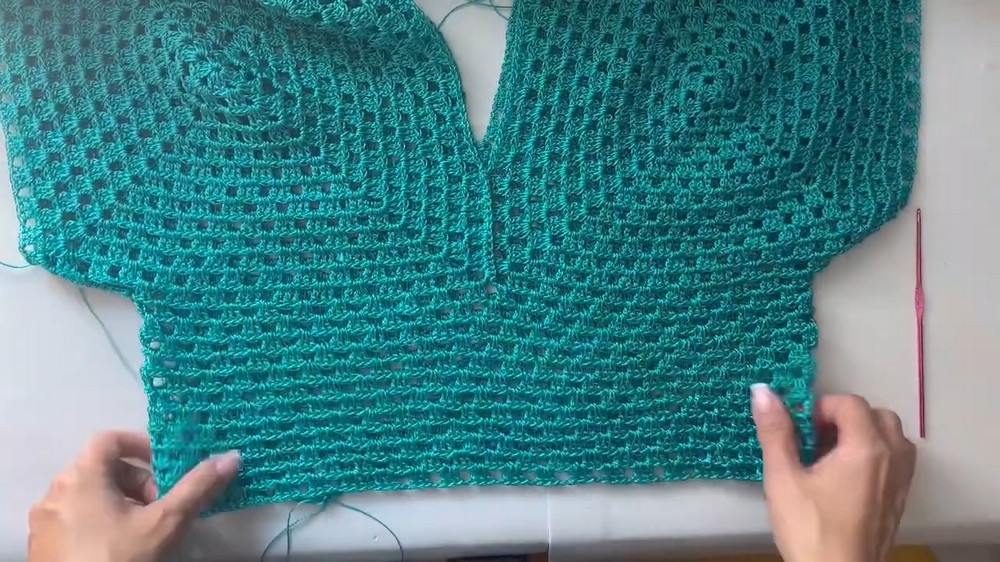
Step 3: Body Extension
- With right side out, join yarn to the bottom edge.
- Ch 3 (counts as dc), work 3 dc in each ch-1 sp or gap across, separated by ch 1 (continue established granny blocks).
- Work as many rows as desired for length (sample shows 13 rows for a slightly cropped fit).
- Fasten off, weave in ends.
Step 4: Edging
- Using a smaller hook (e.g., 2.0 mm), join yarn at bottom hem.
- Work 1 row of sc evenly around for a snug, neat finish. (Optional: Add 1 round of sc at sleeve openings or neckline for uniform edge.)
- Fasten off and weave in ends.
Step 5: Finishing (for Polypropylene Yarn)
- Weave yarn ends through several stitches on the inside of the blouse.
- Trim ends, leaving a short tail (~0.5cm).
- Carefully use a lighter to melt the tip, pressing to tack down and secure (take care, only do this for synthetic yarn; skip for cotton, wool, etc.).
Conclusion
You’ve made a beautiful, quick, and economical granny square blouse, fully customizable to your size and length preferences. This method is ideal for using leftover yarn and adjusting sizing on the go.
Pattern Correction & Tips
- Correction: Always check squares for equal sizing before joining. Adjust as needed.
- Tip: Use stitch markers to decide shoulder, armhole, and neckline depth before seaming.
- Tip: For a more fitted look, make the extension rows below the squares with a slightly smaller hook.
- Tip: For cotton or acrylic, finish ends by weaving—not burning!
- Tip: Add a round of sc or shell edging to sleeves or neckline for extra flair.