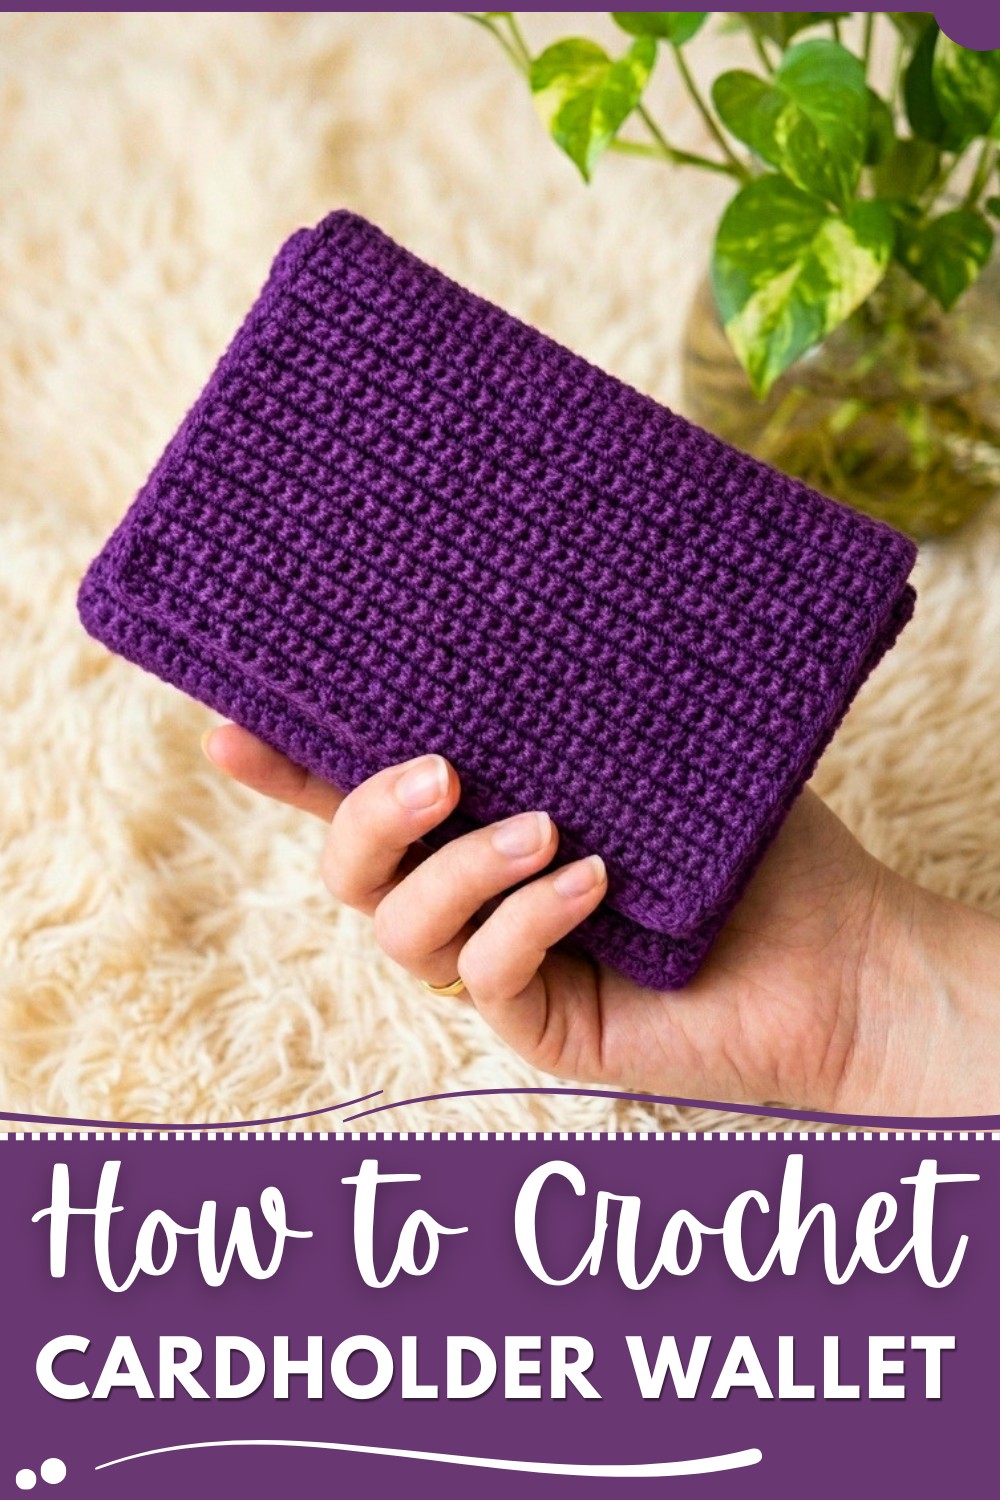
Keep your essentials organized with this free crochet cardholder wallet pattern featuring multiple pockets, secure layers, and a sleek foldable design.
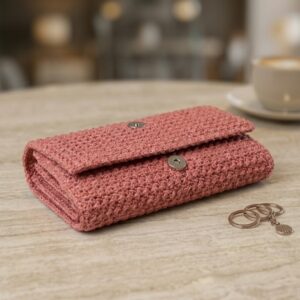
Crochet lovers who enjoy making handy and stylish accessories will find this card holder project delightful. This item, designed with multiple layers and pockets, is perfect for organizing your cards, mobile phone, and other small essentials conveniently. Using the Free Crochet Trifold Wallet Pattern, you can create a versatile and practical wallet that keeps everything neatly in place.
Unique Free Crochet CardHolder Wallet Pattern for Beginners
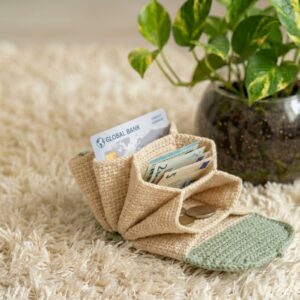
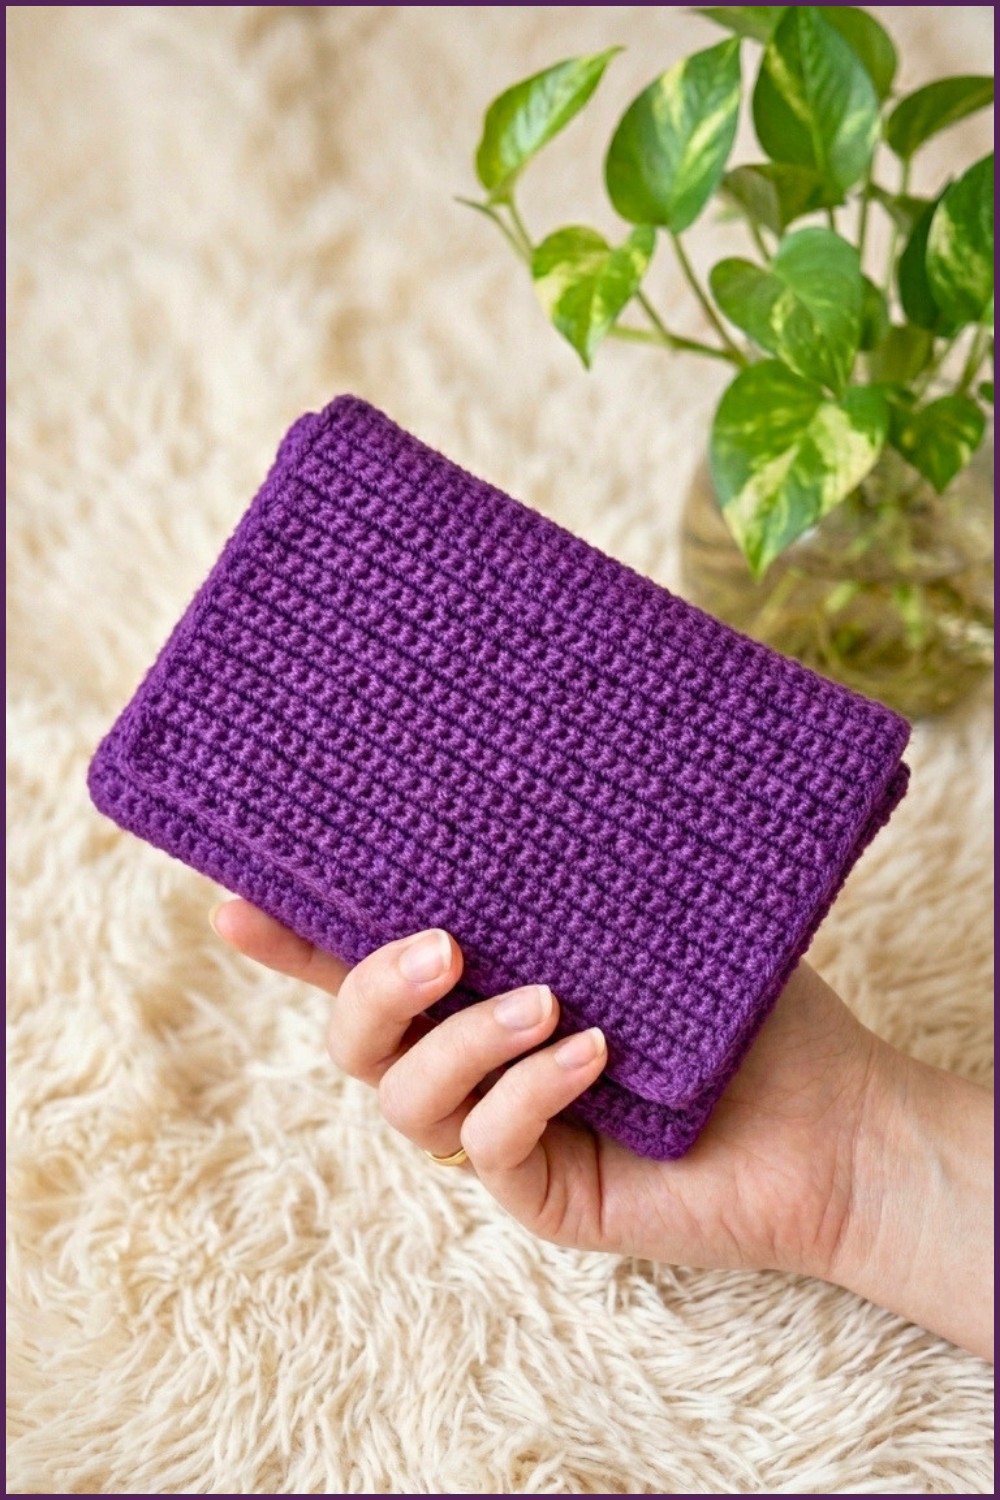
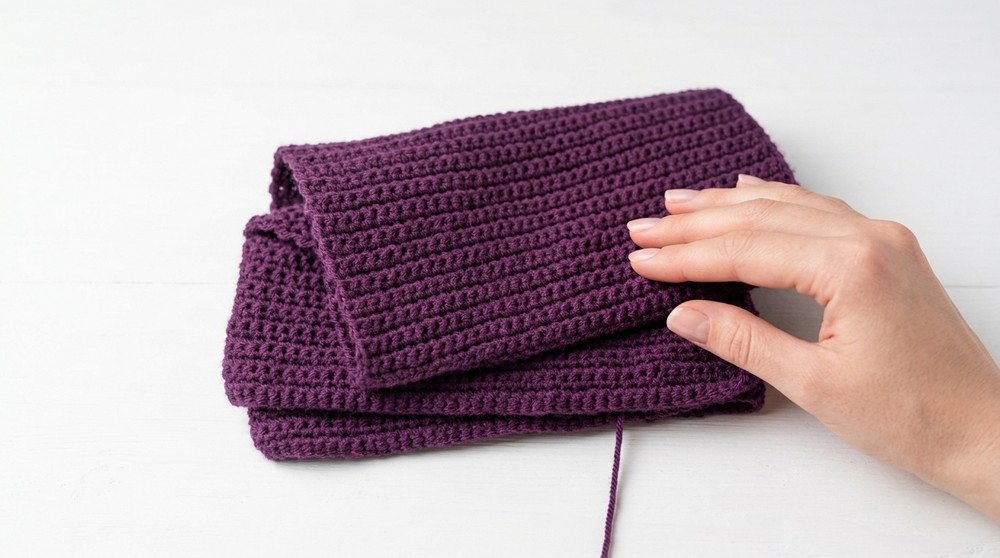
This wallet features a thoughtful design with three distinct pockets, each serving a specific purpose, from holding cards to storing your mobile device and other items. The texture is firm yet flexible, crafted mainly using single crochet stitches that give the project durability and a smooth finish. Its rectangular shape folds elegantly into three parts, combining functionality with chic style. The project’s standout features include well-defined compartments and personalized finishing, such as the embroidered details and a magnet button closure, which add charm and security to the wallet.
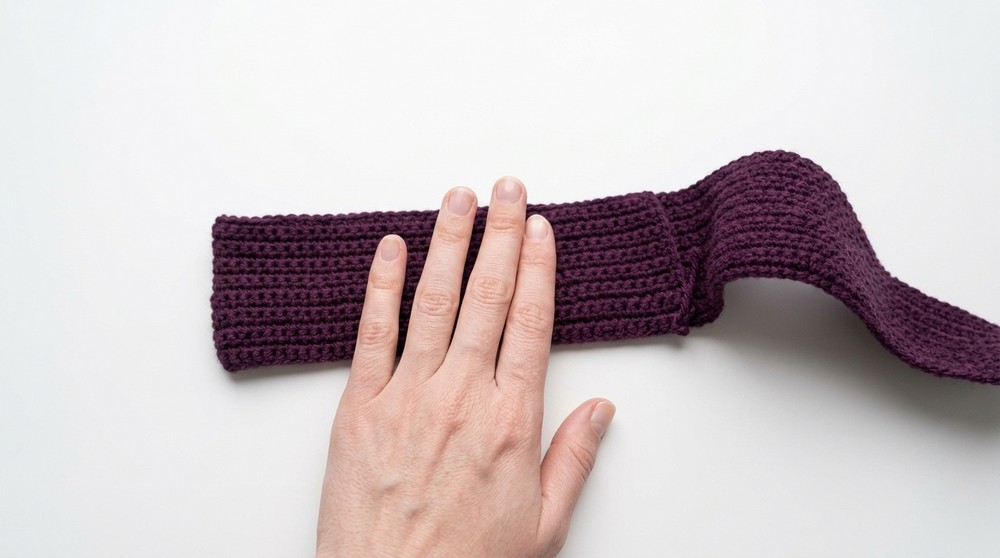
The construction starts by crocheting a large rectangular piece worked in rows of single crochet stitches. The length is divided into three parts to form the trifold design. After creating the base fabric, sections are carefully folded and sewn to form pockets. The sewing process joins these pieces securely, giving the wallet structure and defined compartments. This pattern suits beginners to intermediate crocheters, primarily working with single crochet and basic finishing techniques. You can easily customize by adjusting measurements or adding decorative elements, and with minor changes, you can also create matching cardholders or phone cases.
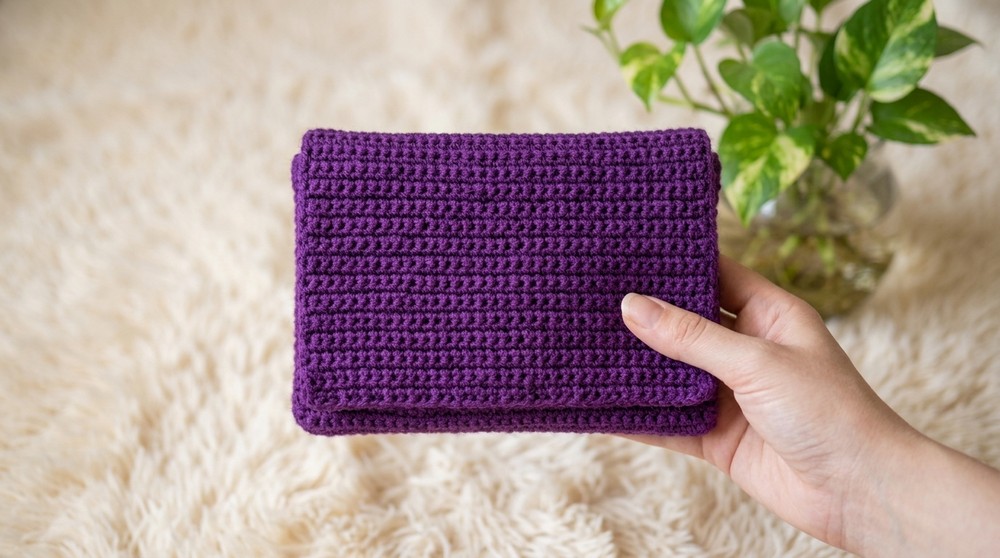
This crochet trifold wallet is practical for daily use and makes a thoughtful, stylish handmade gift. Its neat pockets and durable fabric offer an efficient way to carry essentials, giving a personal touch to everyday accessories. Whether you’re looking to improve your crochet skills or craft something useful and beautiful, this project is a wonderful fit that’s fun and rewarding to complete.
Multi-Pocket Layered Card Holder Crochet Pattern
Before You Start
- Read the pattern completely before beginning.
- Watch the corresponding video for extra clarity, especially on folding and assembly.
- Gather all your materials before starting.
- Use stitch markers to help track the sections (suggested but optional).
- Ensure you’re comfortable with single crochet, chaining, and basic seaming techniques.
- Feel free to adjust the number of chains for your preferred size (must be multiples of 40 for layering as written).
- Accurate measuring is key to ensure the pockets and folds align well.
Pattern Notes
- The card holder is worked flat in consecutive sections, then folded and sewn to create multiple card and mobile pockets.
- The piece is crocheted in one piece, with three folding lines at 40 and 80 stitches.
- No color changes unless desired.
- Stiffen with light interfacing or add a lining if you want more structure.
- All stitches are single crochet for simplicity.
- Pockets are formed by folding and sewing along the edges after crocheting the main piece.
How I Made the Crochet Pattern?
- Converted the stepwise, visual instructions from video narration into written crochet format.
- Matched chain and row counts with measurement cues from the video.
- Divided the construction process into clear steps for each pocket section.
- Explained folding and assembly with sketches and narrative description.
- Wrote step-by-step sewing and finishing, always referencing the folding logic from the video.
Skill Level
Advanced Beginner
(Basic single crochet, shaping, and straightforward seaming).
Finished Size
- Length (unfolded): Approximately 13 inches / 33 cm
- Width: Approximately 3 inches / 7.5–8 cm
- Each pocket: About 2.5"–5" tall, sized for cards or mobile
Materials
- Worsted weight cotton or acrylic yarn, approx. 50g (or as needed)
- 3.5mm or 4mm crochet hook (adjust size for your yarn and gauge)
- Scissors
- Yarn or tapestry needle for sewing seams
- Ruler or measuring tape
- Button or magnetic closure
- Embroidery thread or beads for optional embellishment
Measurements / Sizing (Optional Schematic)
+------------------------------+
| 120 ch (13”) |
|---|
| 16 rows |
| ------------------------------ |
| 80 sc wide, 16 more rows |
| ------------------------------ |
| 40 sc wide, 8 more rows |
| +------------------------------+ |
Gauge
- 10 sc = 2.5 cm (1") (approximate, adjust as needed)
- 8 rows = 2.5 cm (1")
Stitch Abbreviations
- ch: chain
- sc: single crochet
- st(s): stitch(es)
- RS: right side
Special Stitches
- No special stitches for this pattern; all are single crochet.
- For stronger edges, consider crocheting your first and last stitch through both loops.
The Pattern!
Base Foundation
1. Set up and Foundation Row
- Ch 120.
- Turn, sc in second ch from hook and in each stitch across (119 sc).
Rows 2–16:
- Ch 1, turn. Sc in each stitch across (119 sc).
- Repeat until you have 16 rows.
- This forms the base layer (for the first 2.5" pocket).
If you’re not familiar with reading patterns: Make a long chain, then single crochet across for 16 rows. Keep your work flat and edges neat.
Second Section (First Layer Pocket)
Rows 17–32 (on first 80 stitches ONLY):
- Ch 1, turn. Sc in next 80 sts, leave remaining 39 sts unworked.
- Repeat for 16 rows, working only into the first 80 stitches each row.
- You now have a "step" where 80 stitches continue in a rectangle, forming the second pocket.
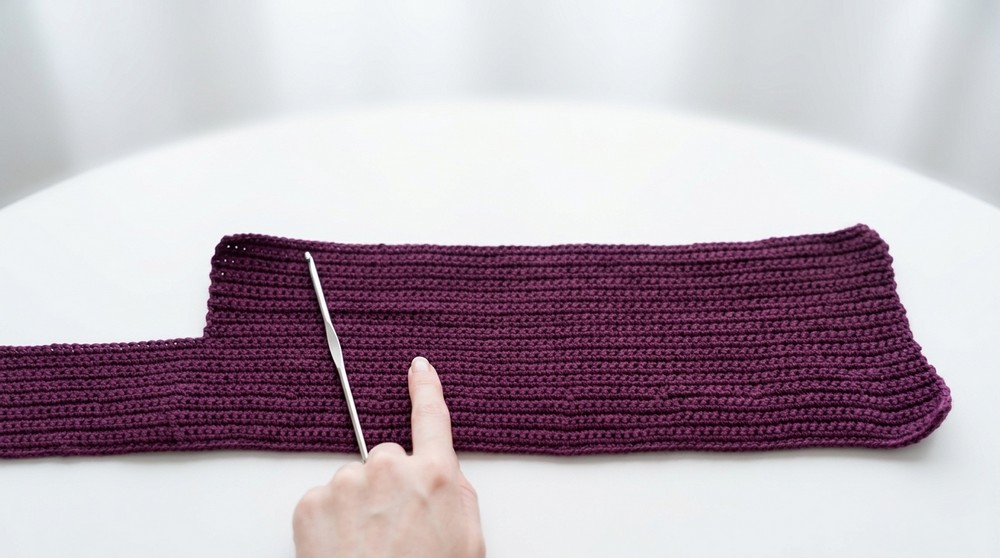
For explanation: Now, you are working on ⅔rd of your original width. If this feels confusing, just fold and check after completing this step—it should look like a flap forming.
Third Section (Body/Second Layer Pocket)
Rows 33–40 (on first 40 stitches ONLY):
- Ch 1, turn. Sc in next 40 stitches, leave remaining 79 unworked.
- Repeat for 8 rows, working on only the FIRST 40 stitches.
- You now have a narrow strip—this ultimately creates your third (main) pocket.
When you’re done, you have three layered sections: the bottom/starting edge, an 80-stitch rectangle "on top" of that, and a narrow 40-stitch panel on top of that.
If Not Reading Patterns:
You make a long strip of crochet, then work a big rectangle on ⅔ of the strip, then a small rectangle on ⅓ of that. At the end, fold everything up for multi-layered slots!
Assembly & Finishing
- Lay flat and fold the first 40 stitches (narrowest flap) up onto the wider section.
- Fold the 80-stitch section over that—your wallet will now look like a thick, stacked layer cake.
- Arrange the folds until you have three layered pockets, each offset from the last.
- Sew sides of each layer, working from bottom to top, using whipstitch or mattress stitch for a nearly invisible finish.
- Attach button or magnetic clasp/closure at the front flap.
- Add embellishments such as embroidery, beads, or decorative buttons if desired.
- Weave in ends and trim excess yarn.
- Block lightly if you want flatter, more professional appearance.

Solution of Problems
- Layer heights not matching/folds not aligning:
Double-check measurement before sewing; undo last rows and add/reduce as needed. - Edges curling/unraveling:
Block finished piece, and make sure to crochet the last stitch of each row snugly. - Tight stitches making folding difficult:
Use a larger hook or adjust tension.
What You Can Make by Using These Stitches
- Card holders (multi-pocket or single-pocket)
- Passport wallet
- Coin purses
- Phone or gadget pouches
- Organizer inserts for bags
- Glasses cases
- Ticket and slip holders
Pattern Recap:
You’ve created a sturdy, multi-layer card holder for cards, phone, and other essentials! The design uses only single crochet for a professional look and easy folding. Adjust length and pocket width for custom fits; decorate the flap for a unique touch.