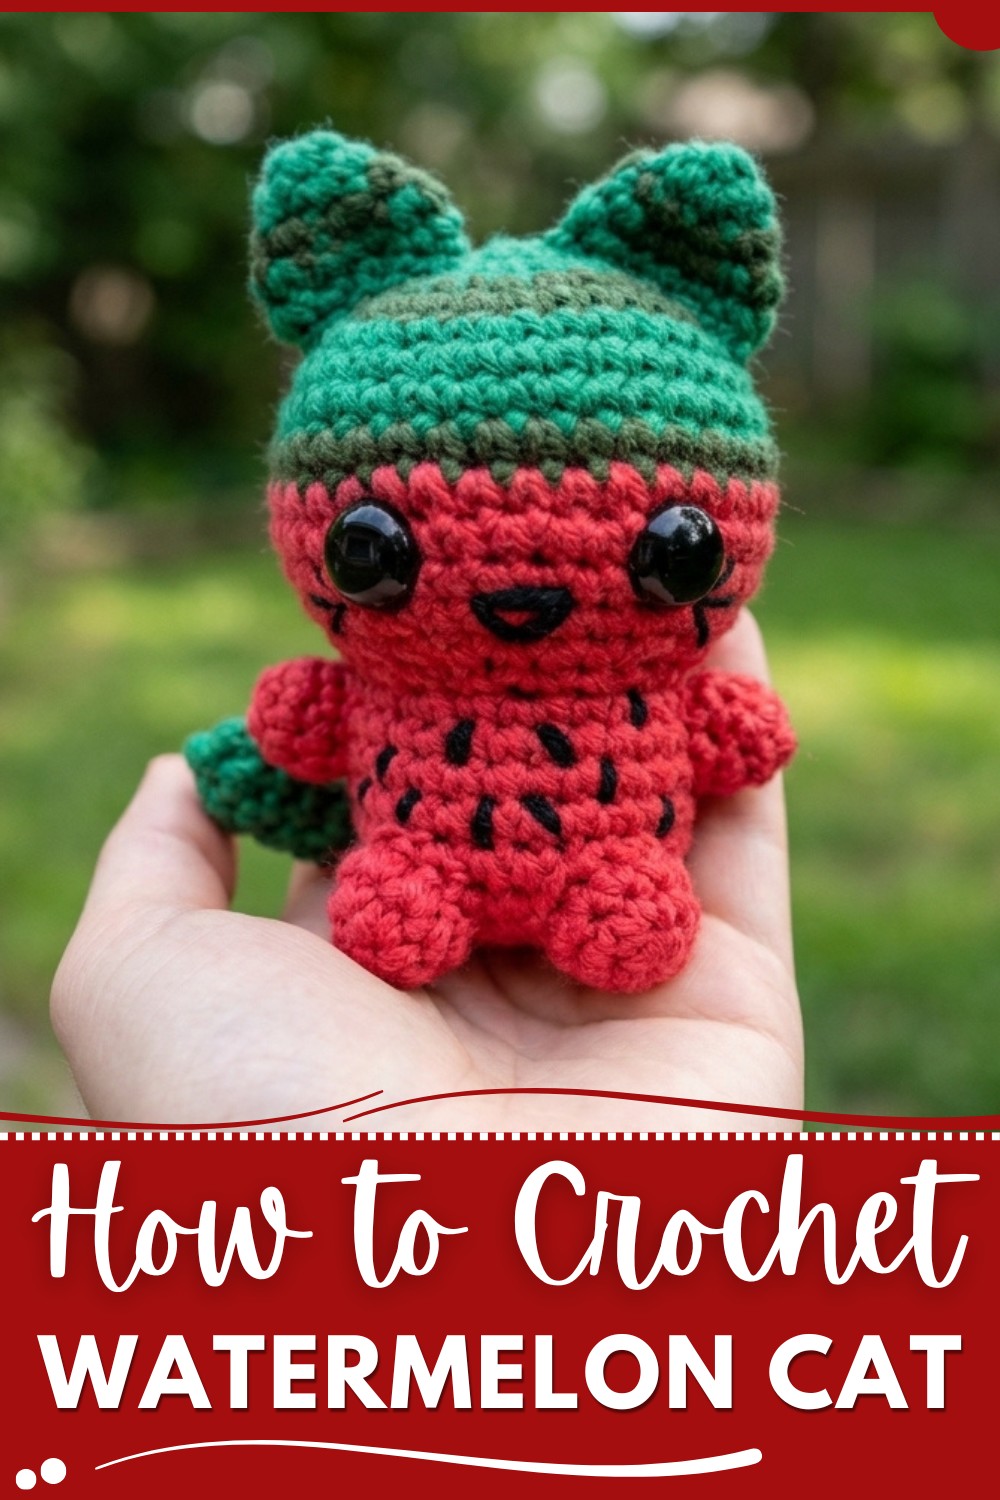
Meet the perfectly adorable watermelon cat where juicy vibes meet kitty cuteness bringing a fruity fun theme that is sure to make you smile.
Have you ever seen a cat that looks like a watermelon? It sounds funny, but the Free Crochet Watermelon Cat Pattern lets you make a cute, colorful cat that reminds you of a bright, juicy watermelon! This pattern is super fun and easy to follow, so anyone can make this little cat, even kids who love crafts.
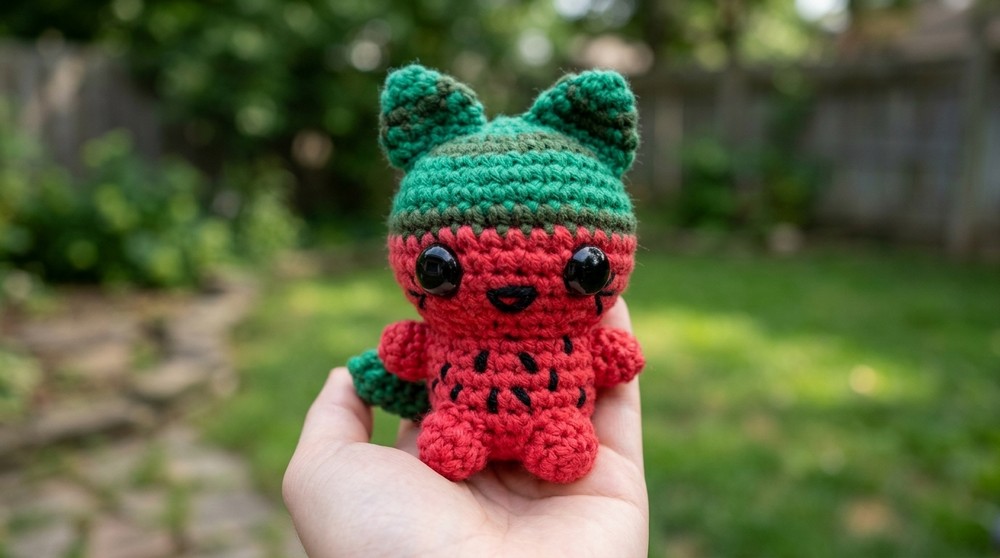
Adorable Crochet Watermelon Cat Free Pattern Step-by-Step
This watermelon cat is really special because of its pretty colors. It usually has a red or pink body with small black “seeds” like a real watermelon, and green ears and tail to match the rind. You can choose any colors you like and even make the cat bigger or smaller by changing the yarn or hook size. It feels soft and squishy, perfect for a toy or a decoration. After finishing, it’s just the right size to hold in your hands or keep on a shelf.
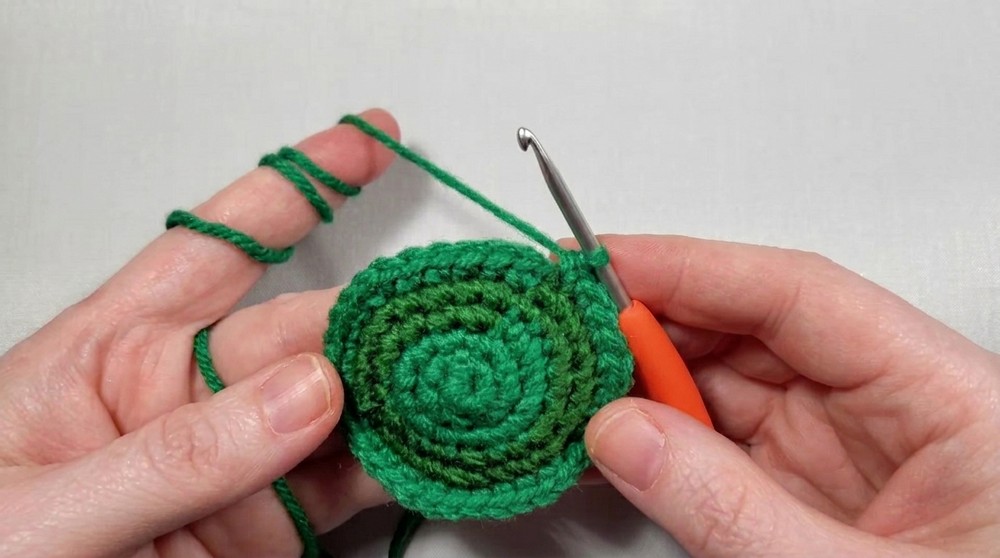
To make this watermelon cat, you’ll use a 3.5 mm crochet hook and worsted weight yarn, which is not too thick or thin. The most important stitch here is the single crochet, which helps make the stitches tight so the stuffing stays inside. You’ll also use a special technique called the magic ring to start the round shape smoothly. The cat’s parts are crocheted separately and then sewn together to create the cute watermelon look.
With this pattern, you can make toys, keychains, or cute little gifts for your friends and family. It’s a joyful project that lets you play with colors and shapes while making something soft and huggable. If you want a colorful, happy crochet project that’s easy and fun, this watermelon cat is perfect for you.
Watermelon Cat Amigurumi - Step by Step Crochet Pattern
Before You Start
- Read through the entire pattern before starting.
- Familiarize yourself with color changes and amigurumi assembly.
- Prepare all materials required ahead of time.
- Use a stitch marker to mark your rounds.
- Adjust the size of hooks and yarn to scale up or down your cat.
Pattern Notes
- This pattern is worked in continuous rounds unless otherwise specified.
- Use a tight tension to prevent stuffing from showing.
- Stuff pieces as you go, especially before final decrease rounds.
- Safety eyes are placed before closing the head.
- Color changes are worked on the final pull-through of the stitch.
- Weave in all ends securely.
How I Made the Crochet Pattern
- Designed as seamless, single-piece body for easy shaping.
- Incorporated “watermelon rind” color stripes for authenticity.
- Used small, simple pieces for ears, arms, legs, and tail.
- Added embroidery for nose, seeds, and whiskers as finishing.
- Minimizing sewing with straightforward assembly and colorwork.
Skill Level
Advanced Beginner (Comfortable with single crochet, invisible decrease, color changes, and basic embroidery)
Finished Size
Approximately 10-12 cm (4-5") tall, depending on yarn and hook size
Materials
- Worsted weight acrylic yarn in:
- Light green
- Dark green
- Pink
- Black (small amount for details)
- 3.25mm crochet hook
- Yarn needle
- Scissors
- Poly-Fil stuffing
- 2 safety eyes (10-12 mm preferred)
- Stitch marker
Measurements / Sizing (Optional Schematic)
- Head/body circumference: ~16 cm (6.5")
- Arm length: ~4 cm (1.5")
- Leg length: ~4 cm (1.5")
- Tail length: ~7 cm (3")
Gauge
Gauge is not critical for this amigurumi project, but aim for tight, no-gaps stitches.
- 6 sc x 6 rounds = 2.5 cm x 2.5 cm (1" x 1")
Stitch Abbreviations
- MR: Magic ring
- sc: single crochet
- inc: increase (2 sc in same stitch)
- dec: decrease (invisible unless stated)
- sl st: slip stitch
- st(s): stitch(es)
- [] repeat instructions within brackets as indicated
Special Stitches
- Invisible Decrease: Insert hook into front loop of next 2 sts, yarn over, pull through 2 loops, yarn over, pull through last 2 loops.
The Pattern
Head & Body (Work as ONE piece, starting at top with light green)
Color Change Sequence:
- 3 rounds light green
- 2 rounds dark green
- 3 rounds light green
- 1 round dark green
- remaining rounds pink
Head
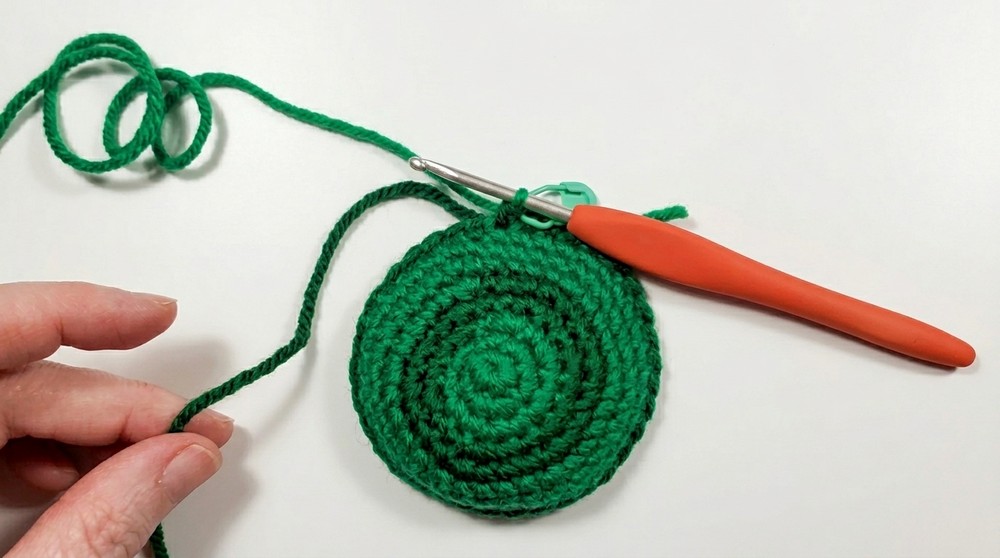
- Round 1 [Light Green]: MR, 6 sc into ring (6)
- Round 2: 6 inc (12)
- Round 3: [sc, inc] x 6 (18)
- Round 4 [Dark Green]: [2 sc, inc] x 6 (24)
- Round 5: [3 sc, inc] x 6 (30)
- Round 6 [Light Green]: [4 sc, inc] x 6 (36)
- Round 7: sc in each st (36)
- Round 8: sc in each st (Change to dark green last st) (36)
- Round 9 [Dark Green]: sc in each st (Change to pink at end) (36)
- Rounds 10-12 [Pink]: sc in each st (36 per round)
💡 At this point, you should have a round Watermelon “melon” head and will soon decrease for the body. Safety eyes go between Rounds 2-3 of the pink section, about 8 stitches apart.
- Round 13: [inv dec, 4 sc] x 6 (30)
- Round 14: [inv dec, 3 sc] x 6 (24)
- Insert safety eyes.
- Round 15: [inv dec, 2 sc] x 6 (18)
- Stuff head.
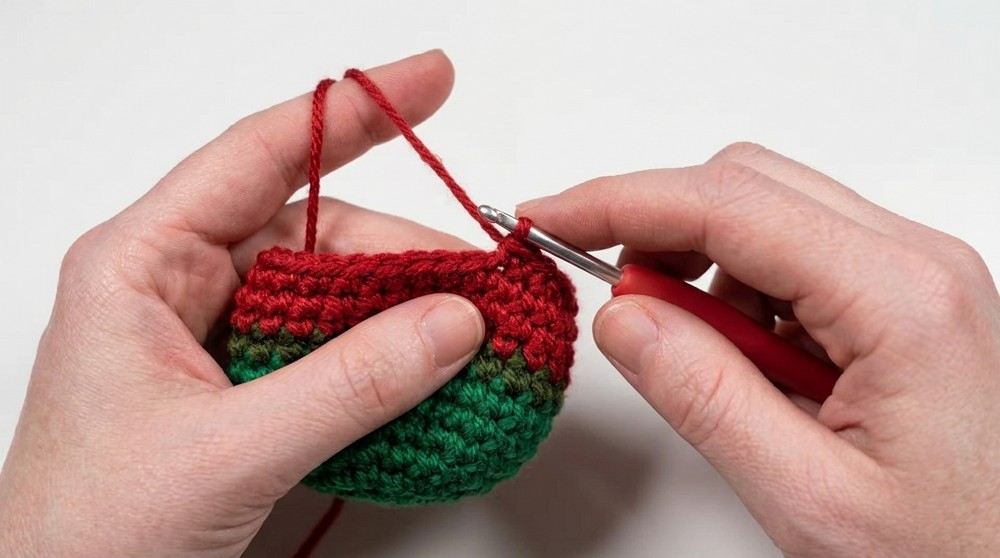
Neck Transition
- Round 16 [Front Loops Only]: [inc, sc] x 9 (27)
- Rounds 17-21: sc in each st (27)
Body & Base
- Round 22: [inv dec, sc] x 9 (18)
- Round 23: [inv dec, sc] x 6 (12)
- Continue stuffing.
- Round 24: 6 inv dec (6)
- Fasten off, weave through front loops of remaining 6 sts, pull tight to close and weave in end.
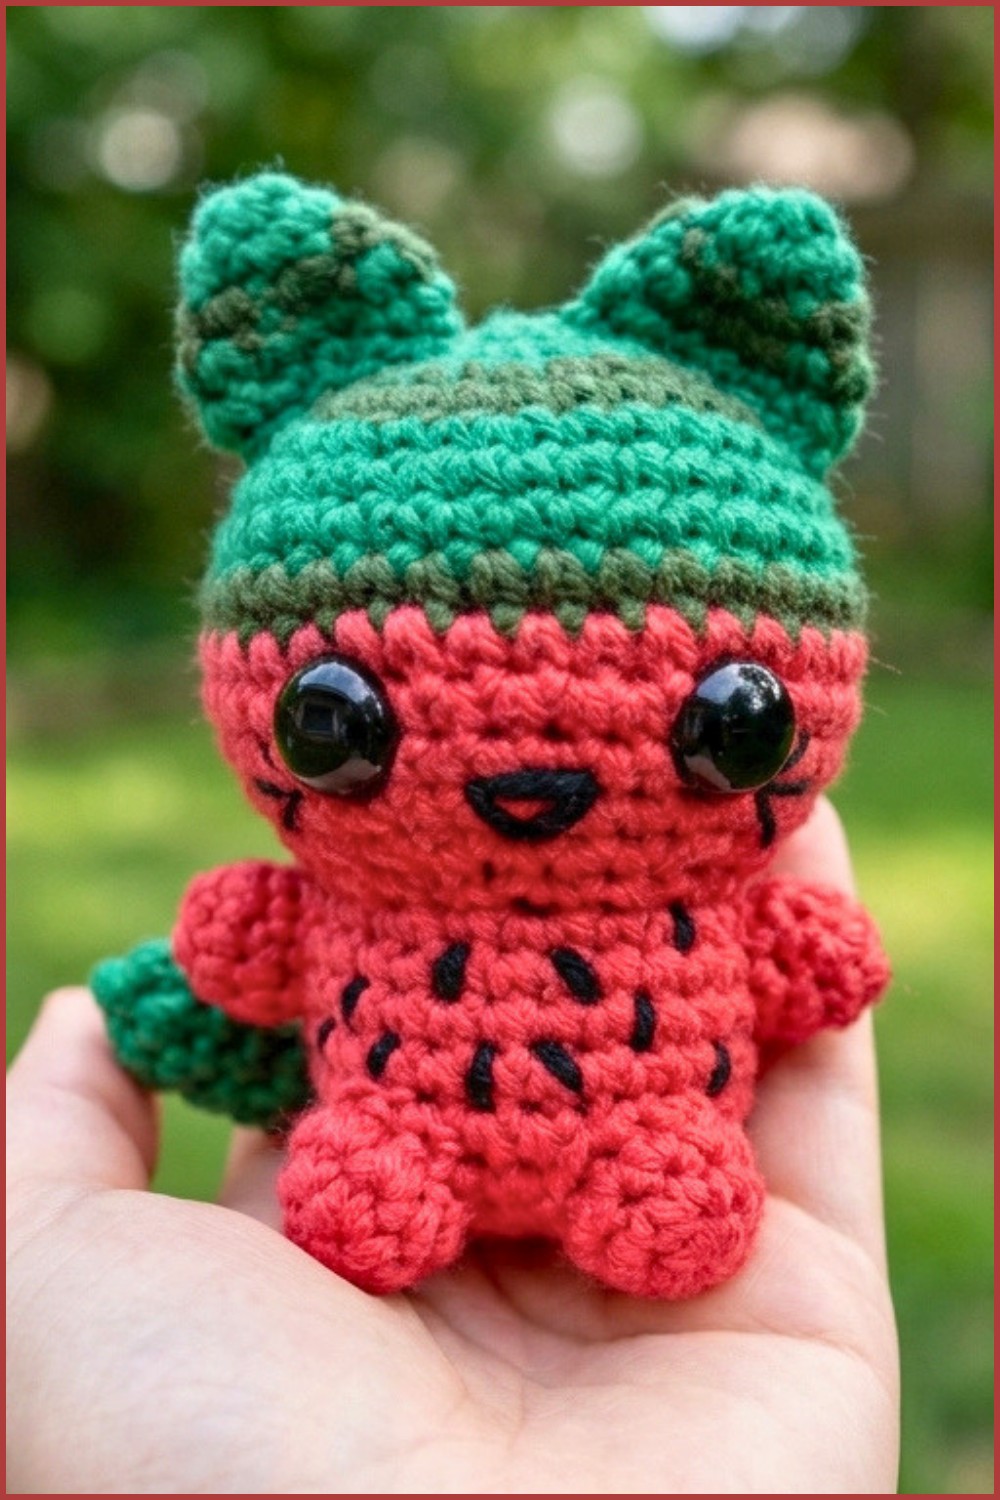
After completing the head and body, you’ll have a seamless basic cat body shaped like a watermelon slice, ready for sewing details.
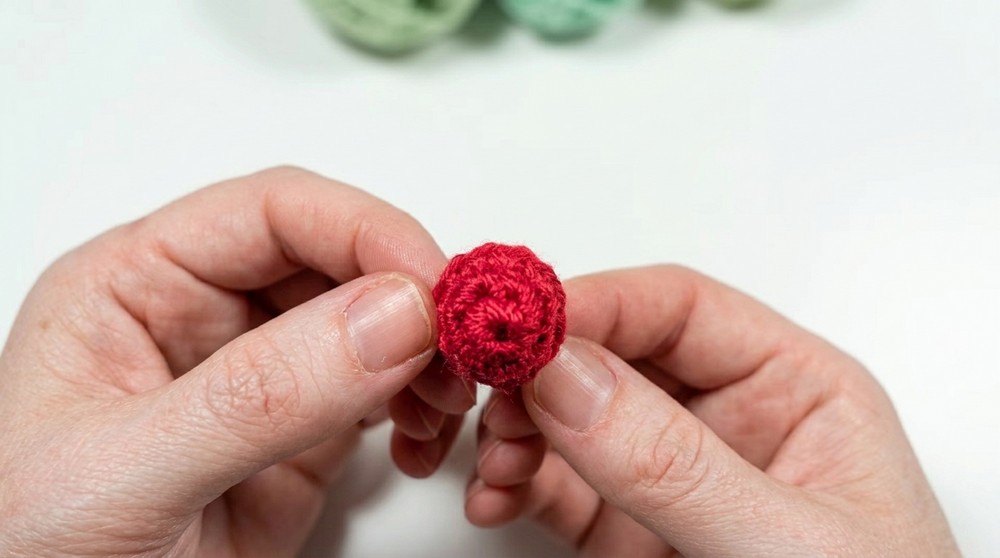
Ears (Make 2)
- Round 1 [Light Green]: MR, 4 sc (4)
- Round 2: [inc, sc] x 2 (6) (prep for dark green color change)
- Round 3 [Dark Green]: [inc, sc] x 3 (9)
- Round 4 [Light Green]: [inc, 2 sc] x 3 (12)
- Round 5: sc in each st (12)
- Fasten off, leave tail for sewing. Fold ear slightly before attaching.
The ears are small, lightly shaped triangles; no need to stuff them.
Tail
- Round 1 [Light Green]: MR, 5 sc (5)
- Round 2: sc in each st (dark green for last st change) (5)
- Round 3 [Dark Green]: sc in each st (light green for last st change) (5)
- Round 4 [Light Green]: sc in each st (5)
- Round 5 [Light Green]: sc in each st (change to pink for last st) (5)
- Rounds 6-11 [Pink]: sc in each st (5)
- Fasten off, stuff lightly, leave tail for sewing.
Tail is a narrow, slightly floppy tube with a green tip and pink base, just like a slice of watermelon.
Arms (Make 2)
- Round 1 [Pink]: MR, 4 sc (4)
- Round 2: 4 inc (8)
- Round 3: sc in each st (8)
- Sl st, fasten off, leave tail for sewing. Lightly stuff.
Legs (Make 2)
- Round 1 [Pink]: MR, 5 sc (5)
- Round 2: 5 inc (10)
- Round 3: sc in each st (10)
- Sl st, fasten off, leave tail for sewing. Lightly stuff.
Arms and legs are stubby; stuff lighly for best effect.
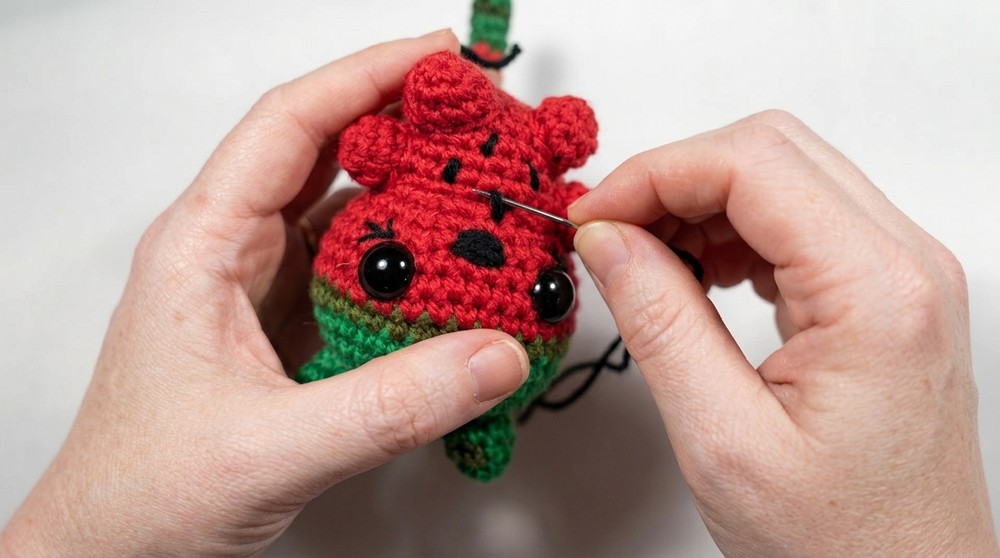
Assembly & Finishing
- Ears: Fold at base and sew to head, aligning with center and matching both sides.
- Arms: Attach at shoulder line, at neck/body junction.
- Legs: Place just below halfway up body, close together at front.
- Tail: Attach to the body base at the back, centered.
- Nose: Embroider a small triangle between the eyes using black yarn.
- Whiskers: Split black yarn, embroider three short lines on each side of the nose.
- Seeds: Using full black yarn, embroider several random short lines or dots on the pink body area for watermelon seeds.
- Weave all loose ends securely into the body.
What you can make by using these stitches
- Other fruit-themed amigurumi buddies (e.g., lemon, strawberry cats)
- Simple round amigurumi animals and objects
- Tiny accessories (ears, arms, tails) for other plush toys