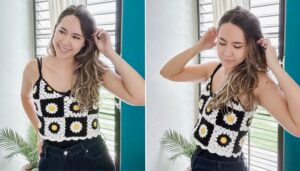
Wear a beautiful crochet puff sleeve top that is soft, stylish, and perfect for everyday or special occasions with this simple and easy-to-follow guide.
The charm of handmade clothing lies in the simplicity and elegance it offers, and a puff sleeve crochet top is no exception. Known for its soft, airy design and stylish puffed sleeves, it is perfect for adding a touch of beauty to your daily outfits. This lightweight top is not only comfortable but also versatile, making it ideal for both relaxed days and more dressed-up occasions. Its delicate texture and unique appearance make it an eye-catching addition to any wardrobe.
Free Crochet Pattern for a Lightweight Puff Sleeve Top
The puffed sleeves create a gentle and feminine silhouette, while the crochet design brings a classic yet modern feel to the piece. It can be styled easily with jeans, skirts, or layered over dresses for a chic and effortless look. The soft material ensures comfort for all-day wear, while the customizable design allows the use of different vibrant or neutral colors. This top combines beauty with practicality, offering style and comfort in a single, timeless item.
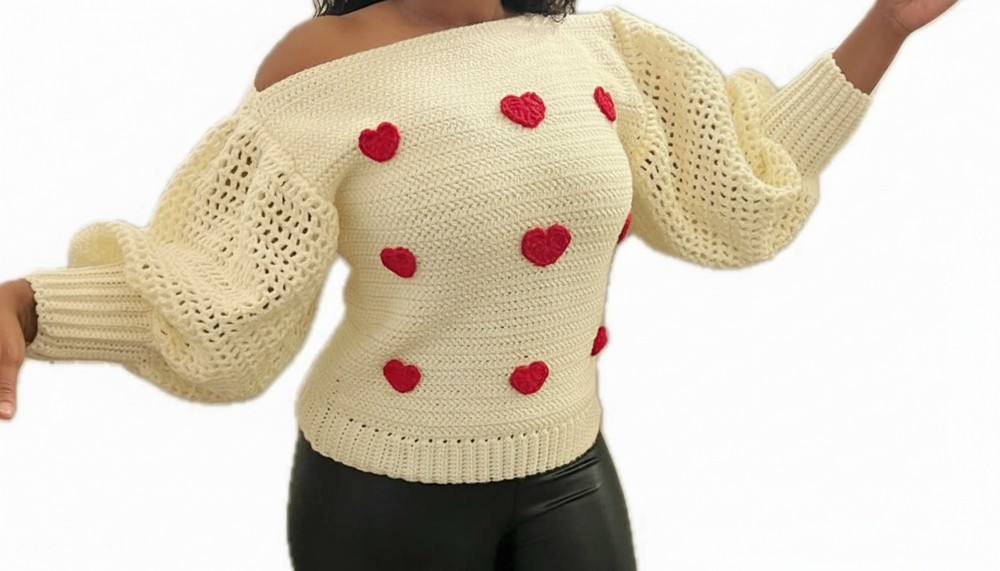
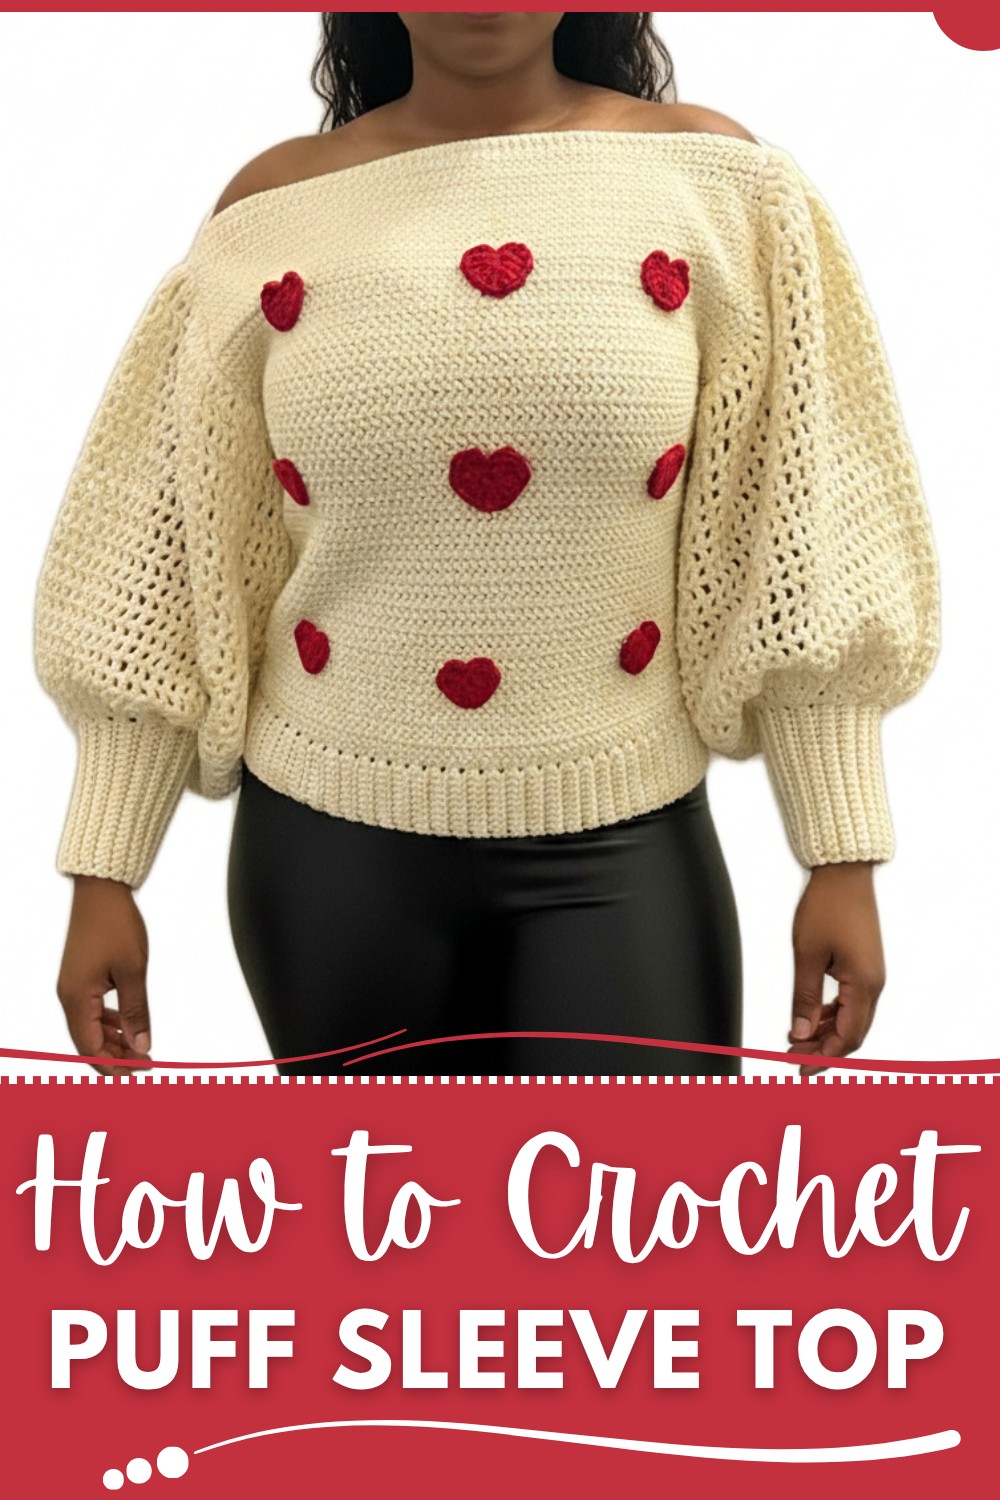
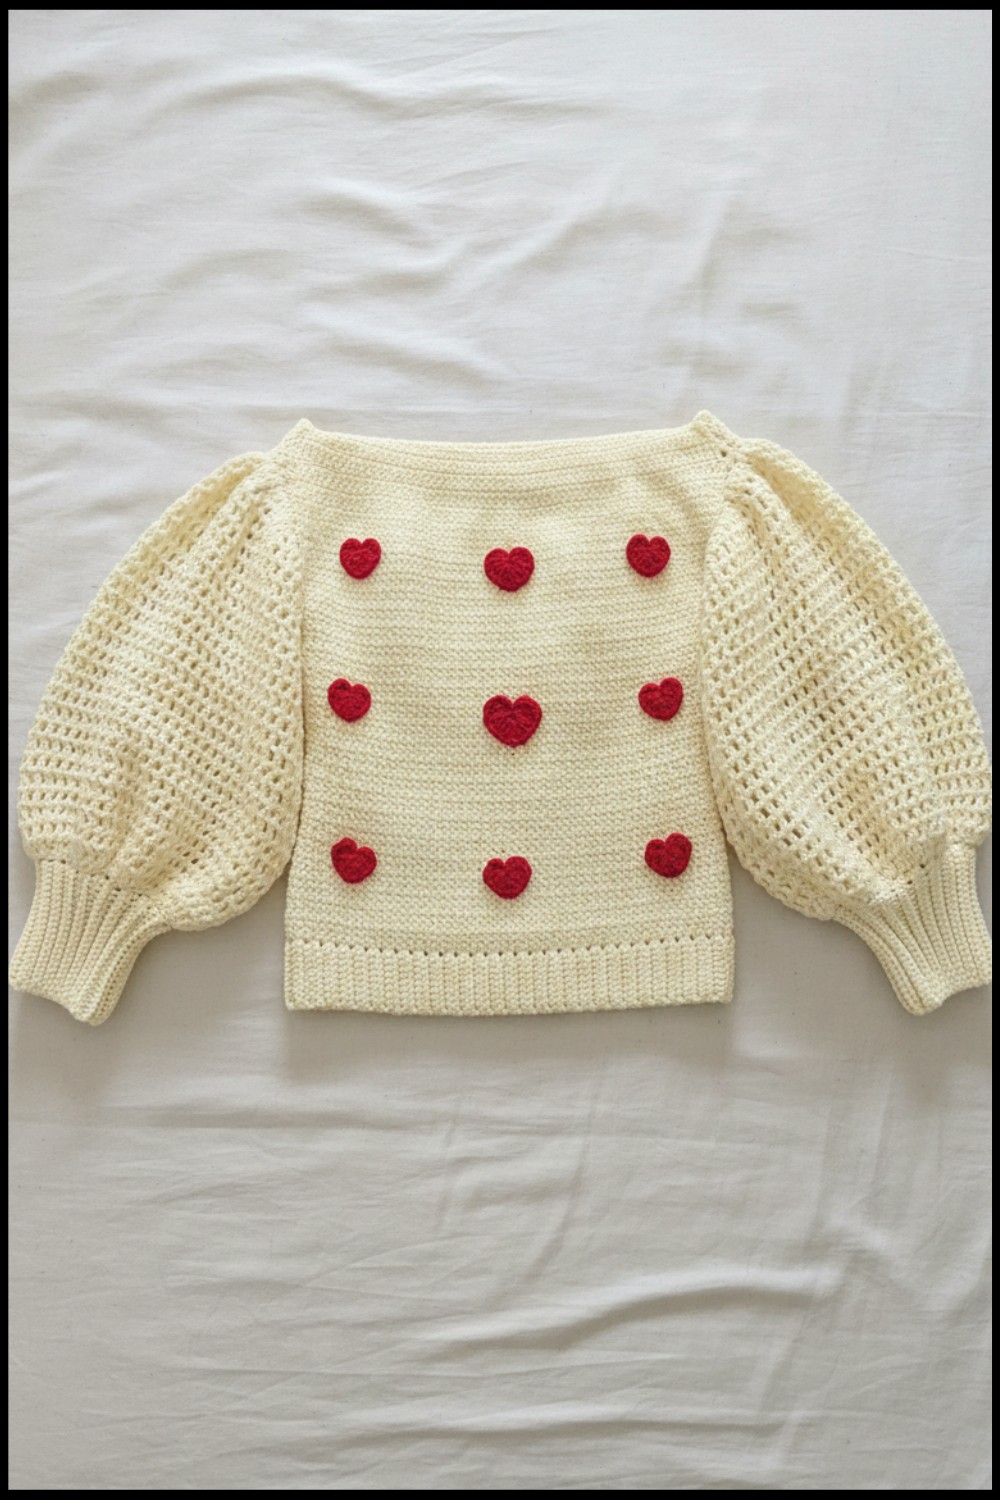
Crochet Pattern: Bell-Sleeve Sweater with Heart Appliqués
Materials Needed
- Yarn:
- Lion Brand: Pound of Love Yarn
- Color: Antique White
- Weight: Medium (Size 4)
- Fiber: 100% Acrylic
- Yardage: Approximately 1,020 yards (you might need slightly less).
- Lion Brand: Pound of Love Yarn
- Crochet Hooks:
- 5.0 mm crochet hook: For ribbing.
- 5.5 mm crochet hook: For the sweater body.
- Additional Tools:
- Stitch markers
- Scissors
- Darning needle
- Measuring tape
- Sewing needle and matching thread (for attaching appliqués).
Gauge
- 10 stitches × 10 rows = approximately 4 inches (10 cm) in half double crochet (herringbone).
Gauge is critical to ensure the correct fit. Make a swatch before starting and adjust your hook size if needed.
Finished Size
- Sweater Body: Approximately 22 inches wide (before seaming). Length: adjust based on your preference.
- Sleeves: 18 inches long, with a bell-shaped cuff.
- Neck Opening: Designed for a slightly asymmetrical neckline, where one side casually falls off the shoulder.
Special Techniques
- Herringbone Half Double Crochet (HHDC):
- Yarn over (YO) and insert the hook into the stitch.
- YO and pull up a loop (3 loops on hook).
- Pull through the first loop (creating the “herringbone” look).
- YO and pull through the remaining 2 loops.
- Back Loop Only (BLO): Working into the back loop of each stitch creates the ribbing texture.
- Slip Stitch Seaming: Joining pieces with slip stitches maintains a clean and finished look.
Instructions
1. Sweater Body Panels (Make 2)
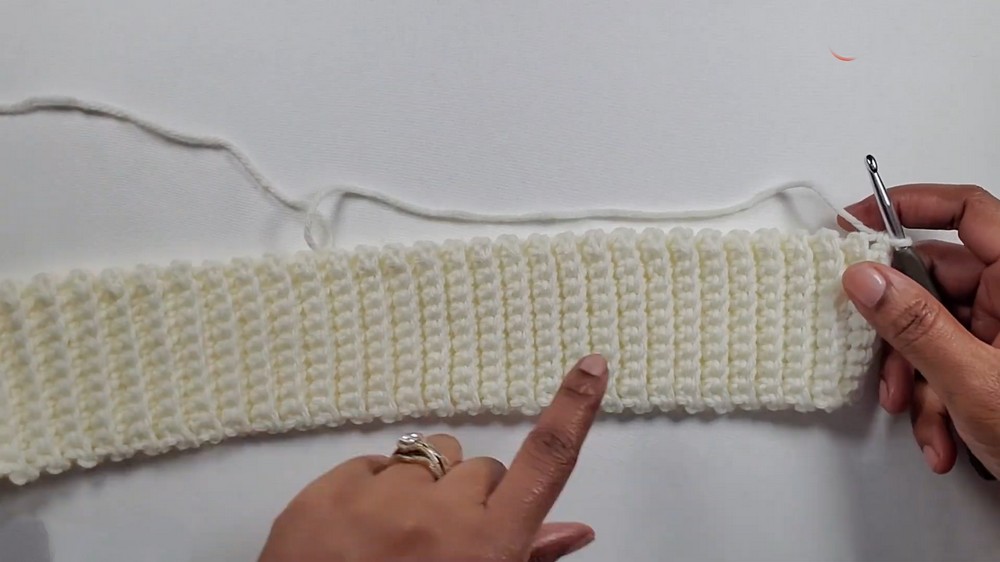
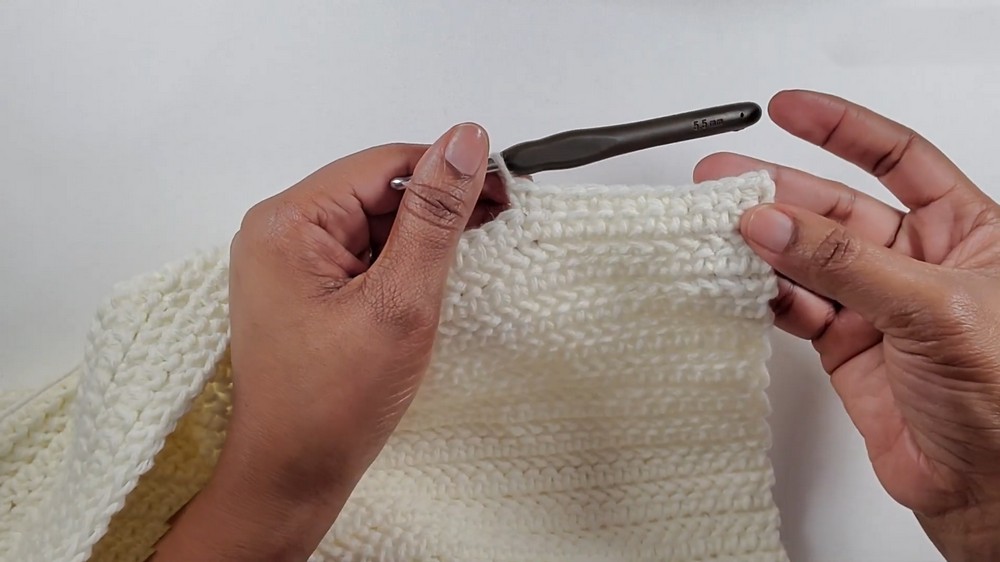
Step 1: Create the Ribbing for the Body Panel
- Using the 5.0 mm hook, make a slip knot and chain 11.
- Begin row 1:
- Work 1 single crochet (SC) in the 2nd chain from the hook and continue across.
- You should have 10 SCs.
- This will form the ribbing's width.
- Chain 1, turn. Work into back loops only (BLO):
- SC in the back loop of each stitch across.
- This creates the ribbed texture.
- Repeat until you've completed 64 rows (or desired width), ensuring the ribbing fits around the bottom of your body panel.
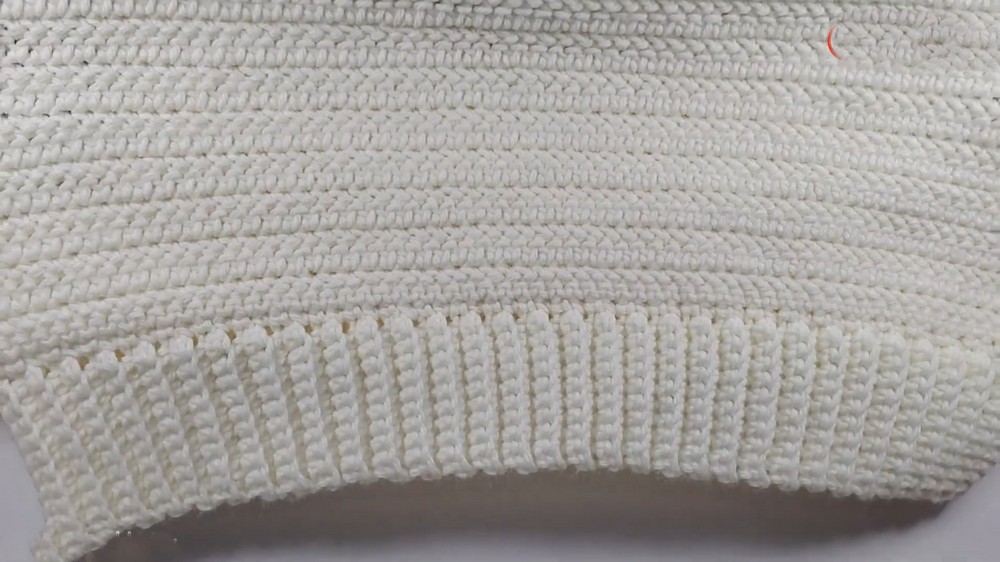
Step 2: Transition to Main Body
- Switch to the 5.5mm hook.
- Work along the long edge of the ribbing:
- Place 1 SC in each row of ribbing, resulting in 64 SCs across.
- Continue for 2 rows of SC.
Step 3: Herringbone Half Double Crochet Rows
- Begin Herringbone Half Double Crochet (HHDC):
- Chain 2, turn. Work HHDC across the row.
- Work a total of 53 rows of HHDC.
Step 4: Top Ribbing
- Work 3 rows of SC across the top of the panel to finish.
Tip: Complete the second panel exactly as above.
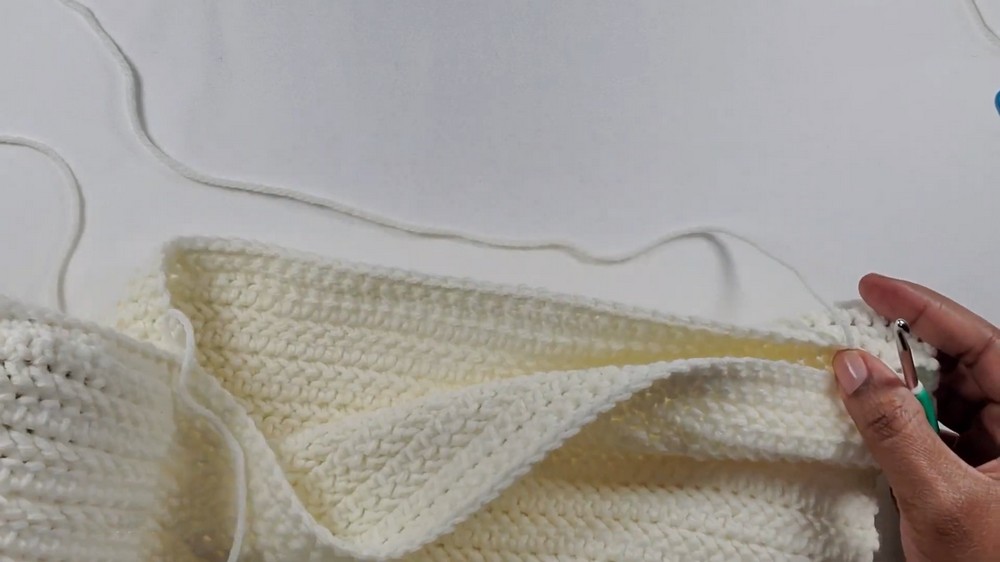
2. Assemble the Body Panels
- Lay the two panels on top of each other, right sides facing inward.
- Seam the shoulders:
- Measure and leave an opening for the neckline. Leave 17 stitches unseamed on one shoulder to create an asymmetrical drop-off.
- Slip stitch or use a darning needle to sew the seams.
- Seam the sides, leaving 8 inches unsewn under each armhole.
3. Sleeves
Sleeve Ribbing
- Chain 21 using 5.0 mm hook.
- Work SC across the chain for a total of 20 stitches.
- Chain 1, turn. Work SC into the BLO.
- Repeat until you’ve created 37 rows.
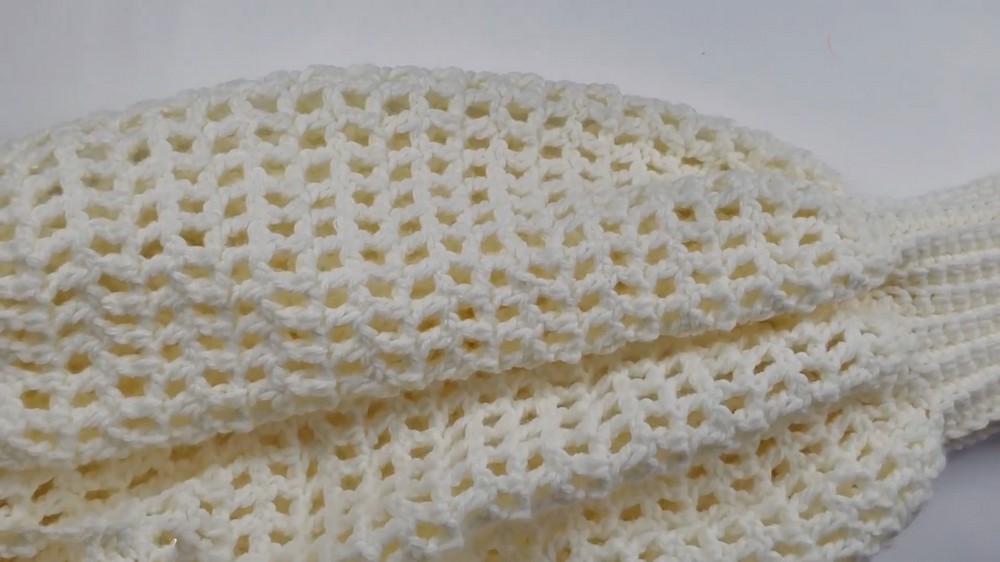
Main Sleeve
- Attach the 5.5mm hook and work 2 SC into each row of ribbing.
- Total: 74 SCs around.
- Begin the sleeve body with mesh stitch:
- Chain 4 (counts as DC + ch-1), turn.
- Skip 1 stitch, work 1 DC in the next stitch.
- Chain 1, skip 1 stitch, and DC into the next.
- Continue this “DC + ch-1” pattern to the end of the round.
- Repeat the mesh stitch rounds until your sleeve is 18 inches long (or desired length).
Attach Sleeves
- Fold sleeves to create a symmetrical edge. Slip stitch or sew them together along the side.
- Attach the sleeve to the sweater body. Line up the edges and slip stitch directly into the armhole.
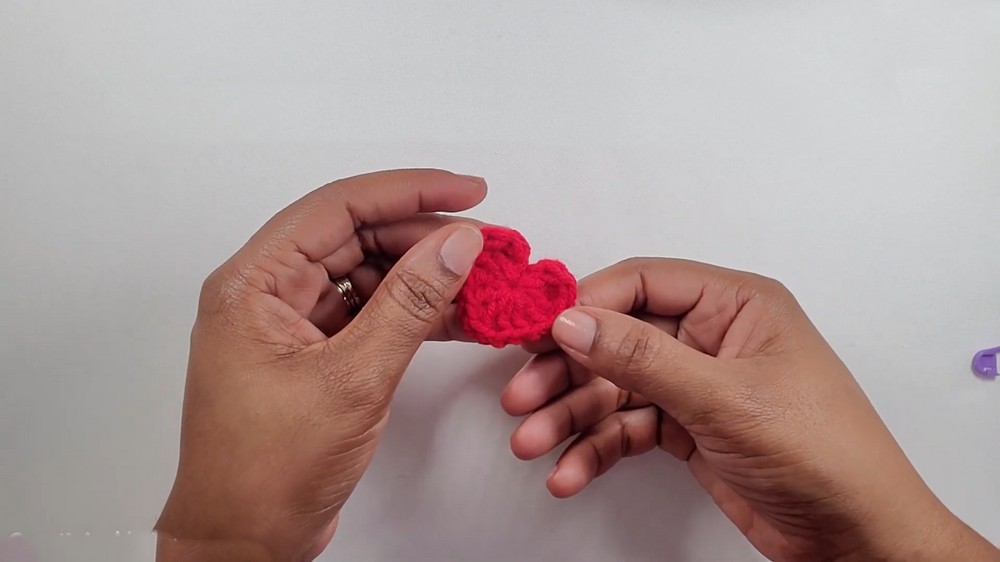
4. Heart Appliqués (Optional)
- Crochet several hearts in different sizes (refer to your preferred heart pattern).
- Use pins to plan their arrangement on the sweater body.
- Sew them securely using matching thread and a sewing needle.
Customization Ideas
- Colors: Choose a bold, vibrant yarn for a statement piece or a subtle neutral for a classic look.
- Appliqués: Add flowers, leaves, or other shapes instead of hearts.
- Length: Adjust the body and sleeve lengths as desired for a cropped or oversized look.
- Stitches: Replace herringbone half-double crochet with traditional or extended half-double crochet for variety.
Finishing Touches
- Weave in all loose ends carefully for a neat finish.
- Block the sweater if necessary to achieve the ideal shape and drape.
Conclusion
You’ve now crafted a customized, stylish bell-sleeve sweater that's perfect for any season! This cozy pullover, adorned with playful heart appliqués, exudes charm and offers the perfect balance of comfort and fashion. Whether wearing it as-is or personalizing it further, this sweater is sure to become a wardrobe favorite.