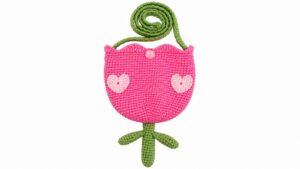
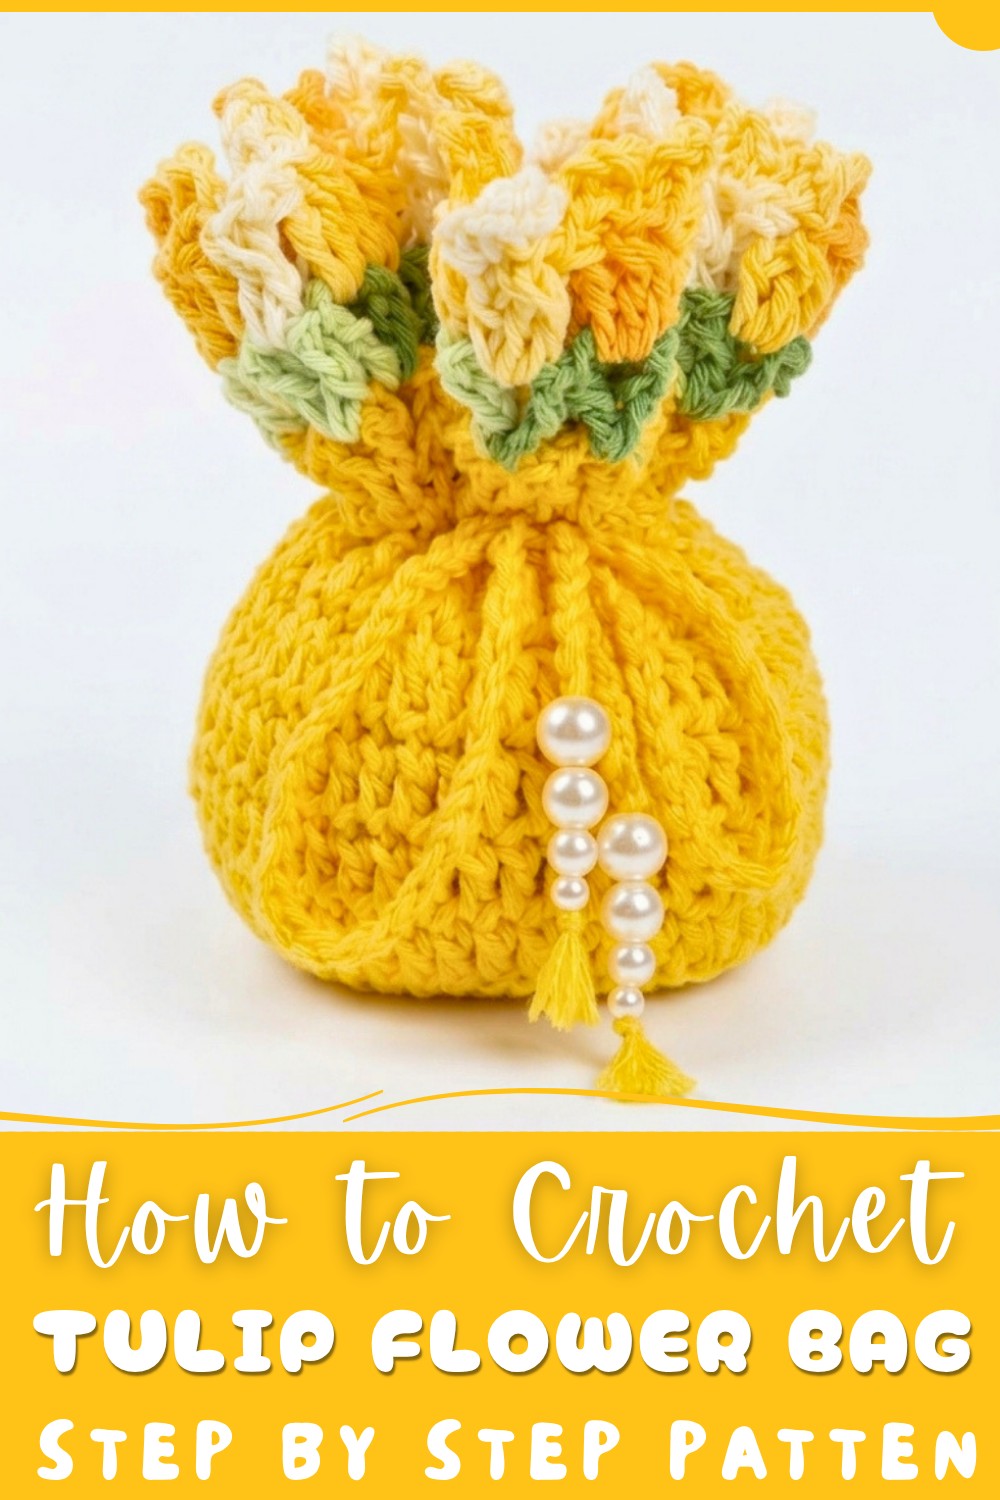
Infuse charm into your handbag lineup using this Free Crochet Tulip Flower Bag Pattern that showcases lovely tulip designs and handy storage space.
Adding a handmade accessory to your collection can brighten up any outfit, and the free crochet tulip flower bag pattern is a delightful choice. This charming project, shared by the creative Márcia Souza Crochê, shows you how to create a lovely bag that combines function with an eye-catching floral design.
This bag stands out with its delicate tulip motifs crocheted in soft, colorful yarns that create a pleasant texture and a cheerful vibe. The shape is practical yet stylish, with ample space inside and a sturdy base that helps the bag keep its form. The tulip flowers wrap around the body of the bag, giving it a unique and decorative look that is both fun and elegant.
Crochet Tulip Flower Bag Free Pattern for Every Season
Perfect for daily use or special occasions, this crochet bag offers great versatility. It’s light enough to carry essentials comfortably and strong enough to last through repeated use. Handmade items like this also make thoughtful presents, bringing a personal touch and a splash of creativity to gifting.
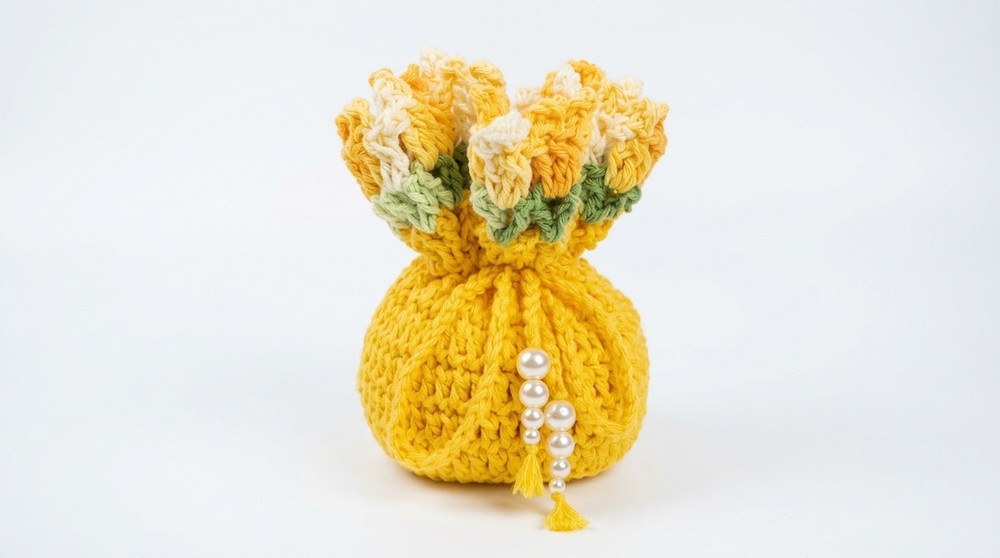
Following the clear, step-by-step video tutorial on the Márcia Souza Crochê channel makes making this bag accessible and enjoyable. The detailed instructions guide you through every stitch, making it a wonderful project for both beginners and experienced crocheters who want to try something fresh and beautiful. This tulip flower bag combines charm, practicality, and handmade warmth in one delightful package.
Crochet Tulip Doorstop Pattern
This crochet tulip doorstop is a charming, simple, and elegant handmade accessory designed to hold doors open while adding a decorative touch to your home. The project features a round base, textured body, delicate tulip flower motifs with leaves, and a practical drawstring closure topped with pearl embellishments. It uses Barroco Maxcolor yarn in yellow tones and green for the leaves, combined with simple stitches and cluster work to achieve a lovely floral appearance.
Pattern Highlights
- Base and body: Constructed in rounds with increases and back loop stitches for texture
- Tulip motifs: Created using cluster stitches and picot loops forming flower petals
- Leaf details: Work green yarn “V” stitches for leaf accents
- Drawstring cord: A long chain threaded through the body allows securing the filling inside
- Weighted filling: Bag filled with sand (~570g) provides function as a doorstop
- Embellished ends: Pearls fixed on cord ends add a finishing stylish touch
Notes
- Yarn colors: multiple shades of yellow and green for a natural look; your choice may vary
- Adjust hook size and yarn weight if necessary for desired tightness and size
- Ensure firm but flexible stitches around the body to accommodate insertion of the weight
- Pearls and fabric glue are decorative and optional but enhance the overall aesthetic
- The weight used (~570g sandbag) matches the construction size; adjust for larger or smaller doorstops
- Maintain consistent tension for uniformity across rounds and motifs
- Follow diagram or video tutorial alongside this pattern for visual guidance
Skill Level
Intermediate beginner crochet: comfortable with
- Magic ring start
- Double crochet (dc) increasing rounds
- Working in the back loops only
- Basic chain and single crochet
- Cluster and picot stitches
- Inserting drawstring and embellishing ends
Materials
- Yarn: Barroco Maxcolor #6 in yellow (main color), multicolor yellow for tulips, and green yarn for leaves
- Crochet hook: 3.5 mm
- Scissors
- Fabric glue
- Pearls in varying sizes for decoration (four suggested sizes)
- Filling: small bag filled with sand, approx. 570 g (or alternative filler)
Measurements / Sizing
- Finished base approximately circular, expanding to a diameter determined by rounds outlined
- Height depending on body rounds and drawstring closure, visually suitable as a doorstop size
- Cord length: chain of 90 stitches for threading and tightening around filling
- Square or schematic is not provided but gauge and stitch counts ensure proportional construction
Gauge & Stitch Pattern
- Magic circle start creates a tight center for the base
- Round increases follow consistent doubling and incremental patterns for flat circles
- Back loop stitches on Round 4 create a defined edge height and texture
- Tulip petals formed by cluster stitches grouped in “3 unfinished double crochets together” plus picot chain loops
- Leaf details executed as “V” stitches (1 dc, ch 2, 1 dc) into chain spaces
Stitch Abbreviations
| Abbreviation | Meaning |
|---|---|
| ch | Chain |
| dc | Double Crochet |
| sl st | Slip Stitch |
| cl | Cluster |
| picot | Small decorative chain loop (usually chain 3 and slip stitch in 1st chain) |
Special Stitches
Cluster Stitch (3 unfinished double crochets together)
- Yarn over, insert hook into stitch, yarn over and pull through (3 loops on hook).
- Yarn over, pull through 2 loops, yarn over and insert hook in next stitch and repeat twice, finishing all partially worked stitches in one stitch together.
Picot
- Chain 4, slip stitch into first chain to create small pointed loop on top of petal.
The Crochet Pattern – Step by Step
The Base (Bottom)
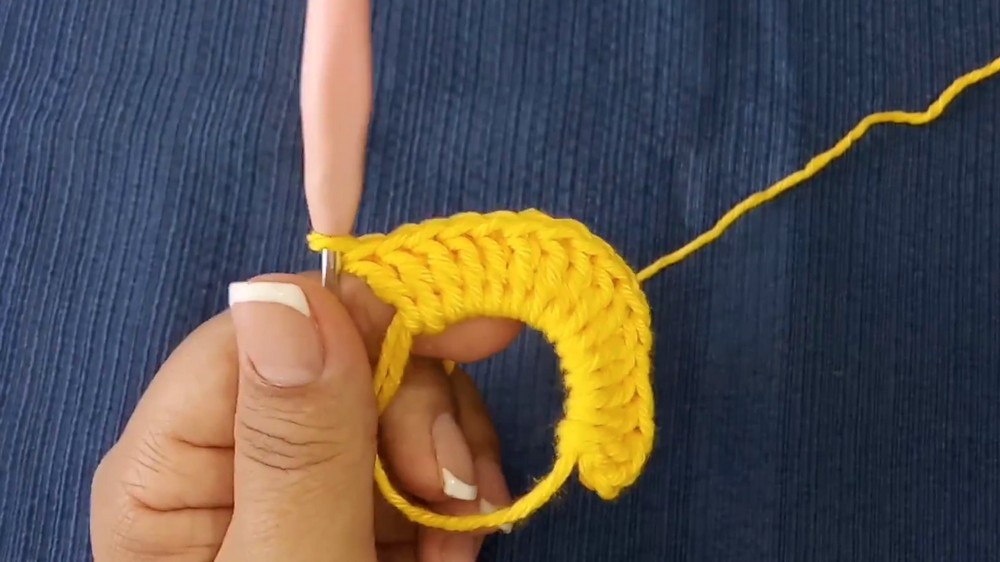
Round 1:
- Begin with a magic ring.
- Chain 3 (counts as first dc).
- Work 16 dc into the ring. (Total 17 with initial chain)
- Join with sl st to first dc to close round neatly.
Round 2:
- Work 2 dc in each stitch around (increase every stitch).
- Total stitches now 32.
- Join with sl st.
Round 3:
- Work increases in an alternating pattern:
- 1 dc increase (2 dc in one stitch), then 1 dc alone.
- Repeat across the round.
- Total 48 stitches.
- Join with sl st.
The Body (Sides)
Round 4:
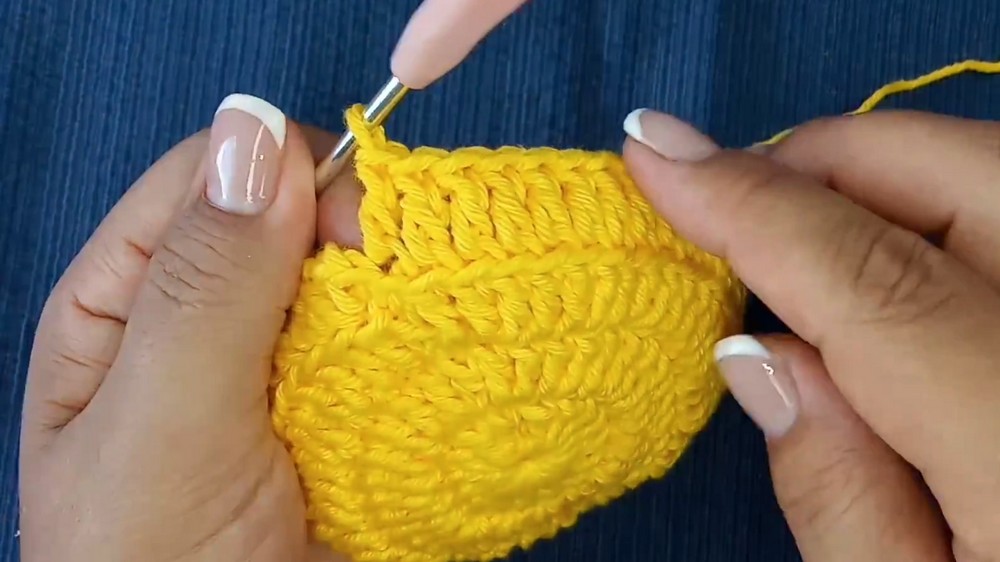
- Work 48 dc, but only in the back loops of previous stitches to create a textured edge.
- Join with sl st.
Rounds 5 to 9:
- Work 5 rounds of 48 dc through both loops of stitches, no increases.
- This creates a straight tubular body for the doorstop.
Preparation for Tulips
Round 10:
- Create spacing rows for tulip insertion:
- 1 dc, 1 ch, skip 1 stitch around the round.
- Join with sl st.
Round 11:
- Into each chain space from Round 10, work a 'V' stitch:
- 1 dc, 2 ch, 1 dc.
- Join with sl st.
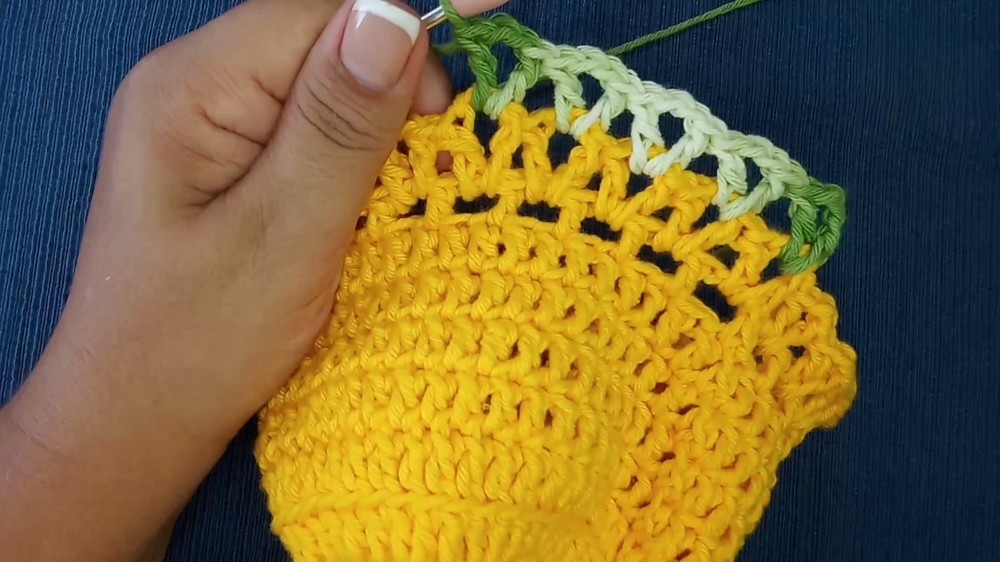
Round 12 (Leaves):
- Using green yarn, repeat the 'V' stitch pattern (1 dc, 2 ch, 1 dc) in every chain space from Round 11 to create leaves.
- Join with sl st.
The Tulips (Flowers)
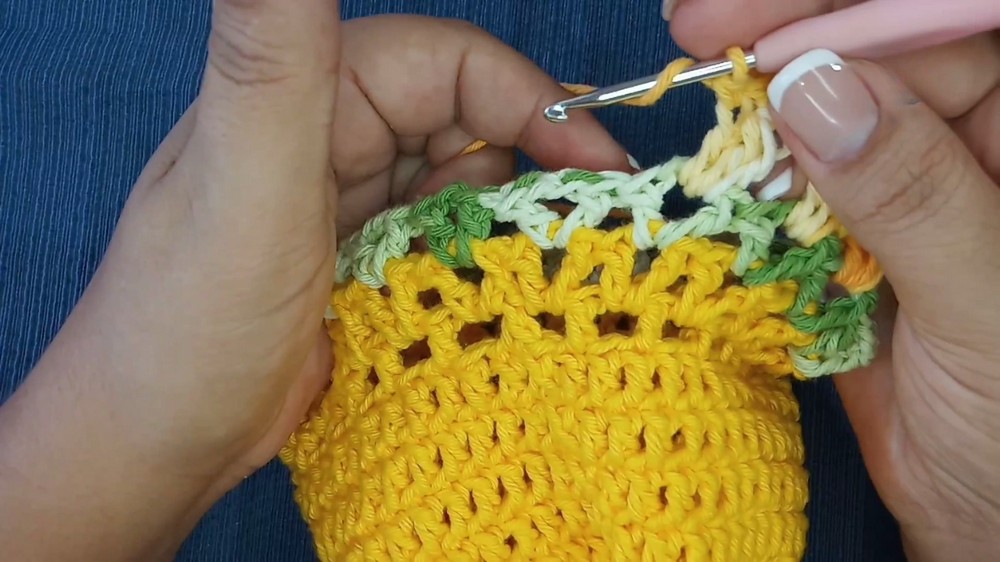
Round 13:
- Using yellow multicolor yarn, on every 'V' space (Round 11/12 chain spaces):
- Work a cluster stitch of 3 unfinished dc together.
- Chain 4, slip stitch into the first chain to form a picot.
- Secure with 1 sc.
- This builds floral tulip petals with delicate picot tips.
- Join with sl st.
Finishing Touches
Cord:
- Chain 90 stitches with yellow yarn to form the drawstring cord.
Assembly:
- Thread the cord through the chain spaces created in Round 10.
- Attach pearls of different sizes to the cord ends using fabric glue, securing the ends decoratively.
- Fray the ends of the yarn on the cord for a finishing touch.
Filling:
- Insert a small sandbag (~570 g) or weighted filler into the pouch center.
- Pull the drawstring cord tight to close the bag securely around the weight.
- Tie a bow or knot with the cord to finish off.
Assembly & Finished Size
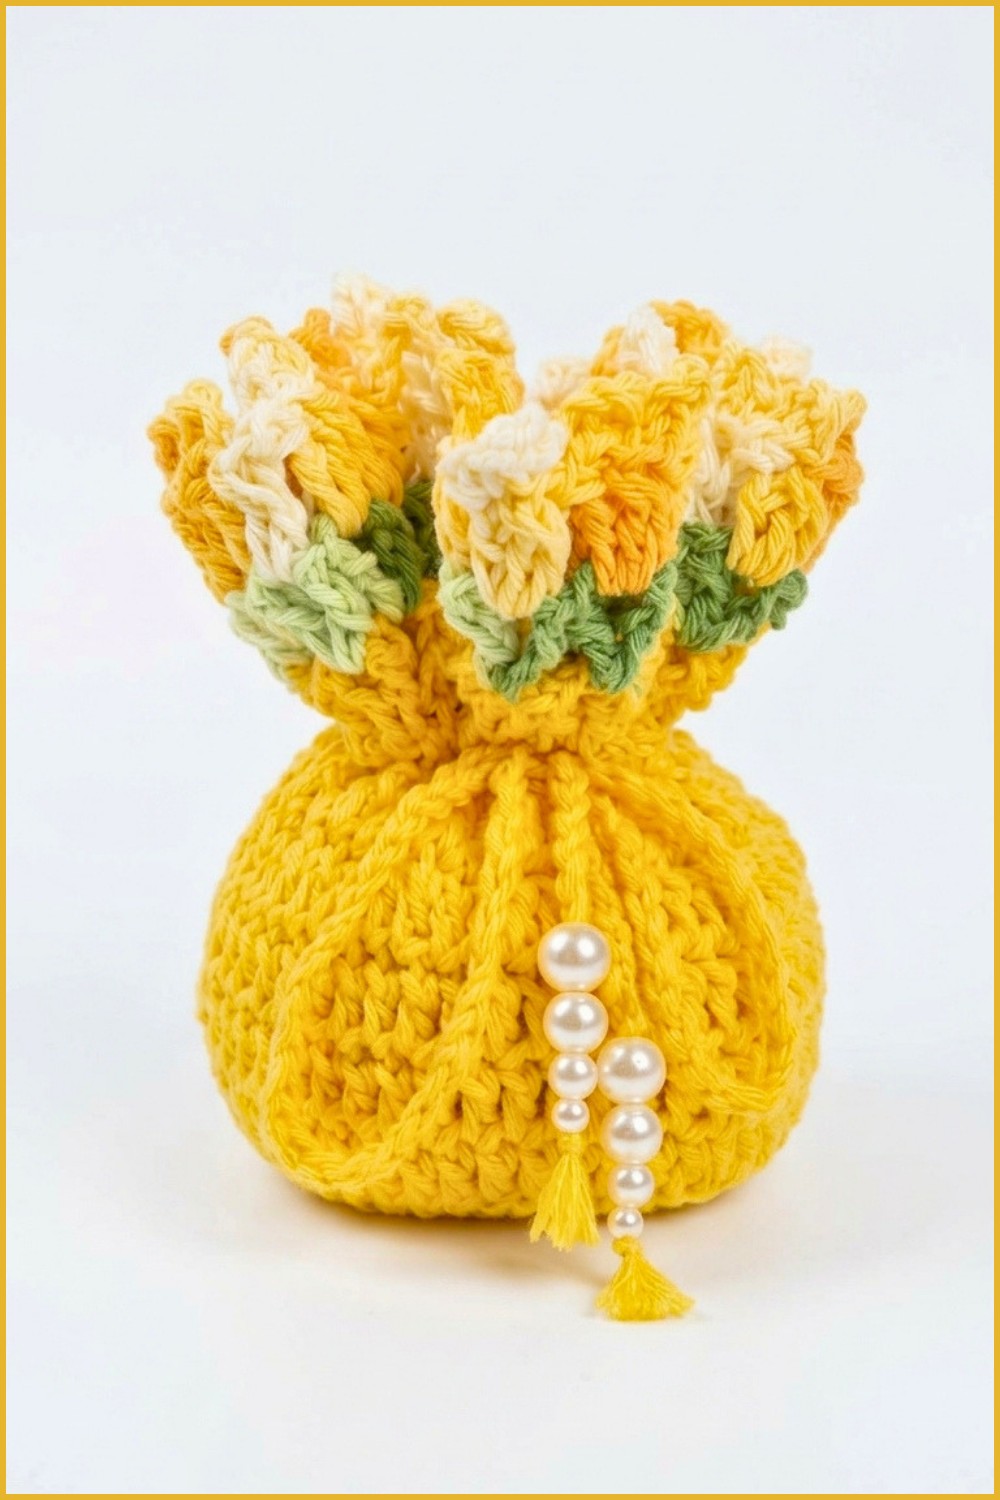
- Base and body form a sturdy cylindrical shape to hold the filling securely.
- Tulip petals and leaf motifs decorate the upper body elegantly.
- The drawstring and pearls provide a functional and ornamental closure.
- Approximate bag diameter and height depend on completed rounds but fit typical doorstop size demands.
Conclusion
This crochet tulip doorstop presents a blend of decorative artistry and practicality. Through strategically combining rounds of double crochet, back loop stitches, and charming cluster flower motifs, you can create an elegant and functional home accessory. The use of a weighted filler paired with a drawstring closure ensures performance while maintaining a gorgeous tulip flower appearance. The pearl embellishments further enhance its visual appeal. Designed for intermediate beginners, this project offers ample room for customization in colors, size, and fill, making it a lovely gift or home addition. Following these detailed instructions will guide you smoothly from base formation to floral finishing.