Carry a splash of color and personality with this free crochet flower bag pattern, turning every outing into a cheerful and stylish adventure!
There’s something truly special about creating handmade accessories, and I’ve found that a charming flower-themed bag can brighten up any outfit instantly. If you’re looking for a fun and practical crochet project, the free crochet flower bag pattern is a fantastic place to start. This lovely bag combines function and style, making it a must-try for anyone who loves crocheting unique, handmade items like purses and totes.
Quick & Easy Free Crochet Flower Bag Pattern for Beginners
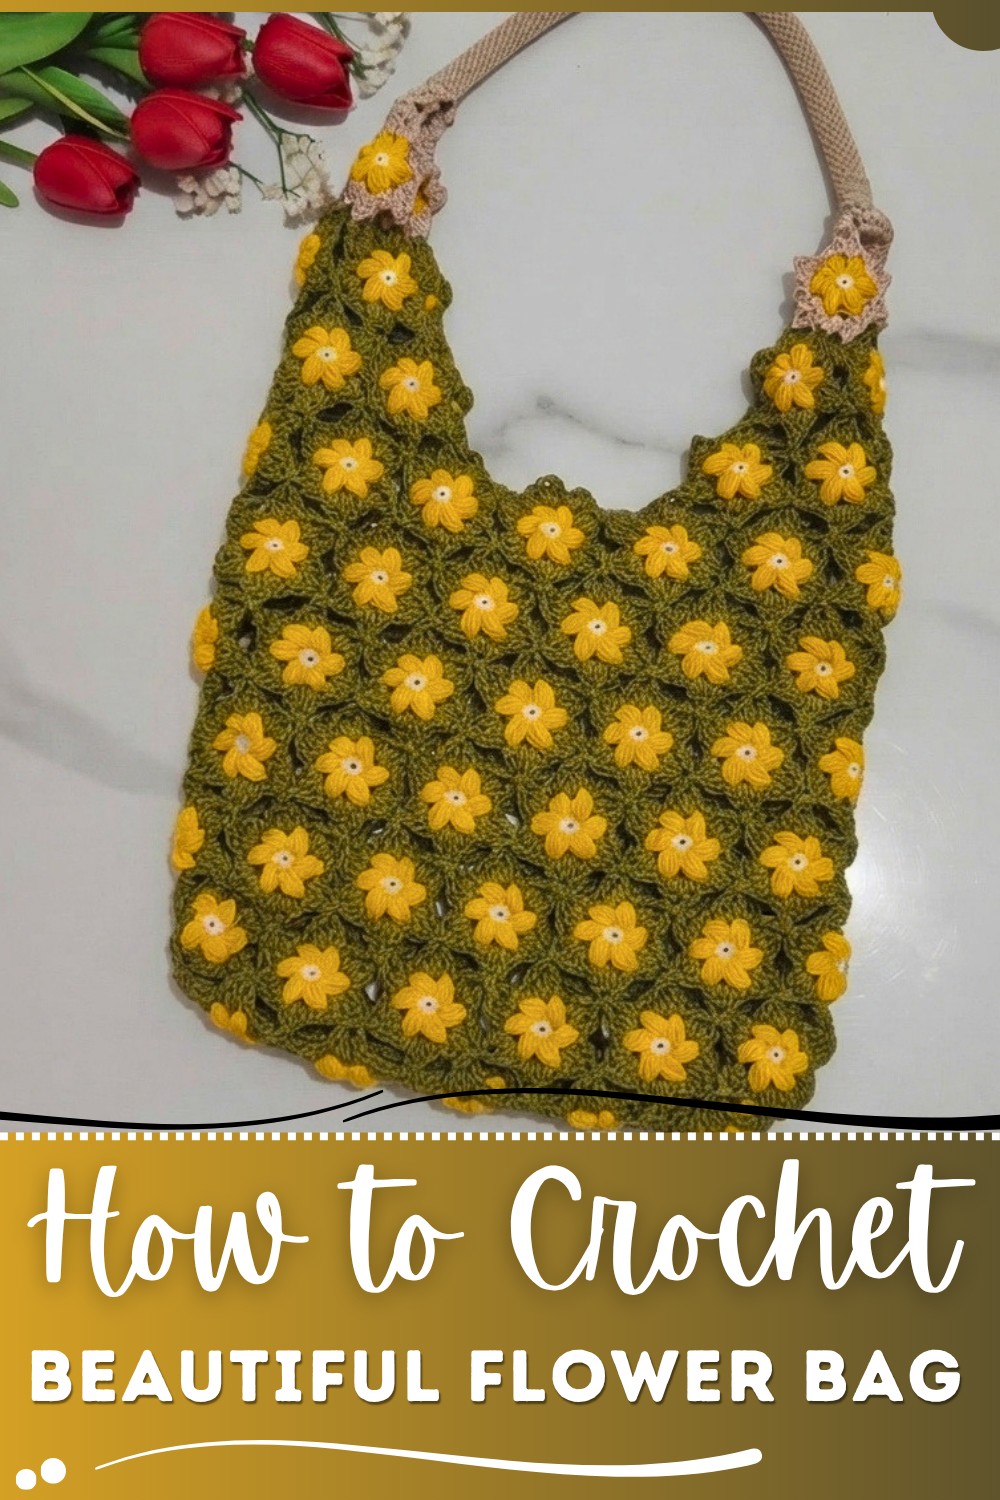
This flower bag stands out with its pretty floral motifs that bring a cheerful, fresh vibe to the design. The bag has a soft but sturdy feel thanks to the textured stitches, giving it a lovely three-dimensional look. Its rounded shape paired with delicate flower patterns adds a touch of whimsy, while the open stitches make it light and perfect for carrying everyday essentials. Whether you’re heading out for a casual day or want a statement piece, this floral bag fits the bill beautifully.
Designed for beginner to intermediate crocheters, the main stitch used is the classic double crochet, which makes it easy to follow yet gives the bag a nice structure. This pattern is great for practicing stitch consistency and joining motifs seamlessly. Beyond being a practical accessory, the flower bag also makes a thoughtful handmade gift and a charming addition to your collection of wearable art. It’s perfect for those who want to carry a bit of handmade beauty wherever they go.
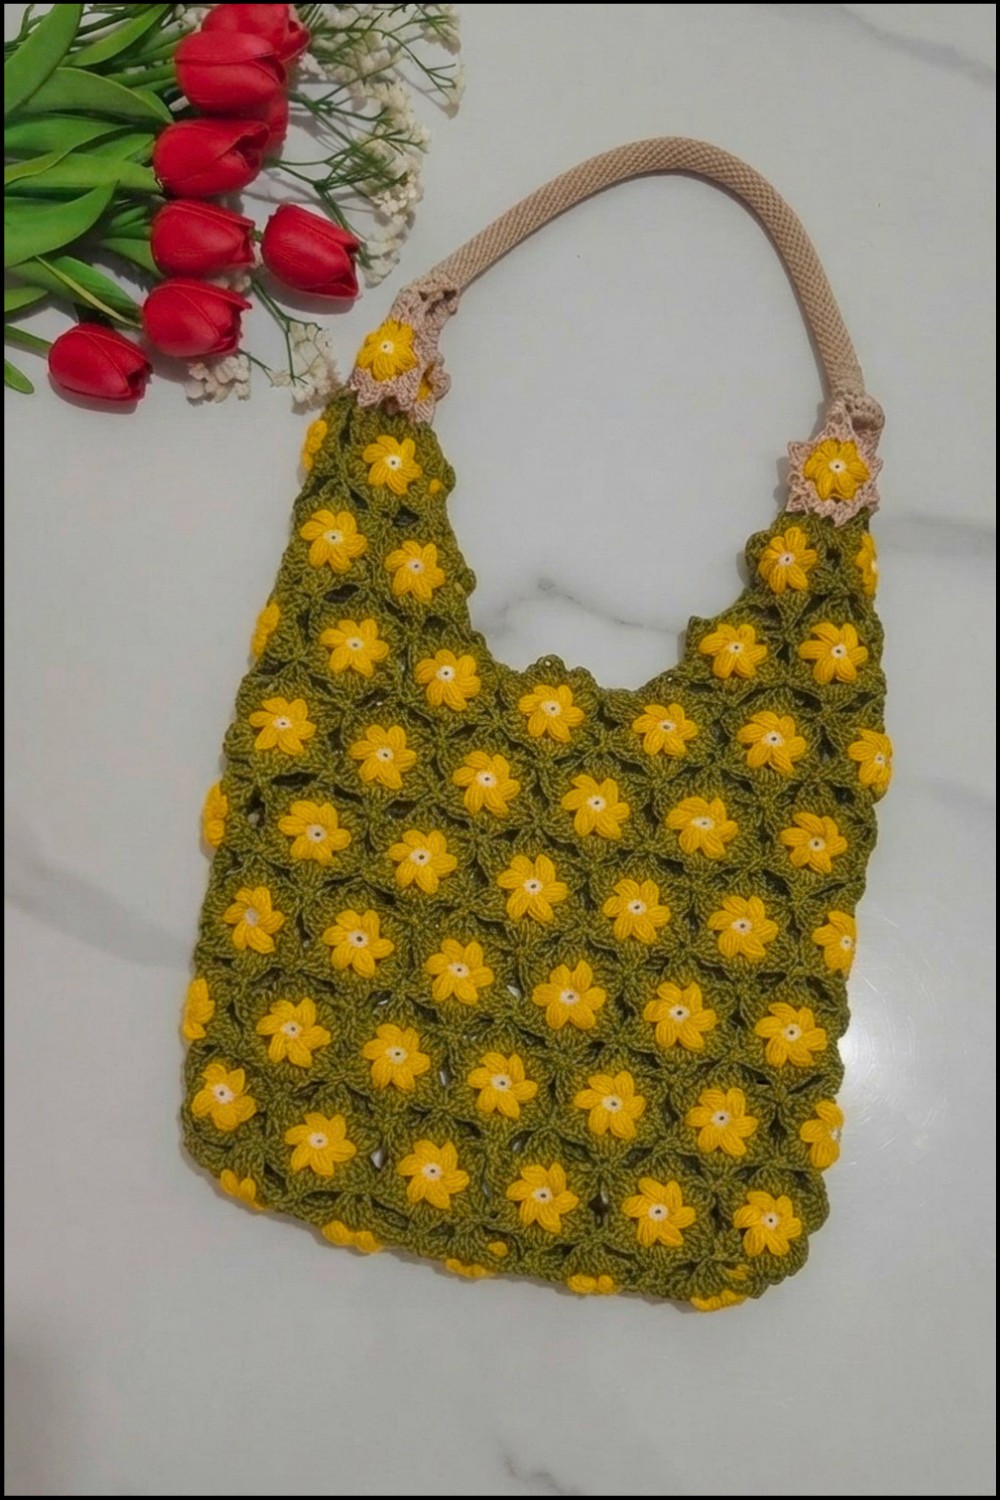
Beginner Puff Flower Crochet Bag Pattern
Welcome to your beginner-friendly tutorial on making a beautiful crochet bag with puff flowers! In this project, you’ll learn how to make puff flowers, join them together as you go, and finish your bag with strong handles and strap holes. Work slowly, follow each step, and you will create a stunning, colorful accessory.
Pattern Highlights
- Easy puff flowers with join-as-you-go technique
- Colorful and 3D for extra style
- Shapes into a sturdy bag by arranging flowers in rounds
- Handles made from connected flower motifs
- Loops at the top for attaching a strap
Notes
- Each puff flower is made in 2 main rounds: a center and petals.
- Flowers are joined as you crochet them—not sewn at the end!
- Following the join points is important for the bag to keep its shape.
- If you’re new to puff stitches, take your time and practice first.
Skill Level
Advanced Beginner
It helps to know:
- How to make a magic ring
- Single crochet (sc), half double crochet (hdc), double crochet (dc), chain, slip stitch
- Simple color changes and joining motifs
Materials
- Yarn: DK (light worsted) weight—several colors for a colorful bag
- Hook: 3.0 mm (or size to match your yarn)
- Scissors
- Tapestry needle (for weaving in ends)
- Stitch markers (helpful for joins)
Measurements / Sizing
- Each finished flower: about 4–5 cm across
- Bag base: 5 flowers in a circle
- First round of body: 12 flowers
- 6 rounds give a medium-sized bag (about 20 x 20 cm)
- Handle: made of 4 flowers in first row, 3 flowers above
Gauge
Gauge is not important for this project. Just make sure your flowers are the same size.
Stitch Abbreviations
| Abbreviation | Meaning |
|---|---|
| MR | Magic ring |
| ch | Chain |
| sc | Single crochet |
| hdc | Half double crochet |
| dc | Double crochet |
| sl st | Slip stitch |
| puff | Puff stitch (see below) |
Special Stitches
Puff Stitch (for petals):
Yarn over, insert hook into stitch, yarn over, pull up a loop — do this 4 times (total 9 loops),
then yarn over and pull through all loops on hook.
Step-by-Step Pattern
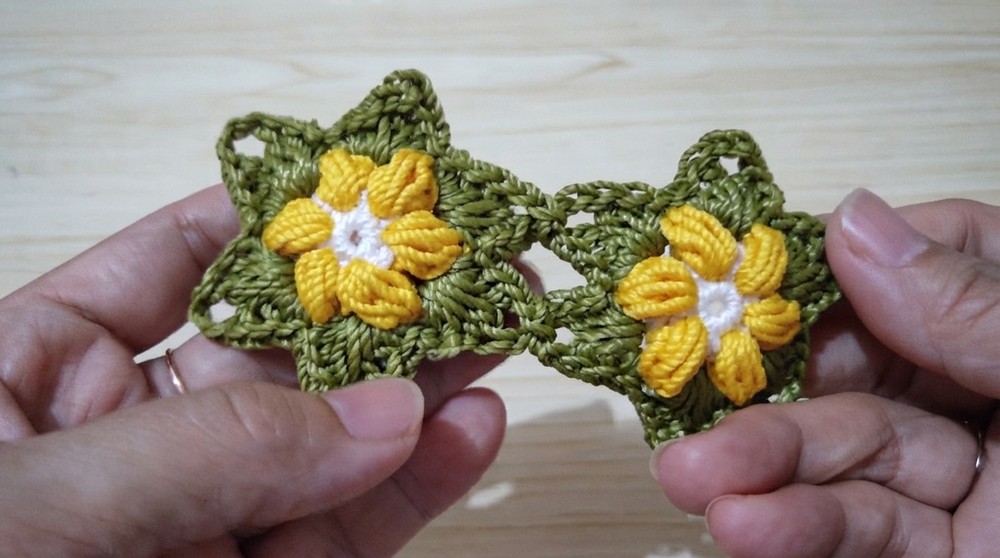
Step 1: Make a Puff Flower
Center of Flower:
- Make a magic ring.
- Ch 1, work 6 single crochets (sc) into the magic ring.
- Pull the ring tight.
- Join to first sc with a slip stitch (sl st).
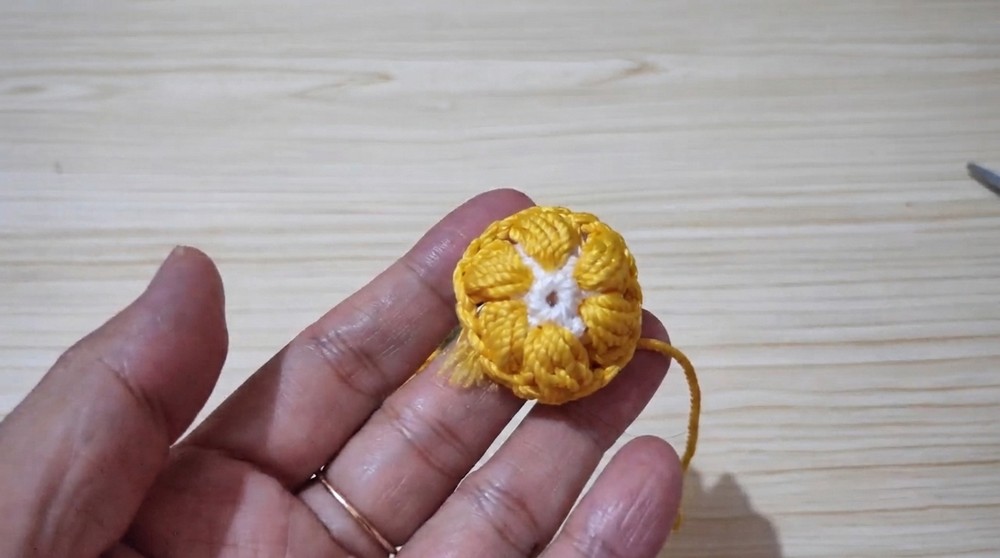
Change to your petal color:
Petal Round:
5. In any sc, join new color.
- Make a puff stitch (see above), then chain 2.
- Repeat: In each of the next 5 sc, make one puff stitch and chain 2 after each.
- After 6 puff stitches (6 petals), sl st into the first puff to finish the round.
- Fasten off or get ready to join to the next flower.
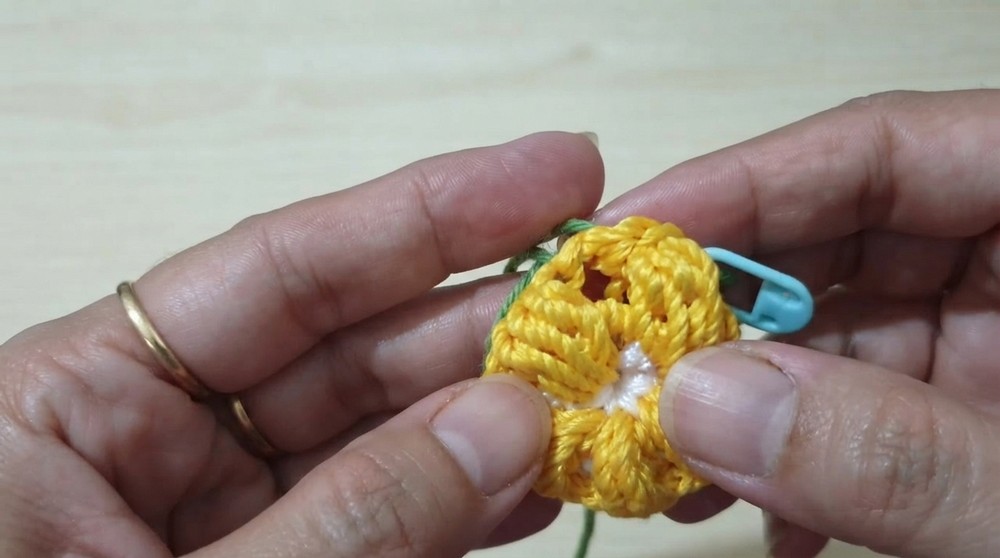
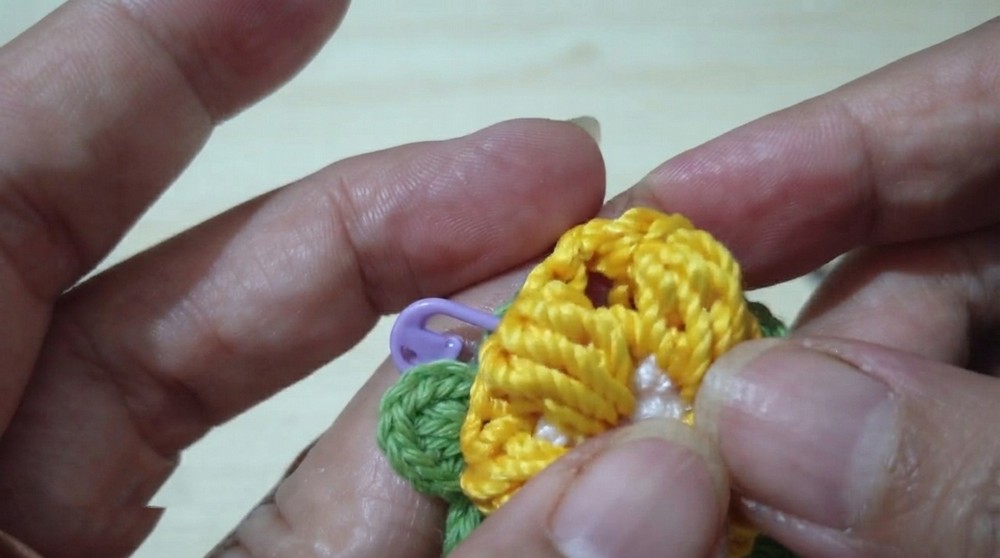
Step 2: Make and Join More Flowers for the Bag Base
- Make more flowers as in Step 1.
- As you make each new flower’s petals, join them to the previous flowers where petals connect (at the chain-2 spaces).
- For the bag base, join 5 flowers in a circle; connect petals at 2 or 3 spots per flower as needed.
Step 3: Start the Bag Body (First Round)
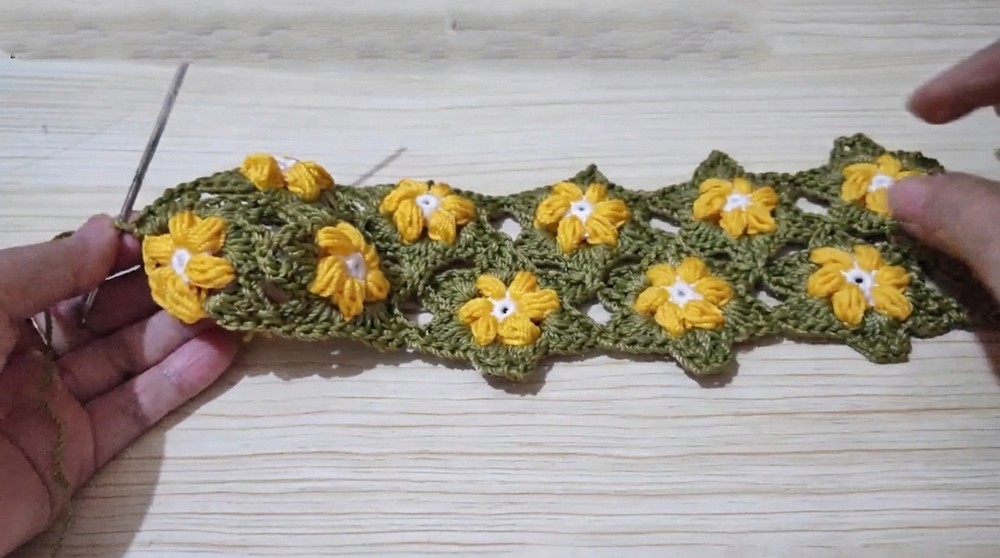
- Work a new flower and join it to the edge of the base at 3 points (to 3 chain-2 spots on neighboring base flowers).
- Continue filling in around the base, always joining at the correct spots:
- Most flowers join at 4 places
- Some (corners) join at 3 or 5 places
- Keep going until you have 12 flowers around, making a ring.
Tip:
It helps to lay out your base and mark join points with stitch markers.
Step 4: Build Up the Bag (Add More Rounds)
- For each new round, make flowers and join as you go:
- First flower: join at 3 points.
- Flowers 2-11: join at 4 points each.
- Last flower: join at 5 points.
- Repeat until your bag is as tall as you like (about 6 rounds for a medium size).
Step 5: Make Handles
- From where you want your handles, fold the top edge in half to help center them.
- For the first handle row:
- Make 4 joined flowers in a row, each joined to the bag at 3 points.
- Second handle row (on top):
- Make 3 flowers, joining to the row below and at the sides.
Repeat handle for the opposite side of your bag.
Step 6: Make Strap Holes
- At the base of each handle, attach yarn.
- Ch 1, make 2 single crochets in next stitches.
- Ch 8 (forms a loop for the strap).
- Make 2 single crochets on the other side.
- Ch 1 and turn.
- Make a long sc (insert into stitches below for strength).
- Work 8 sc along the ch-8 loop.
- Do 2 more long sc into the base.
- Fasten off.
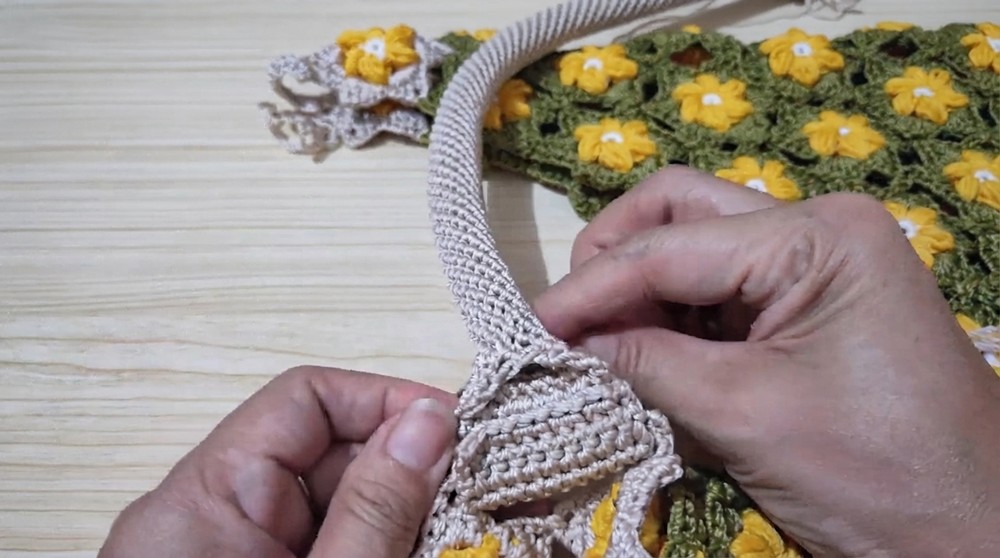
Repeat on the other handle. These loops are for attaching your crossbody or shoulder strap.
Assembly & Finished Size
- Weave in all yarn ends with your tapestry needle.
- Gently block bag if you want to help it keep its shape.
- Optionally, add a spiral or braided strap (see video for details, or use a pre-made bag strap).
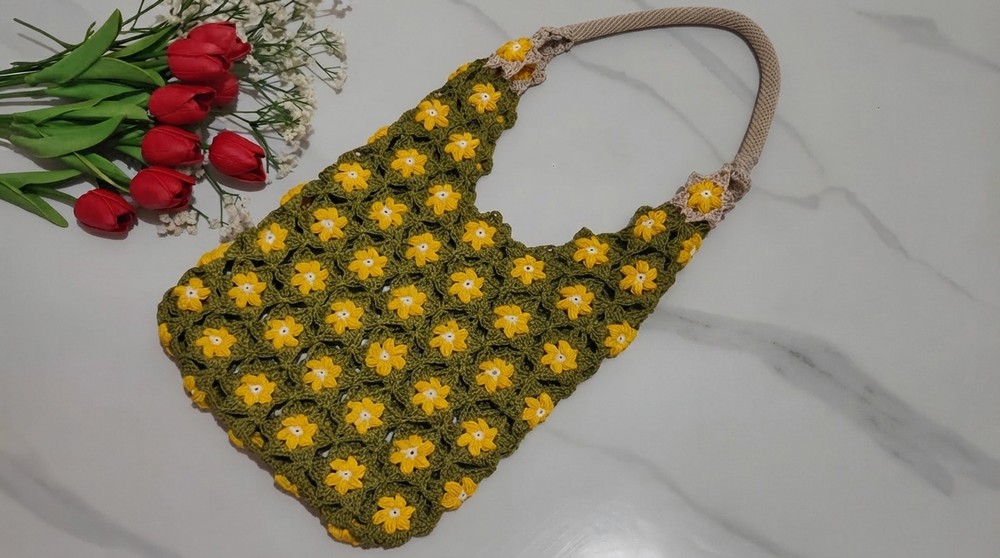
Finished bag size: About 20 x 20 cm (without handles), but adjust by making more or fewer rounds.
Conclusion
Well done! You have crocheted a colorful puff flower bag with sturdy handles and strap openings. Each puff flower is its own little work of art, and together they make a beautiful, useful accessory. Try experimenting with different color combos or flower layouts next time!