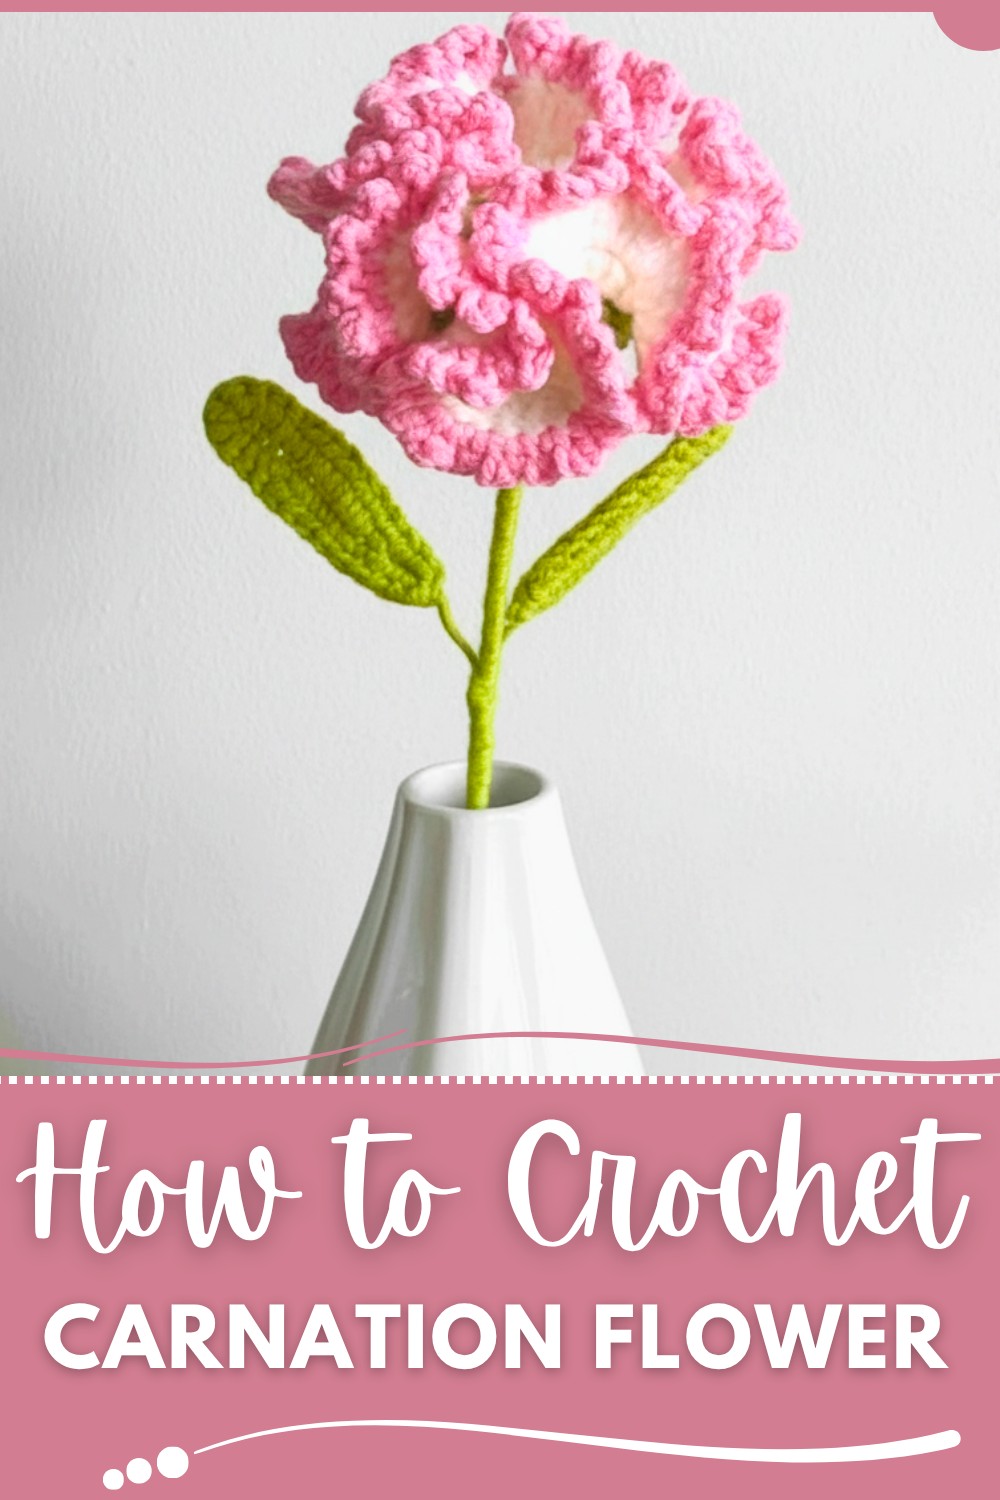
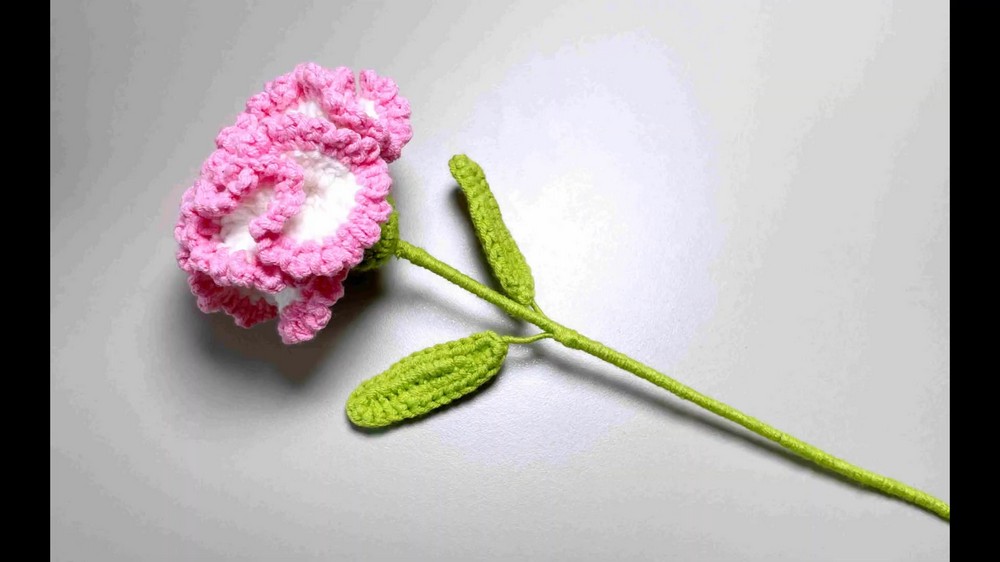
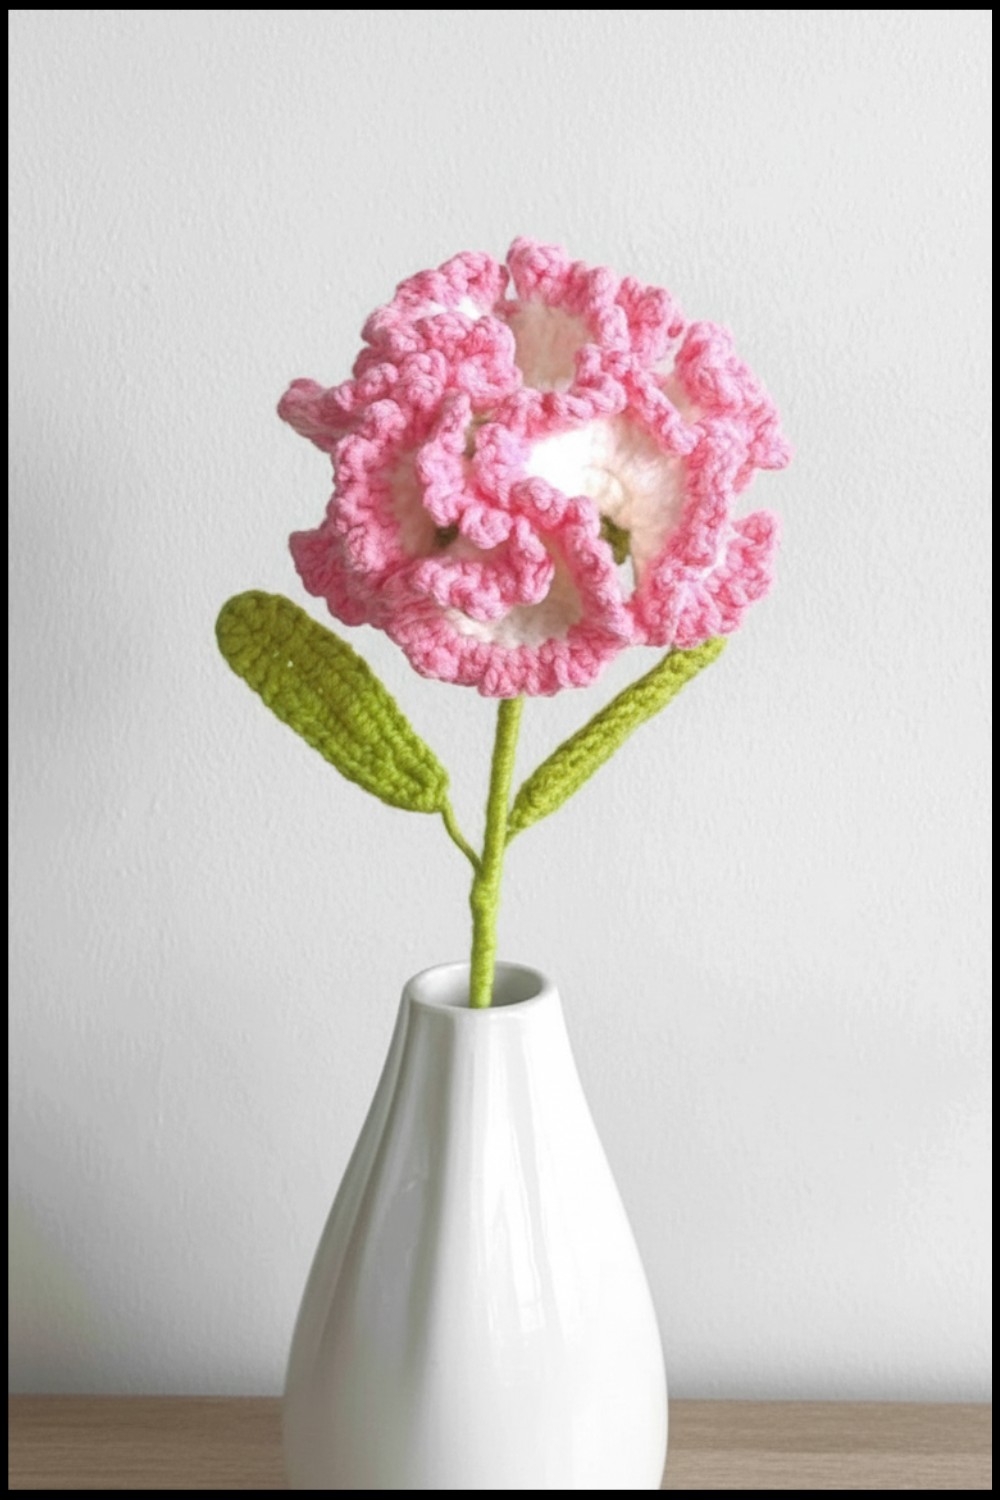
Bring life to your crochet with this charming Carnation Flower Pattern, featuring layered petals, vibrant textures, and endless creative possibilities for décor or gifts.
Add a touch of elegance and charm to your crochet repertoire with the Crochet Carnation Flower Pattern, a fun and versatile project that’s as delightful to make as it is to show off. Carnations symbolize love, admiration, and fascination, making this pattern perfect for heartfelt gifts or stunning decorations. With its layered petals, rich textures, and intricate design, this flower is the epitome of beauty and creativity.
Free Crochet Carnation Flower Pattern – Easy to Use
It’s surprisingly beginner-friendly! Use it to create bouquet arrangements that never wilt, embellish hats, scarves, or bags, or crochet a meaningful keepsake for special occasions like birthdays or Mother’s Day. The combination of soft yarn and vibrant colors lets you mimic nature or go bold with artistic flair.
Carnations were once considered sacred in ancient Greece, earning their name from the word “coronation.” Whether you’re stitching something elegant or adding a playful vibe to your accessories, this project offers endless possibilities to express yourself in a way that blooms forever.
Crochet Carnation Flower Pattern
Materials
- Yarn:
- Main body: 5-ply cotton yarn (white, pink, and green).
- Optional details: Scrap yarn for realistic color gradients.
- Crochet Hook: 3 mm hook.
- Accessories:
- 3 mm thick metal stick (for the stem).
- 0.5 mm metal wire (for the leaves).
- Cotton filling (a small amount).
- Glue (craft glue or hot glue gun).
- Additional Tools:
- Scissors.
- Stitch markers.
- Yarn needle for sewing and weaving in ends.
Skill Level
- Beginner: Basic crochet techniques such as working single crochet (SC), double crochet (DC), front and back loops, magic rings, and decorative stitches like picots are used.
Key Abbreviations
- MR: Magic Ring
- ST: Stitch
- SC: Single Crochet
- HDC: Half Double Crochet
- DC: Double Crochet
- INC: Increase (2 stitches in the same stitch)
- SL ST: Slip Stitch
- CH: Chain
- Picot: Chain 3, SL ST into first chain
Special Techniques
- Magic Ring (MR): Ensures a tight, adjustable center for petals and the main components.
- Working in Front and Back Loops: Adds texture and layers to the flowers.
- Wrapping Wire: Securely wrapping wire around leaves ensures they maintain their shape.
Pattern Instructions
Part 1: Taurus (Base and Structure)
Round 1:
- Start with a Magic Ring (MR).
- Work 5 SC into the magic ring. Pull the tail tightly to close the loop.
- SL ST into the first SC to join the round. (5 ST)
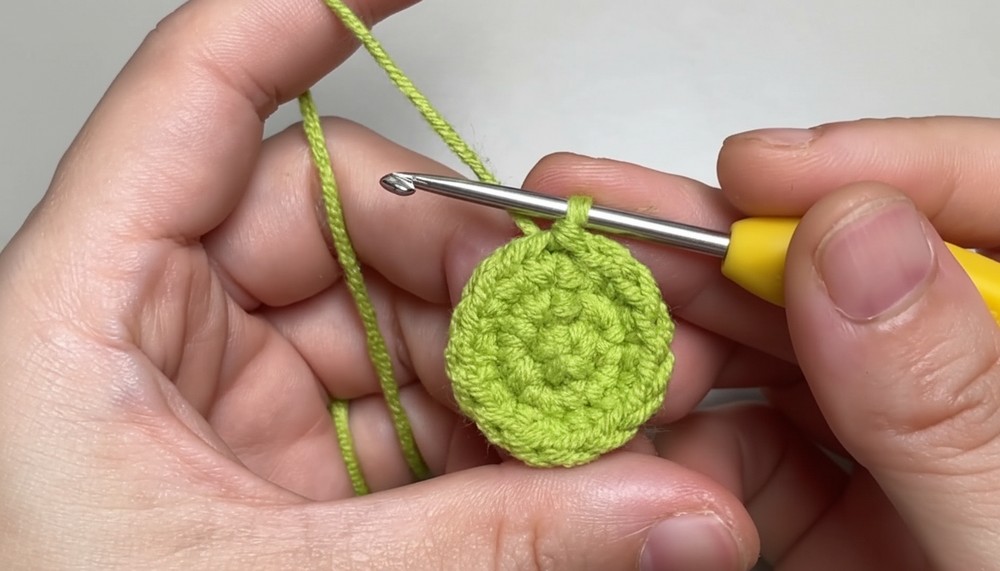
Round 2:
- CH 1.
- Work 2 SC into each stitch around. (10 ST)
- SL ST to the first SC to join.
Round 3:
- CH 1.
- Repeat: 1 SC in the first stitch, 2 SC in the next stitch around. (15 ST)
- SL ST to the first SC to join.
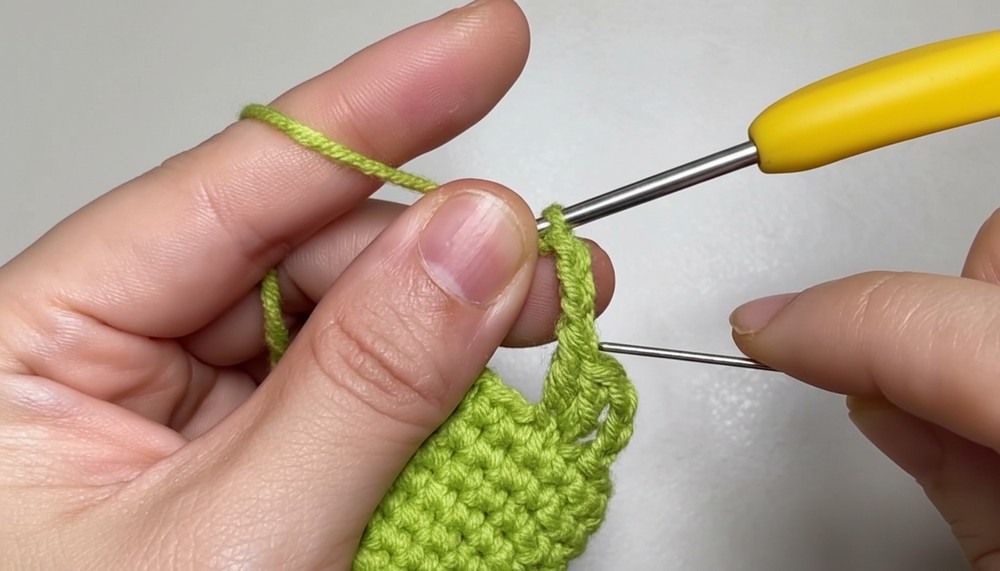
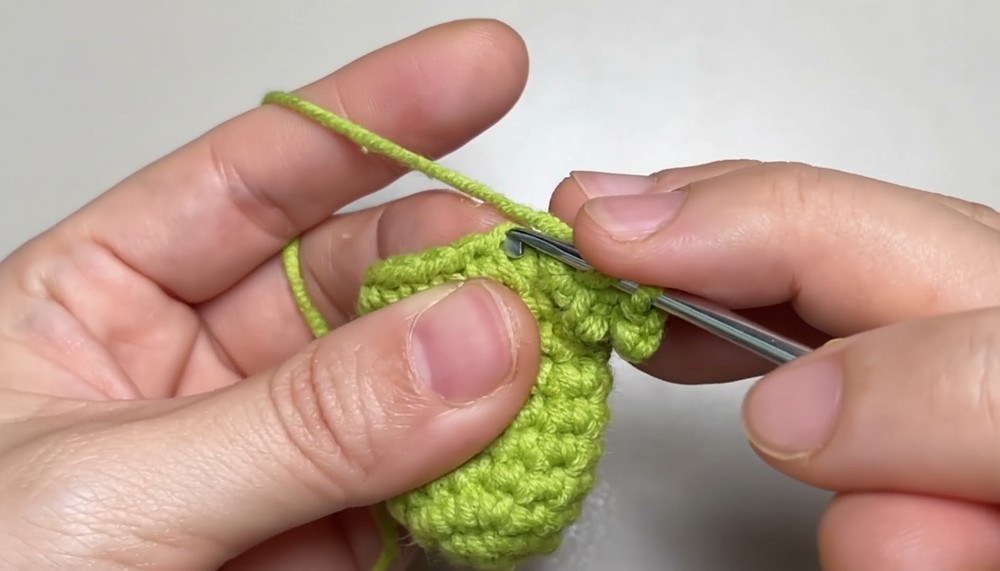
Rounds 4–10: (Maintain the Shape)
- CH 1.
- SC in each stitch around. (15 ST)
- SL ST to the first SC at the end of each round.
Note: The shape will maintain a cylindrical form.
Round 11 (Front Loop Only): (Add Texture)
- CH 3.
- Repeat the following pattern across all front loops:
- Work 2 DC in the next stitch.
- CH 3, create a Picot stitch by SL ST into the first CH.
- Move to the next stitch and repeat 2 DC, CH 3, Picot.
- Continue this full pattern for 5 repeats, covering all the stitches. SL ST to the first DC to finish.
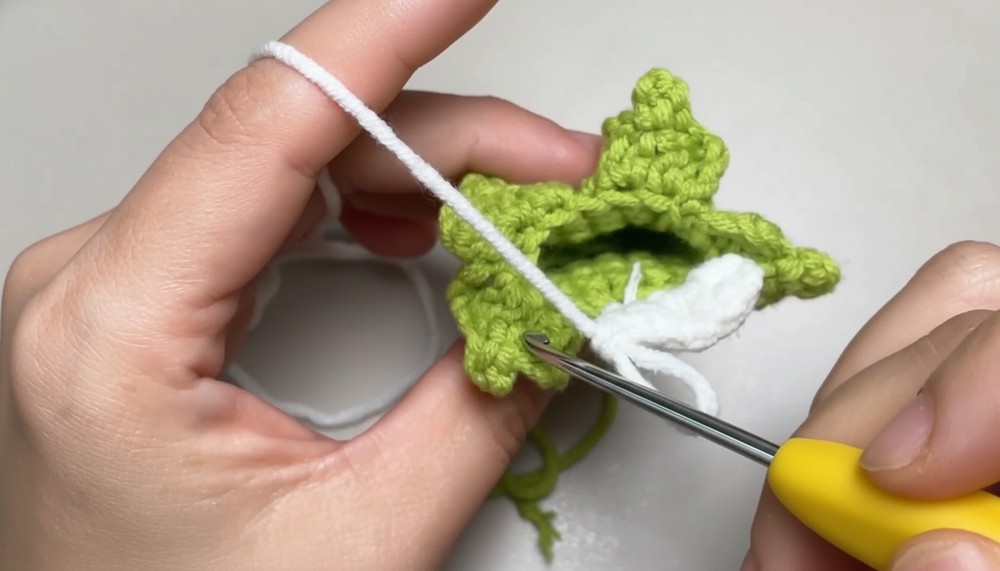
Part 2: Inner Flower Layer
Round 12: (Back Loop Only)
- Switch to white yarn. Attach to any back loop of Round 11.
- CH 3.
- Work 3 DC into each stitch in the round. (45 ST)
- SL ST to the first DC to join the round.
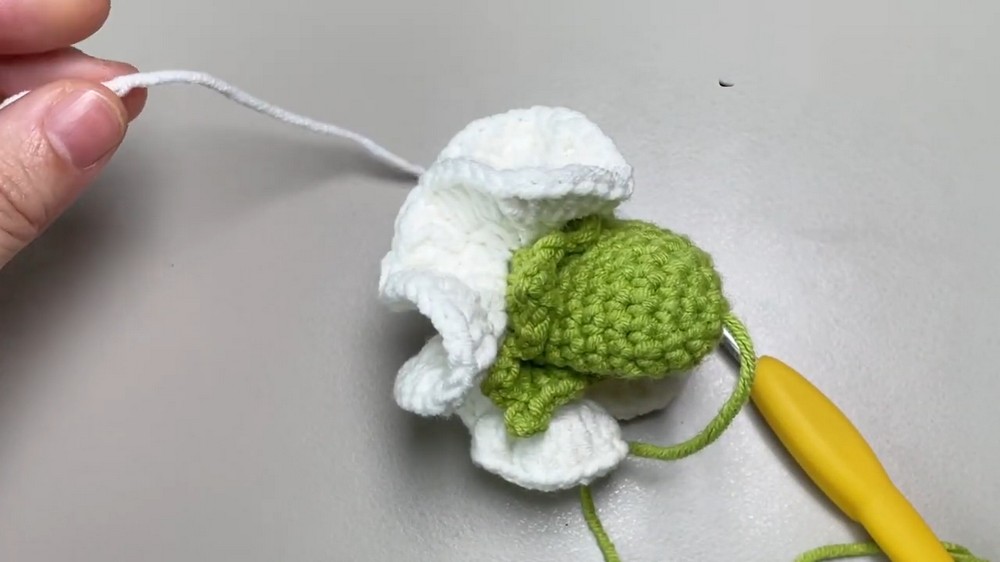
Round 13: (Expand the Flower)
- CH 3.
- Work 3 DC into each stitch in the round. (135 ST)
- SL ST to the first DC to join.
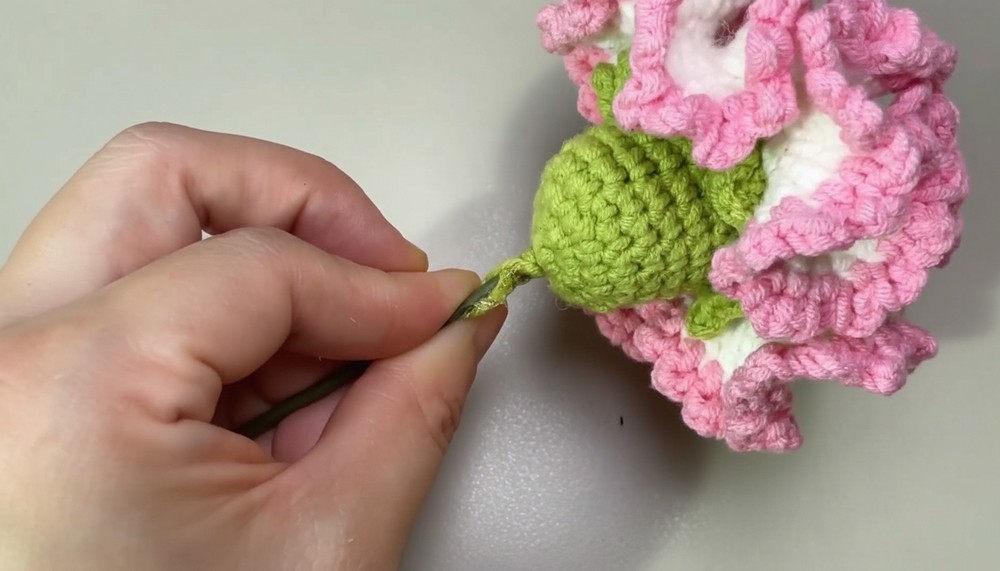
Round 14 (Final Layer): (Add Outer Edge)
- Switch to pink yarn.
- CH 3. Move to the next stitch and create:
- 1 SC in the next stitch.
- CH 3, then move to the next stitch and repeat 1 SC, CH 3.
- Continue this pattern around the entire round, creating small picot-like edges. SL ST to the first SC, fasten off, and weave in ends.
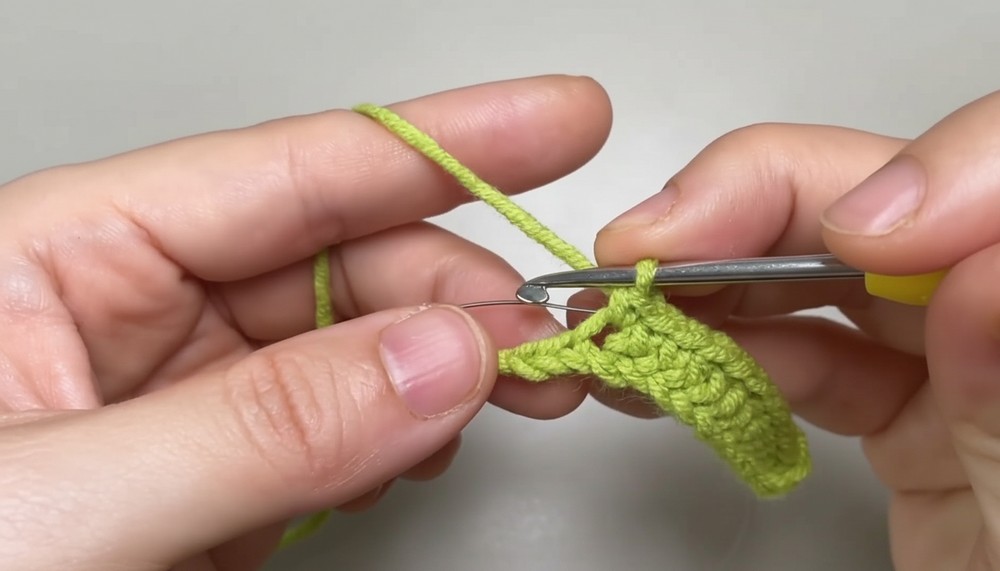
Part 3: Leaves
Leaf Pattern with Wire Support:
- CH 15. Start inserting the wire after the CH foundation is created.
- Starting from the 3rd CH from the hook:
- Work HDC in the first 8 CH (wrapping the wire as you go).
- Work 1 SC in the next 4 CH.
- In the last CH, work 2 SC to create a rounded tip.
- Turn and work back along the opposite side of the foundation chain:
- Work 1 SC in the next 4 ST.
- Work HDC in the next 8 ST, wrapping the remaining wire securely.
- Pull yarn to form a large loop, insert the wire through, and pull tight to secure it completely. SL ST to the first stitch, fasten off, and trim any excess wire.
- Make 2 leaves following this pattern.
Part 4: Assembly
- Prepare the Taurus: Insert the metal stick into the finished Taurus. Bend one end of the stick slightly to ensure it doesn't slip out.
- Add Cotton Filling: Stuff the Taurus lightly with cotton filling to create a structured base for the flower.
- Wrap Yarn: Using the white yarn, cover the cotton within the Taurus neatly, then glue it in place for added security.
- Attach Flower: Position the completed carnation onto the Taurus structure. Apply glue as needed to secure it.
- Wrap the Stem: Take green yarn and wrap it tightly along the metal stick to form the stem. Use glue at the beginning and end to ensure it’s fully wrapped and secure.
- Add Leaves: Attach the crocheted leaves near the base of the flower using glue or sewing techniques.

Finishing the Pattern
- Secure Loose Ends: Weave in all remaining yarn tails neatly using a yarn needle.
- Shaping: Adjust the petals and leaves as needed for a clean, professional look. Light steaming or gentle blocking can be used to shape the flower.
Final Words
Your crochet carnation flower is now complete! This beautiful handmade creation is perfect as a gift or decorative piece. The use of layered petals adds depth and realism, while the wired leaves provide elegance and versatility.
Tips for Maintaining the Pattern
- Wire Wrapping: Ensure the wire is securely wrapped within the stitches to prevent sharp edges or movement during use.
- Glue Application: Use minimal glue, applying only at connection points to avoid a messy finish.
- Customization: Experiment with petal colors (e.g., ombre gradients or stripes) for personalized flowers.
- Gentle Care: Handwash or dust flower creations carefully to maintain their structure over time.