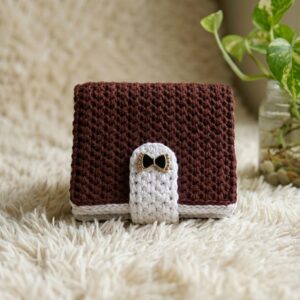
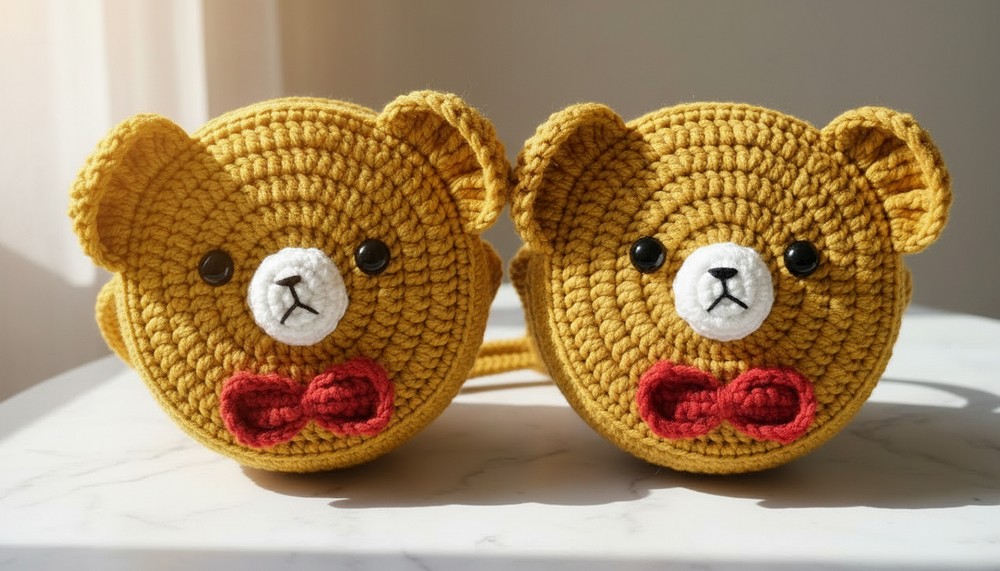
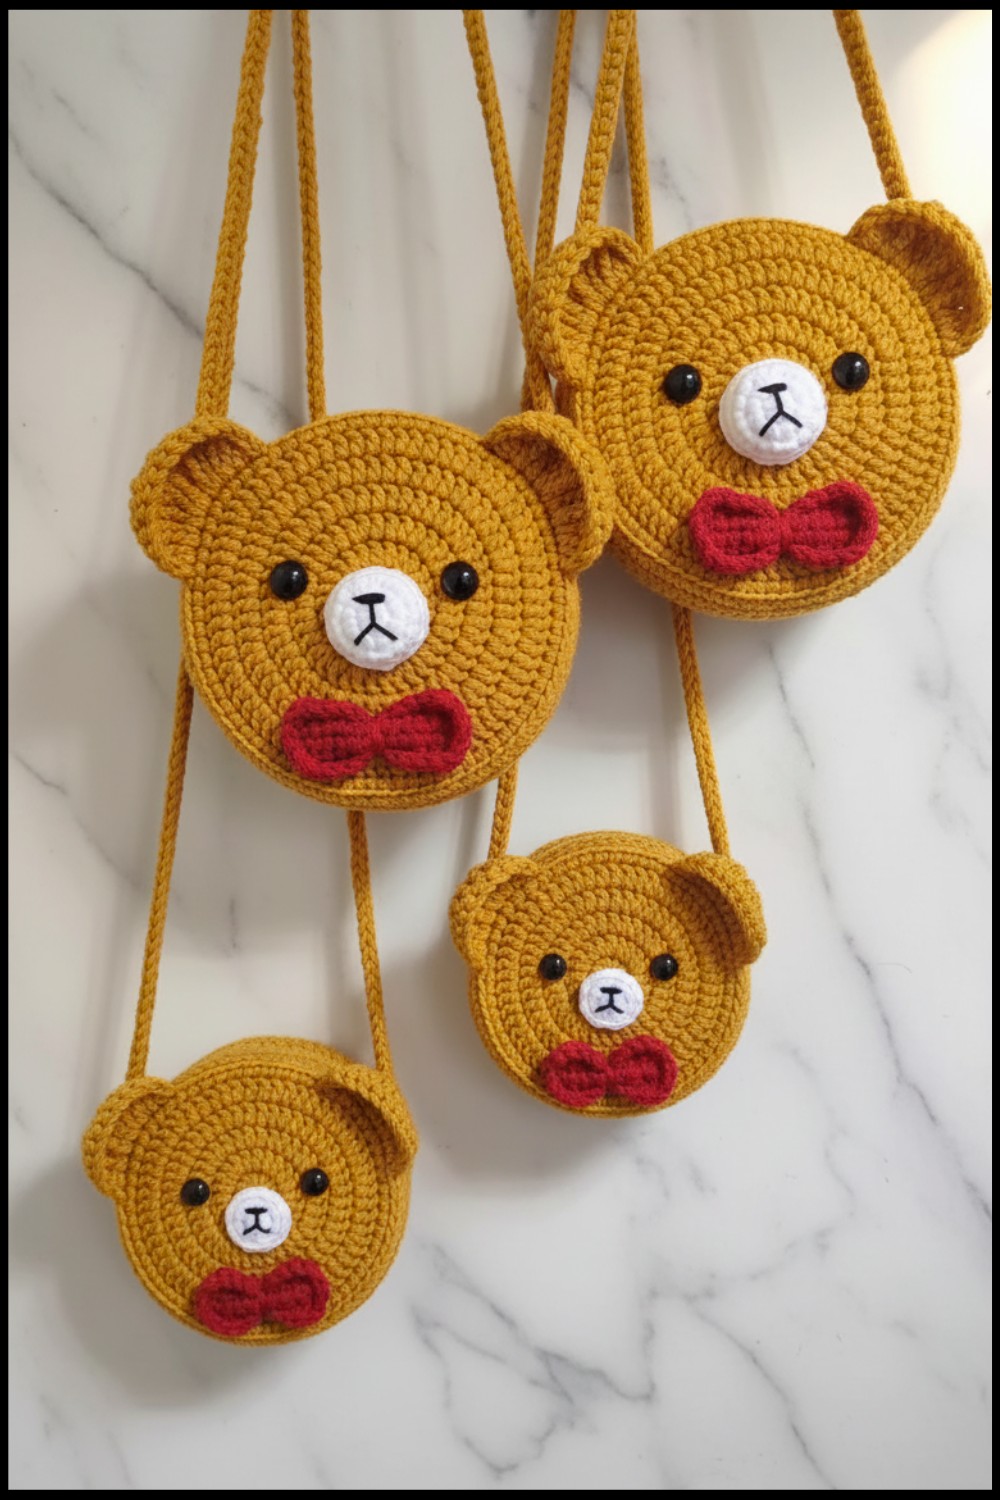
Learn to crochet a playful bear crossbody bag that’s lightweight and beginner-friendly with the cutest way to carry life’s little essentials.
This adorable and handy crochet project brings both charm and utility to your everyday life. Featuring a cute bear design, the Free Crochet Bear Crossbody Bag pattern offers a creative way to crochet an accessory that's not just functional but also makes a statement. Perfect as a gift for kids or bear-loving adults, this bag combines practicality with a fun, playful appearance. Its crossbody style ensures hands-free convenience, making it ideal for carrying small items like keys, wallets, or phones while you're on the go.
Free Crochet Bear Crossbody Bag Pattern – Easy Tutorial
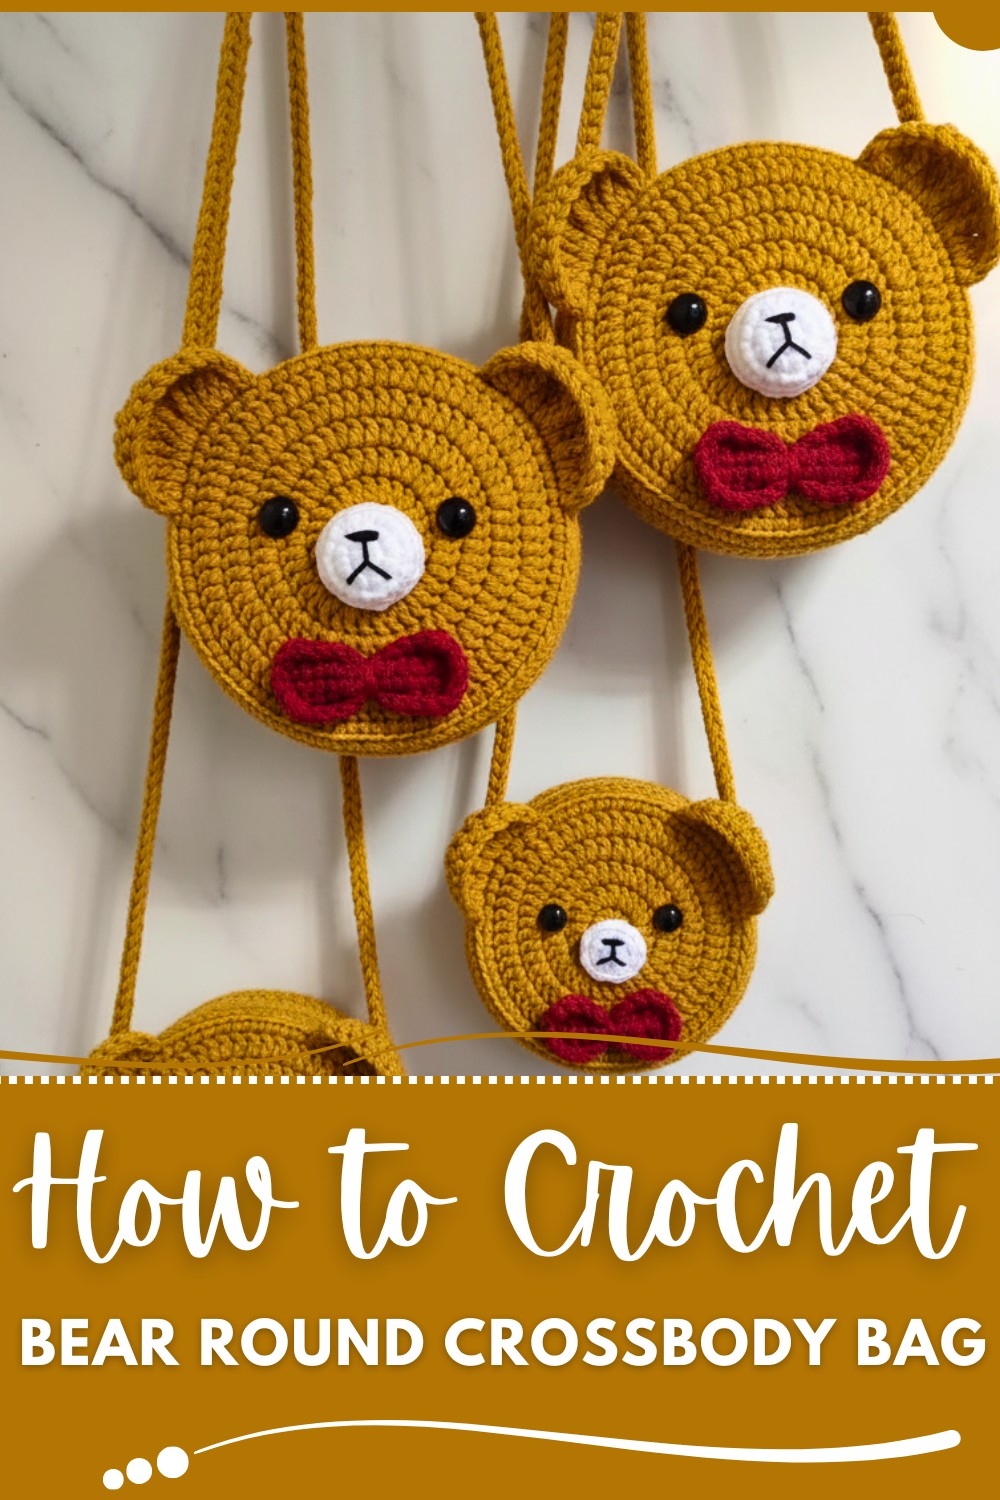
Crafted with soft yarn and a beginner-friendly approach, even new crocheters can enjoy creating this bag with ease. The bear's face adds a touch of personality and warmth, making it a standout piece among everyday accessories. Whether you're heading out for errands, a casual walk, or a picnic, the bag’s lightweight design and secure flap closure make it a reliable companion. With simple steps and creative features, this crochet pattern transforms into a delightful handmade treasure, ready to charm everyone around.
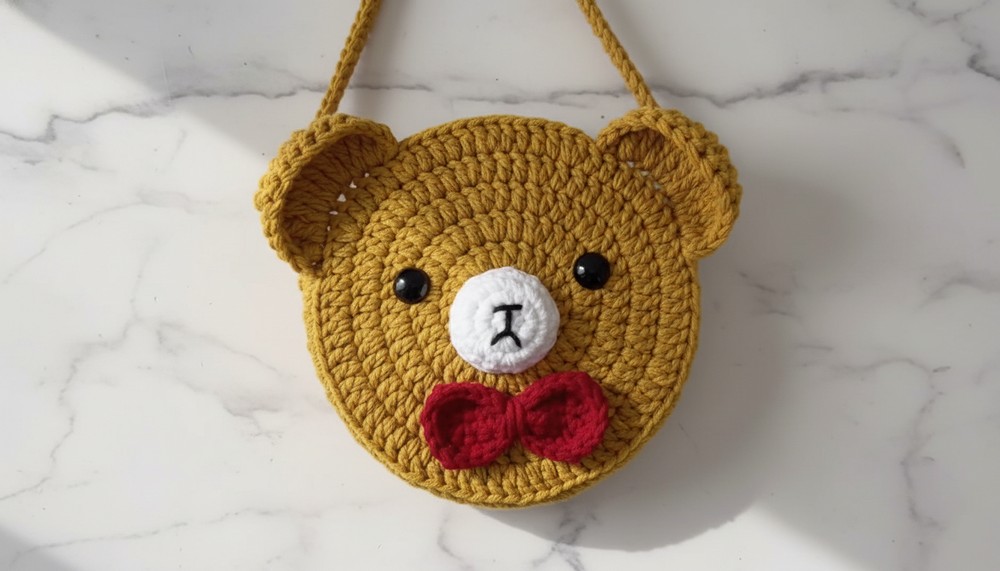
Crochet Little Bear Round Cake Bag Pattern
Finished Size:
Approximately 20 cm (8 inches) in diameter (based on the gauge provided).
Skill Level:
Intermediate.
Materials:
- Yarn:
- Five-strand milk cotton yarn in the following colors:
- Main Body: Mustard Yellow (Bear body).
- Features: Black (Eyes/Nose) and Red (Bow, if desired).
- Five-strand milk cotton yarn in the following colors:
- Hook Size:
- 4.0mm crochet hook.
- Other Supplies:
- Stitch markers, especially for rounds and placement guidance.
- Tapestry needle (to sew ears, bow, and other details).
- Scissors.
- Zipper or button for closure.
- Optional: Fabric mesh or lining for inside structure.
Gauge:
10 double crochets (DC) = ~4 cm (1.6 inches) with a 4.0mm hook and five-strand milk cotton yarn.
Key Abbreviations (US Terminology):
- CH: Chain
- SC: Single Crochet
- DC: Double Crochet
- SS: Slip Stitch
- ST(s): Stitch(es)
- INC: Increase (two stitches in the same space)
- REP: Repeat
Special Techniques:
- Magic Ring: A neat, adjustable starting point for circular patterns.
- Invisible Join: For seamless row transitions.
- Round Increases: Expanding rounds with precise patterns to maintain a flat base.
Step-by-Step Instructions
Part 1: Main Round Base
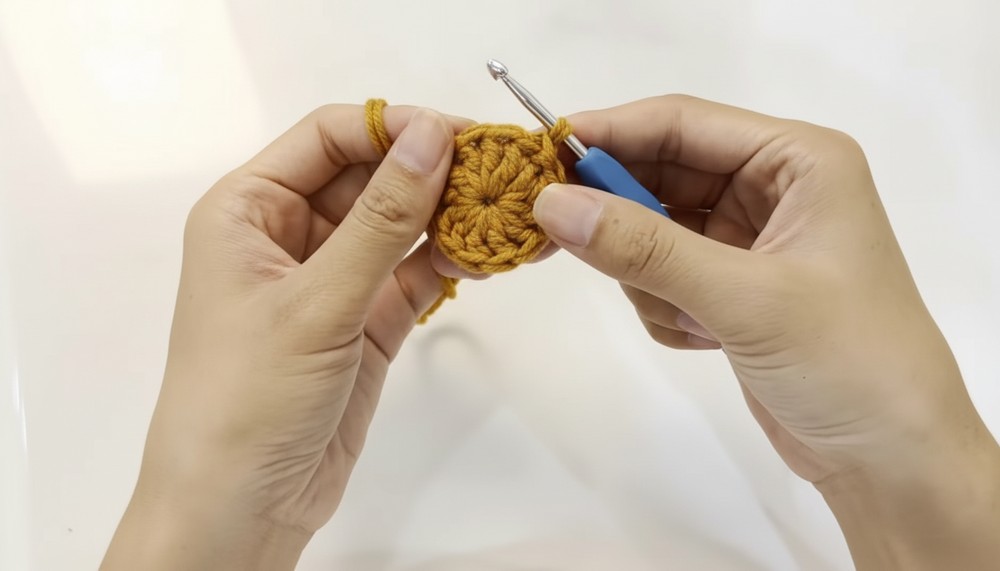
Foundation (Magic Ring):
- Create a Magic Ring, wrapping the yarn around your fingers to form a circle.
- Pull up a loop through the ring, then CH 2 (does not count as the first DC).
Round 1:
- Crochet 12 DC into the Magic Ring.
- Tighten the ring by pulling the yarn tail.
- Join with a SS into the first DC to close the round.
- Place a stitch marker into the first DC of the round (optional).
Round 2:
- CH 2 (does not count as a stitch).
- Crochet 2 DC into each ST around (i.e., 1 INC per stitch).
- Total ST = 24 DC.
- Join with an SS to the first DC of the round.
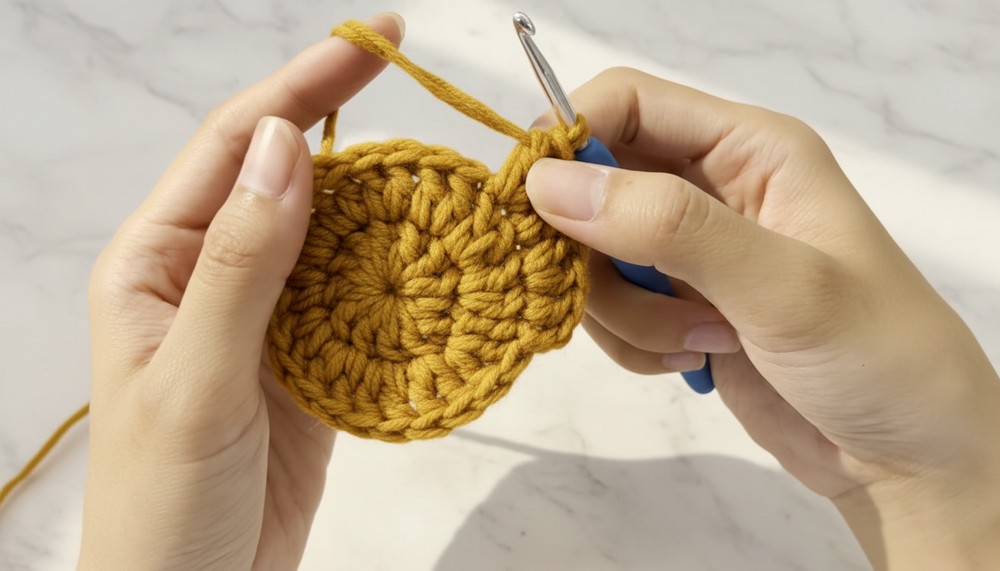
Round 3:
- CH 2 (does not count as a stitch).
- [1 DC in the first ST, INC (2 DC in the next ST)] – REP around.
- Total ST = 36 DC.
- Join with an SS to the first DC.
Round 4:
- CH 2 (does not count as a stitch).
- [1 DC in each of the first 2 STs, INC] – REP around.
- Total ST = 48 DC.
- Join with an SS to the first DC.
Round 5 and Beyond (Optional):
- Continue the same increase logic, adding one more non-increase DC after each round's increments:
- Round 5: 1 DC in each of the first 3 STs, INC (60 DC).
- Round 6: 1 DC in each of the first 4 STs, INC (72 DC).
- Stop once you achieve the desired diameter (20 cm or 8 inches).
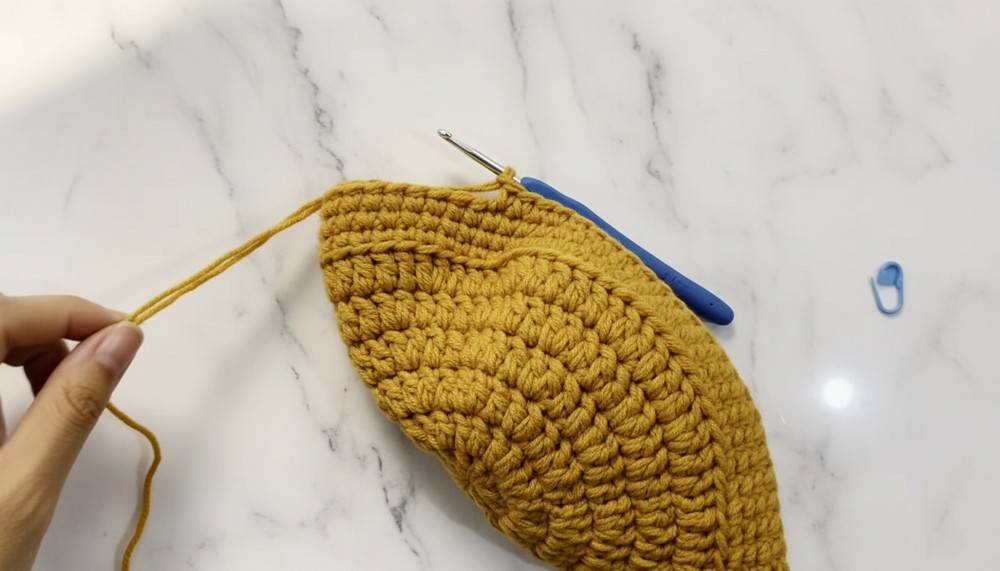
Part 2: Bag Body
Once the flat base is complete:
Round 1 (Bag Body Transition):
- Join yarn to the outer loop of any stitch in the last round.
- Crochet 1 SC in each ST around (no increases or decreases).
- Join with an SS and CH 1.
Rounds 2–3:
- Work 1 SC in each ST around, working through both loops for these two rounds.
- Total = 3 rounds of SC around the body.
- Finish by cutting the yarn and weaving in the ends.
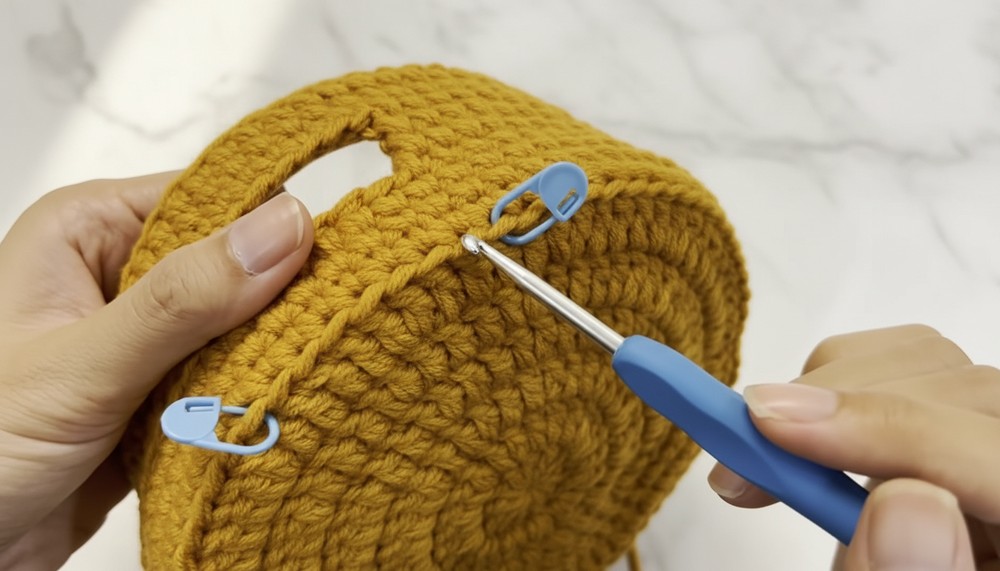
Part 3: Bear Ears
- Determine Ear Placement: Mark two sections evenly spaced from the top of the bag (9 STs per ear, with 13 STs in between).
- First Ear:
- Attach yarn and crochet in row formation:
- Row 1: SC across 9 STs. Turn.
- Row 2: SC DEC at both ends of the row (7 SC remain). Turn.
- Row 3: SC DEC at both ends again (5 SC remain). Turn.
- Row 4: SC across all 5 STs. Tie off yarn and weave in ends.
- Attach yarn and crochet in row formation:
- Second Ear: Repeat steps for the second ear in the marked section.
Part 4: Bear Nose
- Magic Ring:
- Work 6 SC into the Magic Ring.
- Join with an SS.
- Round 2:
- Work 2 SC in each ST (12 SC total).
- Round 3:
- [1 SC, INC] – Repeat around (18 SC total).
- Tie off and leave a long tail for attaching.
Part 5: Bow
Foundation Chain:
- CH 10.
- Work SC rows across the chains to form a rectangular base for the bow:
- SC across, chain 1, and turn.
- Repeat for 4 rows.
Shaping the Bow:
- Cinch the rectangle in the middle with yarn to form a bow.
- Attach the bow to the top of the bag (optional).
Part 6: Strap
Foundation (Length Adjustable):
- CH 150.
- Work SC across the chain to reinforce the strap.
- Attach the strap ends symmetrically to both sides of the bag.
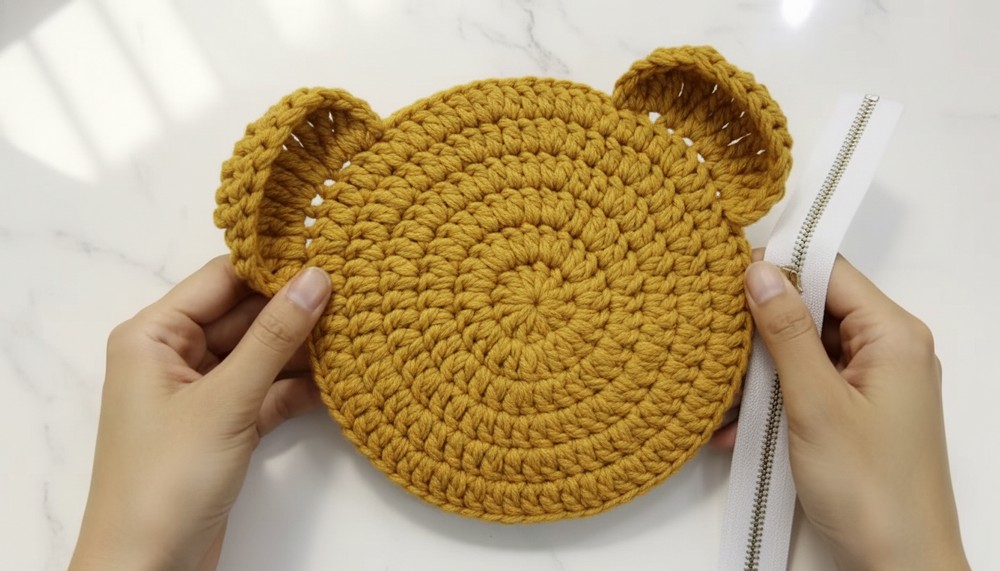
Part 7: Finishing Touches
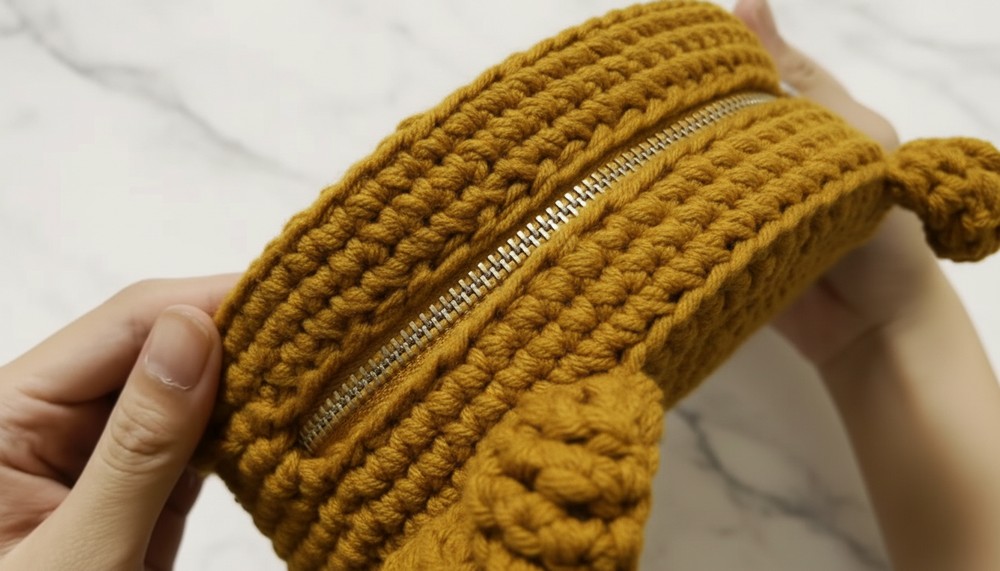
- Zipper: Attach the zipper neatly across the bag opening.
- Facial Features: Sew the bear nose and eyes onto the front. Use embroidery or sew small black buttons for eyes.
- Shape the Ears and Bow: Mold the pieces by hand for a clean and puffy look.
- Inside Lining: Optionally attach fabric or mesh for added durability and structure.
Tips for Customization:
- Change Size: Increase or decrease the base diameter (by halting or adding increase rounds).
- Add Colors: Use multiple colors for a striped or spotted bag design.
- Facial Expression: Use different shapes for eyes and nose, or try adding embroidered smiles for expression.
- Strap Style: Replace the crochet strap with leather or chain straps for variety.
Conclusion:
By combining practical functionality with an adorable design, this Little Bear Round Cake Bag brings joy and creativity to everyday life. With its large capacity and detailed features, this project is a perfect personalized accessory or gift.