Snow Country Super Scarf Pattern Free
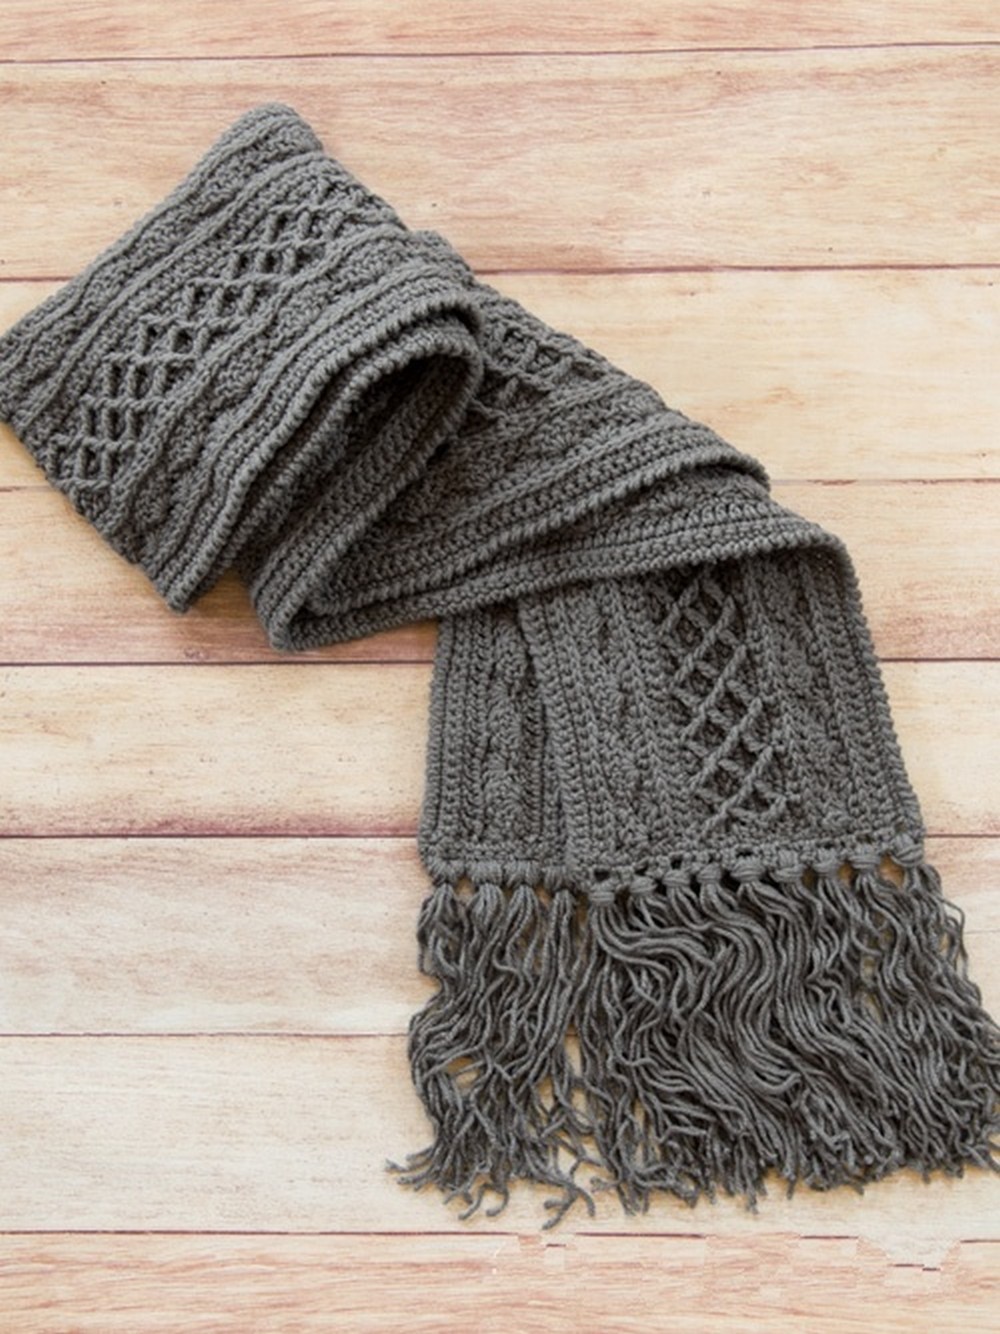
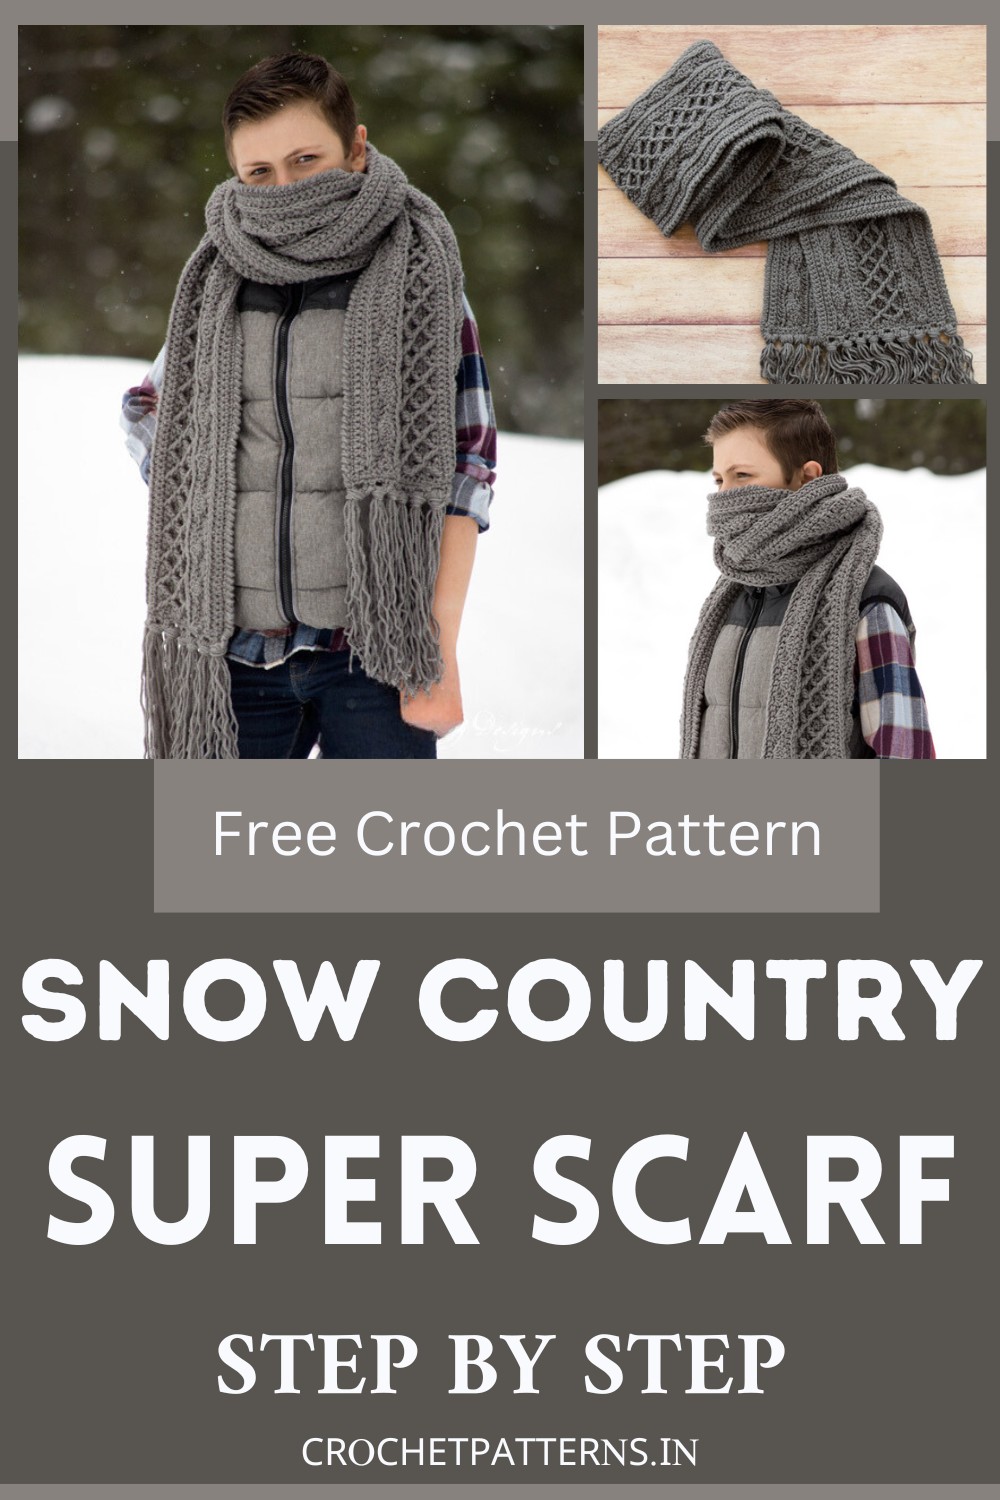
The Snow Country Super Scarf is a crochet scarf designed for extreme warmth and versatile fashion. This crochet pattern is for free and creates a super scarf that is over 9 feet long, allowing wearers to wrap it multiple times for additional warmth, or even modify it into a hooded scarf. Made using soft and warm yarn, the scarf incorporates beautifully criss-crossed diamond stitches for added thickness. Those looking to level up their crochet skills may find the diamond stitch technique, which is cleverly worked in two parts, quite interesting. Whether you’re up north braving the cold months, or simply in need of a stylishly cozy accessory, the Snow Country Super Scarf is a fantastic project to consider.
Snow Country Super Scarf

Making Your Snow Country Super Scarf
Difficulty:
- Intermediate
Materials Needed:
- 5.5mm (I) hook, or hook needed to obtain gauge
- 775-800 yards of #4 worsted weight Red Heart With Love in “Pewter”
- scissors
- yarn needle
- measuring tape
Stitches Used:
- sl st = slip stitch
- ch= chain
- sc = single crochet
- hdc = half double crochet
- dc = double crochet
- FPtr = front post treble crochet
- FPtr2tog = front post treble crochet 2 together
- st/sts = stitch/stitches
Step by step Pattern
Foundation Chain:
- Chain 254
Starting Rows:
- Row 1 (RS): SC in second ch from hook, SC in each st across, ch 1, turn. (253)
- Row 2 (WS): SC in each st across, ch 2 (counts as first hdc of next row), turn. (253)
- Row 3 (RS): HDC in each st across, ch 1, turn. (253)
Creating the Ridge Texture:
- Row 4 (WS): Working in the 3rd loop of hdc, SC in each st across, place final SC of the row in the top of the ch-2 from the prev row, ch 1, turn. (253)
Shell Stitch Section:
- Row 5 (RS): SC in first st, *sk 2 sts, 5 DC in next st, sk 2 sts, SL ST in next st; repeat from * across, on final repeat omit SL ST and SC instead, ch 1, turn. (42 shells, 2 SC)
- Row 6 (WS): 3 DC in first SC, sk 2 sts, SL ST in next st, *sk 2 sts, 5 DC in next st (this will be the SL ST between the shells), sk 2 sts, SL ST in next st; repeat from * across, work 3 DC in final SC, ch 2 (counts as first HDC of next row), turn. (41 shells, 2 half-shells)
Back to HDC Rows:
- Row 7 (RS): HDC in each st across, ch 1, turn. (253)
- Row 8 (WS): Working in the 3rd loop of the HDC from the previous row, SC in each st across, ch 1, turn. (253)
Diamond Stitch Section:
- Row 9 (RS): SC in each st across, ch 1, turn. (253)
- Row 10 (WS): DC in each st across, ch 1, turn. (253)
- Row 11-15: Follow the instructions provided in your pattern to create the diamond stitch details, paying close attention to the FPTr and FPTr2tog stitches that interlock with previous rows.
Transitioning Rows:
- Row 16 (WS): SC in each st across, ch 2 (counts as first HDC st of next row), turn. (253)
- Row 17 (RS): HDC in each st across, ch 1, turn. (253)
- Row 18 (WS): Working in the 3rd loop of HDC, SC in each st across, ch 1, turn. (253)
Second Shell Stitch Section:
- Row 19-20: Repeat the shell stitch pattern as previously described for these rows.
Final HDC and SC Rows:
- Row 21-22: Repeat the HDC and SC rows, continuing the textural pattern.
- Rows 23-24 (RS, WS): SC in each st across, ch 1, turn. (253)
- Fasten off, and weave in ends.
Working the Scarf Ends:
- Note: If omitting fringe, simply do 2 or 3 rows of SC at each end.
- Attach yarn to one end with RS facing, and work the end rows as described. Repeat for the other end.
Attaching the Fringe:
- Loop 6 24” pieces of fringe through each hole on the ends. Adjust the length as preferred.
Crochet Crab Stitch Edging (Optional):
- Follow the instructions to add a crab stitch edging along the long edges of the scarf for a finished look.
Final Note:
- Ensure all ends are securely woven in and trimmed as necessary.
By following these structured instructions, you’ll create a beautifully textured scarf with intricate details. Enjoy your crafting!
