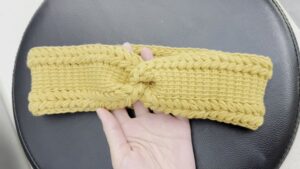
Absolutely Adorable! Follow this Free Crochet Baby Puff Stitch Headband Pattern for cozy, stylish accessories for your precious little one.
This pattern stands out due to its intricate yet simple puff stitch, resulting in a soft, textured finish that is gentle on a baby's delicate skin. Perfect for everyday wear or special occasions, these headbands not only add a touch of handmade charm but also keep baby’s hair neatly in place. The pattern is versatile, allowing for customization in color and size, making it a wonderful gift option that can be personalized to suit individual tastes.
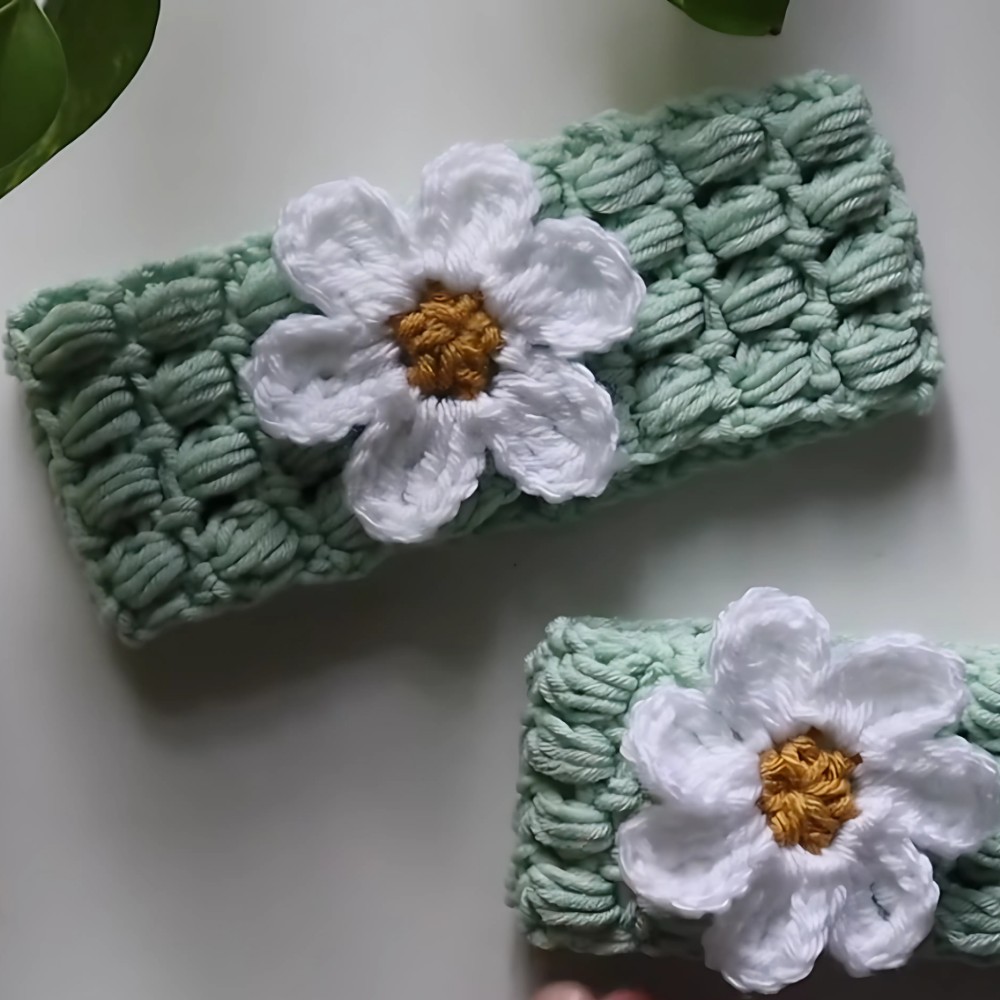
One Hour Crochet Baby Puff Stitch Headband Tutorial

Additionally, crocheting these headbands can be a calming and rewarding hobby, offering a sense of accomplishment.
Tip:
When selecting yarn, opt for soft, hypoallergenic fibers to ensure maximum comfort for your little one. This ensures the headband feels as good as it looks, providing both style and practicality. Happy crocheting!
Introduction
Welcome to Crochet Baby Puff Stitch Headband! This project is perfect for beginners, working up quickly and featuring a charming puff stitch flower. It's an ideal gift item and customization option for various ages.
Materials Needed
- Yarn: Stork Struck Mint Charm by Baby B (or any soft, hypoallergenic yarn)
- Crochet Hook: 5 mm (H) hook
- Scrap Yarn: Yellow and white for flower detail
- Scissors
- Tapestry Needle


Step-by-Step Instructions
1. Creating the Headband Base
- Slip Knot and Foundation Chain:
- Make a slip knot and chain a multiple of two plus one, plus one more for the turning chain. (Example: Chain 10 for a baby-sized headband).
- Single Crochet Row:
- Single crochet in the second chain from the hook and chain one.
- Skip the next chain and single crochet in the following chain. Repeat this pattern across the row.
- First Puff Stitch Row (Row 2):
- Chain two and turn.
- Work a half double crochet cluster in each chain one space from the previous row. Each cluster = 4 half double crochets in the same space.
- After completing each cluster, chain one.
- At the end of the row, half double crochet into the last stitch.
- Single Crochet Row (Row 3):
- Chain one and turn.
- Single crochet in the first stitch, chain one.
- Single crochet in each chain one space across the row, chaining one after each single crochet.
- Repeat Pattern:
- For even-numbered rows, follow the puff stitch pattern (chain 2 at the start).
- For odd-numbered rows, follow the single crochet pattern (chain 1 at the start).
- Continue until the headband reaches the desired length. For baby size, around 12 inches, or customize as needed.
2. Closing the Headband Loop
- Cut the yarn, leaving a 12-15 inch tail.
- Using a tapestry needle, whip stitch the ends together and weave in the ends securely.
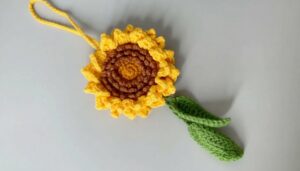
3. Creating the Flower
- Creating the Flower Center:
- Use a magic ring.
- Chain one, then work five half double crochets into the ring.
- Tighten the ring and slip stitch into the first stitch to close the round. Leave a tail to sew the flower to the headband.
- Petals:
- Using white yarn, create the petals.
- Attach the white yarn through a space beside the knot.
- Chain four, then work two triple crochets in the same space.
- Chain four again and slip stitch back into the same space.
- Move to the next space and repeat until you have six petals (or desired number).
4. Attaching the Flower
- Use the tails from the flower center to fix the flower to the headband, covering the seam.
- Tighten and secure the flower by knotting the tails through the backside of the headband.
- Weave in all loose ends.
Conclusion
Congratulations, you’ve created a beautiful puff stitch headband with a charming flower detail! This handmade accessory is perfect for a baby gift, and you can customize it to fit any size or color preference. Enjoy your crocheting journey and continue to explore new patterns and techniques.