
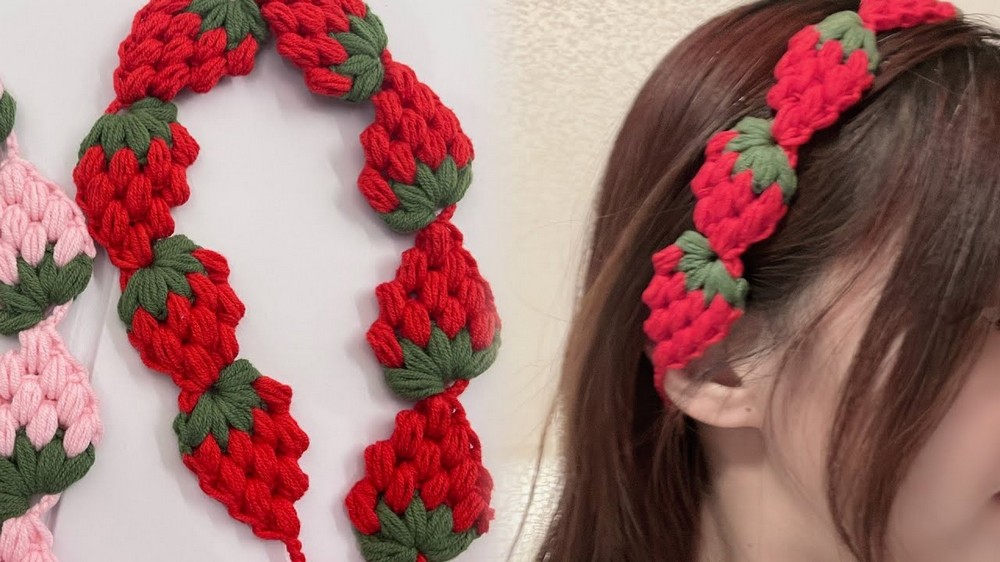
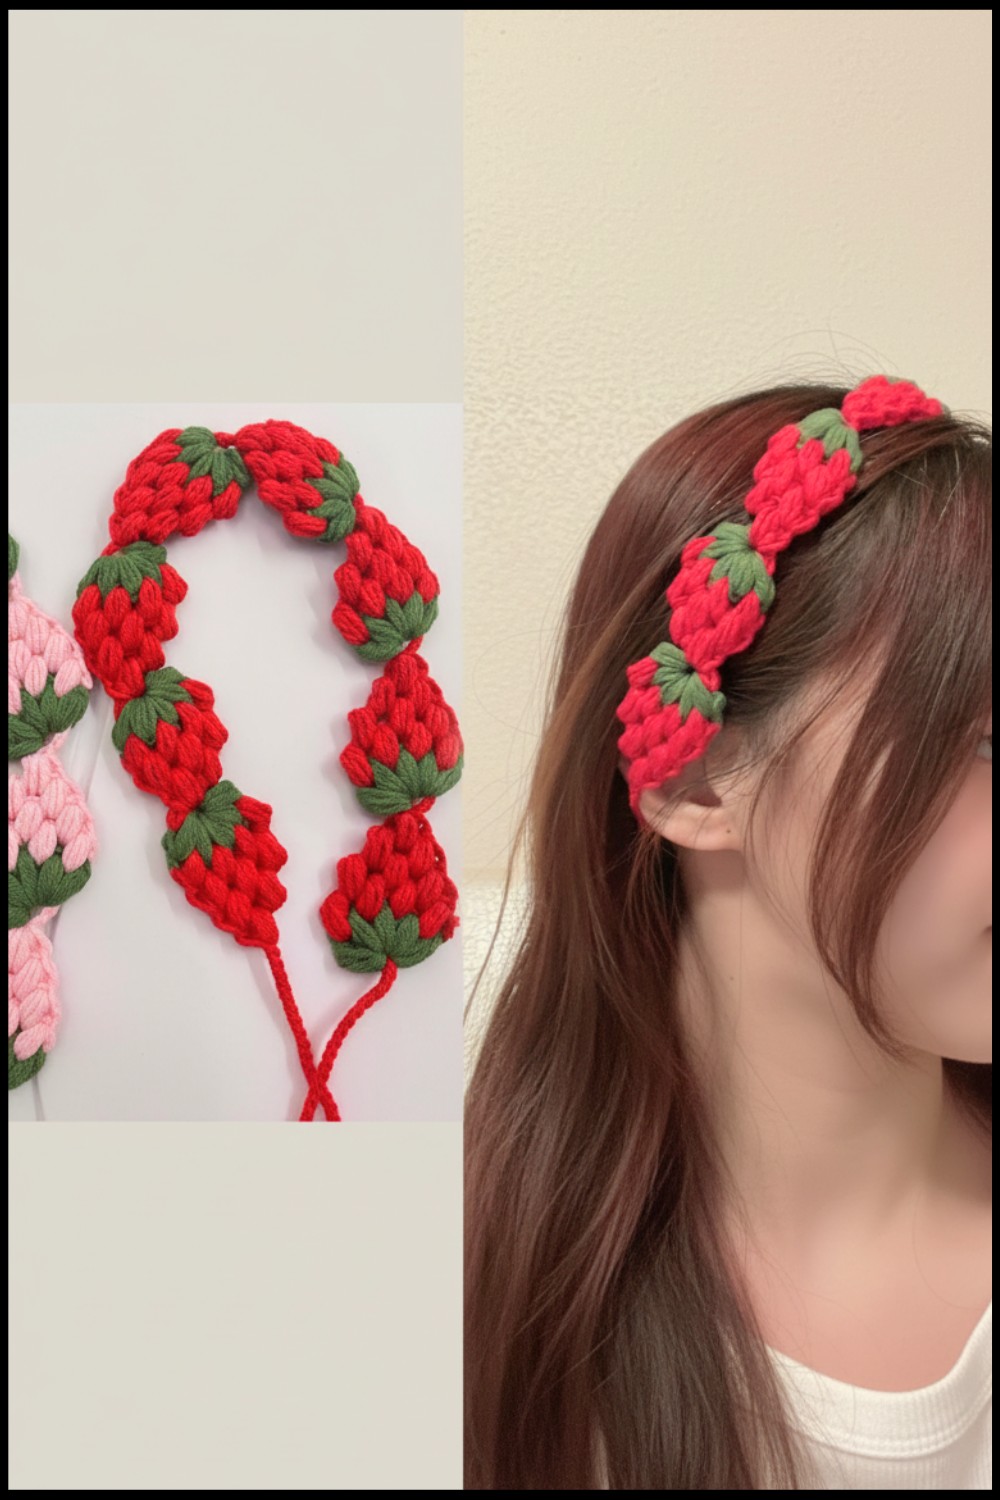
Decorate your wardrobe with the Free Crochet Strawberry Headband Pattern, combining soft milk cotton yarn and cheerful strawberry details for all sizes.
This beautiful crochet project brings a sweet and playful touch to your everyday accessories. The Free Crochet Strawberry Headband Pattern uses soft milk cotton yarn and the bobble stitch to bring adorable strawberries to life, making the headband both fun and stylish. The vibrant pink and green combination of the strawberries adds a cheerful pop of color, perfect for brightening up your outfits in spring and summer. Lightweight and comfortable to wear, it is suitable for both kids and adults, adding charm to any look.
Unique Free Crochet Strawberry Headband Pattern

The pattern showcases simple and clear steps, making it an easy choice for both beginners and those with experience. The headband can be customized for different head sizes by adjusting the number of stitches, allowing for flexibility and a perfect fit. The strawberry details stand out with their textured and bubbly design, turning your work into a delightful accessory that’s hard to miss.
This crochet piece is not just useful for holding hair but also makes for a thoughtful handmade gift for loved ones. Whether for practical use or as a cheerful addition to wardrobe collections, this strawberry-themed headband promises both utility and charm in every stitch.
Free Strawberry Bobble Stitch Headband Crochet Pattern
Materials List
- Yarn: 5-strand milk cotton (Green for the top/calyx, Pink or Red for the strawberry, White or Yellow for “flower” details if desired)
- Hook: 3.0 mm crochet hook
- Notions: Yarn needle for weaving in ends, scissors, measuring tape, and (optional) elastic band or ribbon for extra stretch/closure
Key Abbreviations (US Terms)
| Abbreviation | Meaning |
|---|---|
| ch | chain |
| st(s) | stitch(es) |
| sl st | slip stitch |
| sc | single crochet |
| hdc | half double crochet |
| dc | double crochet |
| yo | yarn over |
| bobble | bobble stitch (see Special Stitches) |
Special Notes
- Size: The number of strawberries/bobbles can be adjusted for different head circumferences; simply crochet more or fewer motifs.
- Customization: The strawberry motif may be converted into flower motifs by changing color/yarn placement.
- Stitch Counts: When splitting loops on the hook during the bobble/calyx portion, strive to keep divisions even for a neat crown.
Special Stitches
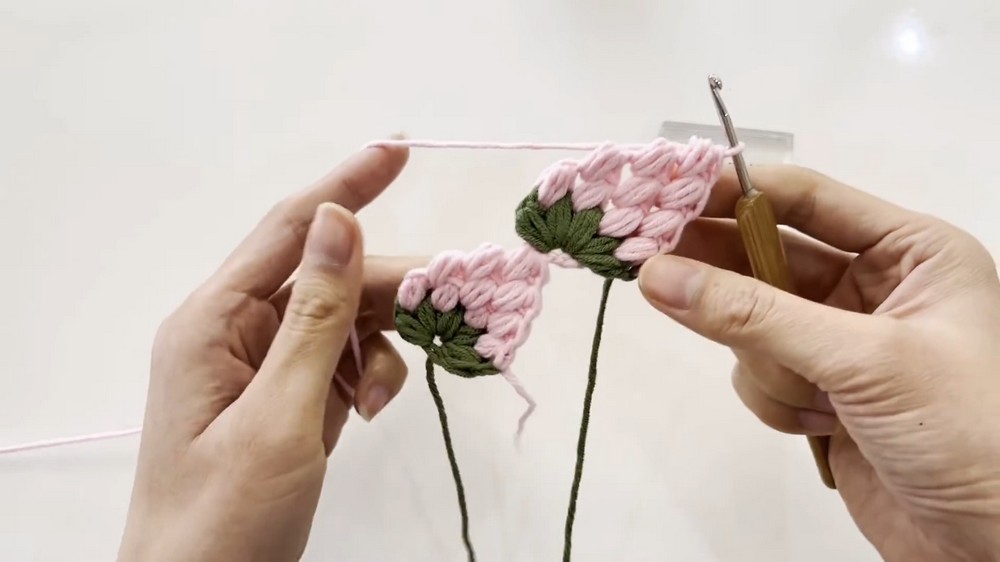
Bobble Stitch (Used for Strawberry Body):
YO, insert hook in designated st, YO, pull up a loop (3 loops on hook), YO, pull through 2 loops. Repeat in same st until required number of incomplete hdc complete (do not finish last YO, keep all loops on hook), then YO and pull through all loops.
Pattern
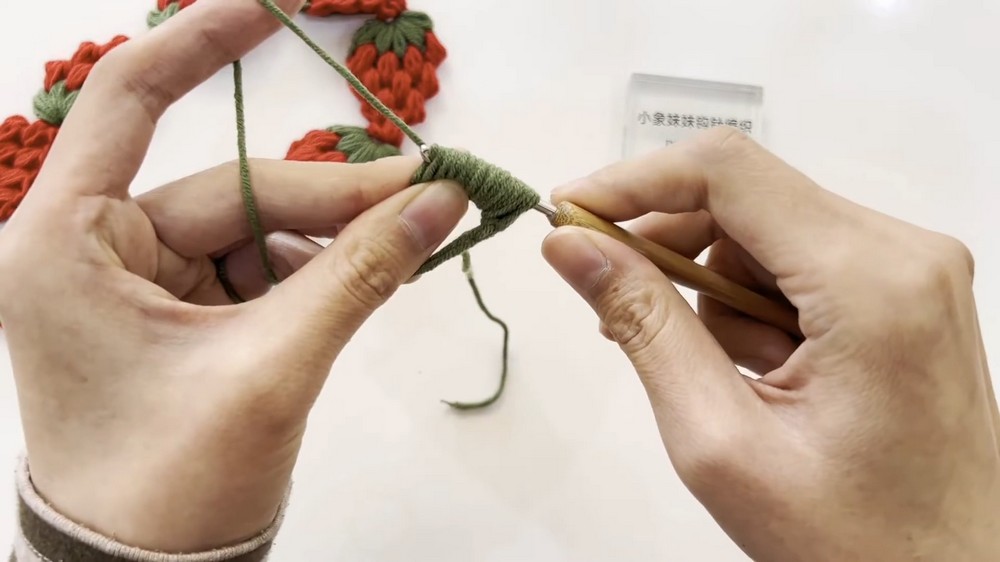
1. Starting the Strawberry Calyx (Green Top)
- Make a Magic Ring: Wind two loops of green yarn around finger to form a ring.
- Insert hook into ring, pull up a loop, and secure with a sl st.
- Ch 1 (as needed for height).
- Work 13 unfinished hdc into the ring:
- YO, insert into ring, YO, pull up a loop, YO, pull through 2 loops (do not finish—keep loops from each hdc on hook).
- Repeat until there are 13 incomplete hdc (each time, leave last loop from each hdc on hook).
- Form Five “Calyx Points”:
- Divide all loops as evenly as possible into five parts (appr. 2-3 loops per part if needed).
- For each group:
- YO, pull through corresponding number of loops and sc to secure.
- Tighten the magic loop to close the center.
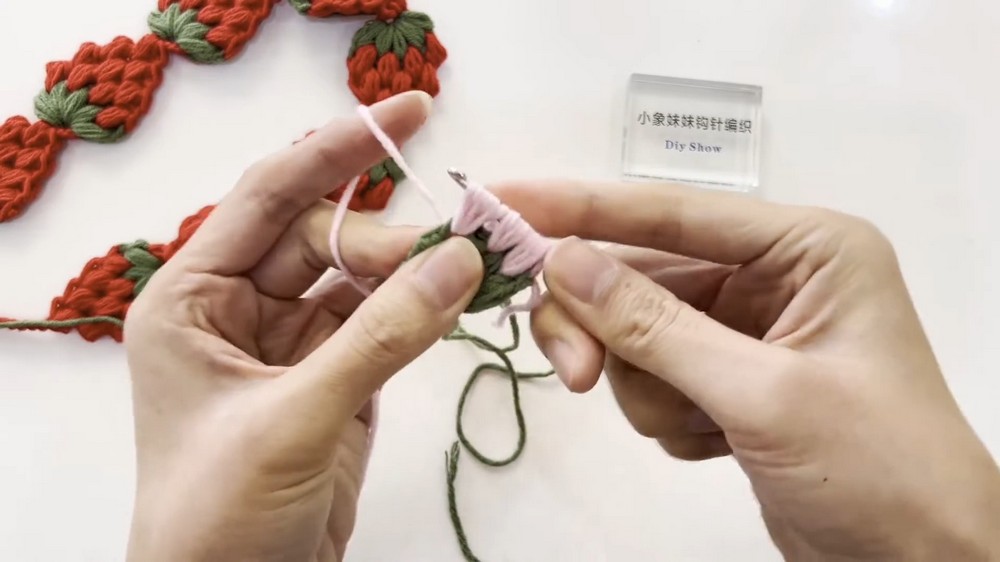
2. Attaching the Strawberry Body (Pink/Red)
- Join Pink/Red Yarn: Tie pink/red and green yarns together. Pull pink/red yarn through to begin.
- In each “space” (between calyx points):
- YO, insert hook, work 3 incomplete hdc in first space, keeping loops from each on hook.
- Repeat in each space around (total five bobble groups, one per space).
- At each "bobble" group:
- YO, pull through all loops on hook at once to complete the bobble cluster.
- Ch 1 after each completed group to secure.
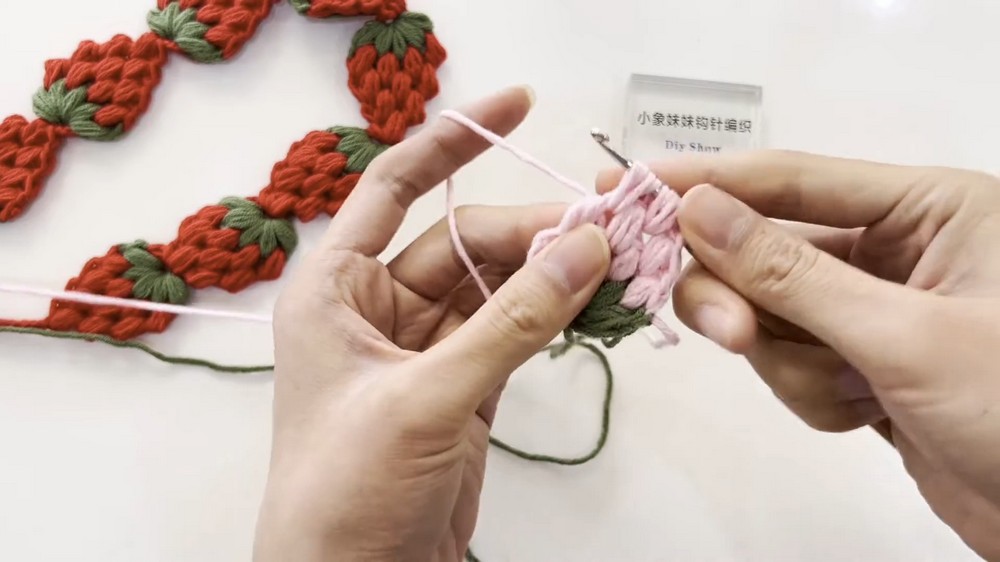
- Repeat for Next Rounds:
- For increased headband height, repeat the process:
- In each space, make 3 incomplete hdc (bobble), YO, pull through all loops, ch 1 to secure.
- Number of repeats depends on desired plumpness of strawberry or width of headband.
- For increased headband height, repeat the process:
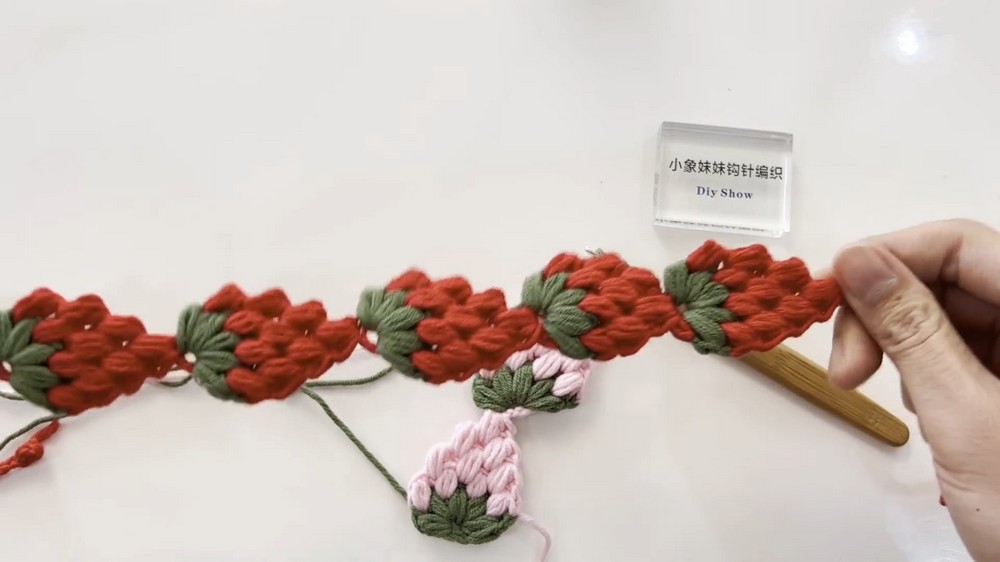
3. Joining Next Strawberry Motif
- For Multiple Strawberries:
- After finishing the bobbles and securing the last ch, pull a long loop, remove hook.
- Insert hook in base of last motif, yarn over with green, and begin the calyx (as Step 1).
- Repeat all previous steps for each new strawberry.
- Customize Length:
- Continue making strawberries (or flowers if desired) to length that fits head (measure as you go!).
- The sample makes 8 strawberries for an average adult head.
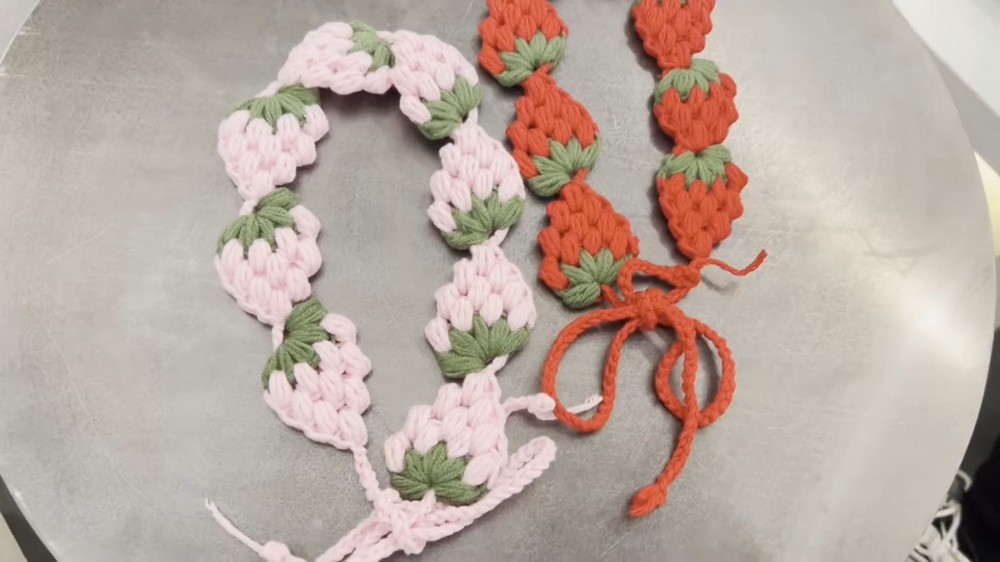
4. Finishing the Headband
- Joining Ends:
- After last strawberry, fasten off.
- Sew ends together directly or attach to a small elastic band/ribbon for added flexibility.
- Weave in all loose ends securely.
Pattern Correction
- Loop Division: Ensure that loops are divided as evenly as possible in the calyx for a neat appearance. If a different number of calyx points are desired, adjust accordingly.
- Bobble Stitch Forming: If you find too many loops are unwieldy, work with slightly fewer hdc per motif or space out the stitches for comfort.
Tips
- Sizing: Always measure head circumference before starting; adjust the number of strawberries accordingly for a custom fit.
- Stretch Factor: Attach ends with elastic or ribbon for enhanced comfort and size versatility.
- Thread Management: Tie off and weave in color changes neatly to avoid bulk at join points.
Conclusion
This sweet strawberry bobble stitch headband combines playful design with crochet technique, resulting in an attractive and comfortable accessory. Adjust colors and the number of motifs to your preference. Whether worn as a statement piece or given as a gift, this headband will brighten any day.


