Find a free crochet water bottle holder pattern to easily stitch a practical, stylish carrier that keeps your bottle secure and convenient to take anywhere.
One afternoon, I realized I needed a better way to carry my water bottle when I went out for a walk. I wanted something lightweight, easy to carry, and a little stylish too. That’s when I decided to crochet my own holder. Using the Free Crochet Water Bottle Holder Pattern, I was able to create a practical and cute accessory that made staying hydrated on the go so much easier. With just a few small changes, this pattern can also be adapted to make snack bags, small totes, or even decorative plant holders, showing how versatile this simple design truly is.
Simple Crochet Water Bottle Holder– Free Pattern

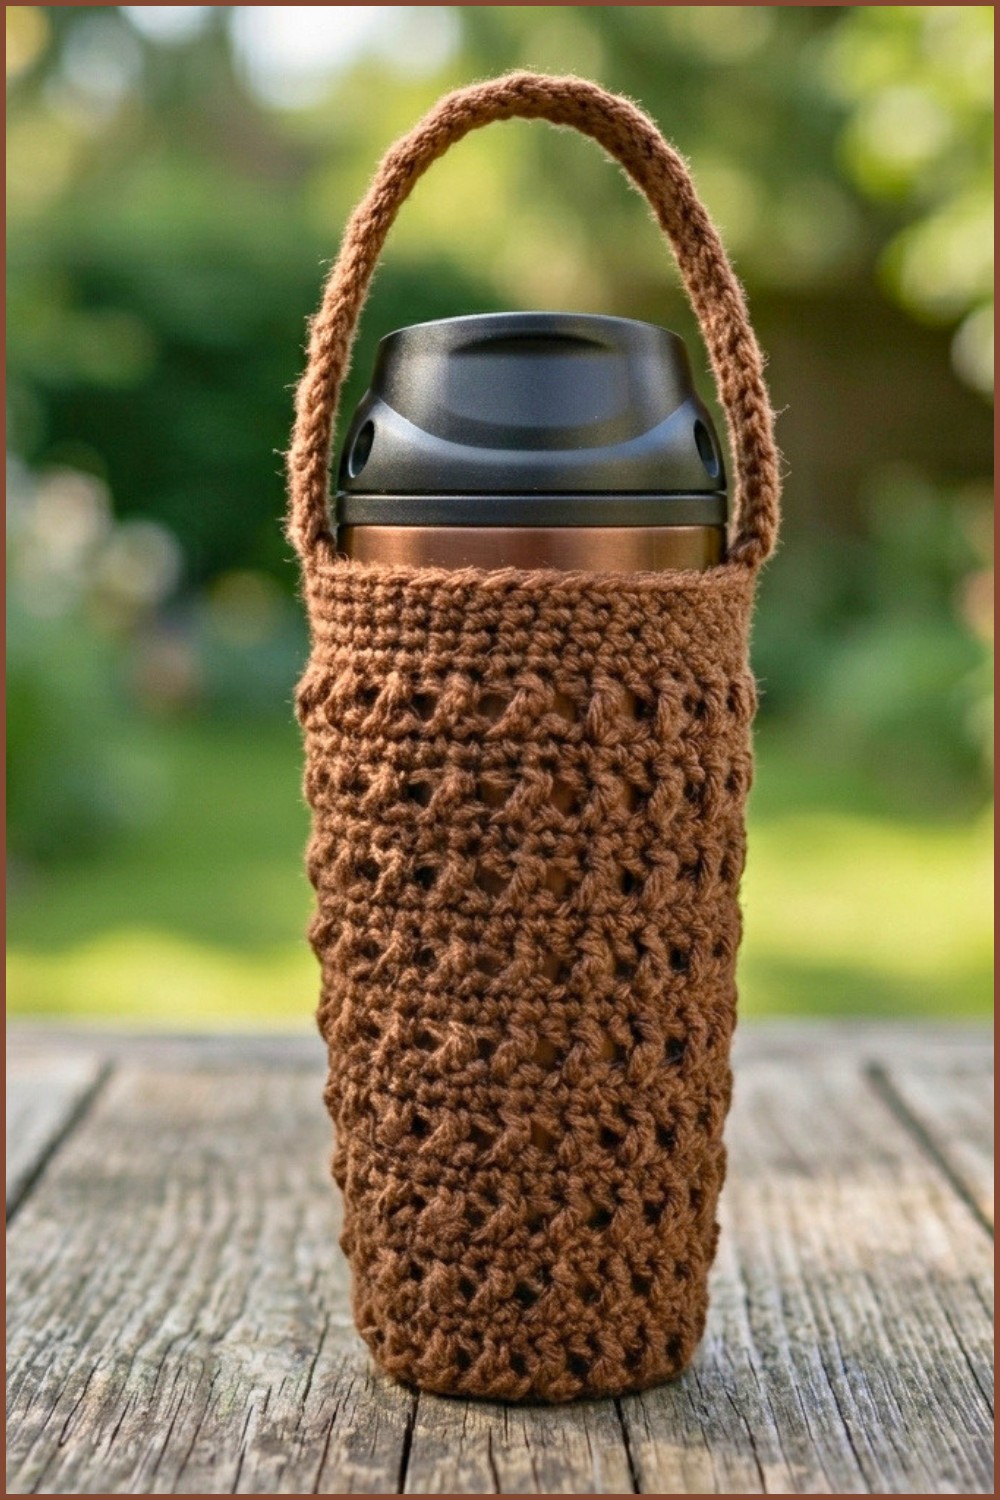
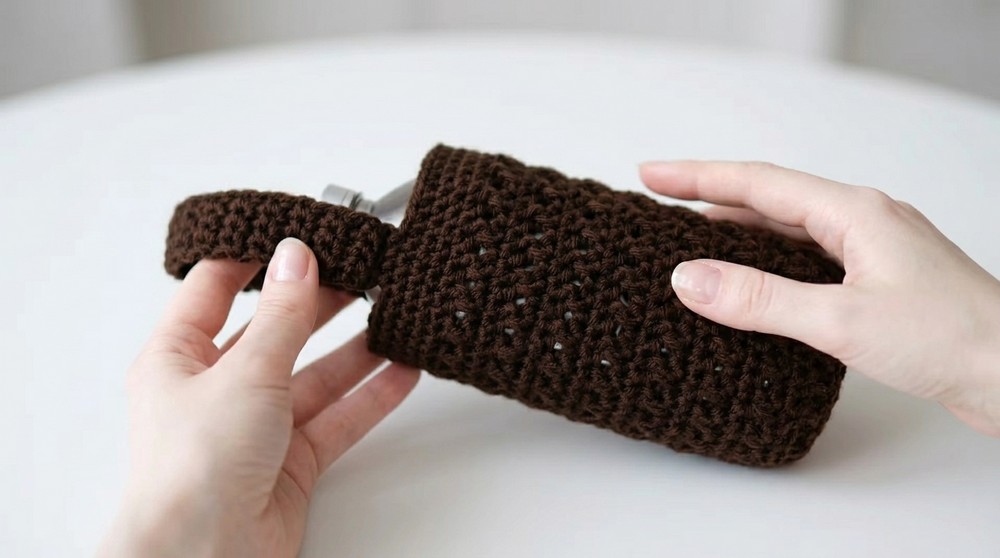
The water bottle holder has a neat, cylindrical shape that fits most bottles perfectly. Its texture is firm and slightly stretchy because of the tight stitches, which helps secure the bottle without feeling too tight. The strap is long enough to sling comfortably over the shoulder, and the open top design ensures easy access whenever it’s time to take a sip. The look is effortless and casual, perfect for outdoor activities or everyday use. What really stands out is how sturdy the holder feels despite being lightweight, combining function and style in one small package.
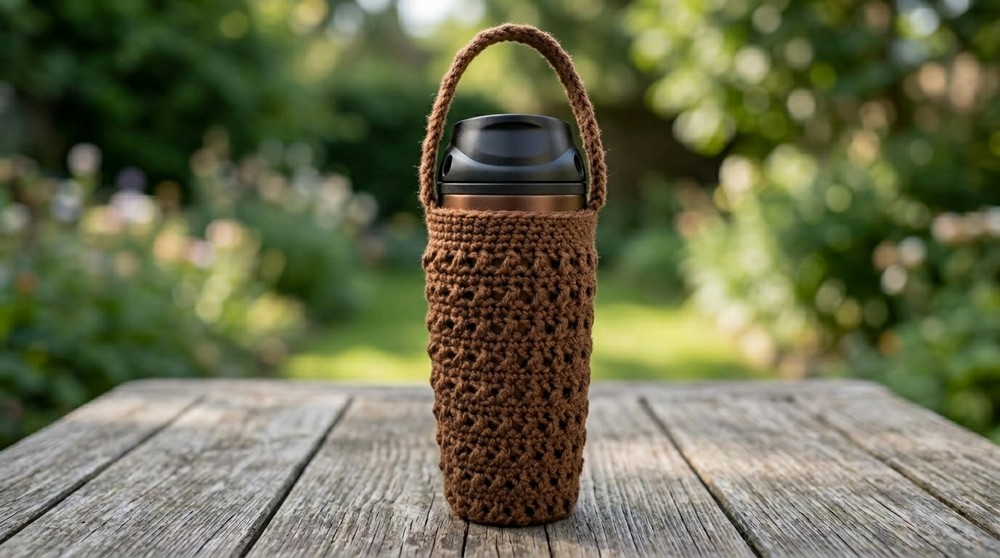
To make this holder, I started by crocheting a round base and then worked in rounds to build up the sides, mainly using the single crochet stitch. This stitch is easy to learn and creates a strong fabric that won’t stretch out or lose shape. Because of its simple construction and basic stitch use, this project is suitable for beginners and those who want a quick, rewarding crochet project.
The Free Crochet Water Bottle Holder Pattern is ideal not only for personal use but also makes a thoughtful handmade gift. It’s a wonderful way to add a personal touch to daily routines, making hydration easy and fashionable. If you want a project that’s both simple and useful, this pattern could be just what you’re looking for.
Crochet Water Bottle Holder with Crossed Double Stitch
Before You Start
- Read through the entire pattern before beginning.
- This project is suitable for beginners; practice basic stitches if unsure.
- Use leftovers/any medium weight (DK/light worsted) yarn you have, avoiding anything too thick.
- Keep a measuring tape handy for customized length.
- Be consistent with your tension for a even finish.
- The pattern is worked in the round from the base up.
Pattern Notes
- The base is started with a center ring, not a traditional flat circle.
- The main texture uses crossed double crochet stitches for a stylish look.
- Single crochet rows provide structure and maintain evenness.
- You can adjust the height to fit your preferred bottle or mug.
- The strap is worked directly onto the holder and joined at the opposite side.
How I Made The Crochet Pattern
- Crocheted a small central ring as the base.
- Increased in the first two rounds to form the bottom.
- Built up the sides alternating crossed double crochet and single crochet rows.
- Finished with extra single crochet rounds for sturdy structure at the top.
- Added a handle/strap to complete the functionality.
Skill Level
Beginner/Easy: Simple increases, basic stitches, and beginner-friendly crossed double crochets.
Finished Size
- Fits a standard water bottle or coffee mug (roughly 6.5 - 7.5" tall; stretchable circumference).
Materials
- Medium weight/DK or light worsted yarn, approx. 50 g.
- 3.0 mm crochet hook (or size to achieve gauge).
- Scissors.
- Yarn needle for weaving in ends.
- Measuring tape (for customizing height or handle length).
- Stitch marker (recommended for rounds).
Measurements / Sizing
- Base circle: About 2” (5 cm) diameter after increases.
- Height: Approx. 7 to 7.5” (18-19 cm) before strap.
- Handle length: About 8” (20 cm), customize as needed.
Gauge
- 10 dc x 7 rows = 2" x 2" (5 x 5 cm) (in main body pattern)
- Adjust hook or tension as needed to fit your bottle/mug snugly.
Stitch Abbreviations
| Abbreviation | Meaning |
|---|---|
| ch | chain |
| sc | single crochet |
| dc | double crochet |
| sl st | slip stitch |
| st(s) | stitch(es) |
| sp | space |
| rep | repeat |
Special Stitches
Crossed Double Crochet (cr dc):
- Skip next stitch, dc in following stitch, dc in the skipped stitch working into it from behind. Each pair forms a crossed double.
The Pattern!
BASE
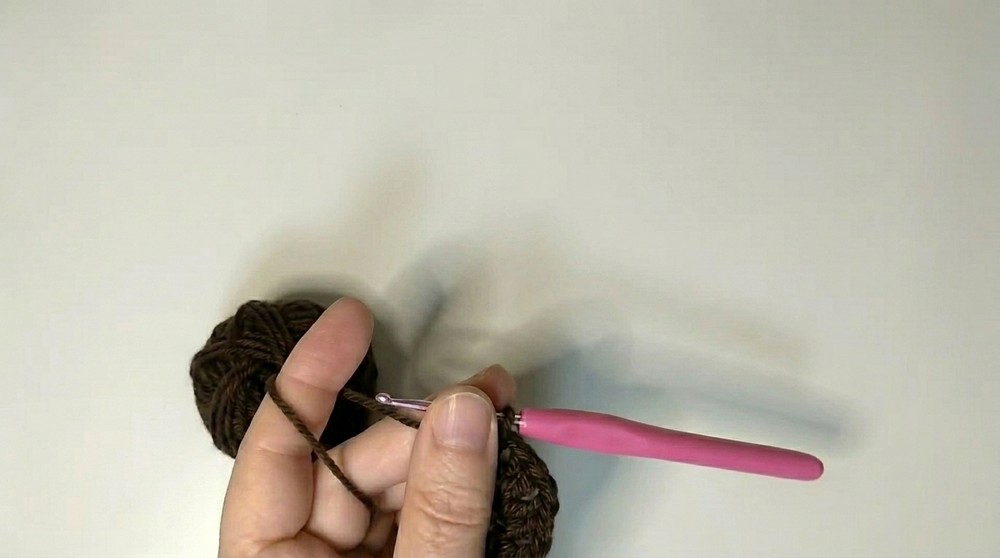
- Round 1: Ch 4, join with sl st to form ring.
- Round 2: Ch 3 (counts as dc), make 9 dc into ring (10 dc total), sl st to top of ch-3 to join.
The base forms a small, secure ring—ideal for holding circular bottles snugly.
SIDES & MAIN BODY
Round 3
- Ch 3 (counts as dc), dc in same st, ch 1, 2 dc in next st, rep from * to * around (10 x 2 dc clusters); sl st to join.
You should have 10 two-dc groups with a ch-1 sp between each.
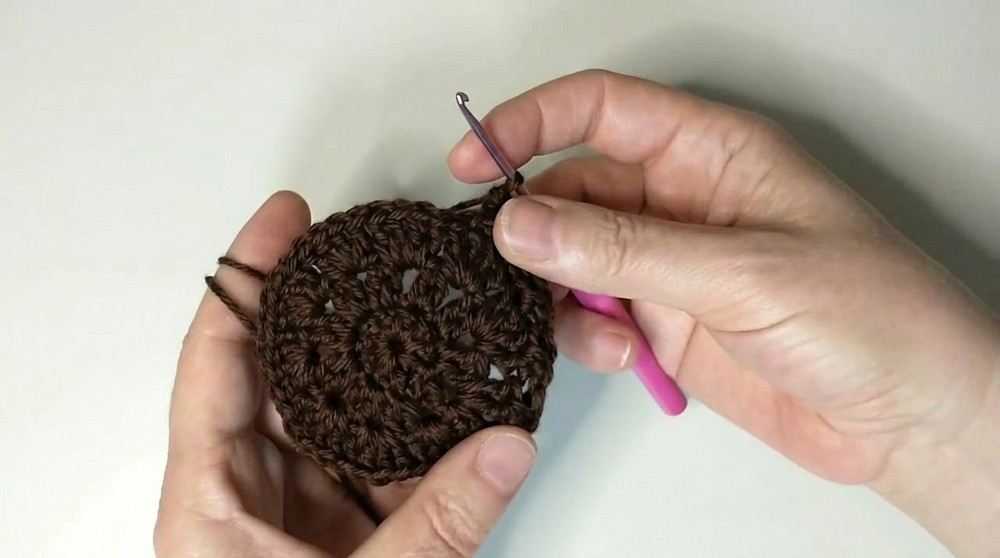
Round 4
- Sl st to next ch-1 sp, ch 3, in same sp work 3 more dc (4 dc in total in each ch-1 sp).
- Work 4 dc in each ch-1 space around.
- Sl st to join.
You should now have 40 dc in this round.
BEGIN TEXTURED PATTERN
Round 5 — Crossed Double Crochet
- Ch 3 (counts as first dc), skip next st, dc in next st, dc in the skipped st from behind (first cross double made).
- Skip next st, dc in next st, dc in skipped st from behind; rep from * to * around.
- Sl st to join. (20 crossed double pairs/40 sts)
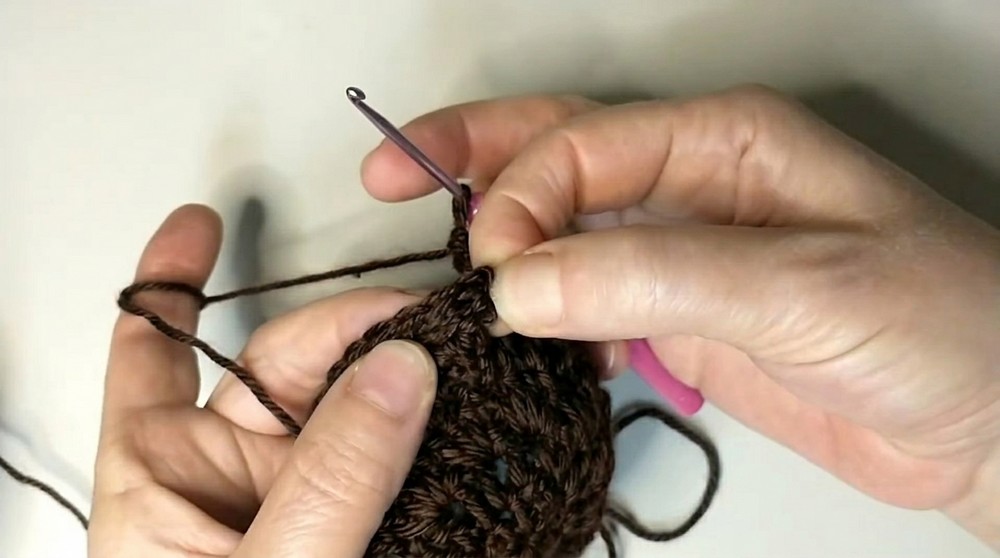
This creates a beautiful textured effect, adding both visual interest and some stretch.
Round 6 — Single Crochet
- Ch 1, sc in same st, sc in each st around (40 sc).
- Sl st to join.
Count your stitches here—always 40—this helps maintain even rounds.
Round 7 — Crossed Double Crochet
- Ch 3, skip next st, dc in next st, dc in skipped st from behind.
- Continue around as Round 5.
- Sl st to join.
Round 8 — Single Crochet
- Ch 1, sc around, sl st to join.
Repeat Rounds 7 & 8:
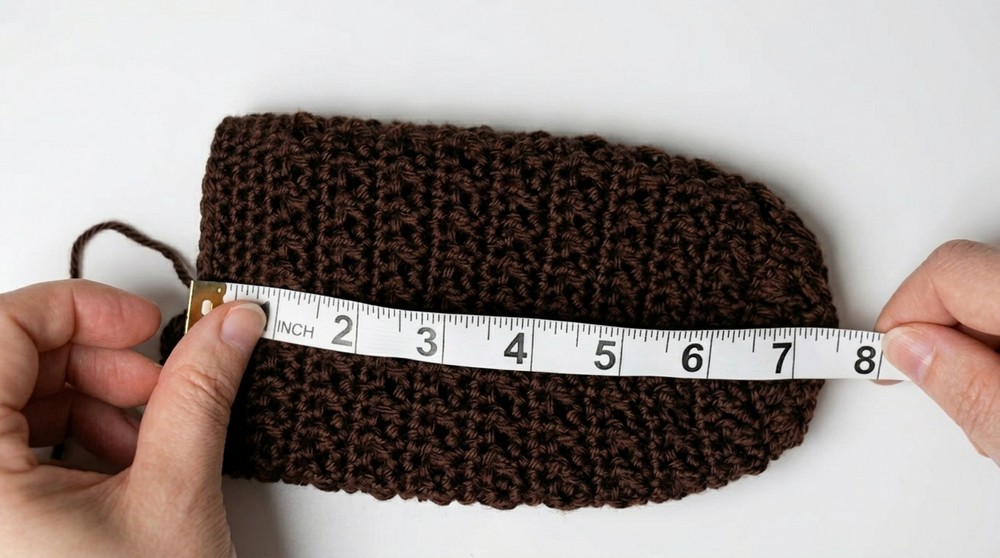
Continue alternating one round crossed double crochet with one round single crochet until the piece measures about 6.5-7" (16.5-18 cm) tall (or to desired height for your bottle/mug).
Upon reaching the preferred height, proceed with:
Top Edge
- Work 4 additional rounds of sc only (for structured, firm edge).
- Each round: Ch 1, sc in each st around, sl st to join.
Take a moment to measure: your holder should be about 7.5” tall, perfect for most bottles and mugs.
For those who prefer paragraph instructions:
Start by making a small ring base, then increase stitches to form a bottom circle. Work up the sides alternating crossed double crochets and single crochet rounds for texture and stretch. Complete with a few solid single crochet rounds for stability and neat finish. Adjust the number of repeat rounds to customize length for your specific water bottle or mug.
STRAP / HANDLE
- After last round, ch 1, sc in each of the next 4 sts.
- Ch 1, turn, sc in 4 sts.
- Repeat last row, working back and forth over 4 sts, until handle measures 8" (20 cm) or the desired length.
- Fold holder flat and, ensuring no twists, securely join end of strap with 4 sc to the stitches on the opposite side where you began (use inside for neater join).
- Fasten off, weave in all ends securely.
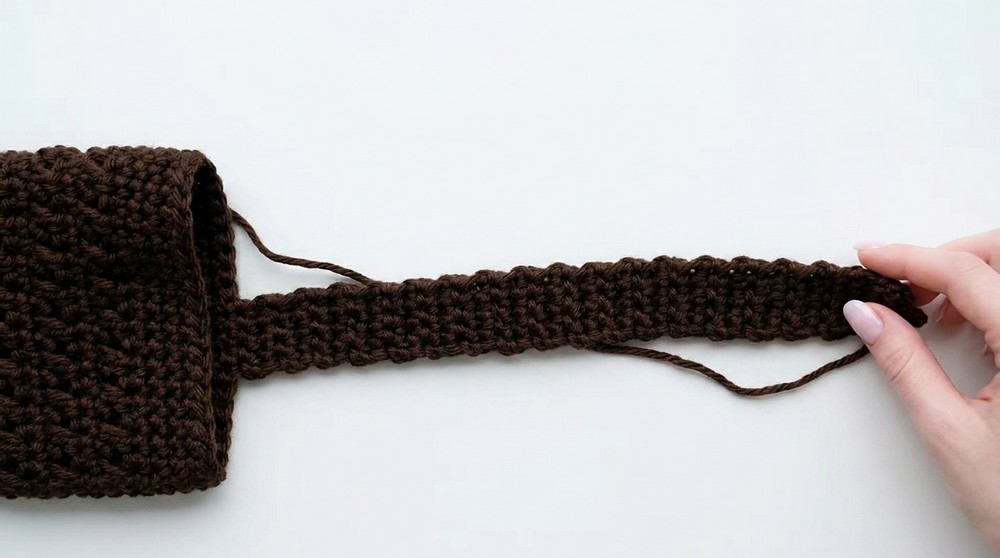
You now have a neat, flexible, and strong handle for your bottle or mug carrier!
Assembly & Finishing
- Weave in all loose yarn ends.
- Lightly block if necessary, particularly the handle.
- Optional: Attach button or embellishments if desired.
What you can make using these stitches?
- Coffee mug cozies or sleeves
- Pouches for accessories (phone/earbuds)
- Crossbody bags using the same base and pattern
- Decorative plant pot covers
- Kids’ drawstring snack bags
Closing Notes
This practical, stylish water bottle or mug holder is perfect for daily outings, gym, or hikes. A simple stitch pattern keeps it interesting while being approachable for beginners. Feel free to personalize with colors or by adding extra details (like beads or custom straps).