Fill your holiday display with this Crochet Reindeer Free Pattern and enjoy an adorable little character featuring cute antlers and festive details.
Brighten up your holiday season with a charming handmade decoration that brings warmth and cheer to any room. A Crochet Reindeer features a round body, short legs, big eyes, and two distinctive antlers that give it its classic festive look. Its simple yet detailed design makes it perfect for displaying on shelves, tables, or as part of your Christmas décor.
Charming Crochet Reindeer Free Pattern Inspired By Christmas
What makes this project special is the opportunity to customize it. You can change the shape or size of the antlers, add a cozy little scarf, or create a red nose to resemble Rudolph. Adding tiny bells or other cute accessories can give your reindeer even more personality.
The project uses basic crochet techniques that are beginner-friendly but still enjoyable for those with some experience. The body and head are created using single crochet stitches with increases and decreases to shape them perfectly. The legs and antlers are crocheted separately and then carefully sewn onto the body for a neat finish.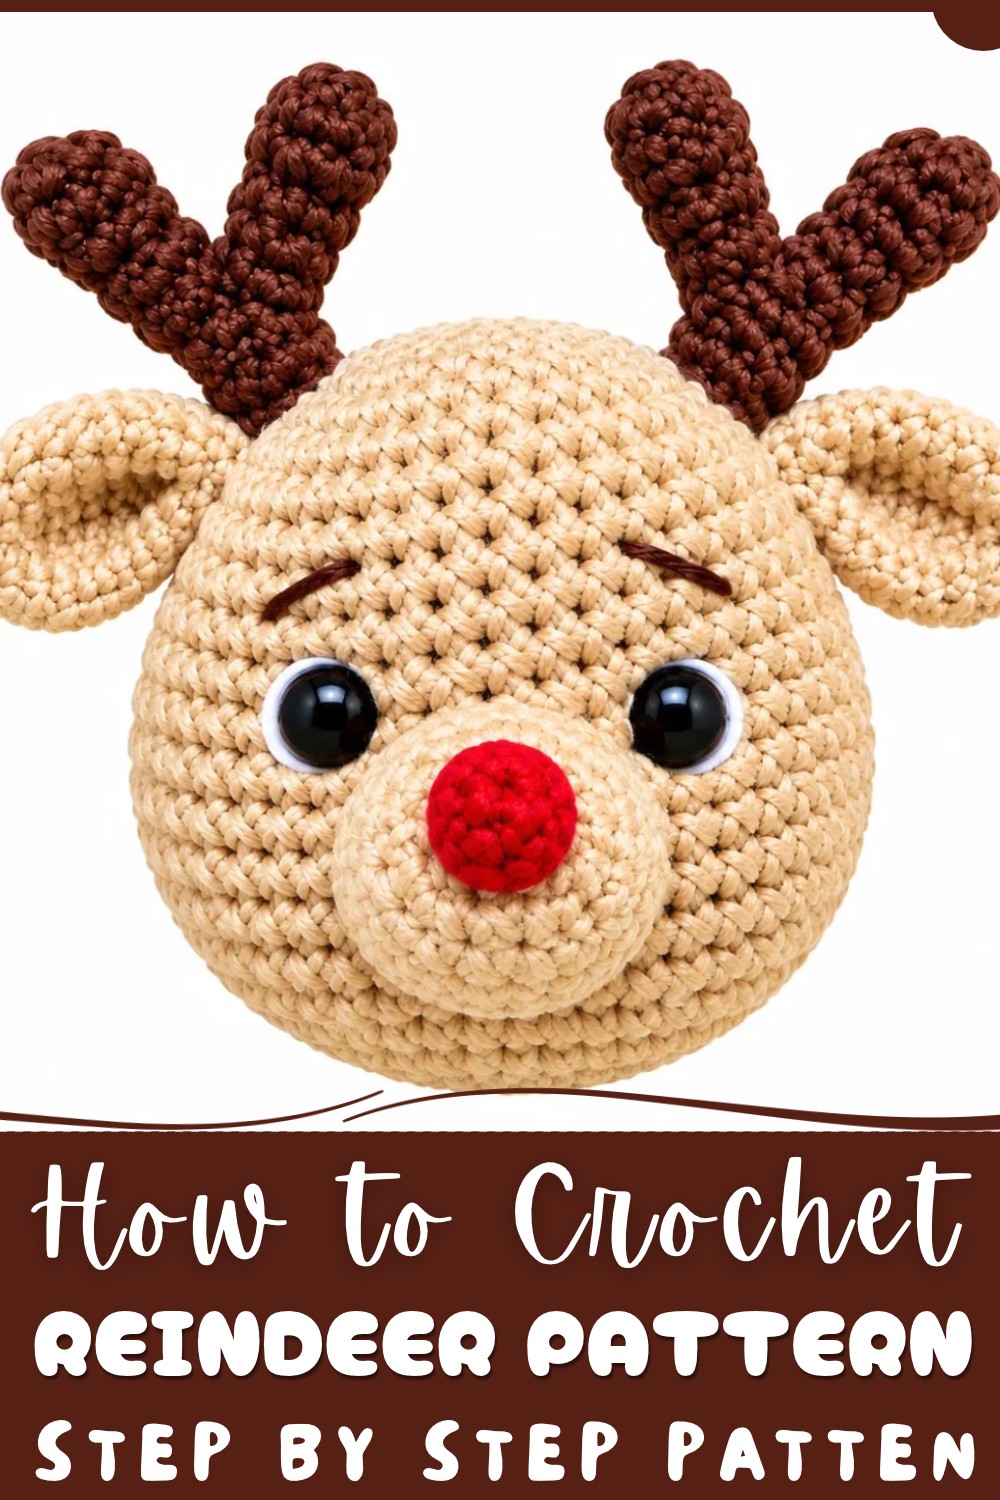
Overall, this Crochet Reindeer is a delightful, fun project that adds a handmade touch to your holiday celebrations. Its friendly appearance and easy customization options make it a rewarding crochet to create during the festive season.
- Written pattern is based on YouTube channel A tejer con Tania Márquez
Reindeer Ornament Crochet Pattern
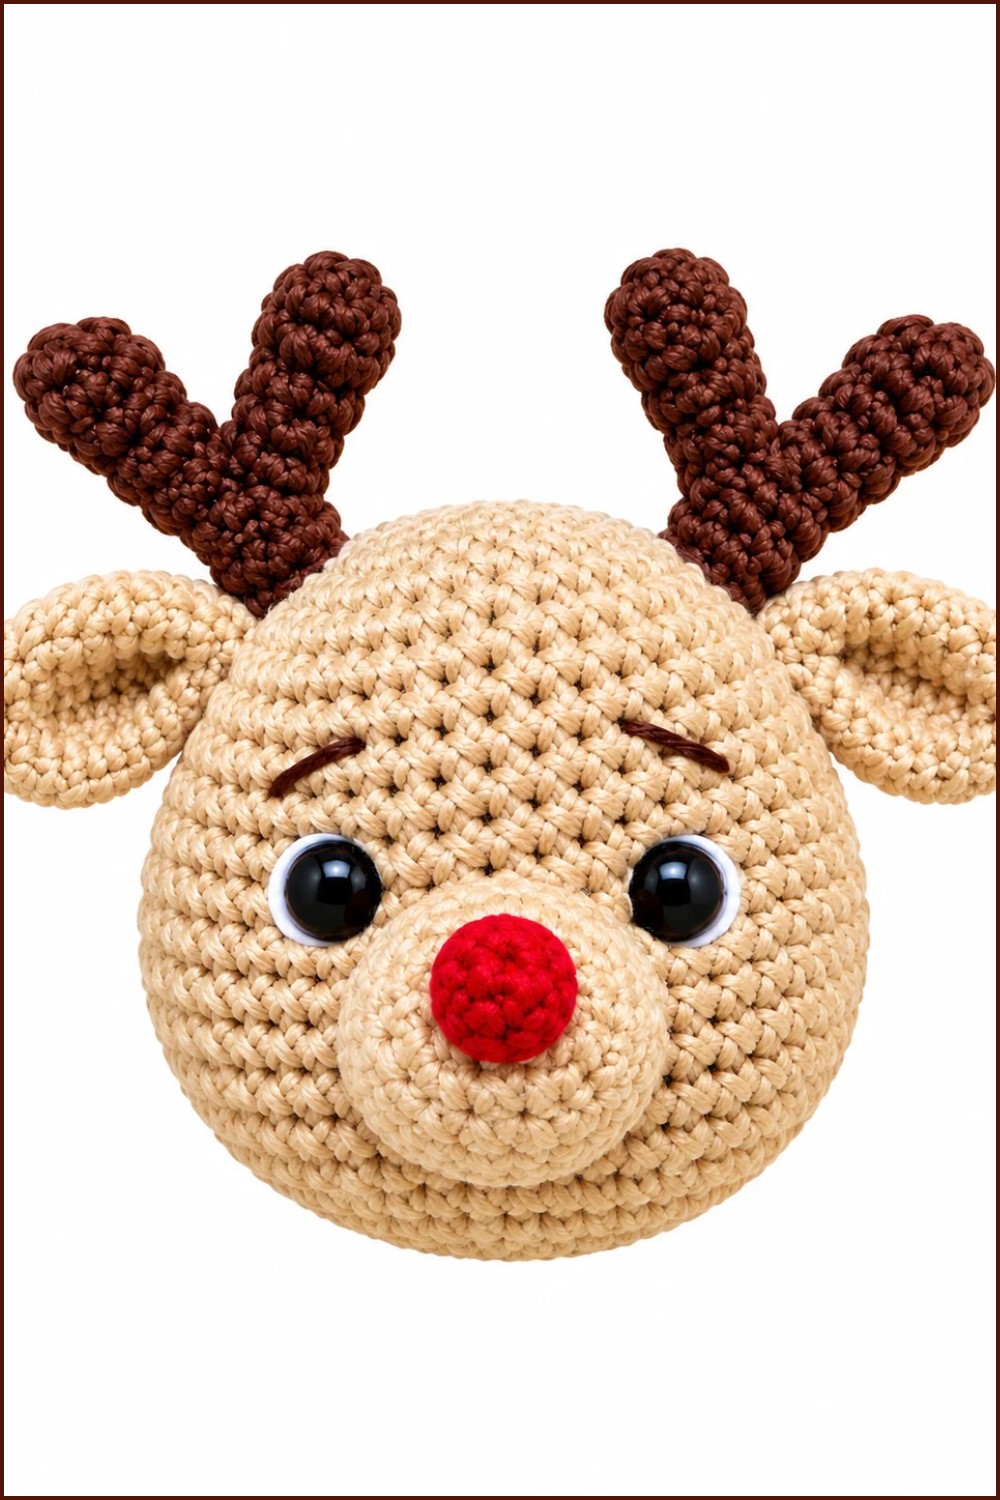
A delightful reindeer ornament captures the spirit of the season with an expressive face, perky nose, gentle ears, and iconic antlers. This pattern assembles five distinct elements—muzzle, nose, ears, and both parts of each antler—making it a rewarding amigurumi project that allows crocheters to create a memorable handmade holiday decoration. Each section is worked in the round with detailed guidance on the construction and assembly for a polished, three-dimensional finish suitable for gifting, decorating, or personal keepsakes.
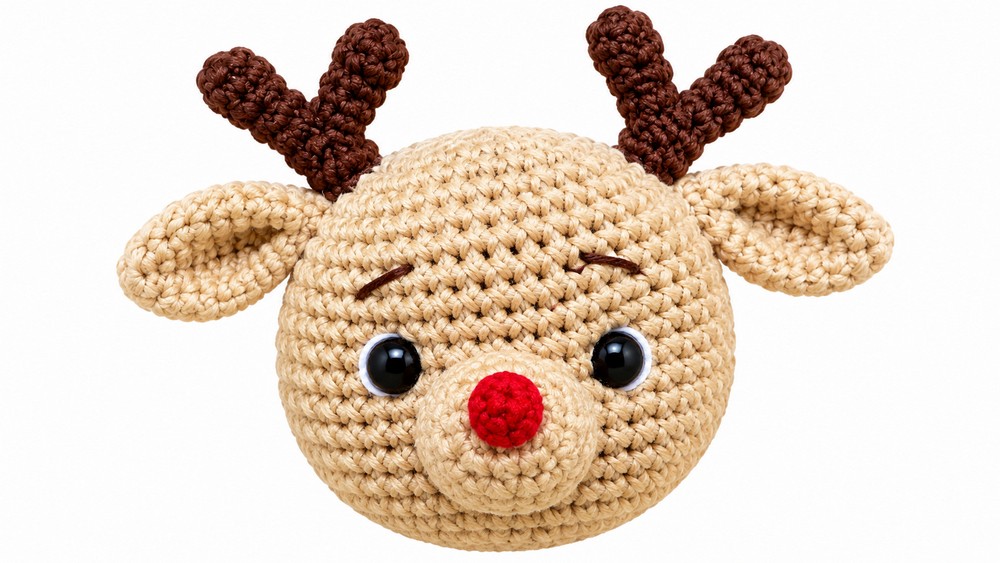
Key Pattern Details
- Ornament Structure: Multi-piece amigurumi, with separate muzzle, nose, ears, and antler sections sewn to a central head base.
- Techniques Employed: Continuous rounds, increases, decreases, embroidery, and basic sewing for assembly.
- Finished Look: Soft, rounded shapes with defined features, playful contrast for a cheerful reindeer expression.
- Application: Use as a festive ornament, gift topper, or small toy.
Important Notes
- Each part is crocheted in a spiral; keep a close watch on round counts to ensure symmetry.
- Use a stitch marker to help track the start of rows, adjusting as necessary when attaching multiple elements.
- Firm, even stuffing supports the rounded finish and helps features retain shape after assembly.
- Embroidery and final assembly bring out the expressive character of the reindeer.
- Safety eyes, if used, should be attached before muzzle placement and secured according to manufacturer guidelines.
Difficulty Level
Beginner to Intermediate
This project is suitable for advanced beginners with knowledge of single crochet, increasing, decreasing, and working in the round. Those familiar with basic amigurumi assembly and simple embroidery will complete it with ease.
Supplies Needed
- Worsted or light DK weight yarn in:
- Brown (main reindeer parts)
- Red (nose)
- Dark brown (antlers)
- Small amount of white (eye detail)
- Black (eyebrow embroidery)
- Crochet hook: 3.0 mm–3.5 mm (or suitable for yarn weight)
- Fiberfill stuffing
- Tapestry/sewing needle
- Scissors
- Yarn needle for embroidery
- Stitch marker
- Safety eyes (if required, size to match the head base; reference not included in this pattern)
- Optional: Pins for positioning pieces during assembly
Size & Measurements
The assembled reindeer ornament typically measures approximately 7–9 cm (2.75–3.5 inches), not including the hanging loop. Antler height may add extra vertical length. Proportions will vary based on yarn and hook size.
Gauge & Stitch Details
- Gauge: 9 rounds in single crochet = approximately 5 cm (2 inches) in diameter (lightly stuffed).
- Gauge is not critical to fit, but tighter stitches yield best amigurumi results for maintaining shape and preventing stuffing from showing through.
- All pieces are worked in single crochet stitches unless stated otherwise.
Crochet Abbreviations
- MR: Magic Ring
- sc: Single Crochet
- inc: Increase (2 sc in same stitch)
- dec: Decrease (sc 2 together)
- st: Stitch
- rep: Repeat
Special Stitch Guide
- Magic Ring (MR): Begin with a small adjustable loop, then work the specified number of single crochet stitches into that loop. Pull tight to close the center.
- Invisible Decrease: For seamless shaping, insert the hook into the front loops of two consecutive stitches, yarn over, pull through, yarn over again, and draw through all loops on the hook.
Complete Crochet Pattern
Head:
- For the head making Go and watch the Tutorial
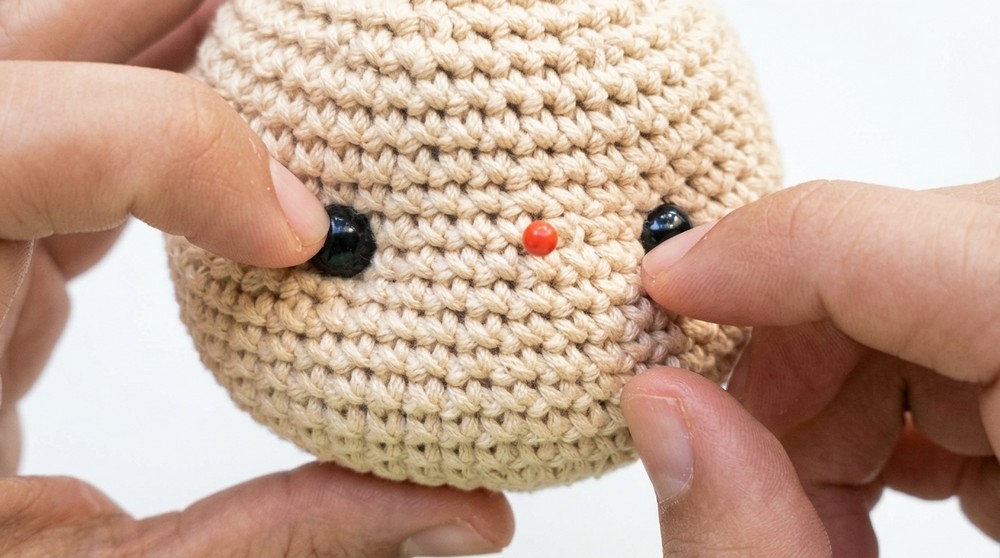
1. Muzzle
- Round 1:
- Create a magic ring, work 6 sc into ring. (6 sts)
- Round 2:
- 6 inc (2 sc in each st around). (12 sts)
- Round 3:
- 1 sc, 1 inc, rep around. (18 sts)
- Rounds 4–5:
- Sc in each st around. (18 sts per round)
- Finish:
- Fasten off, leaving a long tail for sewing. Stuff firmly before attaching to head.
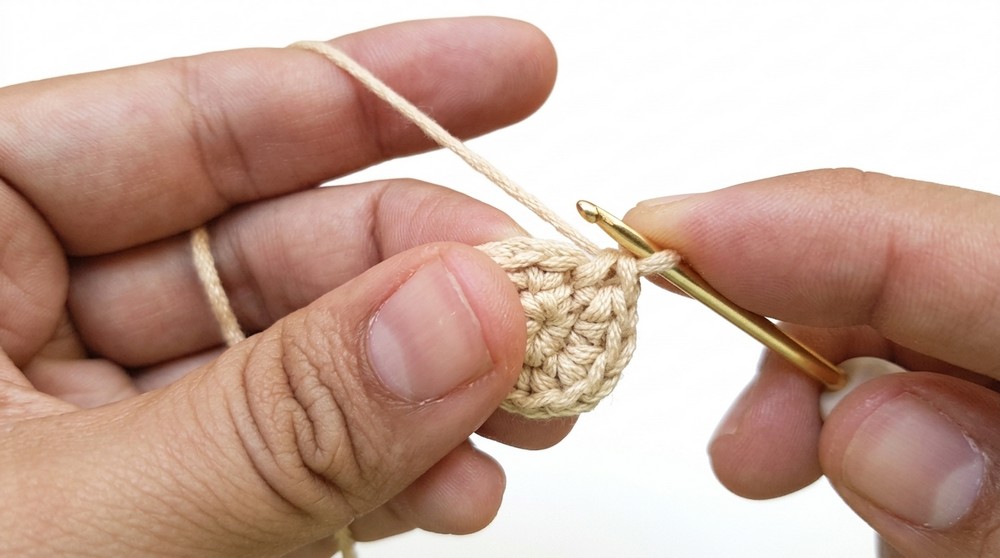
2. Nose
- Round 1:
- MR, work 6 sc into ring. (6 sts)
- Round 2:
- Sc in each st around. (6 sts)
- Finish:
- Fasten off, leaving a tail for sewing. Do not stuff; nose remains flat.
3. Ears (Make 2)
- Round 1:
- MR, work 4 sc into ring. (4 sts)
- Round 2:
- 4 inc (2 sc in each st around). (8 sts)
- Round 3:
- 1 sc, 1 inc, rep around. (12 sts)
- Rounds 4–9:
- Sc in each st around. (12 sts per round)
- Round 10:
- 1 sc, 1 dec, rep around. (8 sts)
- Round 11:
- 4 dec (sc2tog four times). (4 sts)
- Finish:
- Fasten off, leaving a long tail for assembly. Flatten gently; no stuffing needed.
4. Antlers – Long Part (Make 2 per reindeer)
- Round 1:
- MR, work 6 sc into ring. (6 sts)
- Rounds 2–10:
- Sc in each st around. (6 sts per round)
- Finish:
- Do not stuff. Leave a tail for attaching to antler short part and then to the head.
5. Antlers – Short Part (Make 2 per reindeer)
- Round 1:
- MR, work 6 sc into ring. (6 sts)
- Rounds 2–6:
- Sc in each st around. (6 sts per round)
- Finish:
- Do not stuff. Leave a tail for sewing to the long antler section.
Joining & Final Size
Muzzle:
- Lightly stuff the muzzle.
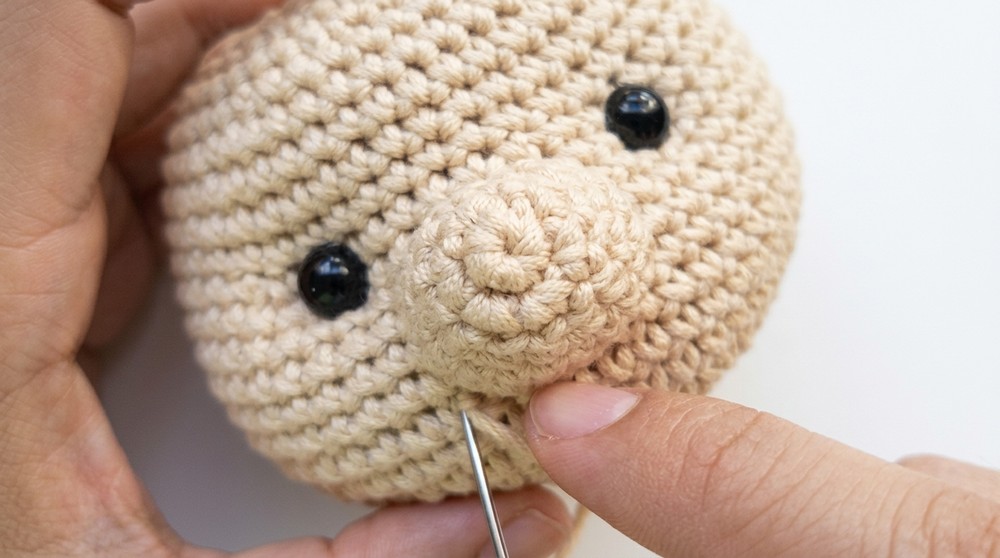
- Center it on the head base at eye level. Sew evenly around edges using the yarn tail, nesting it gently into the head.
Nose:
- Position the small red nose at the top center of the muzzle.
- Stitch around its outer edge, allowing the nose to sit slightly raised.
Antlers:
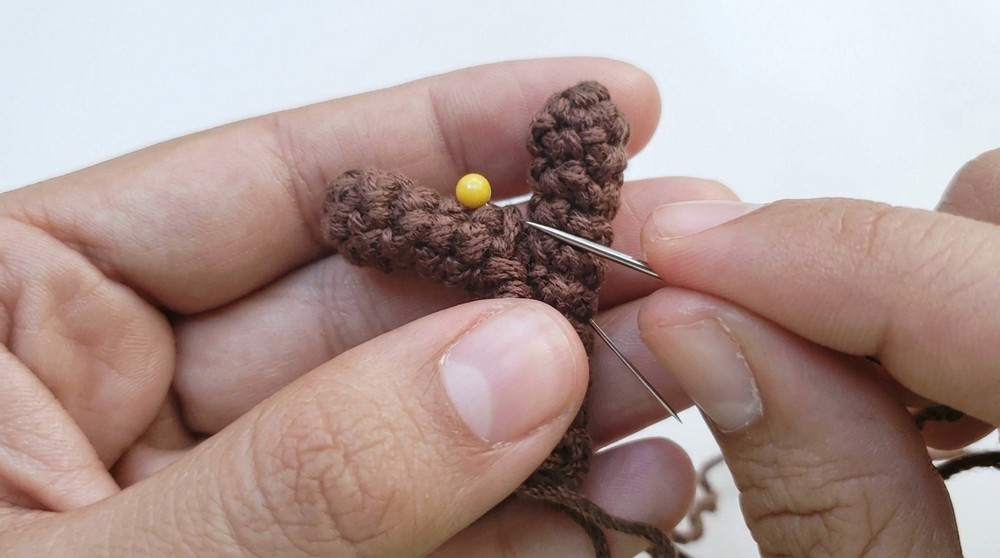
- Attach the short antler section to the long section by sewing at the sixth round of the long antler. Ensure the short piece sticks out laterally.
- Once both parts are joined, sew the antler unit to the top sides of the reindeer’s head at rounds 5–6, spaced evenly.
Ears:
- Attach ears slightly below the antlers and angled outward to give a gentle expression. Sew flat onto the sides of the head securely.
Eyebrows:
- Using black embroidery thread or yarn, embroider two brows three rounds above each eye to impart a friendly look.
White Eye Highlights:
- Embroider or apply a small white stitch or dot on each eye for a lively effect.
Hanging Loop:
- Pass a strand of matching or contrasting yarn through the very top center of the head. Tie securely to form a loop for hanging.
The completed ornament should measure 7–9 cm (2.75–3.5 inches), with antlers extending the ornament’s overall height.
Final Words
This reindeer ornament design utilizes imaginative shaping and careful placement to achieve its spirited look. Each feature builds upon the last, yielding a recognizable and heartwarming holiday figure with simple amigurumi fundamentals. Follow the assembly guidance closely for best results, and personalize expressions or color choices to reflect your festive vision. The finished piece is a joyful addition to any seasonal setting and will stand out on trees or as part of handmade décor ensembles. Your work on the details, from soft shaping to lively embroidery, brings the reindeer’s personality fully to life, showcasing both skill and holiday cheer.