Decorate your home for Halloween with this free crochet ghost amigurumi pattern, bringing a touch of spooky fun and handmade style to your festive season.
Creating adorable crochet projects for seasonal fun is always a rewarding pastime, especially when you can make charming decorations or gifts by hand. One delightful example is the free crochet Ghost Halloween amigurumi pattern, showcased wonderfully in a tutorial by UandYarn. This spooky yet sweet little ghost amigurumi is perfect for Halloween enthusiasts who want a cozy, handmade touch in their festivities.
Adorable Free Crochet Ghost Halloween Amigurumi Pattern for Home Decor
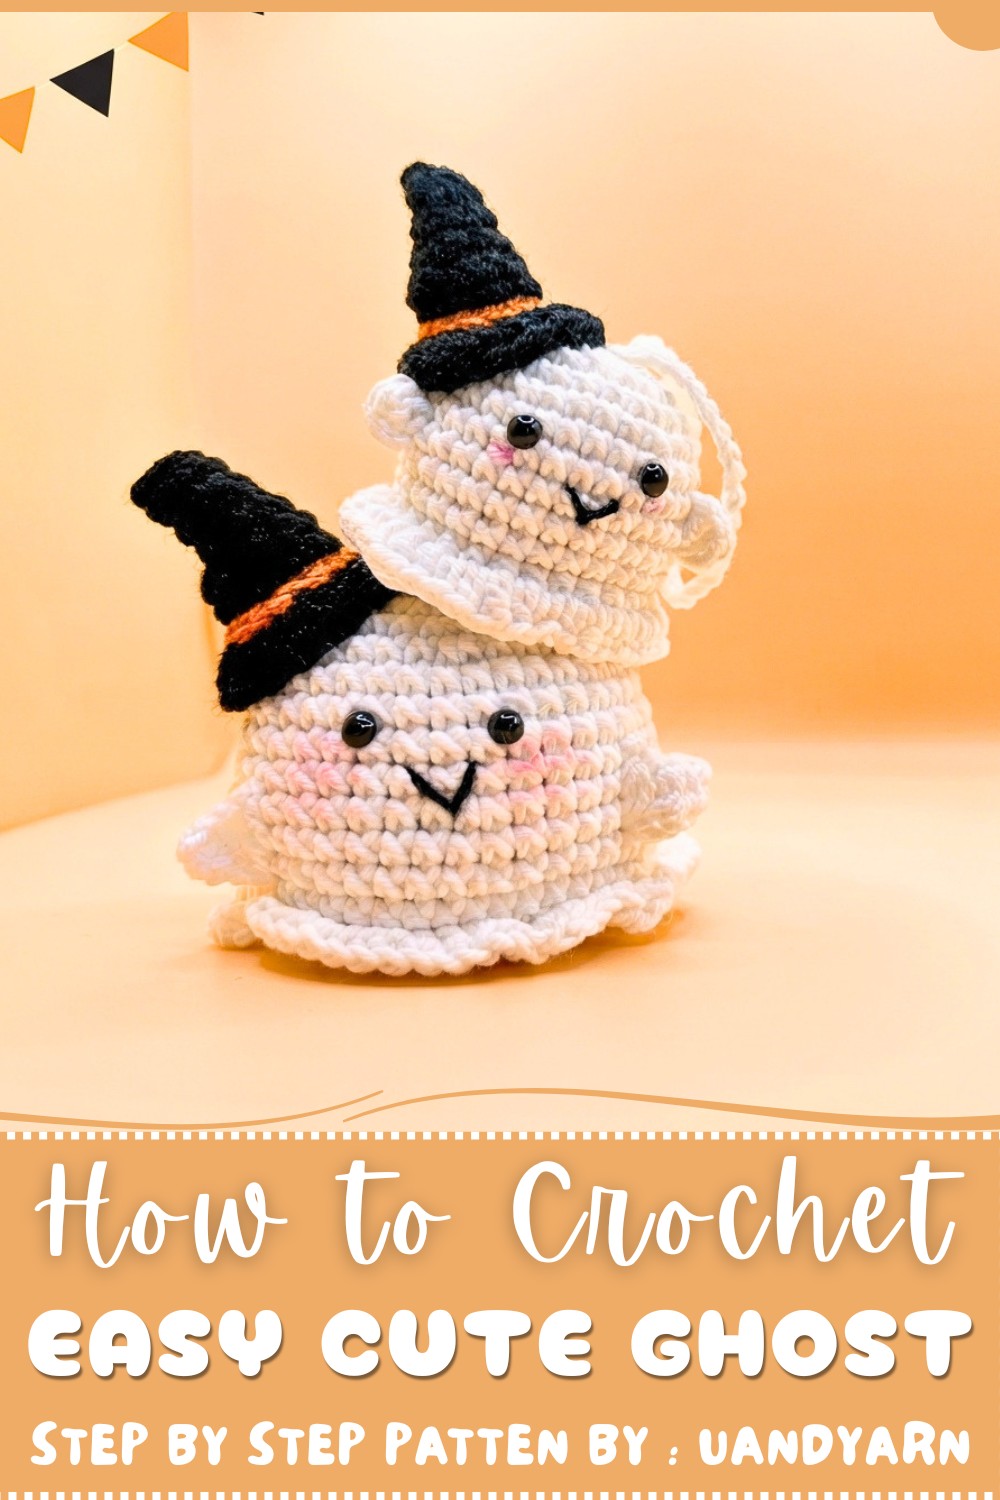
This mini ghost keychain or decoration boasts a soft, plush texture created with tight single crochet stitches worked in continuous rounds, providing a smooth and durable finish. Its rounded shape features a classic ghost silhouette with a flared skirt, adding a playful and whimsical flair. A standout design detail is the cute, expressive face, complete with tiny plastic eyes and a delicately embroidered smile, accented by blush pink cheeks that give it a lovable personality. Adding to the charm, the tutorial also guides you through crocheting a tiny black and orange hat, glued neatly onto the ghost’s head, which gives it an extra festive look.
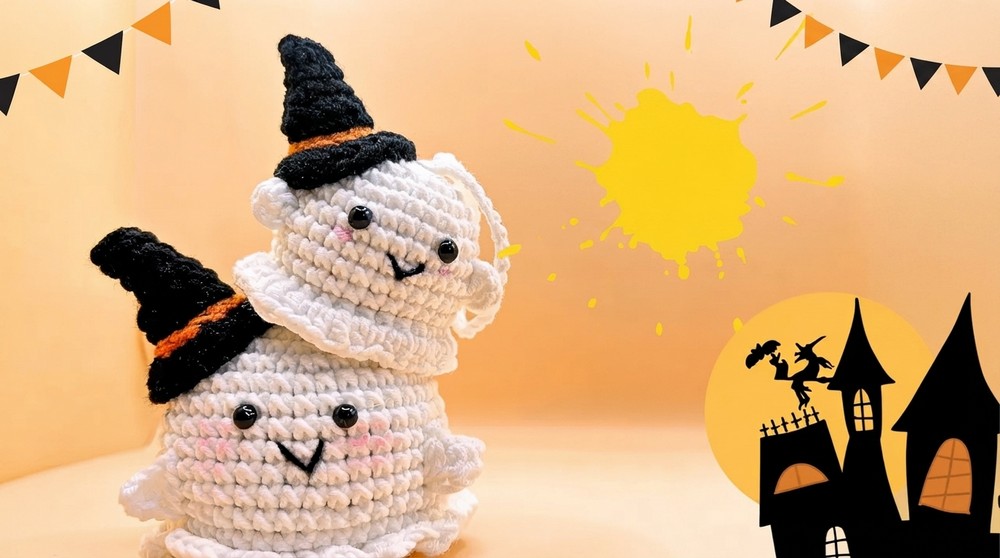
The beauty of this project is not only in its appearance but also in its versatility. The ghost can be hung as a Halloween decoration, attached as a bag charm, or used as a spooky keychain. Its compact size makes it the perfect little gift or party favor, sure to delight both kids and adults alike. Plus, making this ghost is a great opportunity for beginners to practice fundamentals like magic rings, increases, decreases, working in back loops, and shaping, all explained clearly in the UandYarn.
Whether sprucing up your home for the spooky season or gifting a handmade token of fun, this crochet ghost amigurumi brings warmth, creativity, and festive spirit to any collection.
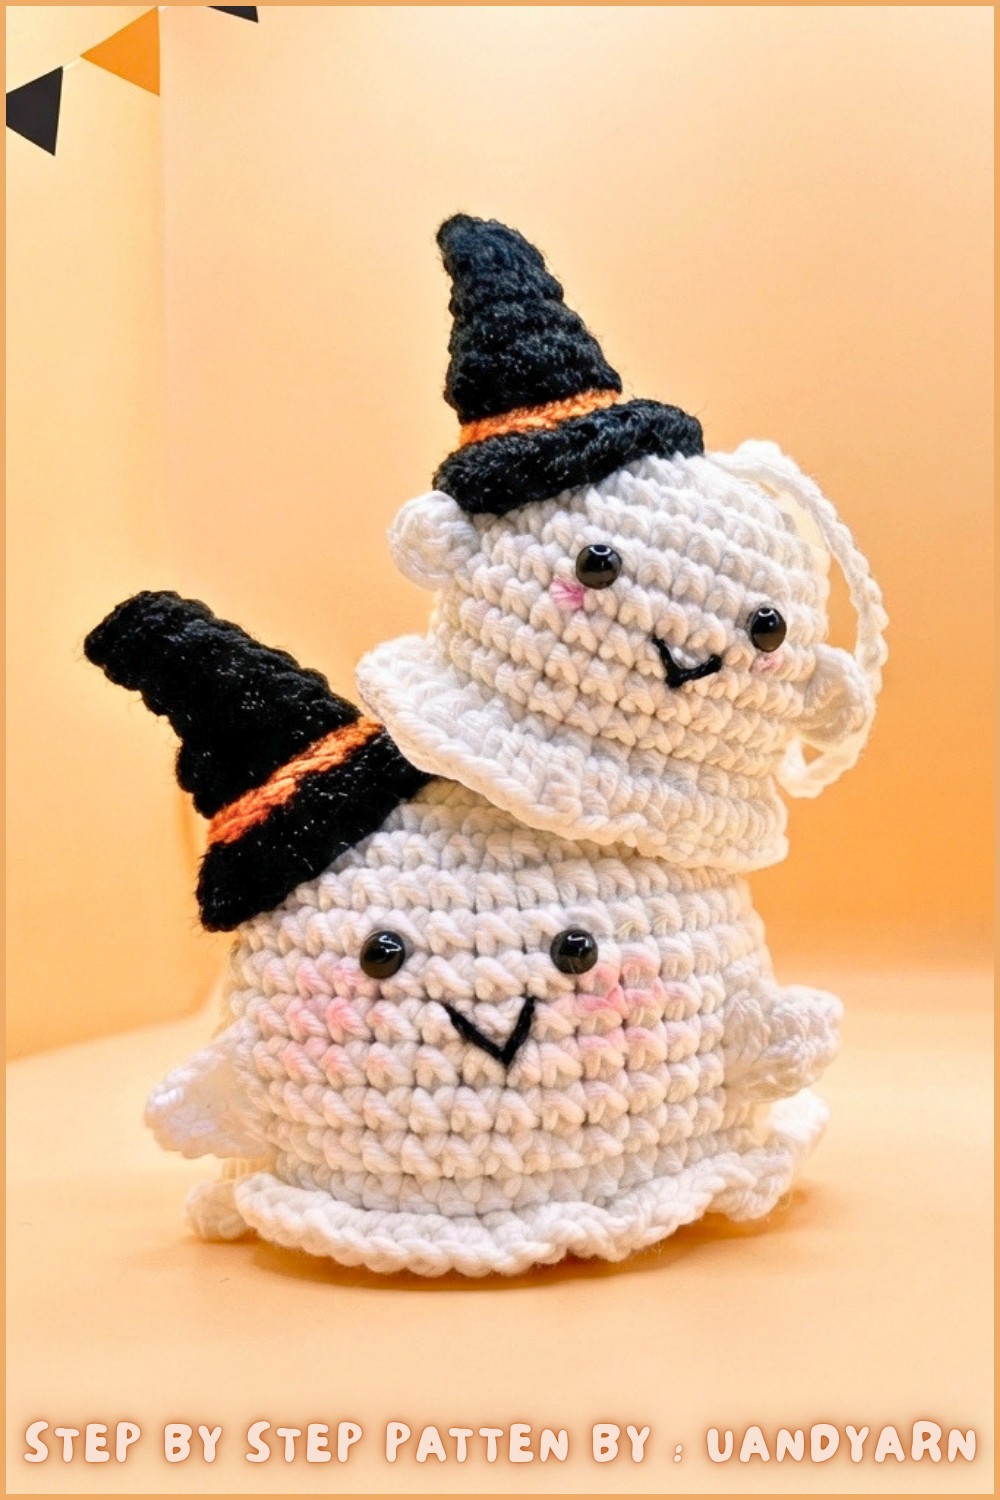
Amigurumi Ghost Crochet Pattern
This cute amigurumi ghost, with its ruffled skirt and playful hat, is perfect for Halloween or as a year-round lucky charm. This pattern guides you, round by round and step by step, through each detail—making it suitable for beginners who want to master amigurumi basics and shaping.
Pattern Highlights
- Complete Amigurumi Construction: Seamless ghost body, skirt, arms, and hat included.
- Shaped Ghost Body: Slightly tapered with defined ruffles and features.
- Textural Details: Skirt and hat add interest and personality.
- Keychain Option: Easily adapted to be a charm or plush.
- Step-by-Step Clarity: Every stitch and round explained with clear bulleted instructions.
Notes
- US crochet terms are used.
- Work in continuous rounds (do not join unless instructed).
- Use a stitch marker to keep track of rounds.
- Stuff firmly but do not overfill.
- Adjust size and facial expression as desired.
- Keychain ring is optional.
Skill Level
Confident Beginner
Materials
- Milk cotton yarn (4 or 5 ply, white + accent color for hat)
- 2.5 mm crochet hook
- Fiberfill stuffing
- Plastic safety eyes (or embroidery thread for eyes)
- Yarn needle & scissors
- Keychain ring (optional)
- Stitch marker
Measurements / Sizing
- Height: 6–8 cm (with hat)
- Width: 4–5 cm
Gauge
Gauge is not critical; ensure tight stitches so stuffing does not show.
Stitch Abbreviations
| Abbreviation | Stitch |
|---|---|
| MR | Magic Ring |
| ch | Chain |
| sc | Single crochet |
| inc | Increase (2 sc in 1 st) |
| dec | Decrease (sc2tog) |
| hdc | Half double crochet |
| dc | Double crochet |
| sl st | Slip stitch |
| BLO | Back loop only |
| FLO | Front loop only |
Special Stitches
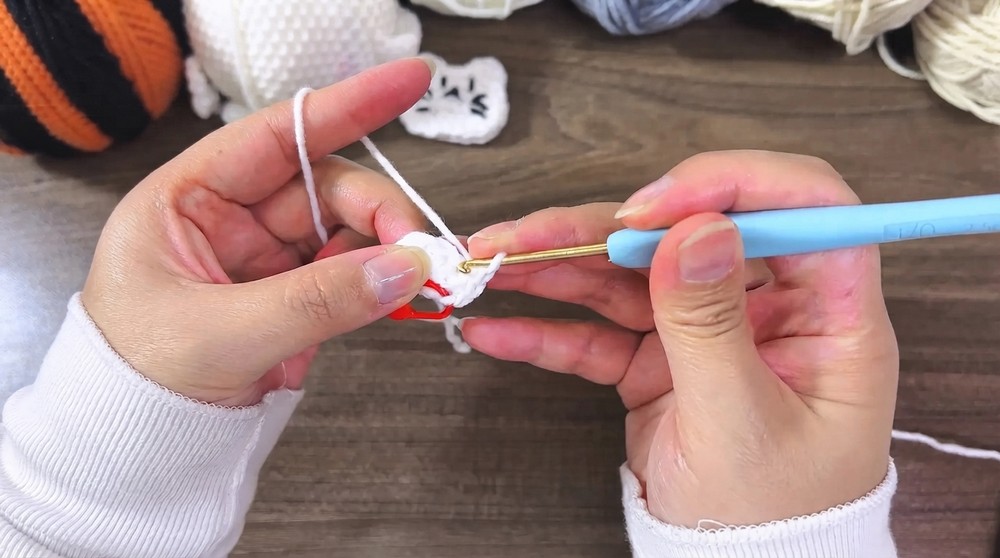
- Magic Ring (MR): Create a loop, insert hook, yo, pull up loop, ch 1, then work stitches in the ring.
- Invisible Decrease (inv dec): Insert hook in front loop of next two stitches, yo, pull through both loops, yo, pull through both loops on hook.
- Skirt Ruffle Pattern: (ch 2, hdc + dc in same st, hdc in next st, sc in next st)
- Work in BLO/FLO as indicated for shape/detail.
Step-by-Step Pattern
Ghost Body
Round 1:
- MR, 6 sc in ring. (6 sts)
Round 2:
- Increase in each stitch around:
- 2 sc in each stitch.
- Repeat 6 times. (12 sts)
Round 3:
- (1 sc, 1 inc) repeat around:
- 1 sc in next st, 2 sc in next st.
- Repeat 6 times. (18 sts)
Round 4:
- (2 sc, 1 inc) repeat around:
- 1 sc in next 2 sts, 2 sc in next st.
- Repeat 6 times. (24 sts)
Round 5:
- (3 sc, 1 inc) repeat around:
- 1 sc in next 3 sts, 2 sc in next st.
- Repeat 6 times. (30 sts)
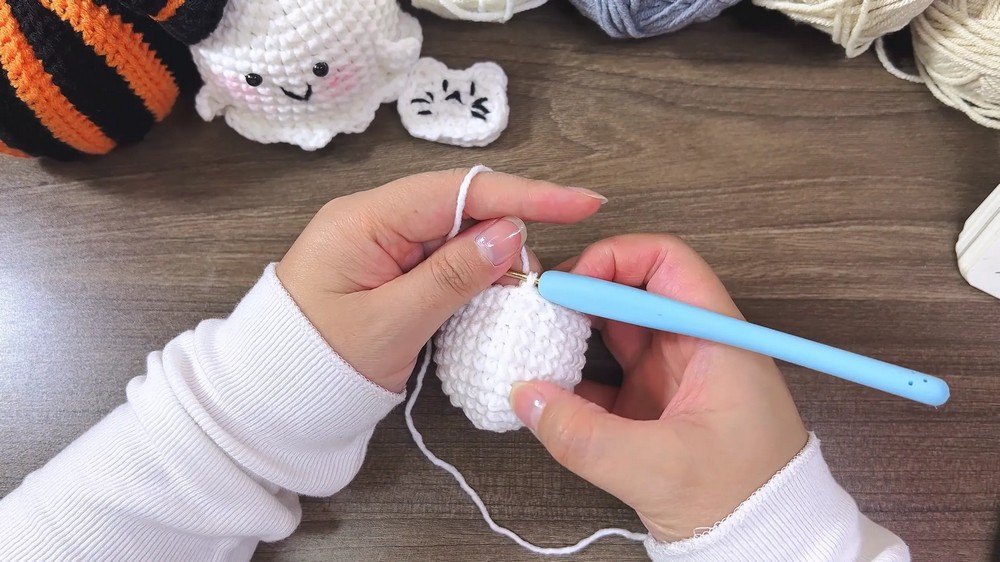
Rounds 6–9:
- Work evenly:
- 1 sc in each stitch around.
- Repeat for 4 rounds (30 sts per round).
Round 10:
- Worked in back loop only (BLO):
- (3 sc, 1 dec) repeat around:
- 1 sc in next 3 sts, sc2tog in next 2 sts.
- Repeat 6 times. (24 sts)
- (3 sc, 1 dec) repeat around:
Round 11:
- (2 sc, 1 inv dec) repeat around:
- 1 sc in next 2 sts, invisible decrease in next 2 sts.
- Repeat 6 times. (18 sts)
- Begin stuffing head and continue as you go.
Round 12:
- (1 sc, 1 dec) repeat around:
- 1 sc in next st, decrease next 2 sts.
- Repeat 6 times. (12 sts)
Round 13:
- Work 6 decreases to close:
- sc2tog in next 2 sts.
- Repeat 6 times. (6 sts)
- Fasten off, use yarn needle to close and weave in.
Skirt
Base:
- Join yarn to the front loop left from Round 10.
- Work around the opening:
- 24 sc evenly around, join with sl st.
Edge/Ruffle:
- In each stitch around:
- ch 2
- hdc and dc in same stitch
- hdc in next stitch
- sc in next stitch
- Repeat this sequence around the full base for ruffled effect.
- Join with sl st, fasten off and weave in ends.
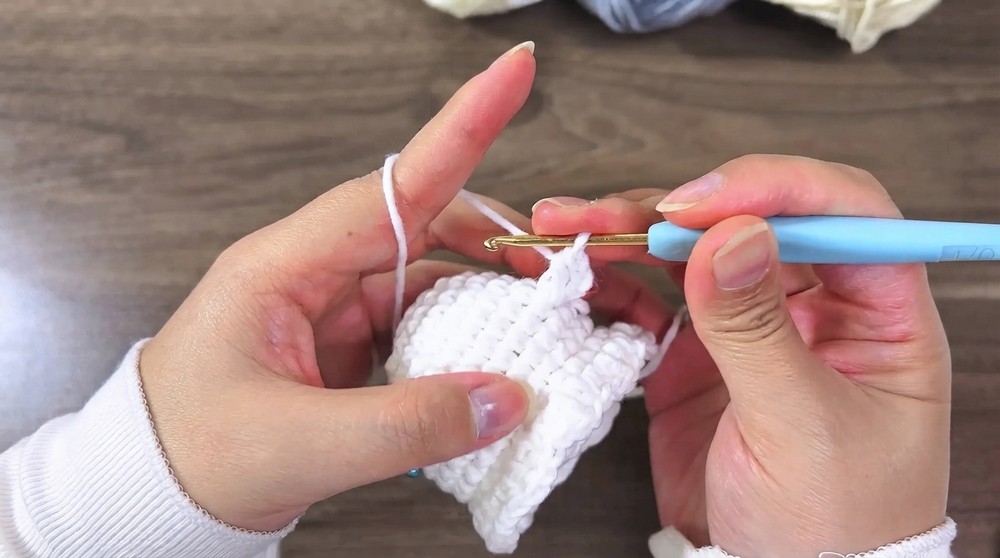
Arms (Make 2)
For each arm:
- At round 7–8 on the body’s side,
- Attach yarn.
- ch 3.
- 2 hdc into the base/side stitch (where yarn was attached).
- Sl st to the same place for security.
- Fasten off, weave in ends.
- Repeat for the other side.
Hat
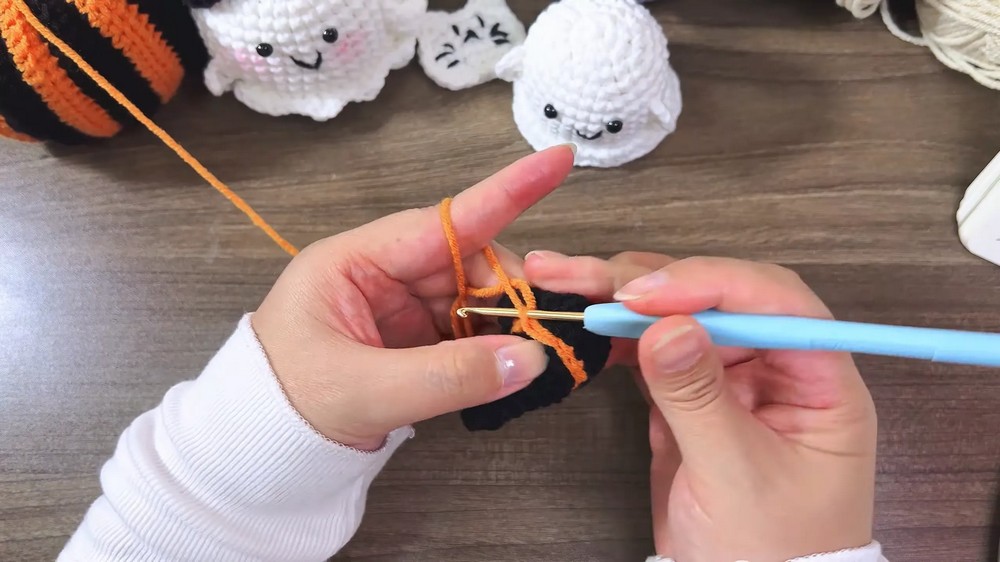
Round 1:
- MR, 6 sc in ring. (6 sts)
Round 2:
- 2 sc in each st around. (12 sts)
Round 3:
- In BLO, (1 dc, 1 inc) repeat around:
- 1 dc in next st, 2 dc in next st.
- Repeat until end. (18 sts)
Rounds 4–7:
- 1 sc in each st around.
- Repeat for 4 rounds (18 sts per round).
- (Can add or remove rounds for desired height.)
Hat Edge (Contrast Trim):
- Join orange or other contrast color at rim.
- 1 sc in each st around for a hatband. Sl st, fasten off.
Eyes & Features
- Attach plastic eyes securely between rounds 6 and 7, spaced evenly.
- Embroider or glue on mouth, cheeks, or other features as desired.
Keychain Attachment (Optional)
- Create a loop (chain or strong yarn loop) at the top of the head or on the hat.
- Slip on keychain ring, secure tightly.
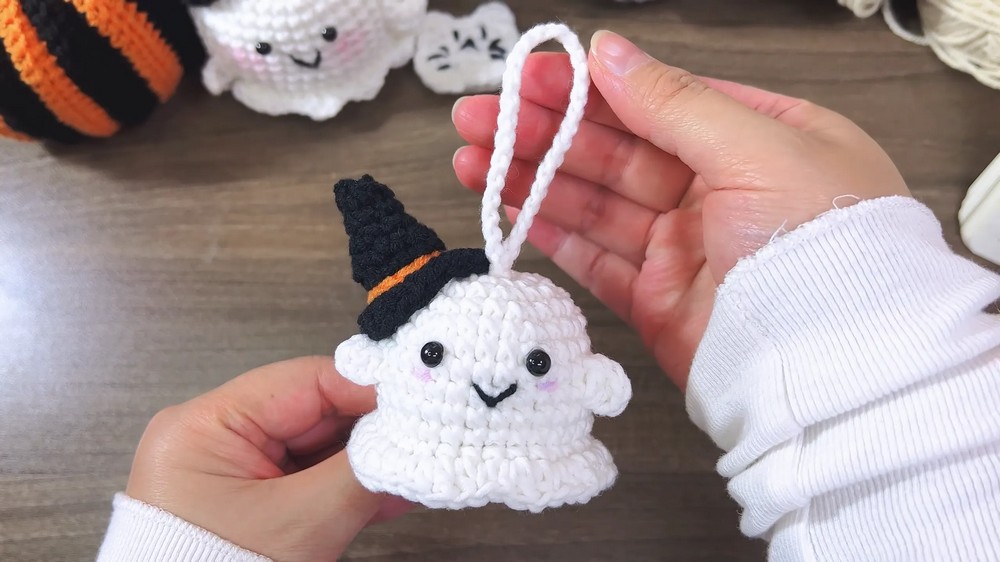
Assembly & Finished Size
- Confirm arms, skirt, hat, and eyes are firmly attached.
- Add any finishing details and check overall shape.
- Ghost should stand 6–8 cm tall (including the hat).
- All ends neatly woven in and trimmed.
Conclusion
With this step-by-step, bullet-pointed pattern, you now have your very own crocheted ghost! Its charming skirt and hat, along with carefully made arms and expressive eyes, will make it a lovely addition to your craft collection or as a seasonal gift.