Stitch a sweet winter friend with this Crochet Snowman Free Pattern, a fun yarn project for Christmas shelves and thoughtful holiday gifts.
When winter draws near and the festive spirit fills the air, nothing quite warms the heart like a charming snowman ornament. Imagine creating a delightful little figure that brings joy and coziness to your holiday decorations or makes a thoughtful personal gift. This is exactly what you get with the Crochet Snowman Pattern, expertly shared by Ana Jiménez Crochet in her detailed and easy-to-follow video tutorial. Giving full credit to Ana for this wonderful design, the pattern guides you step-by-step to make an adorable crochet snowman that’s perfect for decorating your Christmas tree, gifting to loved ones, or even brightening your home all winter long.
Simple Crochet Snowman Free Pattern For Holiday Gifts
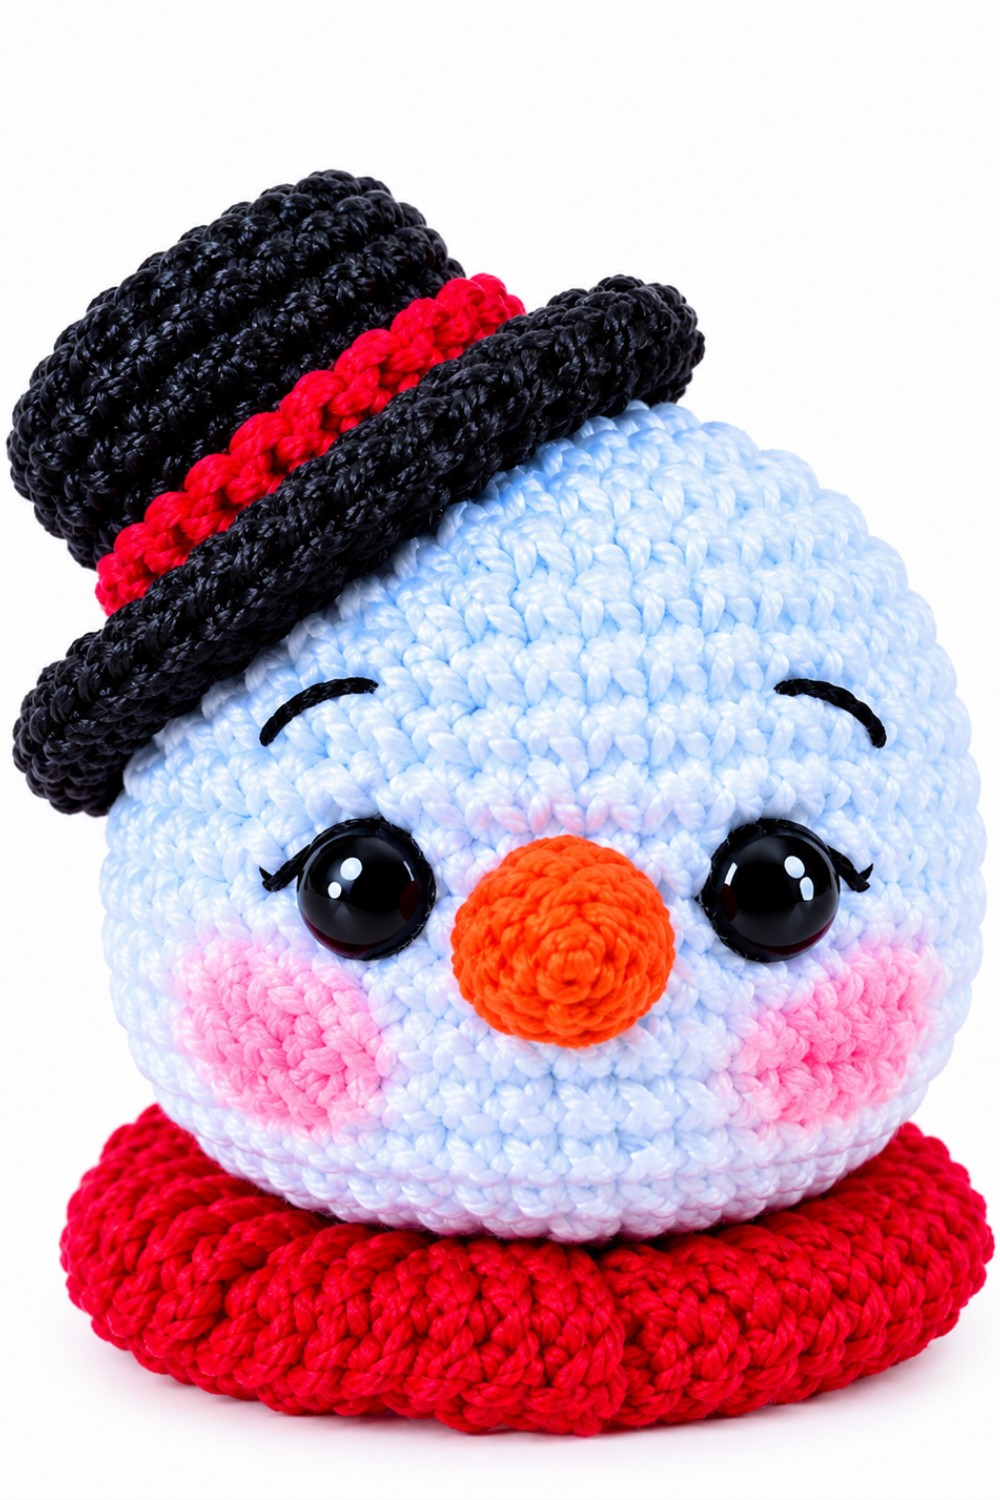
The Crochet Snowman Pattern results in a soft, plush ornament with a classic round shape that perfectly captures the cheerful essence of a snowman. Its wide, spherical body is nicely textured by tight, uniform stitches, forming a smooth yet tactile surface that’s pleasing to touch. The standout design features include expressive safety eyes subtly sunk into the face for an endearing look, a tiny, well-placed carrot-shaped nose, and delicately embroidered eyebrows and eyelashes that add personality and charm. The snowman wears a tiny black hat with a vibrant red rim, giving it a festive and stylish finishing touch.
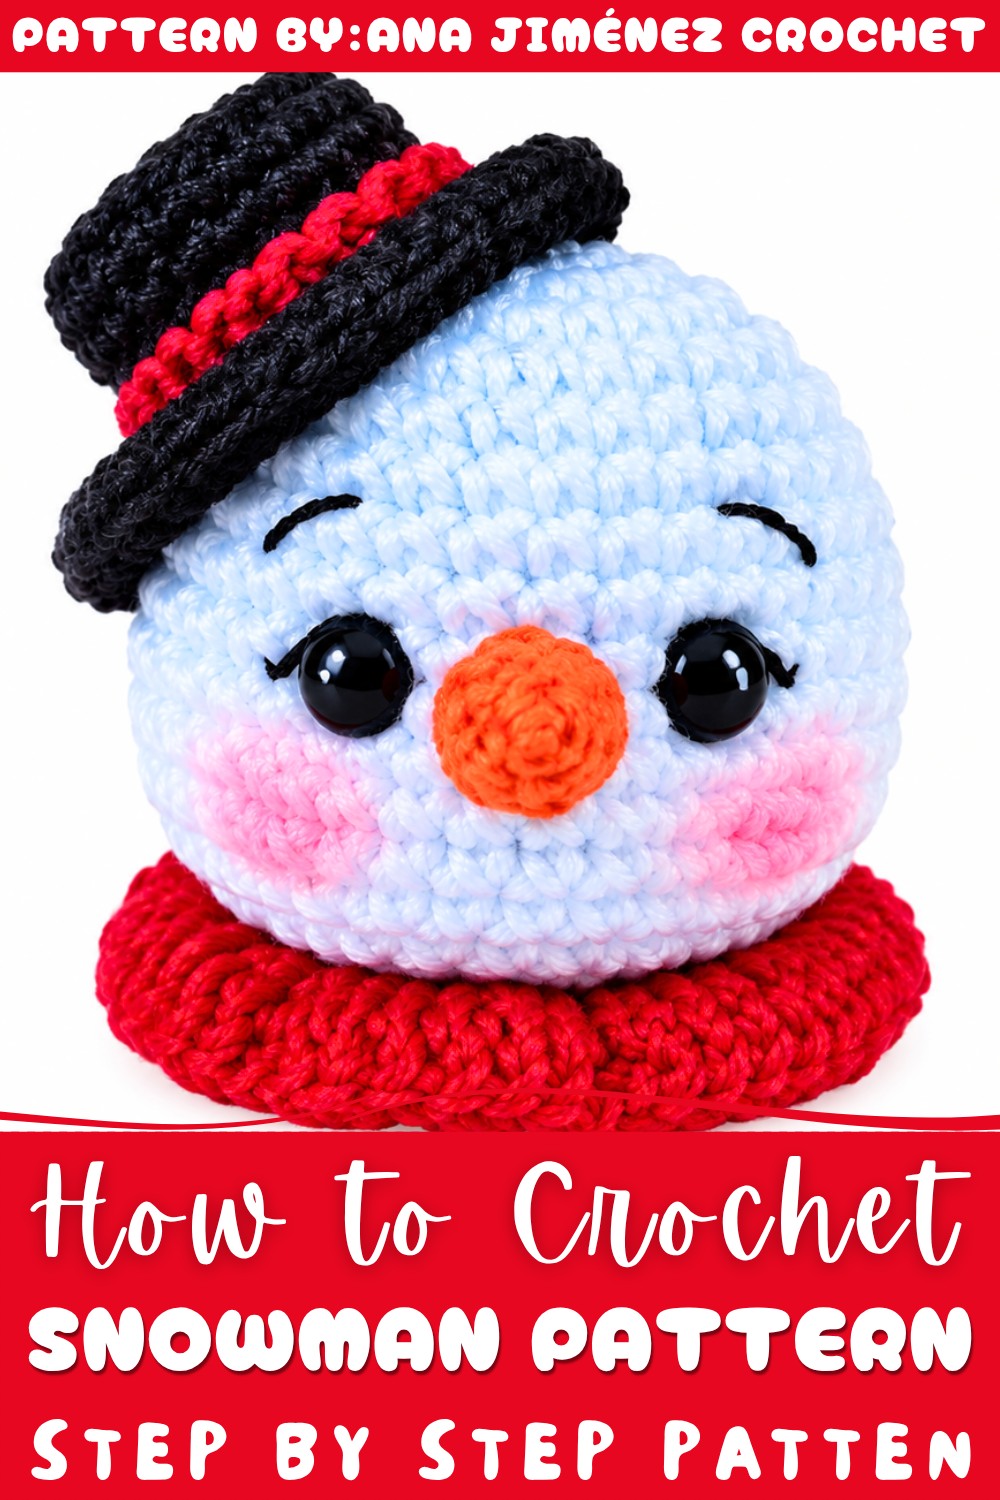
This little creation is not only beautiful but versatile. It suits anyone looking to enhance their holiday décor with a handcrafted touch or those wishing to gift something made with care and warmth. Its compact size makes it ideal as a tree ornament, a sweet desk companion during the cold months, or a heartwarming stocking stuffer. Plus, the soft yarn material ensures it’s lightweight and safe around children and pets. Whether you’re an experienced yarn enthusiast or new to making cozy decorations, this pattern offers an enjoyable and rewarding project that brings holiday magic to life.
Adorable Crochet Snowman Free Pattern
This snowman ornament project delivers a festive touch for the holiday season, combining essential crochet techniques with decorative detail. The methodical approach ensures that each step—from shaping the head and assembling facial features to completing the scarf and hat—contributes to a cheerful, well-defined decoration. Working in spirals, precise placement of safety eyes, color changes, and structured embroidery are all included for clarity. Tightly stitched fabric, firm stuffing, and careful finishing methods yield a sturdy ornament with personality. Attention is given to every element: the carrot nose provides a playful accent, while the hat and scarf evoke classic winter style. Final assembly uses both yarn and adhesives, securing all parts for lasting durability. With detailed instructions for every round and stage, this project suits both new and experienced crocheters looking to produce a charming seasonal addition for home or gift-giving.
Quick Overview Of Pattern
- Begin with a magic ring and crochet the snowman’s head, working foundational increases and subsequent shaping.
- Insert safety eyes at the recommended point for proper spacing and facial balance.
- Make a small carrot-shaped nose and embroider charming details.
- Attach a scarf using creative use of front loops and simple stitches.
- Crochet a classic top hat, including a color change for the band.
- Assemble with a hanging loop and add the finishing blush for charm.
Notes
- Use continuous spiral rounds (no slip stitch joins for head/hat unless noted).
- Always use a stitch marker to mark the first stitch of each round.
- Switch yarn colors as instructed in the hat and scarf for a professional result.
- Firm, even stuffing will give your ornament the best shape.
- Facial embroidery brings the snowman to life—take your time with these details.
Skill Level
Beginner to Intermediate
Familiarity with amigurumi, magic ring, increases/decreases, working in front/back loops, color changes, and basic embroidery.
Materials
- White yarn (for head)
- Red yarn (for scarf + hat band)
- Black yarn (for hat)
- Gold or desired color thread/yarn (for hanging loop)
- Orange yarn/thread (for nose)
- Thin black thread (for face embroidery)
- Crochet hook (to match yarn, ~2.0–2.5 mm)
- Safety eyes (~6 mm)
- Stuffing (polyfill)
- Tapestry needle
- Stitch marker
- Glue or silicone (for hat)
- Blush (makeup or textile)
- Scissors
Measurements / Sizing
- Ornament is about 6–8 cm tall (not including hanging loop)
- Sizing may vary with yarn and hook
Gauge & Stitch Pattern
- Gauge: Not critical. Stitches should be tight so stuffing does not show.
- Stitch: Standard single crochet (sc) throughout unless otherwise stated.
Stitch Abbreviations
| Abbreviation | Meaning |
|---|---|
| MR | Magic ring |
| ch | Chain |
| sc | Single crochet |
| inc | Increase (2 sc in 1 st) |
| dec | Decrease (sc 2 together) |
| BLO | Back loop only |
| FLO | Front loop only |
| sl st | Slip stitch |
| st(s) | Stitch(es) |
Special Stitches
- Magic Ring: Begin amigurumi with an adjustable starting circle.
- Invisible Decrease: Work decrease through front loops of next 2 stitches.
- Color Change: Finish the previous stitch with the new color before continuing.
- Half Double Crochet (hdc): Yarn over, insert into stitch, yarn over, pull up loop (3 loops on hook), yarn over and pull through all 3 loops.
The Crochet Pattern
Head (White Yarn)
- Round 1: Magic ring, 6 sc in ring. (6)
- Round 2: 6 inc (2 sc in each st around). (12)
- Round 3: (1 sc, inc); repeat around. (18)
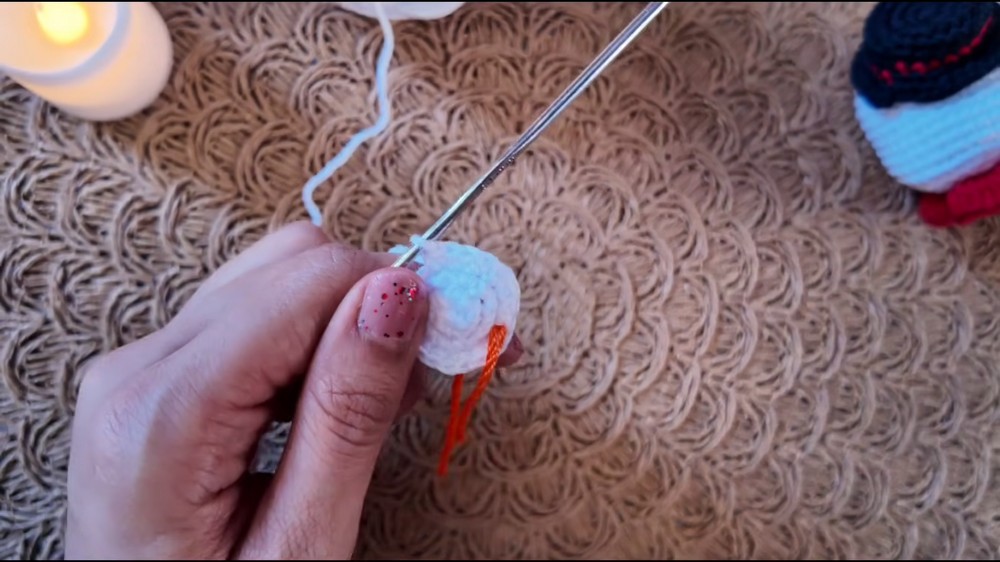
- Round 4: (2 sc, inc); repeat around. (24)
- Round 5: (3 sc, inc); repeat around. (30)
- Round 6: (4 sc, inc); repeat around. (36)
- Rounds 7–11: 1 sc in each st. (36 sts per round)
- Round 12: (5 sc, inc); repeat around. (42)
- Rounds 13–15: 1 sc in each st. (42 sts per round)
- Insert Safety Eyes: Place between rounds 11 and 12, with 6 sc between (count in round 11).
- Round 16: (5 sc, dec); repeat around. (36)
- Round 17: (4 sc, dec); repeat around. (30)
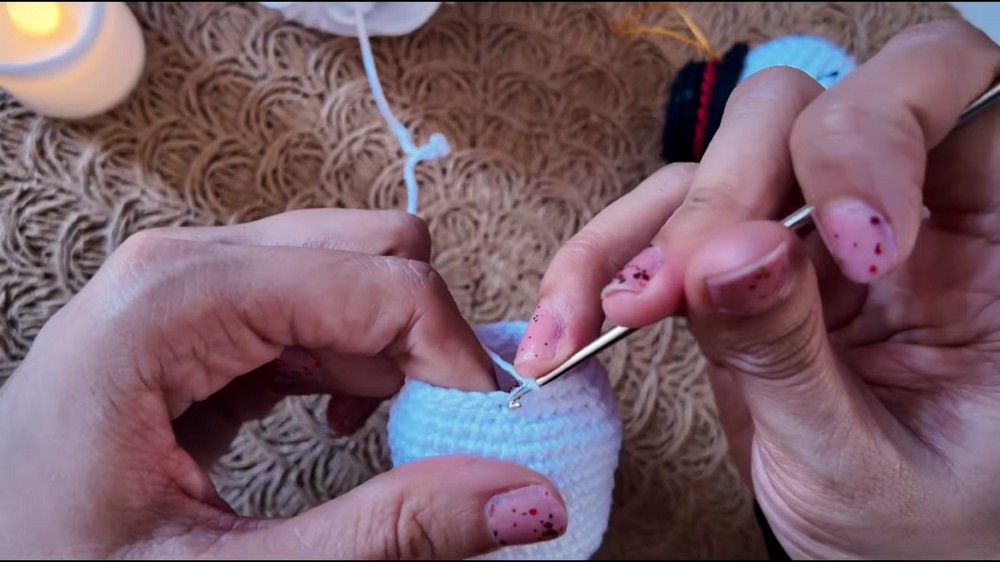
- Round 18: (3 sc, dec); repeat around. (24)
- Round 19: (2 sc, dec); repeat around. (18)
- Round 20: 1 sc in each st, BLO. (18)
- Stuff Firmly Now.
- Round 21: (1 sc, dec); repeat around. (12)
- Round 22: 6 dec. (6)
- Finish off, leaving a long tail.
Finishing Head:
- Use a tapestry needle, weave through the front loops of remaining 6 sts, pull to close.
- Insert into head and out near an eye, pull gently to sink the eyes, tie off, and hide the end inside.
Carrot Nose (Orange Yarn)
- Round 1: Magic ring, 4 sc. (4)
- Round 2: (1 sc, inc); repeat around. (6)
- Round 3: 6 sc, sl st to finish round. (6)
- Cut, leaving a long tail. Sew nose centered between and below the safety eyes.
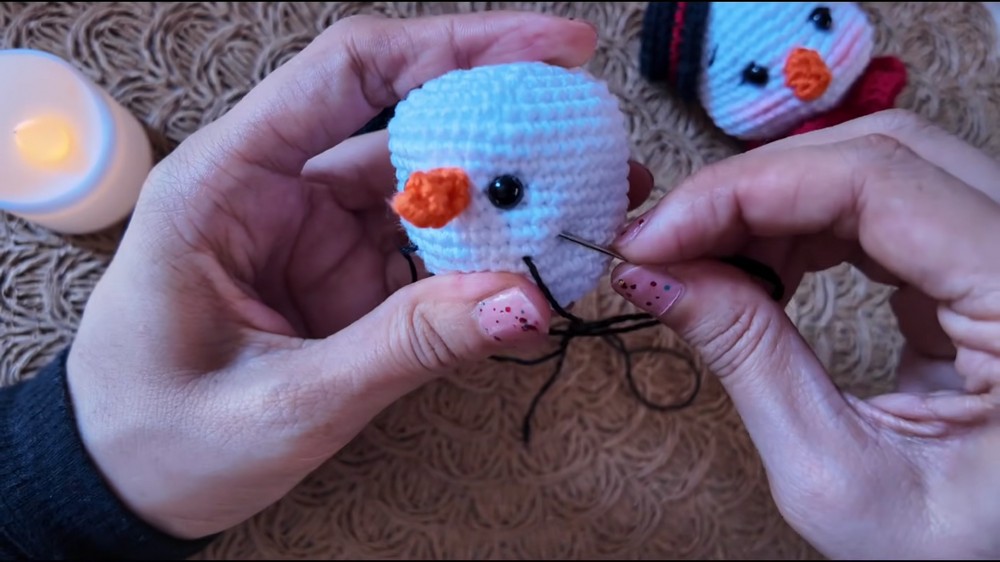
Facial Details (Black Thread)
- Eyebrows:
Embroider above each eye, 3 rounds up. - Eyelashes:
Drop 1 round down, shift 2 stitches over, and embroider a small lash at each outer eye corner.
Scarf (Red Yarn)
- Attach red yarn to the front loops left over from round 20 around the base of the head.
- Row 1: Work 3 sc in each st all the way around (creates a ruffled look).
- Row 2: Sl st in first st, ch 2, then 1 hdc in every st around.
- Sl st to finish, cut yarn, and weave in the end.
Hat (Black and Red Yarns)
- Round 1: With black, magic ring, 8 sc. (8)
- Round 2: 8 inc (2 sc in each st). (16)
- Round 3: (1 sc, inc); repeat around. (24)
- Round 4: 1 sc in each st, BLO. (24)
- Round 5: 1 sc in each st (through both loops). On last st, change to red.
- Round 6 (Red): 1 sc in each st. On last st, change back to black; cut off red.
- Round 7 (Black): (2 sc, inc) in FLO; repeat around. (32)
- Round 8: (3 sc, inc) (through both loops); repeat around. (40)
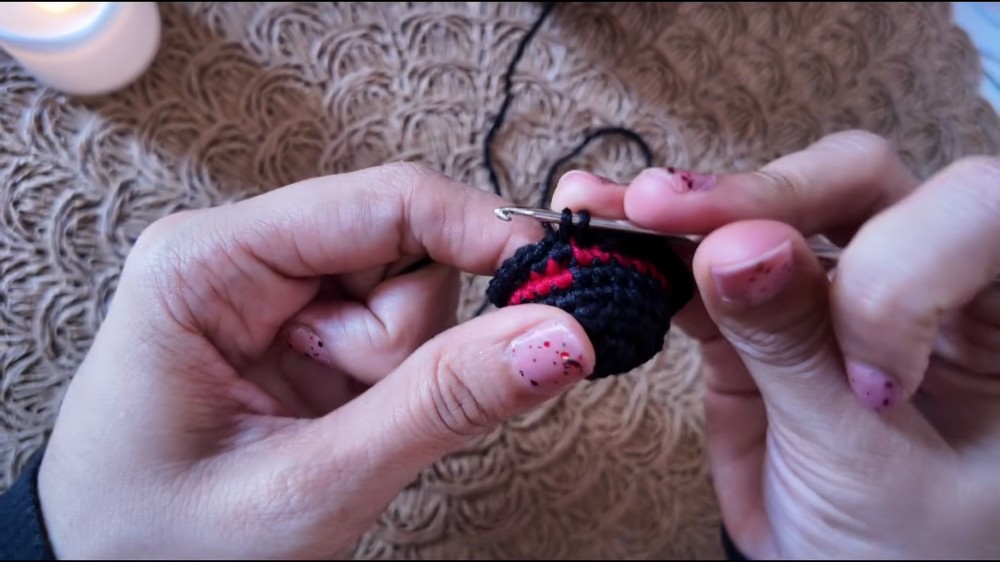
- Sl st to finish, cut thread, and weave in ends.
Assembly & Finished Size
- Pendant Loop:
Thread a length of gold/contrasting yarn from the base to the top. Pull ends through the hat’s side and knot or stitch to secure a loop. - Attach Hat:
Add glue or silicone to the inside bottom edge of the hat. Press onto snowman's head, at a tilt for charm. Pull the hanging loop through a stitch of the hat for extra security. - Blush:
Use fingertip or cotton swab to apply blush to the cheeks below the eyes. - Finished size: 6–8 cm from base to tip of hat (excluding hanging loop).
Conclusion and Ending Words
Completing the snowman ornament involves structured rounds, precise assembly, and decorative finishing, resulting in a cheerful seasonal item suitable for display or gifting. Expressive features—such as embroidered eyebrows, prominent carrot nose, and textured scarf—heighten its character. Each section specifies stitches, transitions, and color changes, ensuring clarity throughout the process. The combination of crocheted elements, embroidered details, and secure attachment techniques means the ornament maintains its shape and integrity over time. Blush applied to the cheeks adds warmth, while the pendant loop allows for versatile hanging. With all instructions followed, the result is both visually appealing and thoughtfully constructed. This project fosters attention to detail, rewarding patience with a decorative piece that stands out during the winter months. Skillful assembly and finishing are emphasized, encouraging neat workmanship from start to completion.