Stitch a tiny accessory with this Crochet Mini Cat Pouch Free Pattern and keep coins or treasures together in a cute holder for daily use.
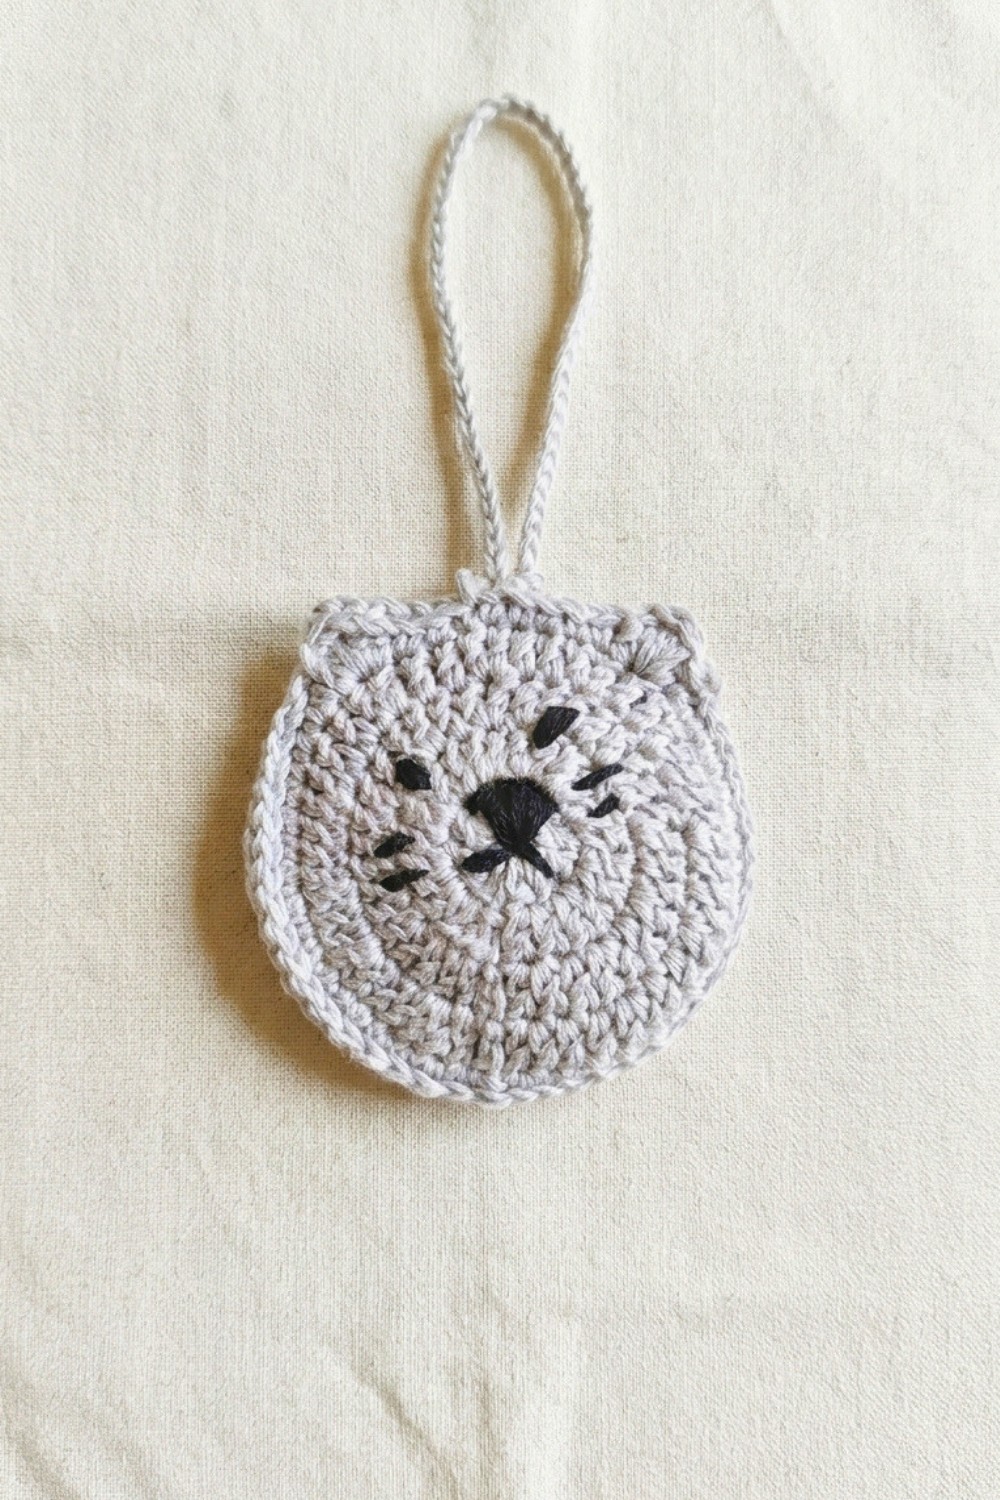
Want to crochet something interesting and adorable? A tiny little pouch that looks just like a cute kitten, complete with delicate ears and sweet whiskers. This mini cat pouch is not only charming but also super useful! You can keep your coins, keys, earbuds, or lipstick safely stored inside. The delightful design comes from Mônica Guimarães, and you can find the original tutorial on her YouTube channel, Mônica Moda Crochê. The Crochet Mini Cat Pouch Pattern is a fun project that results in this lovable, soft pouch that folds neatly and closes with a special string, making it easy to carry around.
Simple Crochet Mini Cat Pouch Free Pattern For Small Accessories
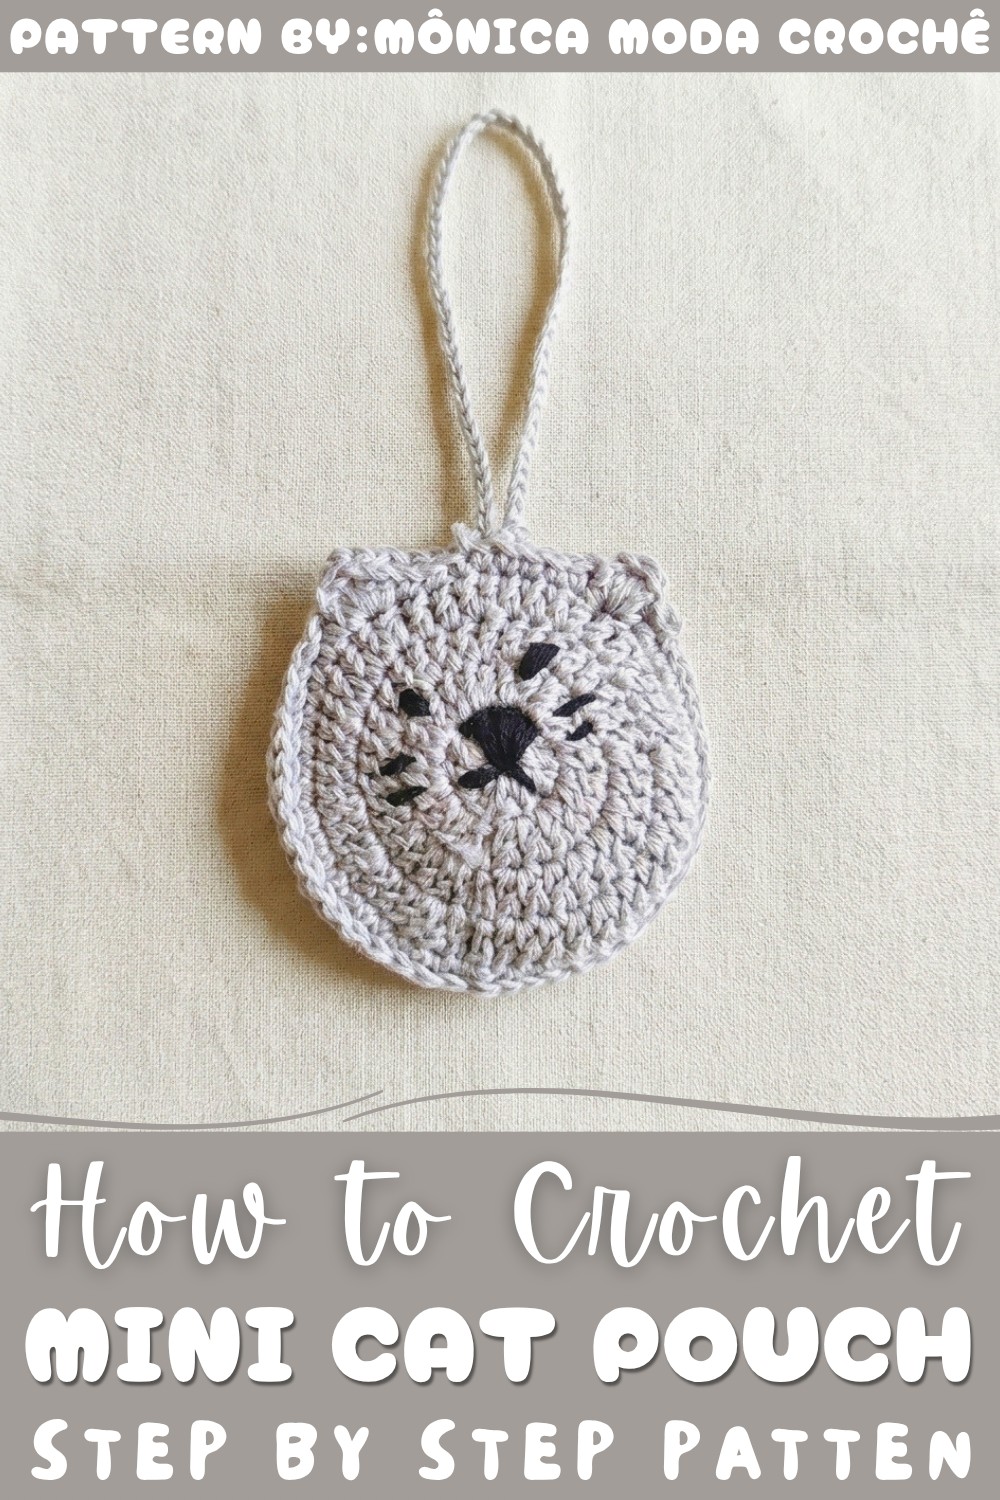
This pouch captures the playful spirit of a kitty with its delicate face details, cute button eyes, and tiny whiskers, giving it a warm and friendly look. It is small enough to fit in your handbag or backpack but big enough to hold little essentials, making it perfect for daily use or gifts for cat lovers. The craftsmanship shines in how the two halves come together to form a sweet little bag, turning a simple yarn project into a useful treasure.
If you enjoy making things that are both charming and practical, this mini cat pouch will brighten your day and add a lovely touch to your accessories. For a step-by-step, easy-to-follow guide, be sure to check out the free Crochet Mini Cat Pouch Pattern. It’s a delightful way to create a cute keepsake that you’ll cherish or share with friends.
Crochet Cat Pouch Keychain
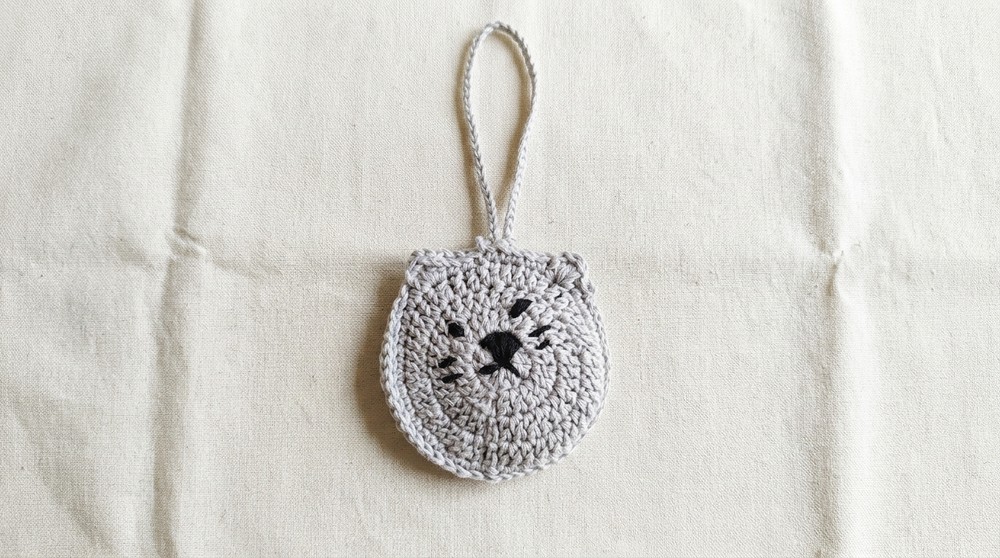
This crochet pouch depicts a charming cat face with distinct three-dimensional ears and embroidered facial details. Its size enables storage for earbuds, lipstick, coins, or similar small items. Constructed from two circular panels with increases and unique ear shaping, the pouch secures with two drawstring-style cord closures. Embroidery gives character to the cat’s face. Detailed instructions for each round and assembly step ensure consistency and a polished finish. The following guide establishes both the structure and embellishments, enabling you to achieve a secure, functional, and visually captivating mini accessory entirely by hand.
Quick Overview Of Pattern
- Begin with a closed round base using chain stitches and a slip stitch.
- Shape each circle with increase rounds worked in double crochet.
- Form the cat’s ears directly on the outer round using a mix of stitches.
- Make two identical pieces for the front and back of the pouch.
- Embroider the nose, mouth, eyes, and whiskers.
- Seam the two panels together with slip stitches.
- Add drawstrings as corded closures at the top opening.
Notes
- Work all rounds seamlessly unless otherwise stated.
- Each new round begins with a chain stitches “height” (counts as first double crochet).
- Stitch counts are referenced by “high point” (double crochet), “half point” (half double crochet), “low point” (single crochet), and “double high point” (treble crochet).
- For best results, maintain even tension throughout.
- Ensure facial embroidery is completed before joining the pouch panels.
- The drawstring cords are made separately and looped for secure closure.
Skill Level
Confident Beginner
- Comfort with basic shaping stitches (single, half double, double, and treble crochet).
- Experience joining rounds and working slip stitches.
- Able to follow stepwise increases and basic embroidery.
Materials
- Gray amigurumi yarn (or desired main pouch color)
- Anne yarn: thinner black or contrast color for facial embroidery
- Crochet hook: nickel-plated size 4 (approx. 2.5 mm)
- Tapestry needle
- Scissors
Measurements / Sizing
- Finished pouch: Approx. 9–10 cm across (ear-to-ear) when constructed with amigurumi yarn and suggested hook
- Depth: 1.5–2 cm (depends on joining tension)
- Cord length: Front closure (8 chains), back closure (50 chains)
Gauge & Stitch Pattern
- Gauge: Not critical, but work tightly to avoid large gaps.
- Basic fabric: Standard double crochet (US terminology)
- Edge and ear shaping: Uses single, half double, double, and treble crochet
- Embroidery: Nose (triangle), eyes (thread-wrapped knots), whiskers (lines)
Stitch Abbreviations
| Abbreviation | Meaning |
|---|---|
| ch | Chain |
| sl st | Slip stitch |
| sc | Single crochet (low point) |
| hdc | Half double crochet |
| dc | Double crochet (high point) |
| tr | Treble crochet |
| inc | Increase (2 in one stitch) |
Special Stitches
- Increase (inc): Work 2 stitches of the same type in one base stitch.
- Ear motif: Sequence of hdc, dc, tr in one stitch, then reverse order down next stitch.
The Crochet Pattern
Base Circle (First Part)
- Chain 5 and join with a sl st into the first chain to form a ring.
Round 1
- Ch 3 (counts as first dc/high point).
- Work 11 dc (high points) into the circle for a total of 12 dc.
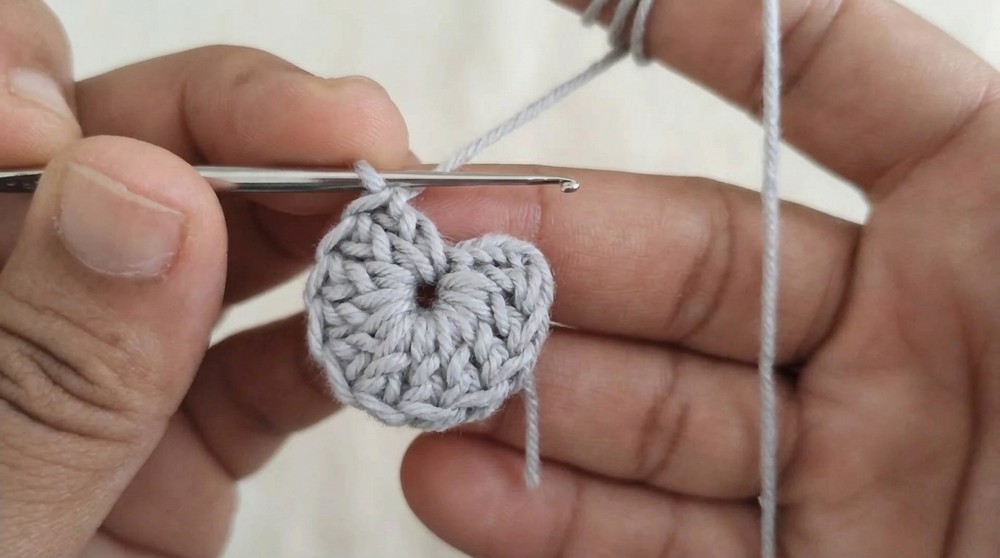
- Sl st into top of initial ch-3 to join.
Round 2
- Ch 3 to begin.
- In each stitch: Work 2 dc (high points) (inc) around. (Total: 24 dc)
- Sl st in top of initial ch-3 to join.
Round 3
- Ch 3.
- In the next stitch: 2 dc (high points) (inc).
- In the following: 1 dc. Then 2 dc in the next.
- Continue pattern (1 dc, 2 dc) around.
- Sl st to join.
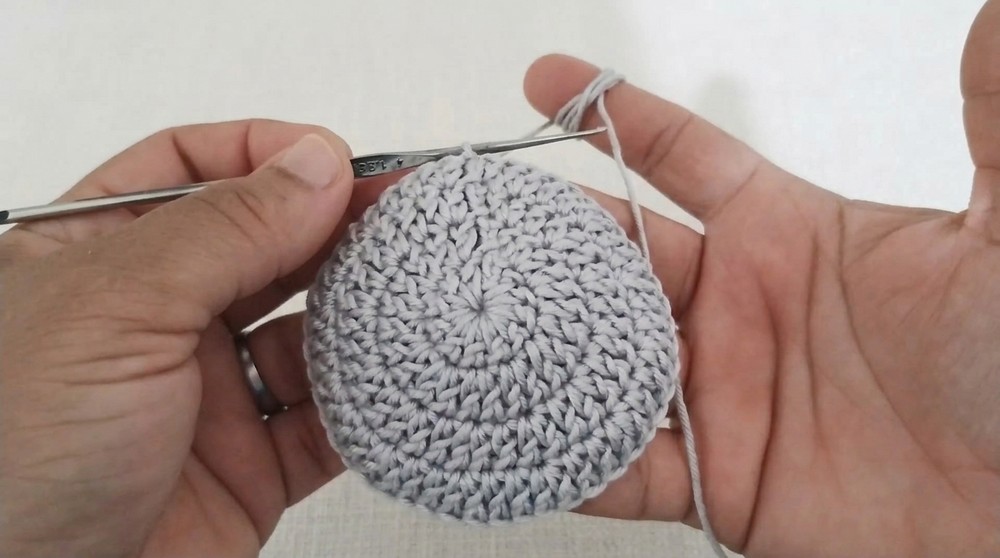
Round 4
- Ch 3, 1 dc in next st (2 dc in consecutive stitches).
- In next stitch: 2 dc (increase).
- Proceed: 1 dc, 1 dc, 2 dc; repeat until round end.
- Sl st to join. The circle is now complete for one side.
Edge and Cat Ears
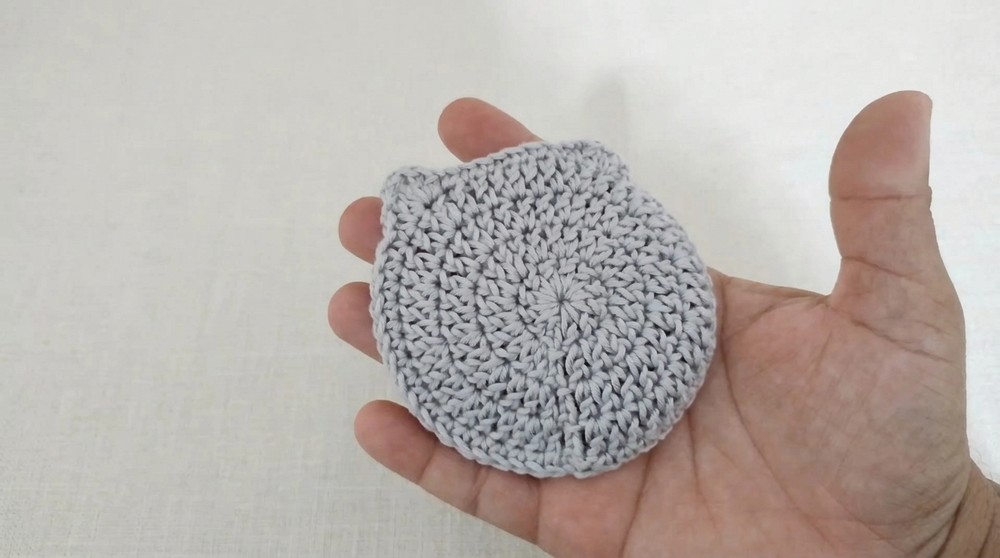
Round 5 (Base Edge & First Ear)
- Ch 1, sc (low point) in same st.
- Sc in next 18 sts (19 sc total).
- Ch 1.
- In the next st: hdc, dc, tr (all in same st).
- Continue in next st: dc, hdc, ch 1, sc to shape first ear.
- Work sc in next 8 sts (across the top center).
Second Ear
- Ch 1.
- In next st: hdc, dc, tr all in same st.
- In next st: dc, hdc, ch 1, sc (downward slope of ear).
- Finish edge with 19 sc.
- Sl st to first sc, ch 1, fasten off and cut yarn.
Repeat Entire Sequence For Second Piece
- Work one more piece exactly as above; both will form the front and back of the pouch.
Facial Details (Embroidery)
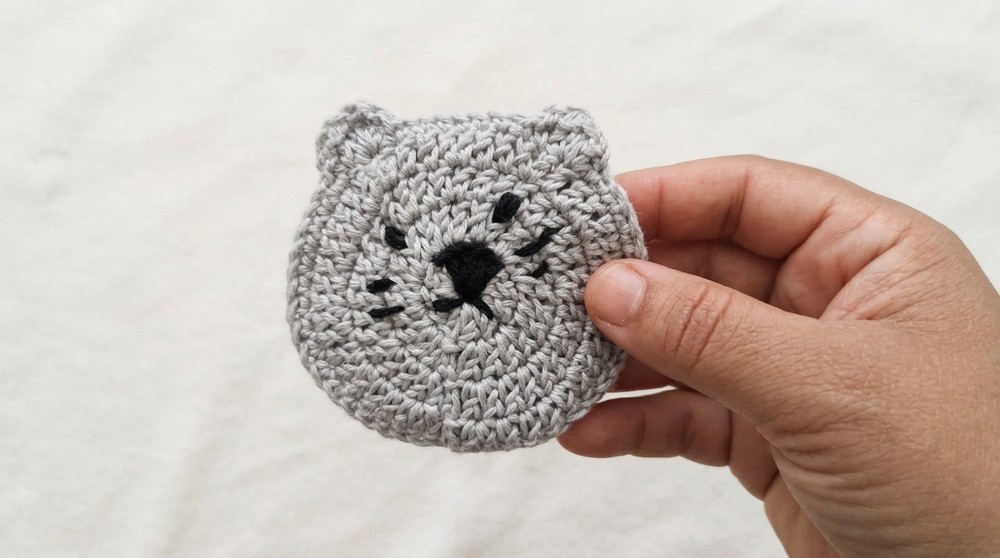
- Using black Anne yarn and tapestry needle:
Nose
- Center: Embroider a filled triangle for the snout, stitching across until solid.
Mouth
- Add downward lines from each corner of the nose.
Eyes
- Above the nose, make 4 wraps per eye (thread-wrapped French knots).
Whiskers
- On the same row or just below nose, stitch single-strand lines extending outward on each side.
- Finish and secure all tails on the back (wrong) side.
Assembly & Drawstrings
Joining Pouch Halves
- With right sides facing out, align both pieces.
- Use gray yarn to sl st through both layers all around the edges, leaving the top (ear-to-ear curve) open.
- When finished, ch 1, fasten off, and hide any yarn tails inside.
Drawstring Cord Closures
Smaller Cord (Front Closure):
- Attach gray yarn 3 sc in from top left opening edge.
- Sc, then ch 8.
- On opposite edge, sc to secure; ch 1, cut yarn, and weave in ends.
Larger Cord (Back Closure):
- On the opposite (back), attach yarn 3 sc from the left edge.
- Sc, then ch 50.
- Sc on the opposite side, ch 1, cut yarn.
To close pouch: Thread the longer cord through the smaller loop.
Finished Size
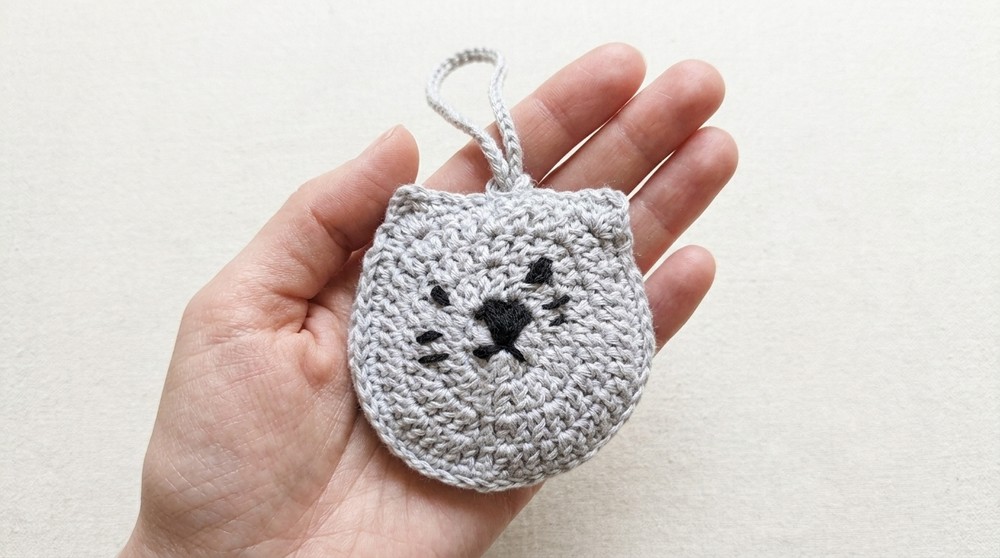
- Pouch measures about 9–10 cm wide by 9–10 cm tall including ears.
Conclusion and Ending Words
This minimalist cat pouch is structured for both functional utility and whimsical appeal. Each round and shaping element, from the expanding double crochet circle to ear formation, aligns to form a balanced and visually neat silhouette. Embroidered facial features add expression, bringing out the kitty’s personality. Closing cords installed at staggered heights provide security and practicality for carrying or closure. Thoughtful assembly, secure slip stitch joining, and sturdy yarn choices make the final pouch ideal for repeated use. By following each step carefully, from the initial circle to the closing cord, you achieve a compact and durable result. Once the cords are in place and excess fibers are hidden, the pouch is ready for everyday essentials, gifting, or accessorizing personal items. Each pouch will reflect your attention to detail, creativity, and commitment to quality finishing.