Refresh your hair accessories with this Crochet Scrunchie Free Pattern and stitch a colorful tie for ponytails, buns, and relaxed daily outfits.
Want to crochet something interesting and both practical yet stylish? The joy of creating a useful accessory that brightens your day is truly satisfying. Full credit goes to Mônica Guimarães from the YouTube channel Mônica Moda Crochê for her clear and engaging tutorial that guides you through making a beautiful Crochet Scrunchie Pattern. This scrunchie is much more than a simple hair tie—it’s a soft, decorative piece that adds flair to any hairstyle. With its handmade appeal, it’s also a wonderful gift idea, perfect for surprising friends or family with a personal touch.
Trendy Crochet Scrunchie Free Pattern For Everyday Hairstyles
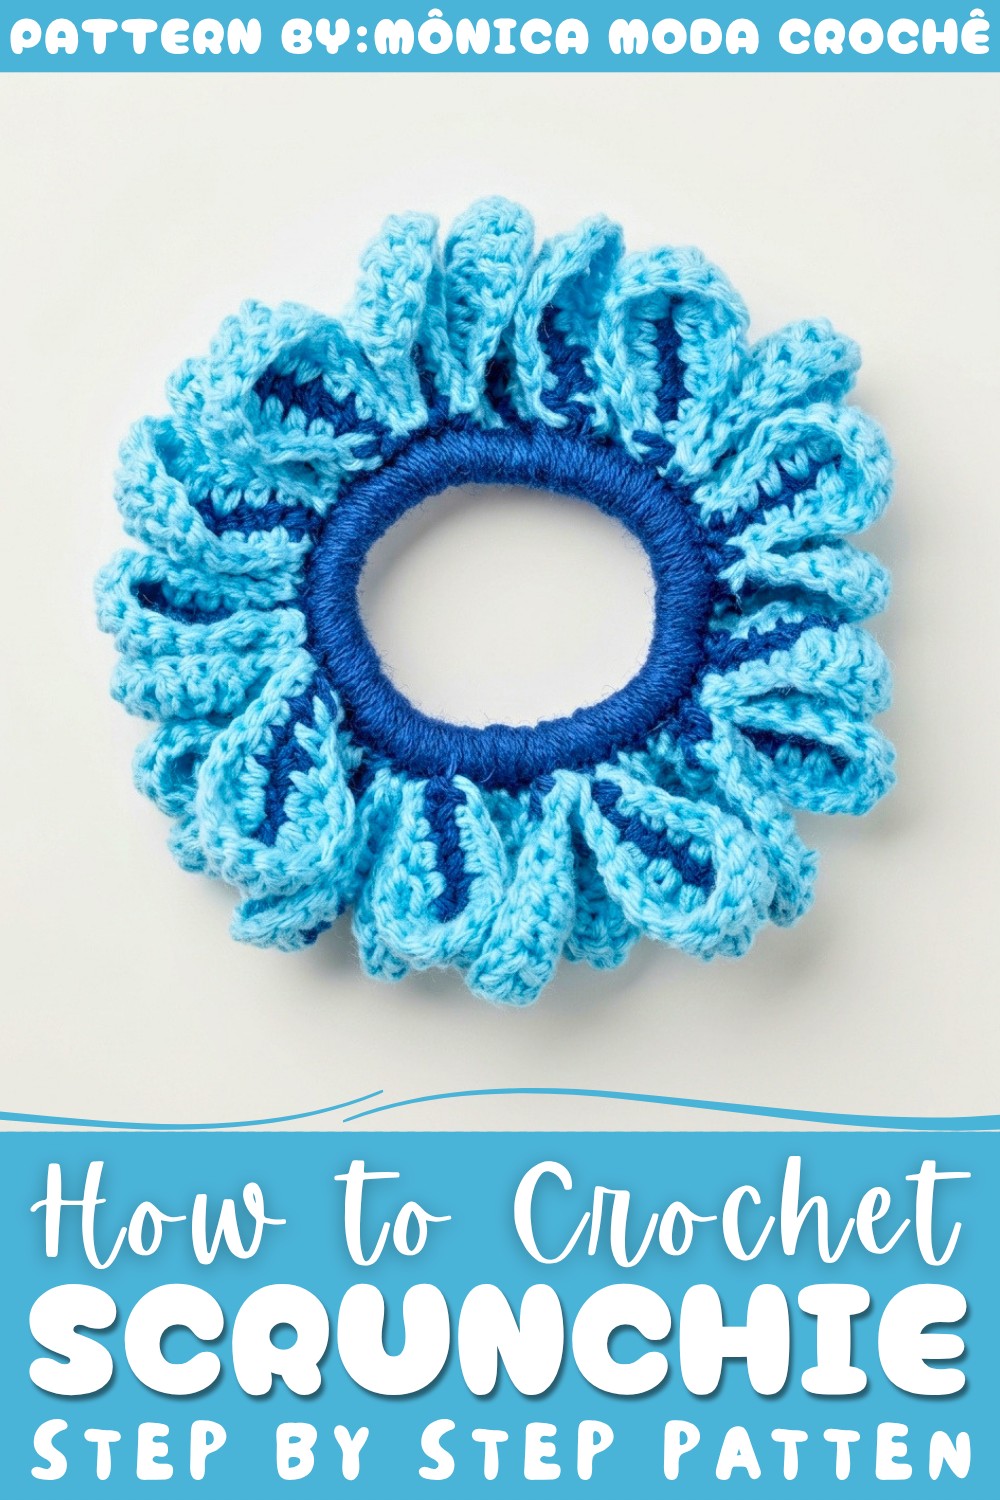
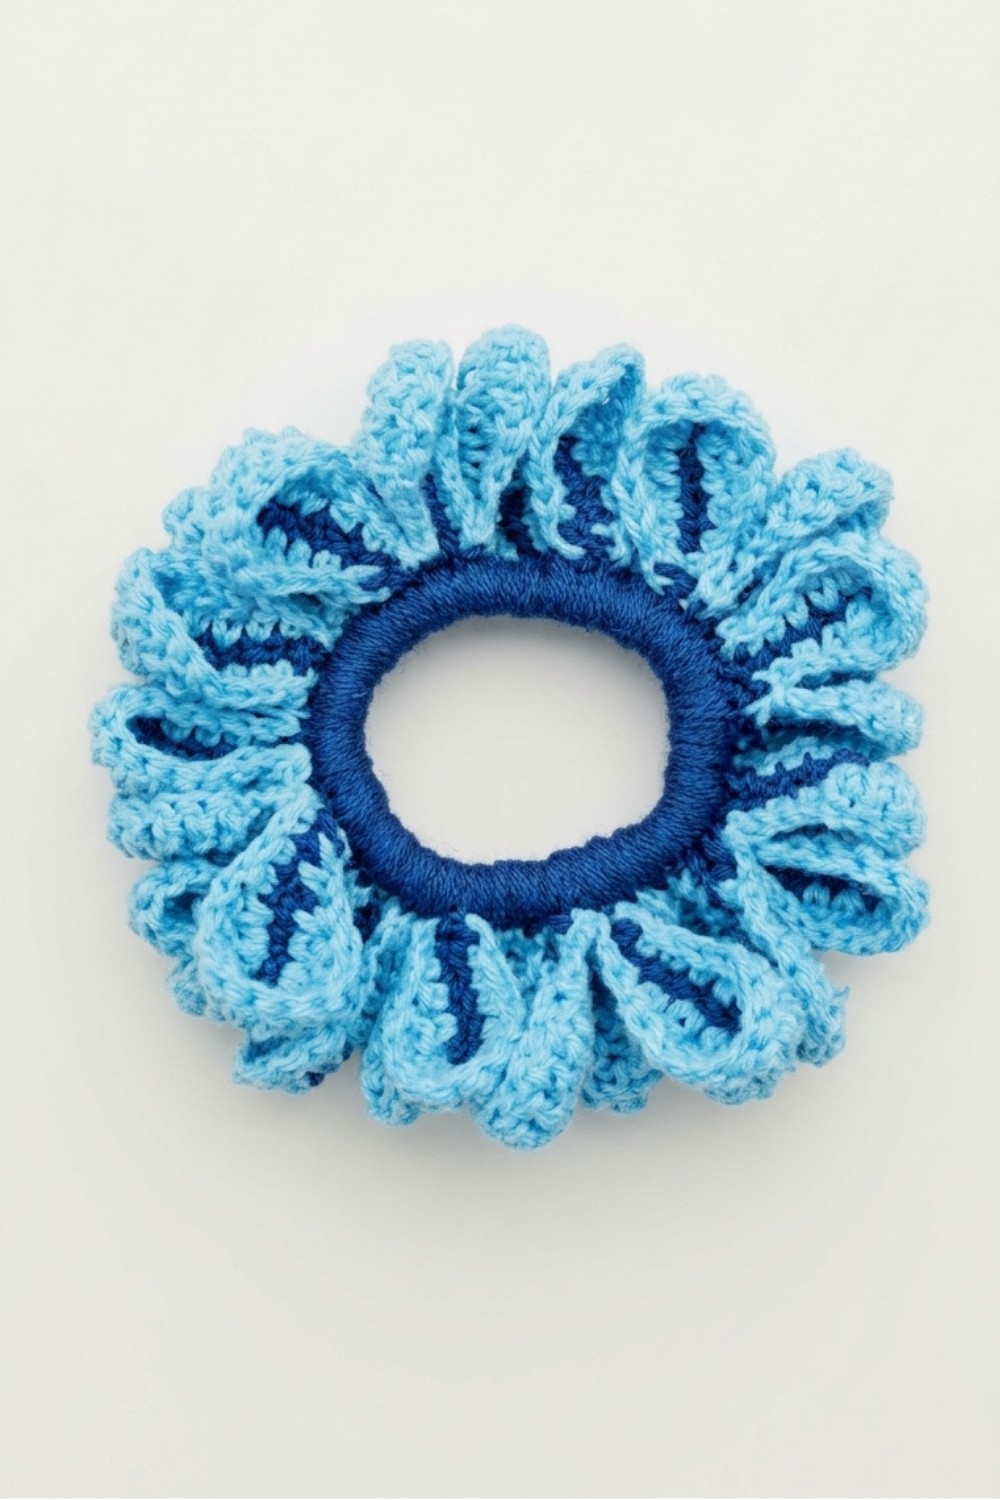
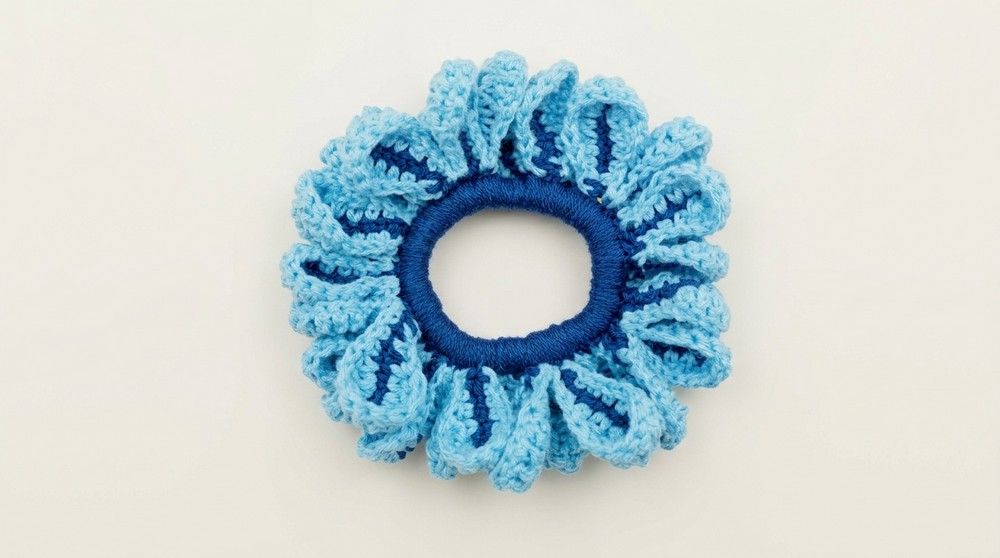
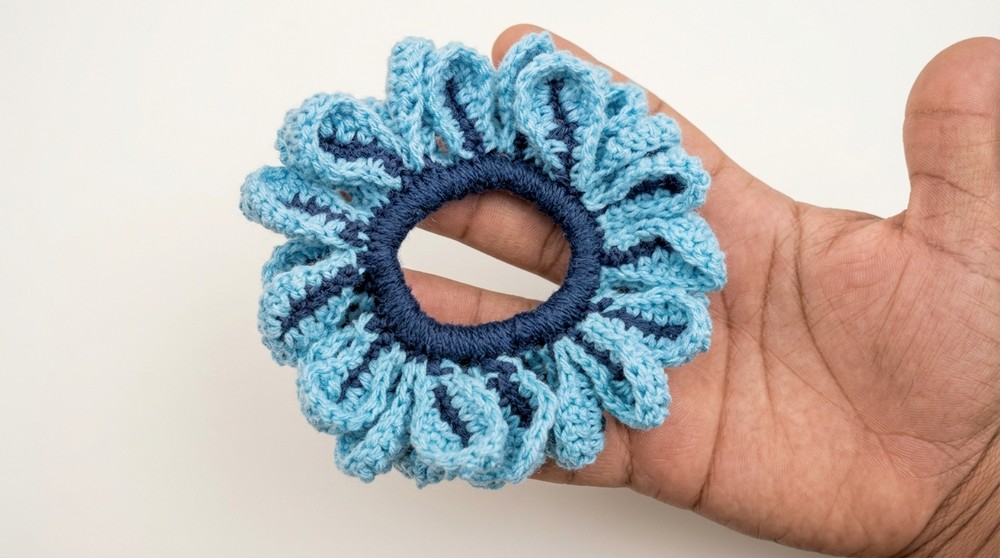
This Crochet Scrunchie Pattern brings together beauty and usefulness effortlessly. Designed to wrap securely around an elastic band, the scrunchie offers a comfortable yet stylish hold. Its standout feature is the elegant two-tone color scheme, which highlights the textured stitchwork and gives it a rich, layered look. The pattern reveals a series of delicate, leaf-shaped loops that create volume and a subtle floral impression. The rounded form and plush texture make it ideal not only for ponytails or buns but also as a cute wrist accessory.
What makes this design so special is its varied stitch technique, combining simple and double crochet stitches for an attractive, tactile finish that feels soft but substantial. This versatile scrunchie adds a splash of handmade charm to daily hairstyles or makes a delightful present that reflects thoughtfulness and care. Perfect for anyone wanting to brighten their accessory collection, this pattern turns ordinary hair ties into little pieces of art.
Beginner-Friendly Crochet Scrunchie Free Pattern
A crocheted hair tie offers a stylish solution for accentuating hairstyles while also adding a personalized touch to everyday accessories. By using two contrasting or coordinating colors of fine yarn and a simple elastic hair band, a textured, ruffled scrunchie is easily achieved. Classic crochet techniques paired with careful attention to even stitch placement yield a finished hair tie that looks charming and possesses a satisfying stretch, holding hair comfortably in place. This project allows for creativity in color selection, resulting in a variety of potential looks—ranging from subtle to bold. Completing the floral-inspired ruffle design on both sides of the elastic creates a hair accessory that is both fashionable and functional for daily wear.
Quick Overview Of Pattern
- Cover the elastic band with tightly placed single crochet stitches (low points) to form an even foundation.
- Work a first ruffle layer using chain loops and rows of single crochet to form petals around the band.
- Add a decorative second ruffle layer with a leaf/petal design using single crochet, half-double crochet, and double crochet stitches in a contrasting color.
- Finish the hair tie by slip stitching, fastening off securely, and weaving in ends for a polished accessory.
Notes
- Make sure the first round of stitches fully covers the elastic with no visible spaces, as this ensures neatness and durability.
- Consistent stitch tension prevents the hair tie from becoming too stiff or too loose.
- Adjust the colors to your preference—you may use pastels, brights, or even variegated yarn for different effects.
- A finer yarn will produce a more delicate look, while a thicker thread will yield a fuller ruffle.
- Weave in all loose ends carefully so the hair tie is comfortable for everyday use.
Skill Level
Beginner to Confident Beginner:
This pattern requires familiarity with basic crochet stitches—including chain, single crochet, half-double crochet, double crochet, slip stitch—and working in the round. Attention to detail with stitch placement is important for an even, symmetrical result.
Materials
- Elastic hair band (neutral color, about 4-5 cm in diameter)
- Yarn or thread: Two colors (e.g., dark blue for the base and light blue for the leaf petals); Anne or similar lightweight cotton is recommended.
- Crochet hook: 2 mm (nickel-plated is suggested for smooth gliding)
- Scissors
- Tapestry needle (for weaving in ends)
Measurements / Sizing
- Scrunchie diameter (unstretched): Approximately 6 cm
- Ruffle width: Approximately 2.5–3 cm from center
- The finished hair tie will stretch comfortably to fit standard ponytails and buns.
Gauge
- Gauge is not critical for this project.
- Aim for tight, uniform stitches for the first round to ensure the band is covered completely.
- Maintain even tension in all rounds for a consistent ruffle.
Stitch Abbreviations
- ch – chain
- sc – single crochet
- hdc – half double crochet
- dc – double crochet
- sl st – slip stitch
Special Stitches
- Increase (inc): Two stitches worked in the same base stitch to add fullness when needed (especially in petal tips).
- Mirror sequence: Repeat the same stitch sequence in reverse order on each side of a petal for symmetry.
The Crochet Pattern
Covering the Elastic Base
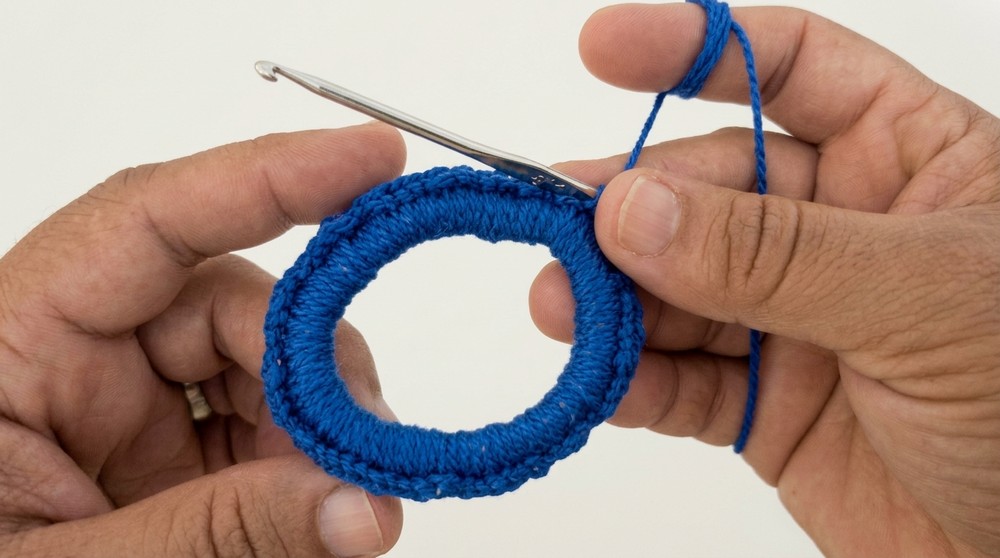
Round 1: Cover Elastic With Single Crochet
- With dark blue yarn, make a secure slip knot.
- Fasten the knot tightly onto the elastic band using a sc stitch.
- Continue to work sc stitches all the way around the elastic, pushing each stitch closely together to avoid gaps.
- Ensure the entire elastic is completely covered and adjust stitches as needed for perfect coverage.
- When the entire circumference is covered, close the round by joining with a sl st to the first sc.
Creating the First Ruffle Layer (Dark Blue)
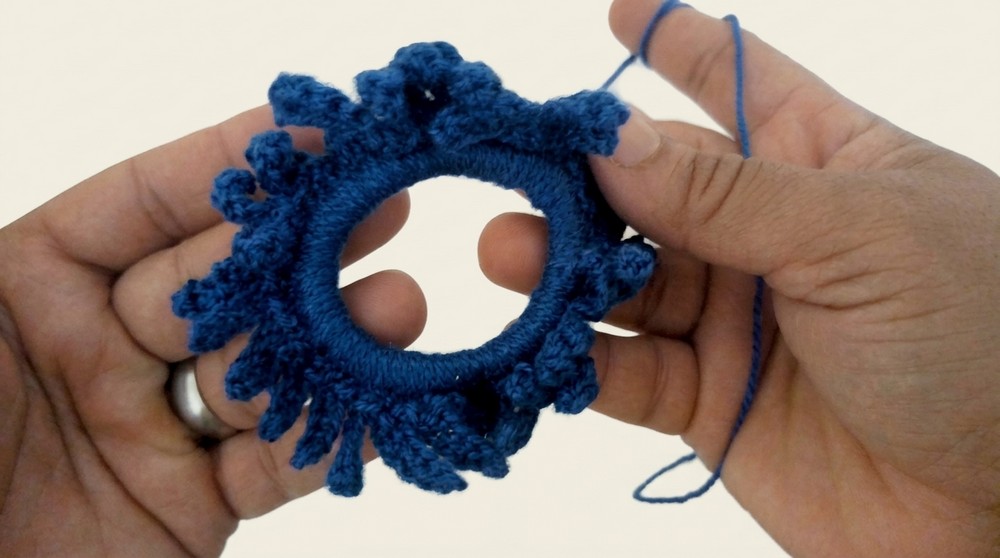
Round 2: Ruffle Foundation
- Begin the first ruffle by forming petals around the band:
- Ch 6, forming a chain “stem.”
- Skip the first chain from the hook.
- In the remaining five chains, work sc stitches (1 sc per chain), resulting in 5 single crochets worked down the chain.
- To anchor the petal, find the next base sc, and join with a sl st.
- In the following base stitch, make another sl st to provide a firm anchor for the next chain.
Continue the Ruffle Layer
- Repeat:
- Ch 6
- Skip 1 chain
- 5 sc down the chain
- Join with sl st into the next base stitch
- Continue around the entire base, creating evenly spaced petals or ruffles.
- After completing the round, finish with two sl sts.
- Ch 1, cut yarn, and carefully weave in the dark blue ends.
Adding the Second Layer (Light Blue)
Petal Layer Set-Up
- Attach light blue yarn with a knot at or near your starting point.
- Pick up the yarn and insert the hook through one of the base sc stitches of a ruffle.
- Secure the yarn with a sc to lock it in place.
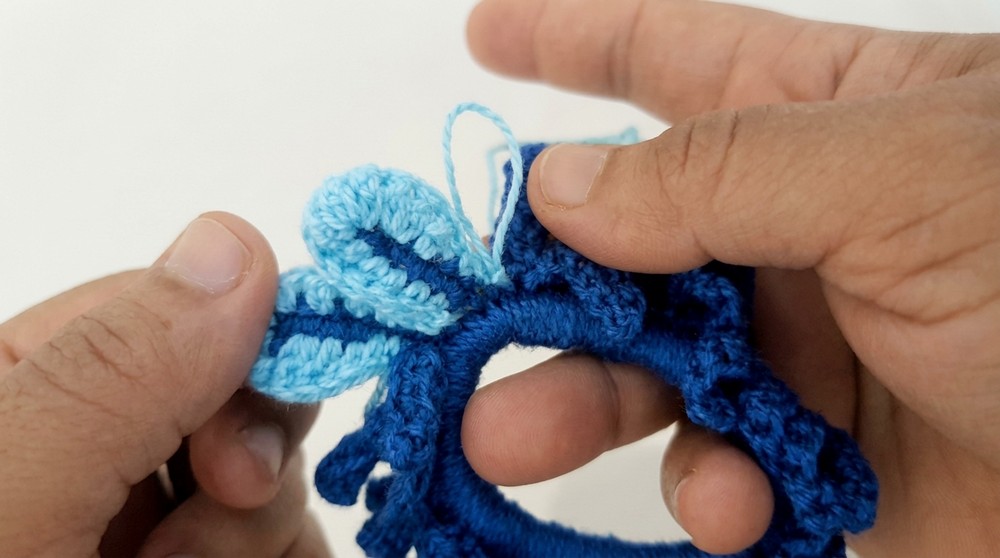
Working the Leaf/Petal (Repeat for Each Ruffle)
- At the base:
- Work 1 sc in the first stitch of the ruffle's chain.
- Continue with 1 sc in the next stitch.
- Midsection:
- In the next stitch, work 1 hdc.
- Next, 1 dc in the following stitch.
- In the next, work 2 dc in the same stitch for increased ruffle fullness.
- Top Peak:
- At the very top of the petal (end of chain), work 3 dc in the same space—this exaggerates the tip of the petal and gives a full shape.
- Descending Side (Mirror Sequence):
- In the following stitch, work 2 dc in the same space.
- Next, 1 dc in the following stitch.
- Then, 1 hdc in the next.
- Finish with 1 sc in each of the next two stitches at the base.
- Securing the Petal:
- Join the bottom of the petal to the next available base stitch with sl st.
- Make a sl st in the next base stitch to ensure the petal edge is tight before starting the next one.
Repeat for All Ruffles
- Continue this process around the entire scrunchie, working the petal stitch pattern over every ruffle base.
- The top edge will gently ruffle and flare, forming a two-tone effect and soft, leaf-like petals all around.
Assembly & Finished Size
- Once the last petal is complete, securely fasten off the yarn and pull the tail through.
- Use a tapestry needle to neatly weave in all yarn ends, tucking them under existing stitches to avoid scratching or unraveling.
- Confirm that the scrunchie stretches smoothly and returns to its original size without losing shape.
- The finished accessory should measure close to 6 cm in diameter and stretch readily to wrap hair comfortably.
Conclusion and Ending Words
Completing a two-color crochet hair tie reinforces both practical skills and a sense of artistry, offering a result that is as visually appealing as it is functional. The combination of a solid, fully covered base and intricately layered ruffles forms an attractive accessory suitable for a variety of hair types. By following each phase—from securing the initial loop to the detailed addition of second-layer petals—crafters gain a deeper appreciation for structure and texture. The thoughtful use of color not only elevates the look but can also be tailored for coordination with outfits or occasions. With secure weaving and tidy finishing, the hair tie stands up to regular use, making it a reliable and stylish addition to one’s collection of handmade accessories.