Keep exploring Crochet Granny Square 3d Flowers Pattern for colorful creative crochet work that adds charming texture and beauty to handmade projects.
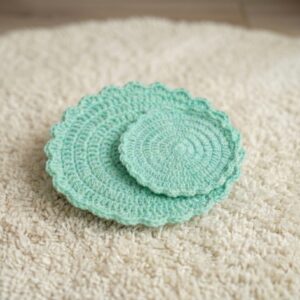
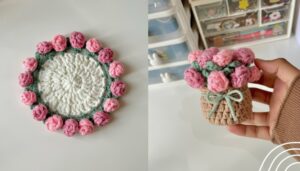
Not every crochet project looks the same, and some stand out for their textured floral detail. The Crochet Granny Square 3d Flowers Pattern is a method where small square pieces are worked with raised flower shapes that appear on the surface, giving a soft layered look. This style is often used in blankets, tote bags, cushion covers, and wall pieces that need a warm handmade feel.
Granny Square 3D Flowers Pattern for Crochet Use in Home Styling

The repeating stitches feel calming and give a steady rhythm that many people enjoy during free time. Each square can use different colors, and the raised petals add depth that makes the surface look lively and detailed without being too complex. Small squares can be joined in many ways, allowing a single idea to turn into a larger item such as a shawl or decorative cover. Color combinations and stitch height variations help give each piece a different personality, making it suitable for personal home decoration or thoughtful handmade gifts.

Step-by-Step Square Crochet Pattern
Materials
Yarn
- Type: DK-weight yarn (Category 3)
- Colors:
- Main color (used for the base square, rounds 1–7)
- Contrasting color (used for decorative rounds 8–10)
- Edge color (optional for the last round, round 11)
Hook
- Crochet hook: 3.5–4.0 mm (adjust size based on yarn choice)
Additional Supplies
- Scissors
- Yarn needle (for sewing in ends)
- Stitch markers (optional, highly recommended for beginners)
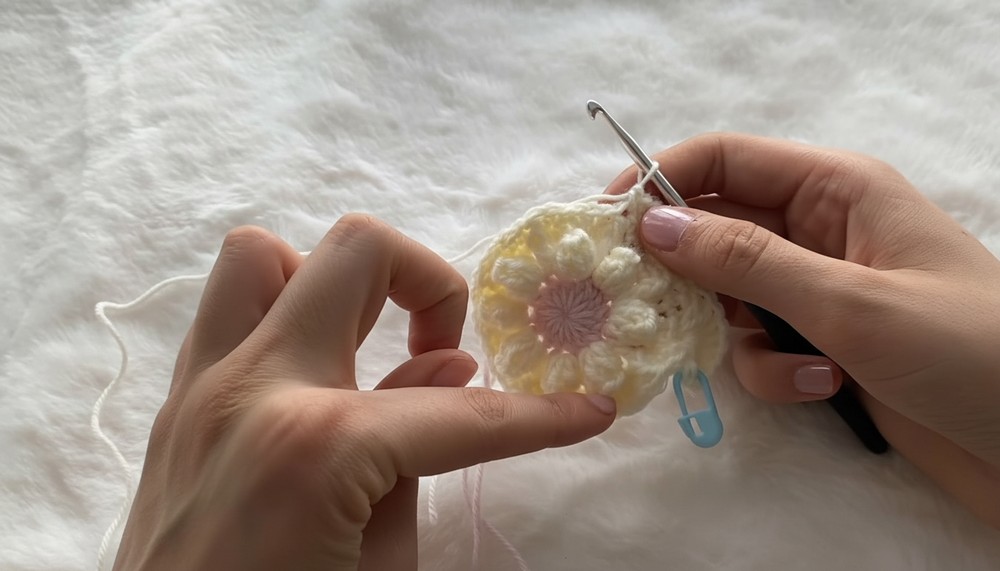
Special Techniques
Magic Ring
The magic ring allows you to create a tight, closed center for circular shapes, ensuring a neat appearance.
Standing Double Crochet
This technique replaces the slip stitch and chain to start a new round, giving a clean edge and stable stitches.
Post Stitches
Front post and back post stitches add texture and depth to the square, giving it a 3D effect.
Skill Level
This pattern is advanced beginner to intermediate. You should be comfortable with:
- Working in the round
- Double, half double, and single crochet stitches
- Post stitches (front post and back post techniques)
- Chains and skipped stitches
Pattern Instructions
Round 1: Foundation Ring
- Create a Magic Ring: Wrap the yarn around your fingers, make a loop, and secure it with a slip knot.
- Ch 2 (does not count as a stitch).
- Work 16 dc into the magic ring, ensuring you incorporate the loose strand into all stitches.
- Place a stitch marker into the first dc to mark the beginning of the round.
- Tighten the magic ring to close the center securely.
- Sl st into the first dc to close the round.


Round 2: Double Crochet Clusters
- Start with a slip knot and insert your hook into the loop.
- Work a standing double crochet into any stitch from round 1.
- Into the same stitch, work 4 more dc (5 dc in total).
- Loosen the working loop and insert the hook into the first dc made in this cluster. Pull the working loop through to create a cluster stitch.
- Ch 4, skip the next stitch, and repeat the cluster (5 dc, pull through the first dc).
- Continue around, alternating between clusters and chain-4 spaces until the end of the round.
- Close with a sl st into the first cluster stitch.

Round 3: Single Crochets with Offset Double Crochets
- Ch 1, and work 2 sc into the first chain-4 space. Place a stitch marker into the first sc.
- Work 1 dc into the skipped stitch from round 1 (this creates an offset texture).
- Insert the hook only into the skipped stitch, not the chain space beside it.
- Work 2 more sc into the same chain-4 space.
- Move to the next chain-4 space and repeat 2 sc, 1 dc (into skipped stitch from round 1), 2 sc.
- Continue around using this method.
- End the round with a sl st into the first sc and ch 1.
Round 4: Front Post Double Crochets for Texture
- Ch 1, make 1 sc into the same stitch where the slip stitch was made. Place the stitch marker here.
- Make 1 sc into the next stitch.
- Work 1 front post double crochet (FPdc) around the dc from round 3, inserting your hook behind it.
- Pull the FPdc slightly to the side to expose the next stitch.
- Work 1 sc into each of the next two stitches (both sc from round 3).
- Ch 1, skip a stitch, and repeat around:
- 2 sc, FPdc around dc, 2 sc, ch 1.
- End with a sl st into the first sc.

Round 5: Decorative Shells
- Ch 2, and work 9 dc into the first chain-1 space. Place a stitch marker into the first dc.
- Skip 2 stitches, then work 1 sc into the FPdc from round 4.
- Skip 2 stitches, and work 9 dc into the next chain-1 space.
- Repeat: 9 dc in chain-1 space, skip 2 sts, 1 sc in FPdc, around the round.
- Close with a sl st into the first dc.

Round 6: Back Post Single Crochet with Chains
- Ch 2, and work 1 back post single crochet (BPsc) around the FPdc from round 4. Place the stitch marker into this stitch.
- Ch 4, and make 1 BPsc around the next FPdc from round 4.
- Repeat: BPsc into FPdc, ch 4 around the round.
- End with a sl st into the first BPsc.
Round 7: Decorative Peaks
- Ch 1, and work 1 sc into the first BPsc.
- Work 2 hdc into the first chain-4 space, followed by 3 dc in the same space.
- Ch 1, skip the BPsc, and repeat in the next chain-4 space:
- 3 dc, 2 hdc, adding texture to the peaks.
- End with a sl st into the first sc.
Round 8: Flower Petals in Contrasting Color
- Switch to the second color and begin with a slip knot.
- Work 2 tr into the first chain-1 space, followed by ch 2.
- Repeat sets of 2 tr and chain spaces in each chain-1 space around.
- Attach petals with a sc between larger groups of stitches.

Round 9: White Detailing
- Switch to white yarn and create textured borders using:
- 1 front post single crochet around petal edges.
- 2 sc between chain spaces.

Round 10: Final Edging
- Complete the square with single crochet rounds around all edges for stability.
- Use chain spaces to create small decorative points at corners.
Finishing the Pattern
- Weave in all loose ends using a yarn needle.
- Block the square to flatten it and enhance stitch definition.
Final Words
This crochet square offers versatility in use for various projects. The combination of post stitches and decorative shells creates a textured, standout design. Play with colors for added vibrancy and dimension!

Tips to Maintain the Pattern
- Count Your Stitches: Miscounted stitches can throw off the texture; double-check after each round.
- Use Stitch Markers: Mark the first stitch of each round to avoid confusion.
- Adjust Tension: Keep tension consistent for a neatly finished square.
- Experiment: Vary yarn types and colors to customize your square to fit larger or smaller projects.