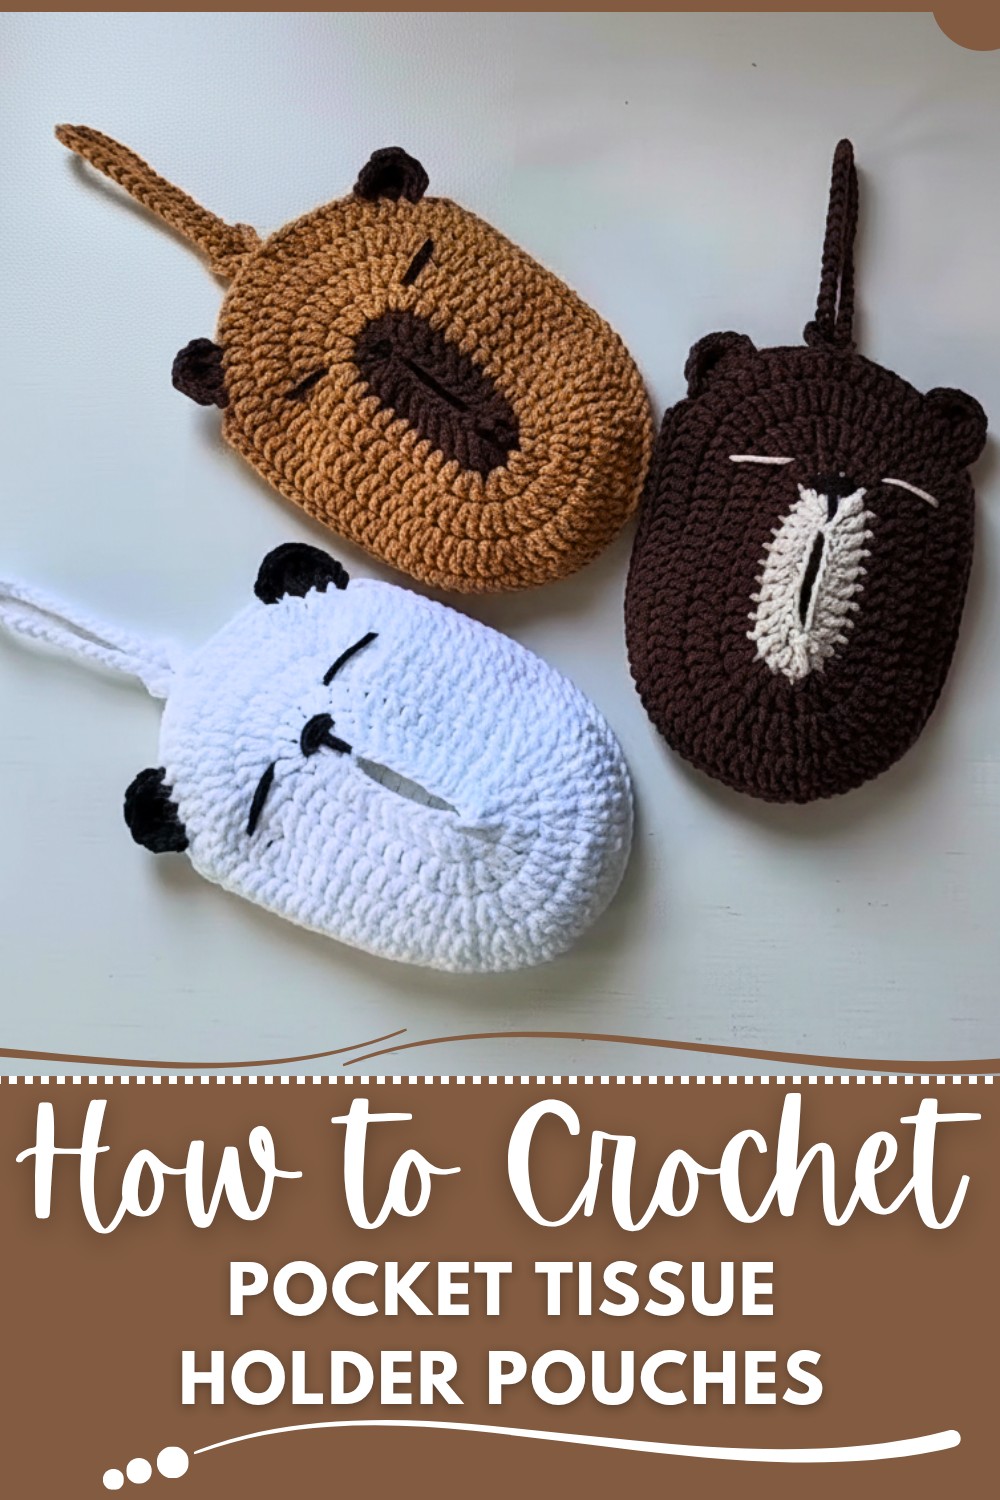
Stay organized with this Free Crochet Pocket Tissue Holder Pouches Pattern that is stylish, practical, & perfect for everyday use or gifting.
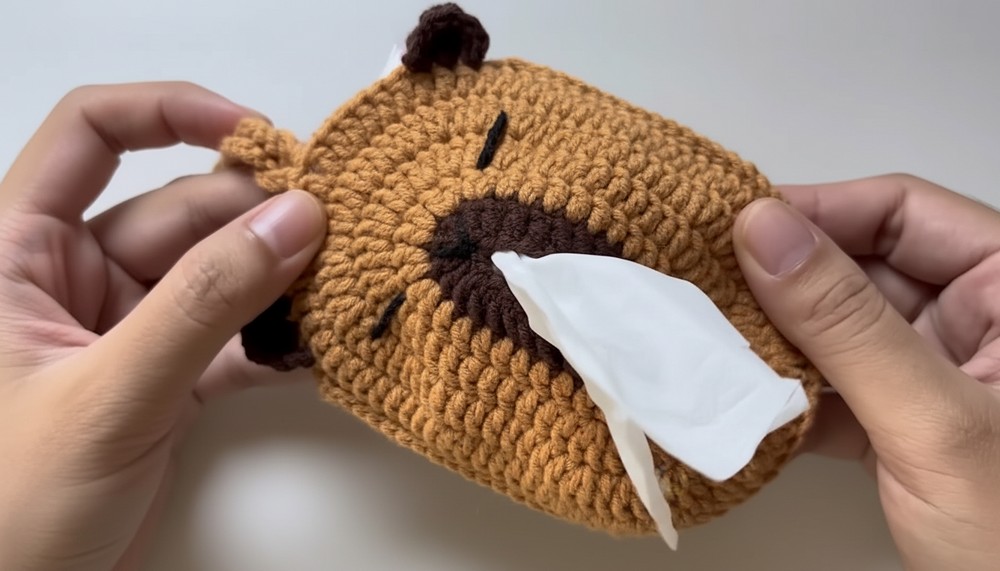
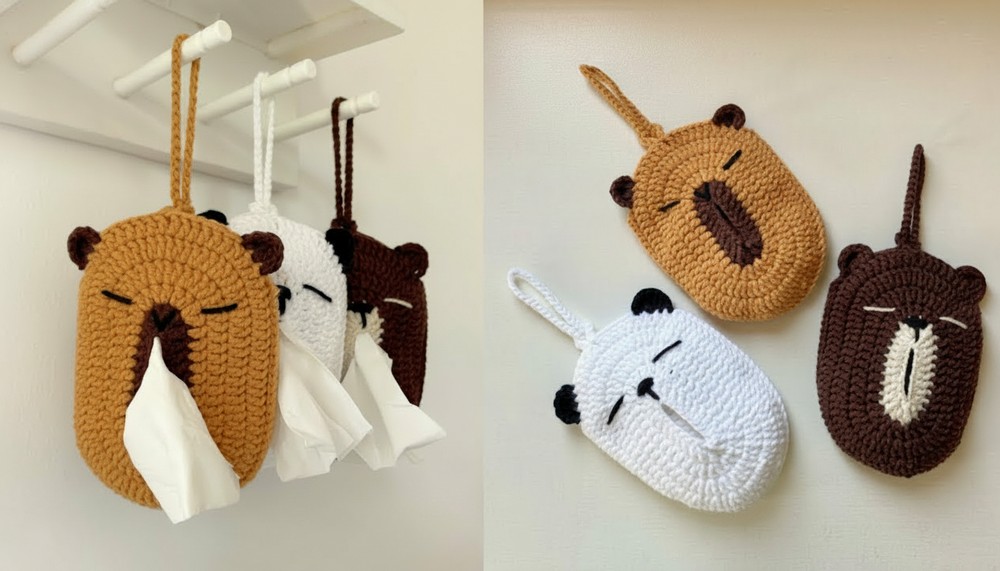
Soft, portable, and surprisingly stylish, these small pouches turn ordinary pocket tissues into a neat, modern accessory you’ll actually enjoy carrying. A free crochet pocket tissue holder pouches pattern gives you the freedom to crochet your own practical organizers without spending extra on store-bought covers. They slip easily into handbags, backpacks, car compartments, or office drawers, keeping tissues clean, protected, and always within reach.
Learn to Crochet Pocket Tissue Holder Pouches for Everyday Use
Perfect for winter sniffles, allergy season, or teary moments during movies and goodbyes, this pattern is both useful and comforting. They also shine as quick, thoughtful gifts—ideal for teachers, coworkers, or friends who appreciate small, handmade touches in daily life.
Because this use only a little yarn, this pattern is great for using up leftovers from other projects, making it a budget-friendly and low-waste option. A free crochet pocket tissue holder pouches pattern helps you stay organized, express your personality, and add a cozy detail to everyday essentials with minimal effort.
Special Features
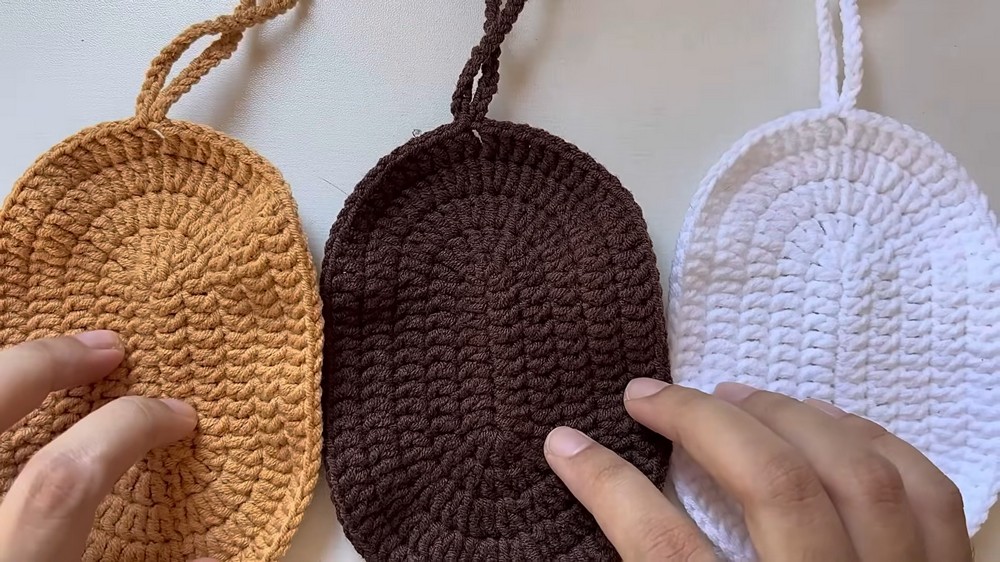
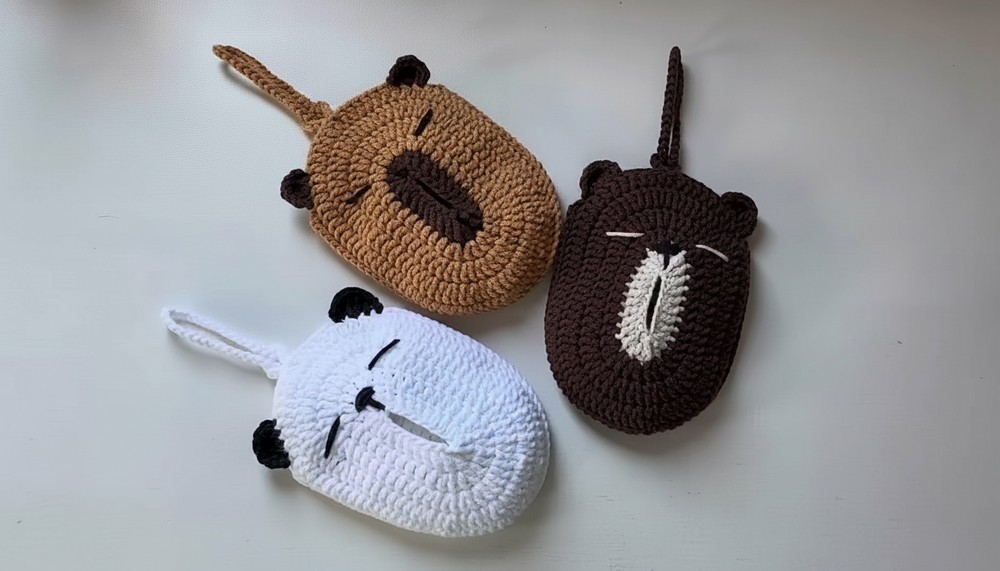
- Adorable Animal Designs: Choose from Cappy Bara, Bear, or Panda styles.
- Compact and Functional: Perfect size for holding pocket tissues, easy to carry in a bag or purse.
- Beginner-Friendly: The video provides detailed instructions, making it accessible to both beginners and experienced crocheters.
- Customization Options: Pick from various colors to match your personal style.
Materials Needed
- Yarn: Milk cotton in different colors:
- Light brown, chocolate brown, and white (for Cappy Bara and Panda)
- Pink (for Bear)
- Crochet Hook: 3.5 mm
- Tapestry Needle: For weaving in ends.
- Stitch Marker: To mark your starting points.
- Scissors: For cutting the yarn.
Abbreviations:
- CH: Chain
- DC: Double Crochet
- SLST: Slip Stitch
- TRC: Treble Crochet
- DC INC: Double Crochet Increase (2 DC into the same stitch)
- TRC INC: Treble Crochet Increase (2 TRC into the same stitch)
Pattern Instructions
1. Back Panel
- Start with a Slip Knot: Make a slip knot and create 12 CH (chains).
- Row 1: Starting from the 3rd chain from the hook, make:
- 1 DC INC in the first stitch (2 DC in the same stitch).
- 1 DC in each chain for the next 8 stitches.
- At the last chain, make 5 DC to round the corner.
- Row 2:
- 1 DC in each chain on the opposite side, crocheting along the other edge of the foundation chain.
- At the last chain, make 3 DC to form the other corner.
- Join: Join the round with a SLST into the first DC. Chain 2 (this doesn’t count as a stitch).
- Rounds 2–4:
Each round expands the panel with increases at the corners:- Round 2: Add 2 DC INC in the same stitch and begin working 8 DC on the edges. Add 5 DC INC at the corners.
- Round 3: Expand the increases further; you will make 10 DC INC around the curved edges and continue stitching 8 DC along the flat sides.
- Round 4: Follow the same format, creating a base large enough for the tissue pouch size.

2. Front Panel
Follow the same steps as the Back Panel, but chain 19 at the start (instead of 12).
Adjust the increases in Rounds 2–4 to incorporate broader edges, but maintain the same round structure. You’ll also incorporate 10 CH to leave an opening.
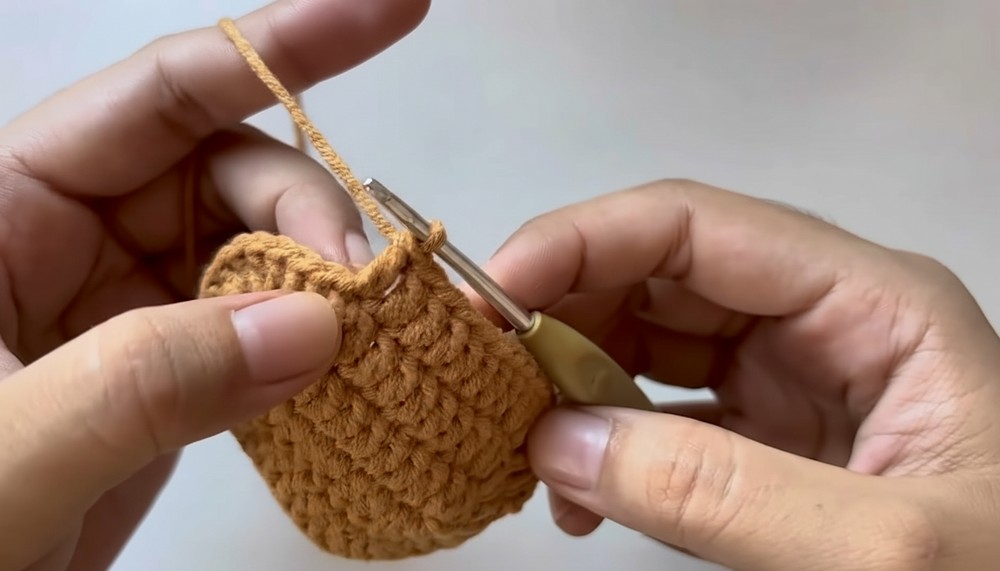
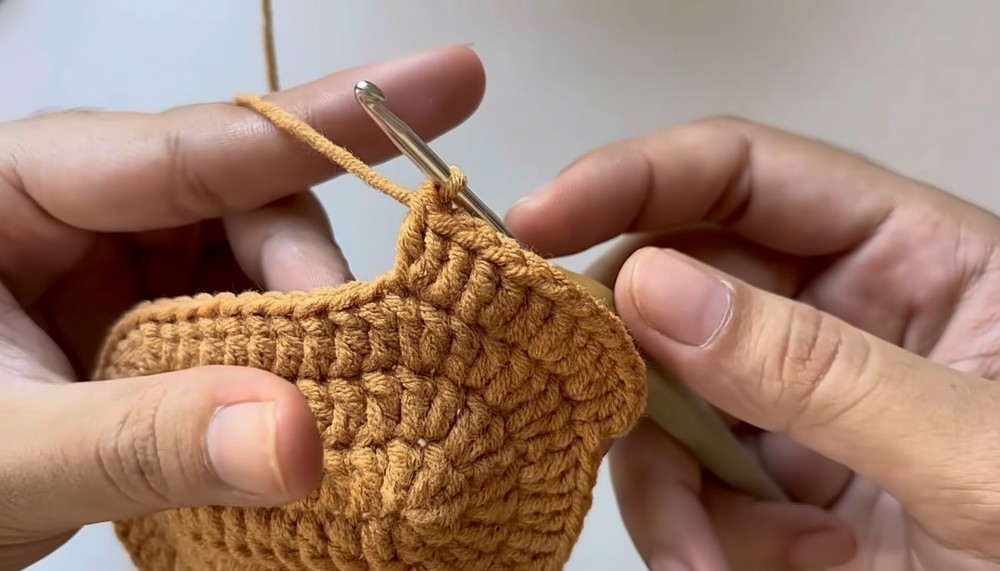
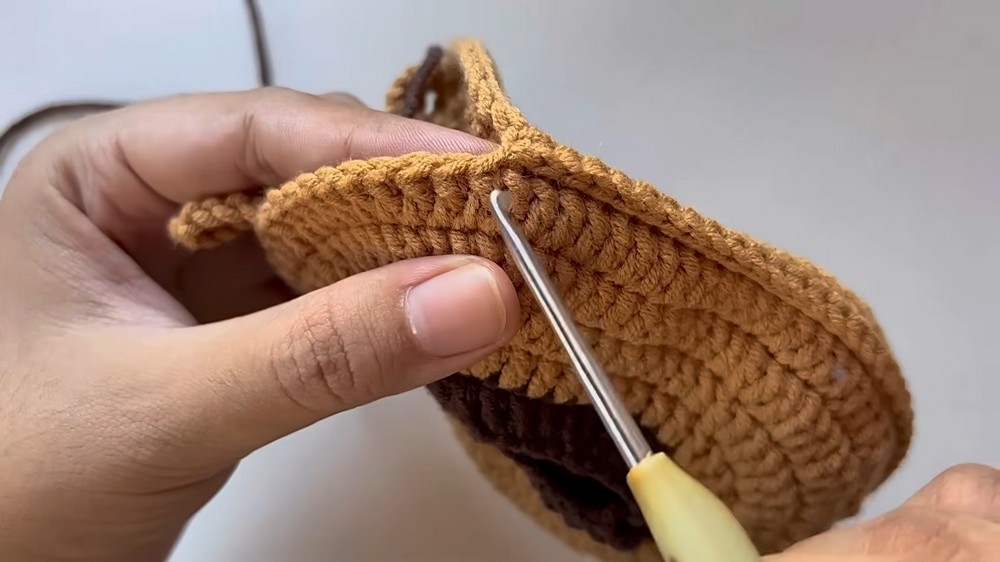
3. Joining the Front and Back Panels
- Align the panels with the wrong sides facing inward and the right sides outward.
- Slip Stitch (SLST) Join: Insert your hook through the Front Loop of the Front Panel and the Back Loop of the Back Panel.
- Make a total of 58 SLST around the panels until completely joined.
- Weave in the yarn tails with a tapestry needle to secure the join.
4. Ears
For Cappy Bara, Panda, and Bear (Same Pattern):
- Start from the Stitch Next to SLST: Use appropriate yarn color (chocolate brown for Cappy Bara, black for Panda, and pink for Bear).
- Create:
- Chain 2, 1 DC into the next stitch.
- TRC INC (2 TRC in the same stitch) at the following stitch.
- 1 DC into the next stitch.
- Chain 2, SLST in the same stitch to close the ear.
- Cut the yarn and weave in the tail ends.
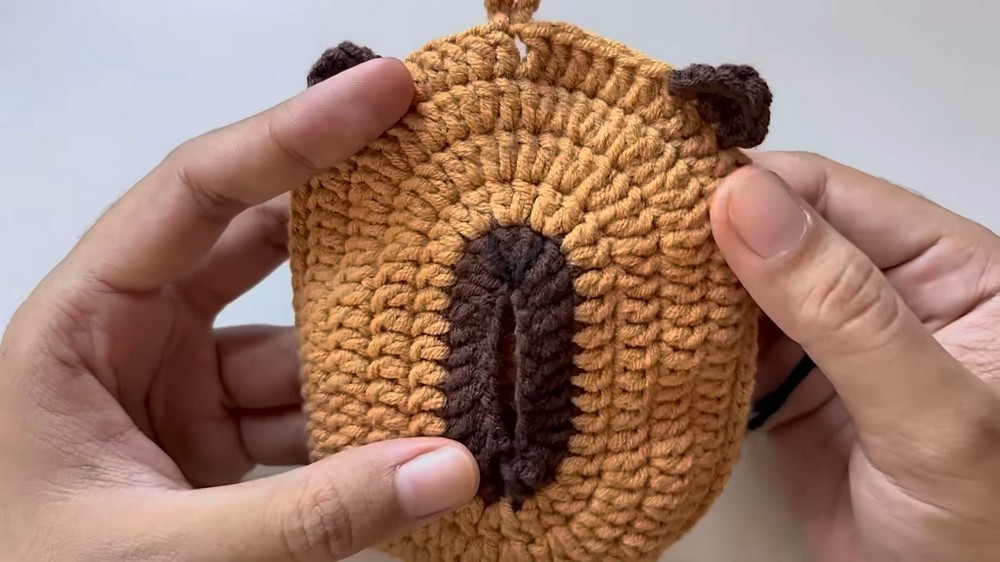
5. Nose
- Cut a piece of black yarn (20 cm) and thread it through a needle.
- Stitch the nose in the center of the face, using a simple embroidery technique. Secure the ends by weaving them into the fabric.
6. Eyes
- Similar to the nose, cut black yarn (20 cm) and use it to stitch eyes at Round 3 and Round 4 on the face.
- Secure and weave in the ends.
Difficulty Level
Beginner-Friendly (Easy): This pattern is straightforward, with clear instructions on basic stitches like DC, SLST, and simple increases. If you're new to crochet, take your time with the pattern's shaping and joining steps.
Tutor’s Suggestions
- Color Coordination: Pick colors that suit the personality of the recipient or match your surroundings.
- Experimentation: Try using yarn with sparkle or texture for a unique look.
- Customization: Add embellishments like bows, buttons, or even embroidery patterns for the finishing touch.
Uses
- Practical Everyday Use: Perfect for keeping tissues clean and handy while on the go.
- Gifts: Great for anyone who appreciates handmade crafts.
- Marketable Item: These could be sold at craft fairs as functional, decorative accessories!
Tip for Success
“Keep the tension uniform!” This will ensure that your stitches are even, resulting in neat and professional-looking panels. Practice your slip stitch joins to make the seam invisible.
Conclusion
Crocheting this Pocket Tissue Holder Pouches pattern is not only a relaxing and rewarding project, but it’s also a practical item you can use every day or gift to loved ones. Whether it's for a cheerful Panda, a cute Bear, or a sweet Cappy Bara, each pattern is sure to bring smiles and warmth wherever it goes!