Handmade holiday decorations have a special charm, and nothing says festive quite like a beautifully crocheted wreath. The Free Crochet Christmas Wreath Pattern offers a wonderful way to bring that warmth and holiday cheer into your home. Many crocheters enjoy making this project because it’s both joyful and satisfying—resulting in a soft, textured wreath that feels inviting and full of seasonal spirit.
When complete, the wreath boasts a plush, layered look thanks to its cleverly worked stitches that imitate the boughs of real evergreens. Its circular form holds up nicely, making it ideal for displaying on doors, walls, or as part of holiday tablescapes. You can add personal touches by crocheting little holly leaves, berries, or delicate flowers to make your wreath truly one of a kind.
Quick and Cute Free Christmas Wreath Crochet Pattern
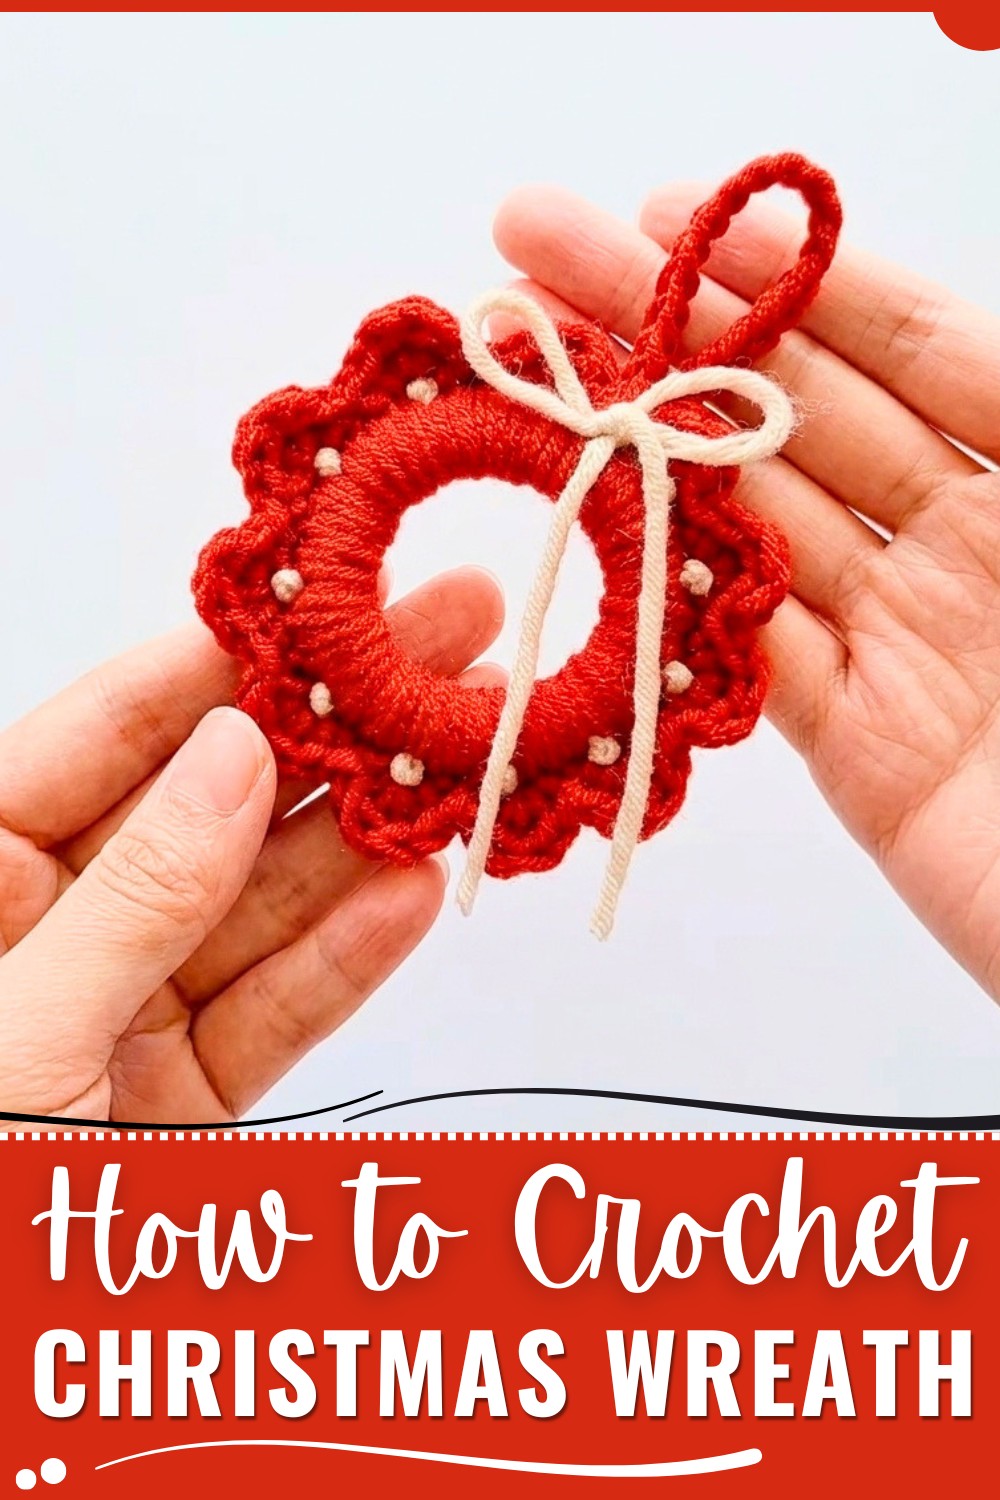
This pattern suits those with some crochet experience, especially intermediate makers who can navigate working in rounds and shaping with confidence. That said, dedicated beginners willing to take their time can also enjoy working through the texture-building stitches and assembling pieces for a lovely finished product. In the process, you’ll sharpen skills like joining motifs and crocheting three-dimensional shapes.
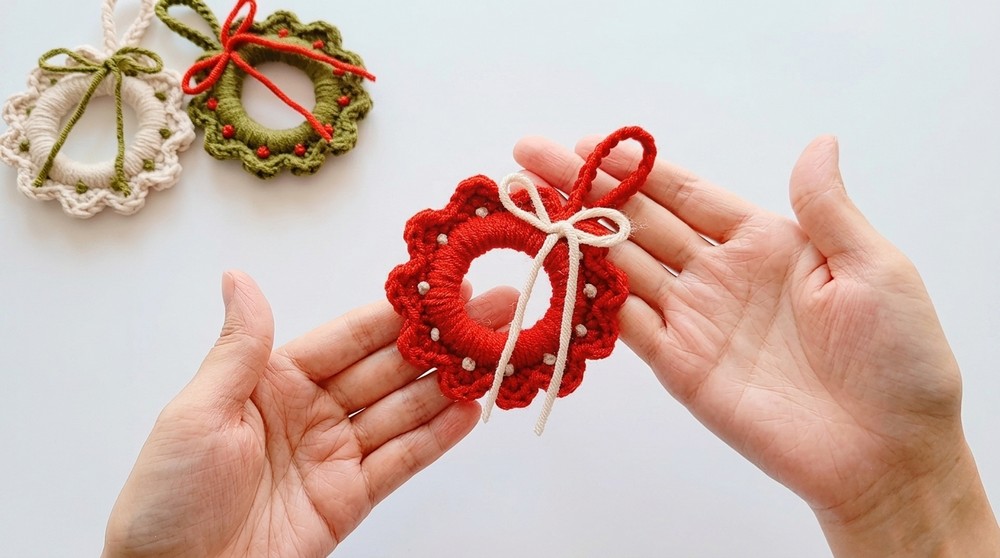
What’s great about this Free Crochet Christmas Wreath Pattern is how flexible it is. You can go classic with greens and reds or mix in metallic yarns or soft pastels to fit your holiday decor style. Whether you’re creating a gift or a standout accent for your own home, this wreath brings a handmade touch that warms the season and makes your crochet efforts all the more meaningful.
Beginner-Friendly Christmas Wreath Crochet Pattern
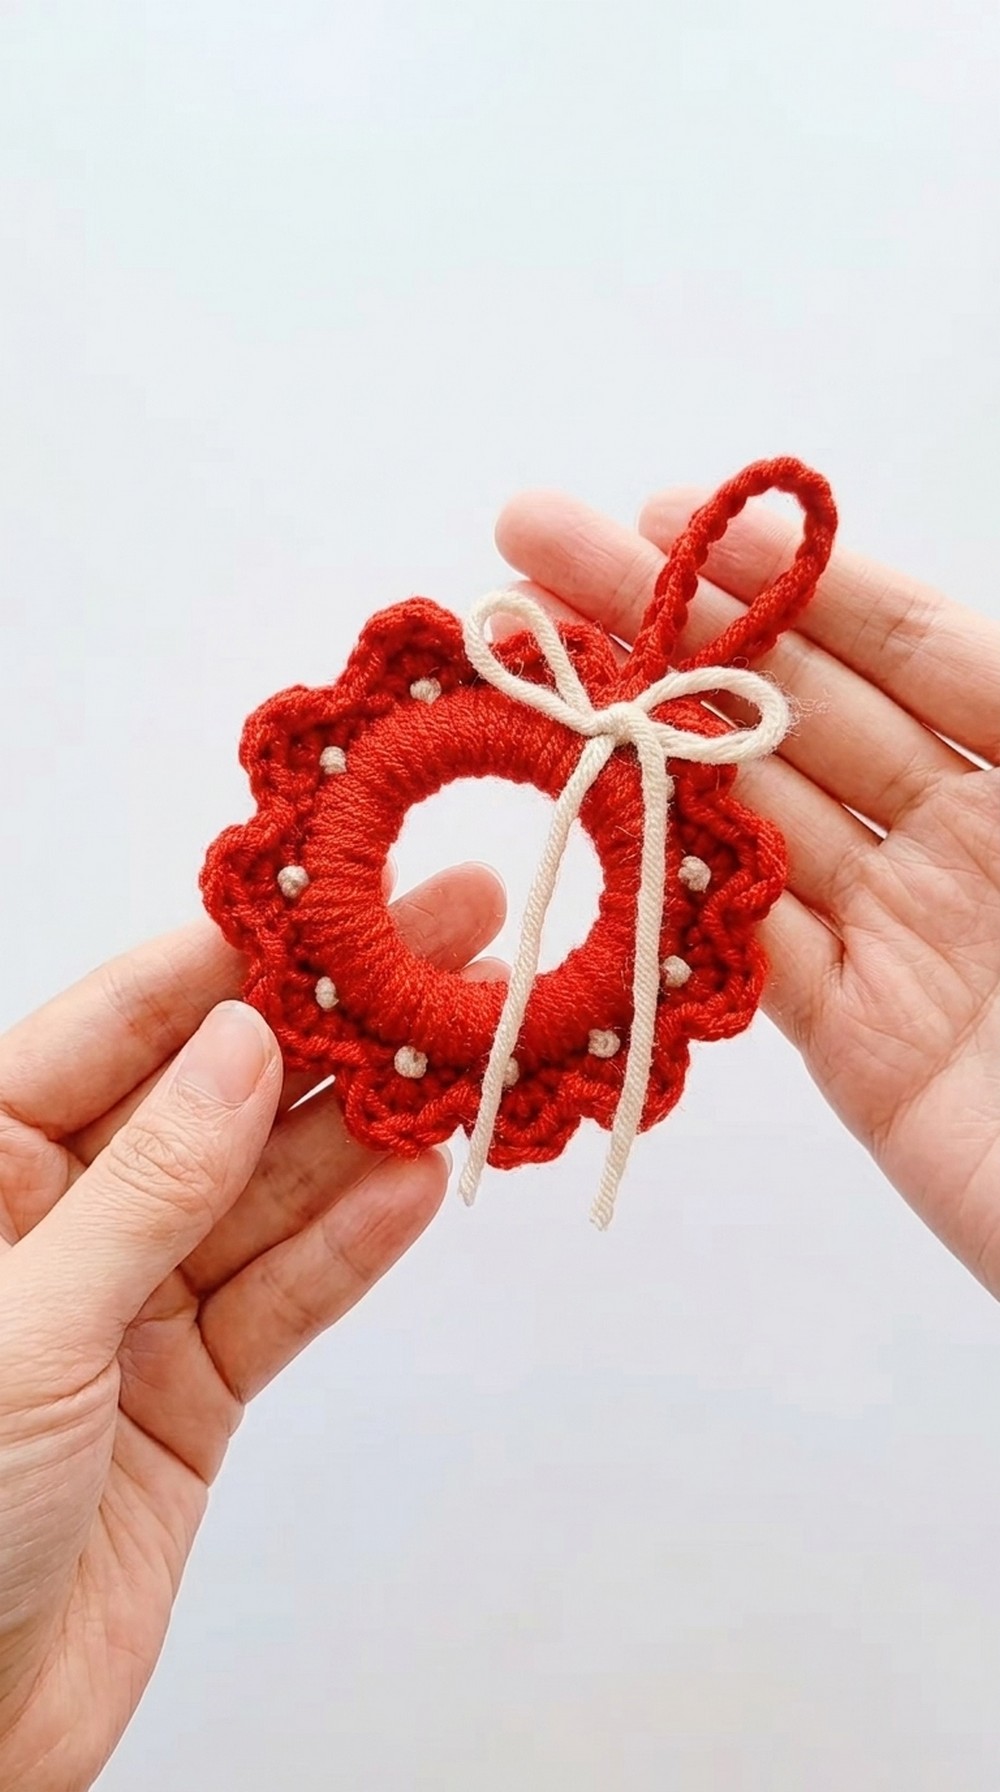
In this project, you will create a beautiful Christmas wreath using simple finger weaving and basic crochet stitches. This wreath features a circular loop base into which single crochets, double crochets, and slip stitches are woven to form an elegant festive decoration. Embellishments with knot stitches and a small bow complete the look. The combination of finger weaving and crochet makes this project unique yet simple enough for beginners who have mastered basic stitches.
Quick Overview of the Pattern
- Start by wrapping yarn loops around your finger to create a circular base.
- Work crochet stitches around the loops in rounds: single crochet (sc), double crochet (dc), and slip stitch (sl st).
- Create a hanging cord by locking stitches and crocheting a loop.
- Stitch embellishments with beige thread using knot stitches.
- Finish with a small decorative bow.
Notes
- Keep your wrapping loose for a smooth circular base.
- Total stitches worked should be a multiple of 4 to ensure an even, repeating pattern around the wreath.
- Embellishment stitches are sewn by hand for a personal touch.
- Final wreath size depends on your wrapping tension and yarn thickness.
- Use a yarn needle and scissors for neat finishing.
Skill Level
Beginner to Intermediate: Basic knowledge of finger weaving, chaining, single crochet, double crochet, slip stitch, and simple hand sewing.
Materials Needed
- Medium weight yarn for wreath base (any color you like).
- Beige thread (or contrasting color) for embellishments.
- Crochet hook (4.0 – 5.0 mm recommended).
- Yarn needle for sewing and weaving ends.
- Scissors.
Estimated Finished Size
- Approximately 20–25 cm (8–10 inches) in diameter, depending on your yarn and wrapping tightness.
Stitch Abbreviations
| Abbreviation | Meaning |
|---|---|
| ch | Chain |
| sc | Single Crochet |
| dc | Double Crochet |
| sl st | Slip Stitch |
Step-by-Step Crochet Pattern
Step 1: Create the Loop Base
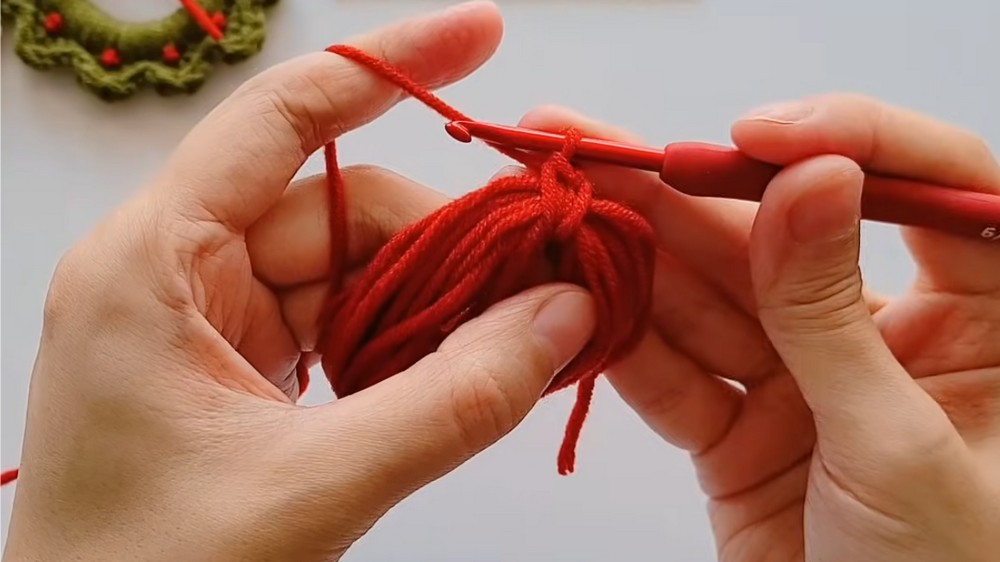
- Wrap the yarn 20 times around your finger loosely to create loops.
- Continue the yarn inside the loop, keeping the loops loose but secure.
- Slip one stitch onto your crochet hook to begin working around the loops.
Step 2: Join and Prepare for Crocheting Round 1
- Ensure the loops are not twisted and join the first and last chain with a slip stitch (sl st) to form a ring.
- Remember: the number of stitches must be a multiple of 4 for the stitch pattern to fit evenly.
Step 3: Round 1 - Single Crochet Stitch Around Loops
- Chain 1 (does not count as stitch).
- Work 1 single crochet (sc) into each loop around the ring.
- Total stitches this round = number of loops (e.g., 20 stitches).
Step 4: Create the Hanging Cord Base
- After finishing Round 1, weave a hanging cord by locking 20 stitches (or same number as your base loops).
- Attach yarn at the starting point with a slip stitch (sl st).
Step 5: Round 2 - Pattern Stitch Formation
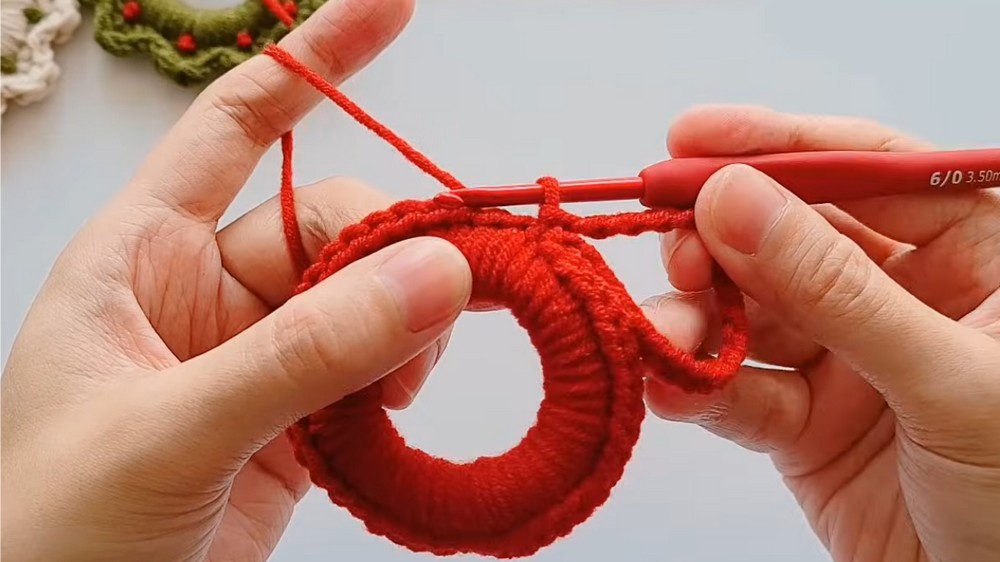
This pattern repeats in groups of 4 stitches.
- Skip 1 stitch.
- In the next stitch:
- Work 1 single crochet (sc).
- Work 2 double crochets (dc) in the same stitch (cluster).
- Work 1 single crochet (sc) immediately after the double crochets.
- Skip 1 stitch.
- Work 1 slip stitch (sl st) in the next stitch.
- Repeat this group until the round is complete.
Step 6: Repeat the Stitch Pattern
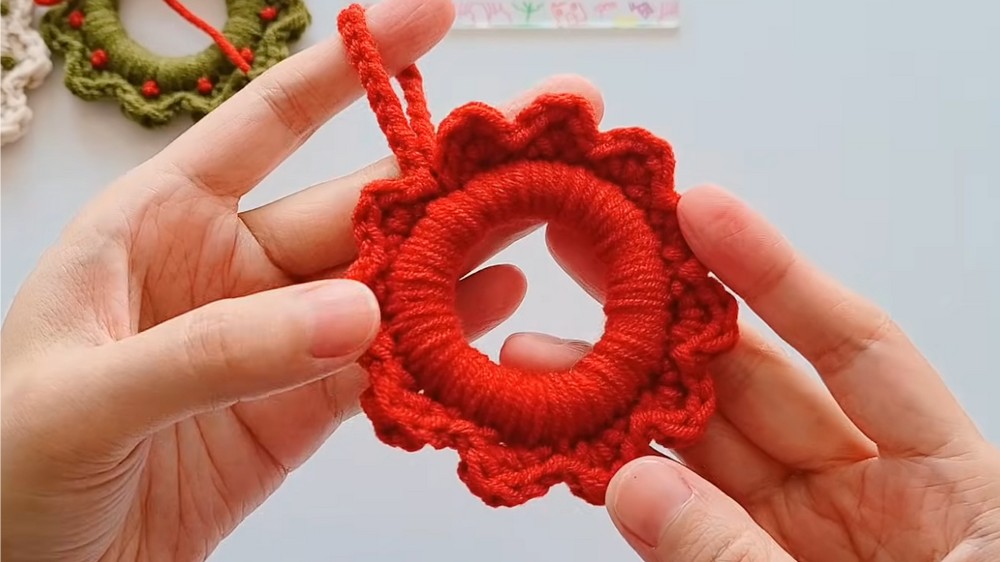
- Continue repeating the pattern described in Step 5 (groups of 4 stitches) around the wreath for the second loop round.
- Make sure your stitch count remains consistent.
Step 7: Finishing the Second Round
- After completing the second round, cut the yarn.
- Weave the yarn ends securely into the back of the work to hide them.
Step 8: Adding Embellishments with Knot Stitches
- Take a piece of beige thread (or contrasting color).
- Thread a yarn needle and insert it into the starting end of the wreath base.
- Pass the needle through the center of the first stitch group on the wreath (middle of cluster).
- Tie a small knot stitch securely.
- Continue by threading the needle through the centers of each consecutive stitch group, tying knot stitches evenly across the wreath.
- Repeat until you have embellished all the stitch groups.
Step 9: Final Decorative Touch - The Bow
- Tie a small bow from yarn or ribbon.
- Attach it firmly to your wreath in the position you prefer (top or side).
Assembly & Finished Size
- Once complete, your wreath will measure approximately 20–25 cm (8–10 inches) in diameter.
- Use the crocheted hanging cord to place it easily on doors, walls, or windows.
- Securely tucked yarn ends and knot embellishments complete the look.
Conclusion
You’ve just created a festive and textured Christmas wreath, combining simple finger weaving with basic crochet stitches. This project allows beginners to practice stitch repetition, yarn tension control, and introduces hand-embellished knotting for extra charm. The finished wreath is both beautiful and personal, ideal for decorating your home or gifting to loved ones during the holiday season.