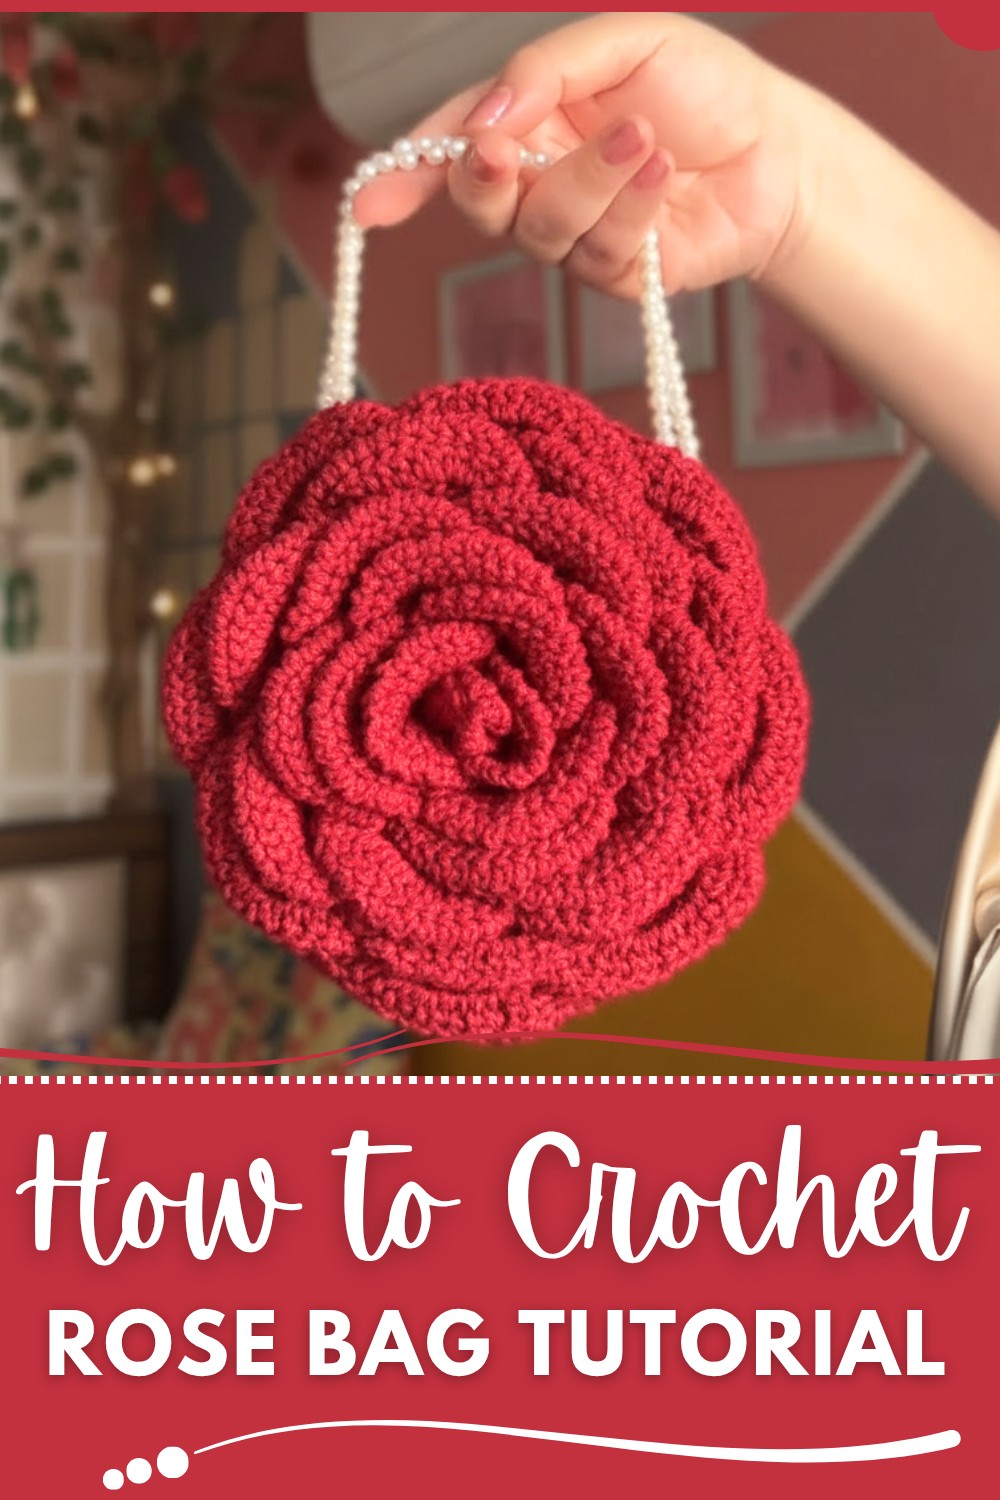
Learn how to make a beautiful crochet rose bag that is easy to carry, looks lovely, and is perfect for everyday use or as a special handmade gift.
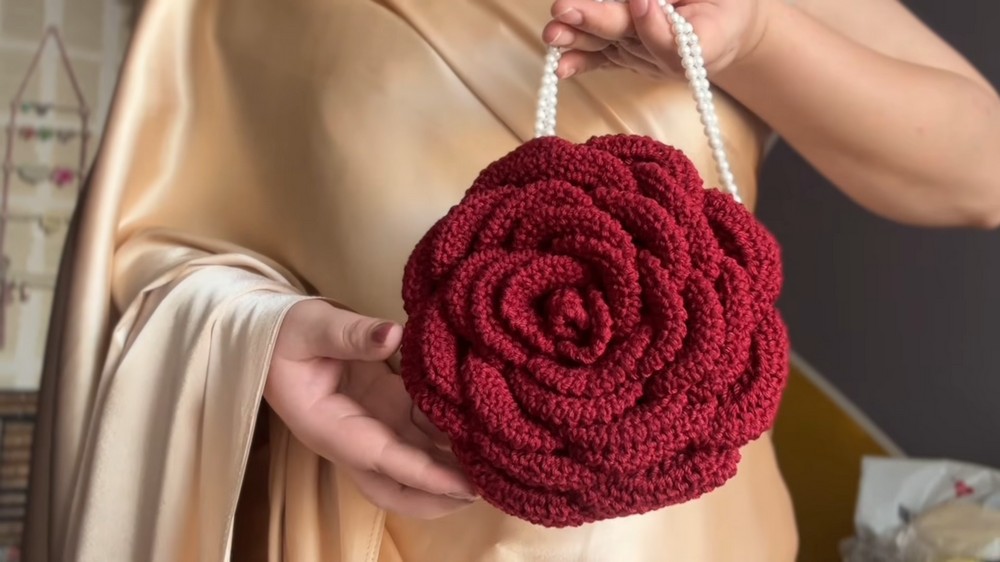
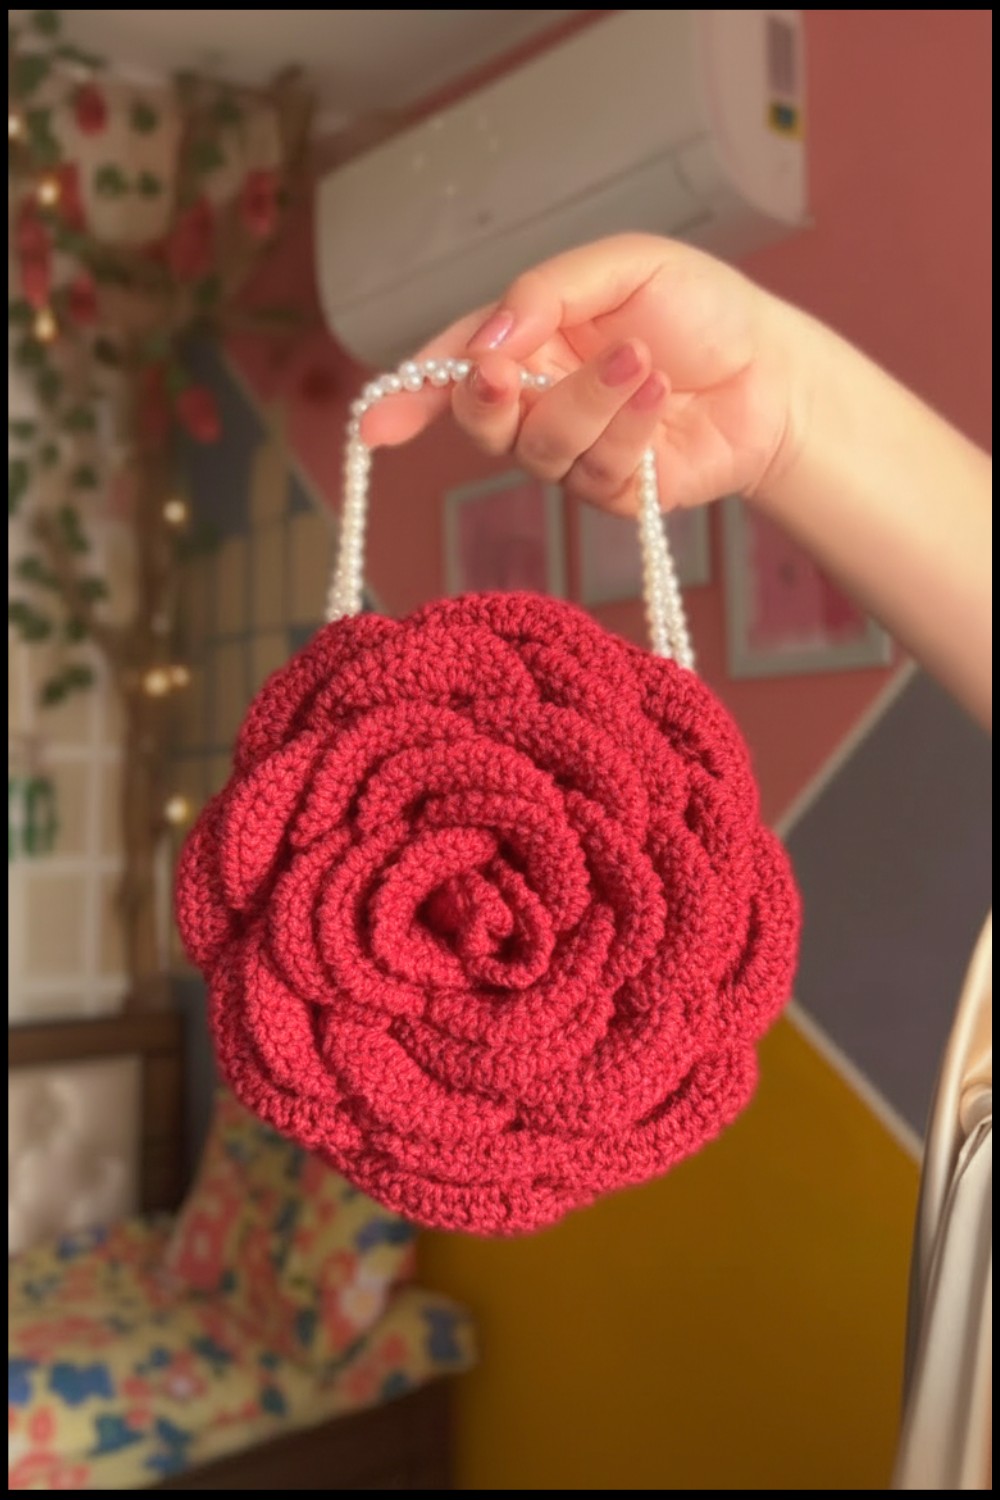
A handmade bag shaped like a blooming rose is not just beautiful but also useful. Its soft texture and detailed appearance catch everyone’s attention, making it something special to carry anywhere you go. The rose shape gives it a graceful and artistic look while still being practical for everyday use. This bag is lightweight but strong enough to hold your daily essentials, making it a perfect balance of style and function.
Free Crochet Rose Bag Pattern for a Stylish and Lovely Tote
The size can be adjusted based on your needs, whether you want it small or roomy. You can use this unique bag for school, shopping, or even as a thoughtful gift for someone special. The variety of colors and styles lets you choose something personal and unique. It’s more than just an accessory—it’s a simple way to carry something beautiful while staying organized. Perfect for all ages, it effortlessly combines charm with convenience.
Detailed Crochet Pattern: Pedaled Round Bag
Skill Level
Intermediate to Advanced: Techniques include the magic ring, working in rounds, back loop-only stitches, slip stitches, petals, reverse single crochet, and assembly.
Finished Size
The size may vary depending on your materials and tension, but you can adjust the size by adding rows or customizing the handle.
Materials Required
- Yarn (Worsted Weight or #4):
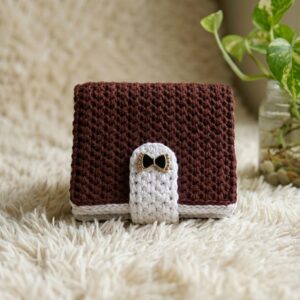
- Maroon yarn for the main body of the bag.
- Optional: Contrasting yarn for decorative elements.
- Hook Size:
- 4.5 mm Crochet Hook.
- Additional Supplies:
- Scissors.
- Stitch Markers: To track rounds.
- Tapestry Needle: For sewing in loose ends and assembly.
- Magnetic Button or Zipper (optional): For the bag closure.
- Beads or decorative elements (optional): Use for the handle.
Key Abbreviations (US Terminology)
| Abbreviation | Meaning |
|---|---|
| ch | Chain |
| sc | Single Crochet |
| dc | Double Crochet |
| sl st | Slip Stitch |
| st(s) | Stitch(es) |
| BLO | Back Loop Only |
| inc | Increase (work 2 stitches in one st) |
| MR | Magic Ring |
| rev sc | Reverse Single Crochet |
Special Notes
- Maintain Consistency: Ensure consistent tension for a uniform appearance.
- Work in the Back Loop Only (BLO): Increases are worked only in the back loop for the textured petal effect.
- Petal Adjustments: Feel free to modify the number of petals in each round for a wider or denser pattern.
- Handle and Closure: Beads and closures can be customized or swapped out for other materials as preferred.
Pattern Instructions
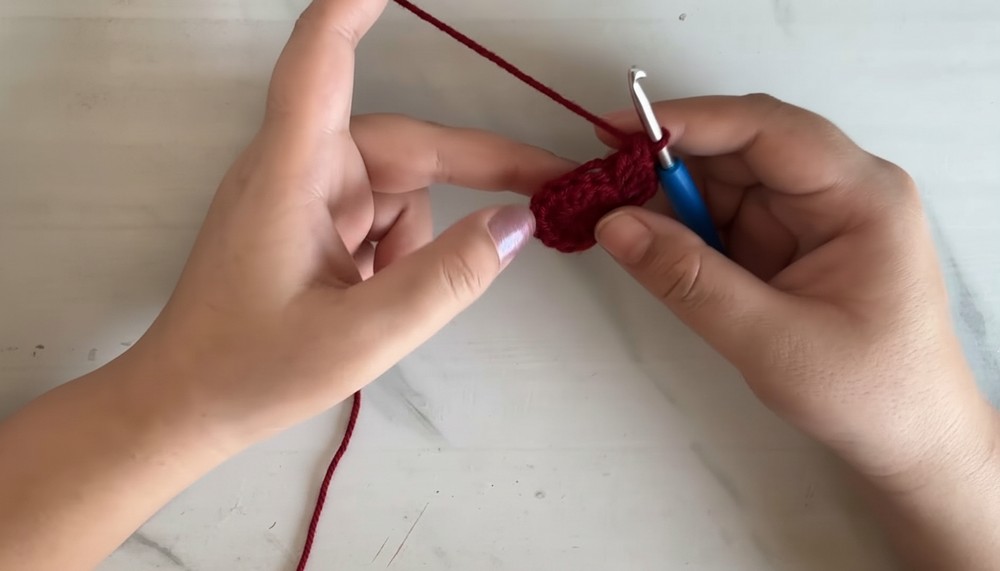
Step 1: Magic Ring and Base of the Bag
Round 1:
- Begin with a magic ring (MR).
- Chain 3 (counts as the first double crochet).
- Work 11 dc into the MR.
- Stitch Count: 12 dc in total.
- Pull the tail to tighten the ring.
- Sl st into the top of the ch-3 to close the round.
Round 2:
- Ch 3 (counts as the first dc).
- Work 2 dc in each st around (inc) only in the BLO of each st.
- Stitch Count: 24 dc.
- Sl st into the top of the ch-3.

Round 3:
- Ch 3 to start.
- Work [2 dc in the first st (inc), 1 dc in the next st] in the BLO and repeat around.
- Stitch Count: 36 dc.
- Sl st to close the round.
Round 4:
- Ch 3.
- Work [2 dc in the first st (inc), 1 dc in the next 2 sts] in BLO and repeat around.
- Stitch Count: 48 dc.
- Sl st to close.
Round 5:
- Ch 3.
- Work [2 dc in the first st (inc), 1 dc in the next 3 sts] in BLO and repeat around.
- Stitch Count: 60 dc.
- Sl st to close.

Round 6–9:
- Continue increasing as follows:
- Round 6: [2 dc in the first st (inc), 1 dc in the next 4 sts] – 72 dc.
- Round 7: [2 dc in the first st (inc), 1 dc in the next 5 sts] – 84 dc.
- Round 8: [2 dc in the first st (inc), 1 dc in the next 6 sts] – 96 dc.
- Round 9: [2 dc in the first st (inc), 1 dc in the next 7 sts] – 108 dc.
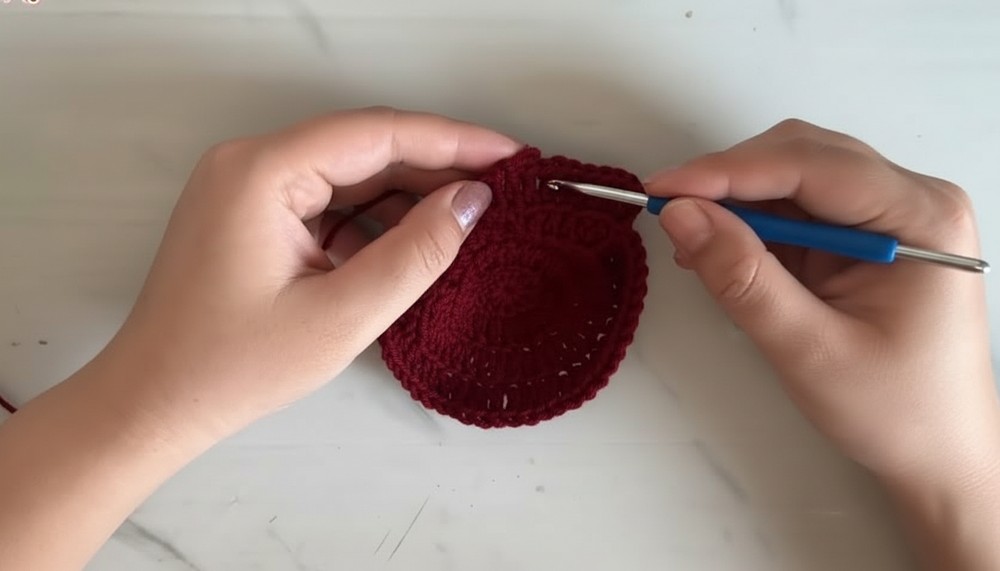
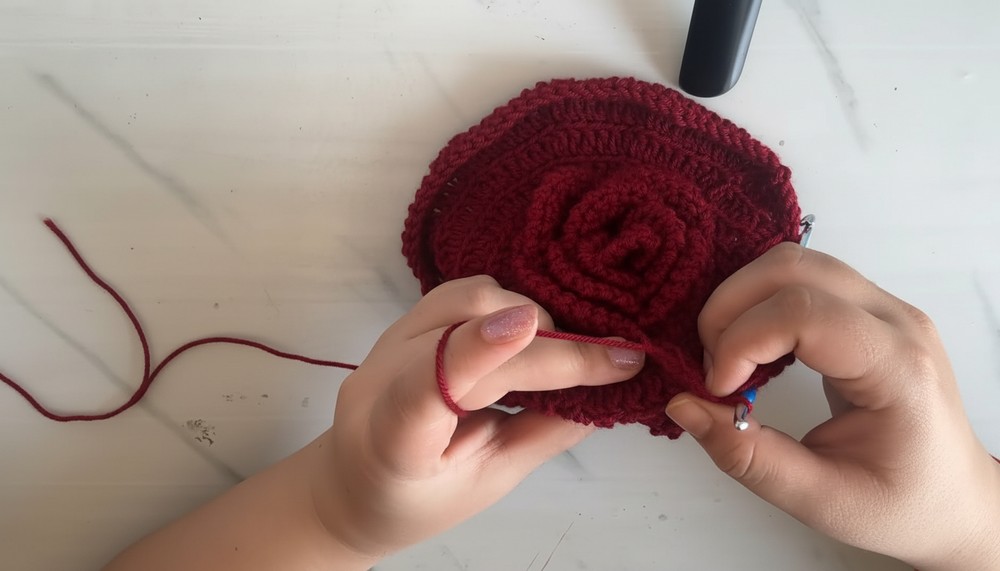
Step 2: Petal Creation
Each petal is worked into the front loops (FLO) of a specified round.
Petal Rows:
- Attach Yarn in FLO of the Base Round:
- Chain 3, then 2 dc in the same st, creating a double crochet increase.
- Work around the row using the following sequence within each petal space:
- [2 dc in the first st, then 1 dc in each st across, ending with a reverse single crochet along the back loop spaces].
- Repeat these steps for subsequent petal layers, increasing the width as follows:
- First layer: Work into every third st.
- Second layer: Skip 4 sts between petals.
- Third layer: Skip 5 sts.
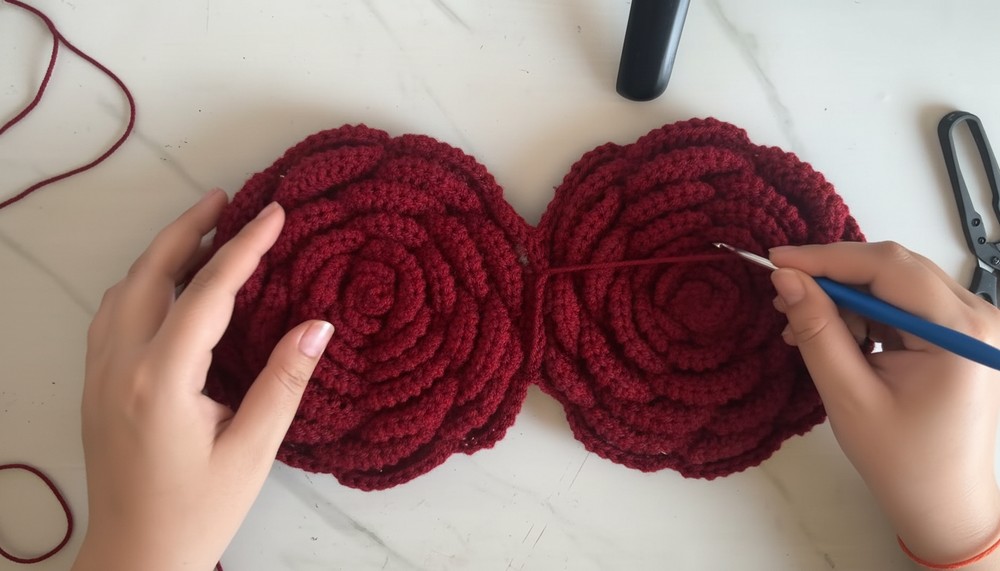
Step 3: Bag Assembly
- Prepare Two Identical Circles:
- Ensure the petal pattern matches for uniformity.
- Joining the Circles:
- Hold the circles wrong sides together.
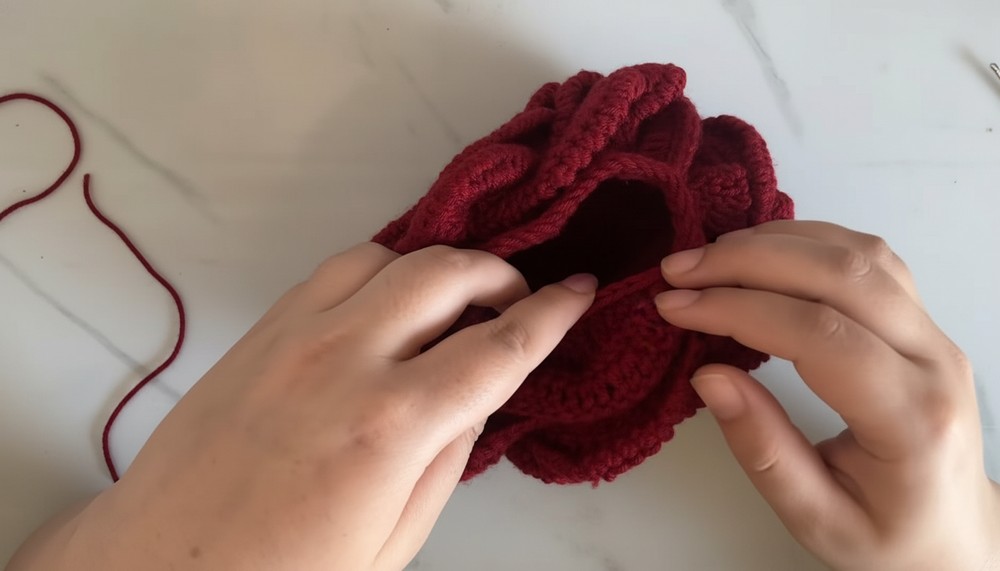
- Using maroon yarn, sl st through the inner loops of both circles to join along the circumference. Leave a portion open for the bag's opening.
- Add a Handle:
- Beaded Handle: Thread beads onto yarn, then crochet a chain to form the handle. Sew the handle onto the sides of the bag’s opening.
- Alternative Handle: Create a chunky crocheted rope or a simple chain strap.
- Closure:
- Attach a magnetic button or a zipper for a practical, secure closure.
Finishing Your Pedaled Round Bag
- Tidy Loose Ends:
- Use a tapestry needle to weave in all loose ends securely inside the bag.
- Blocking (Optional):
- If desired, gently block the bag to enhance shape and definition.
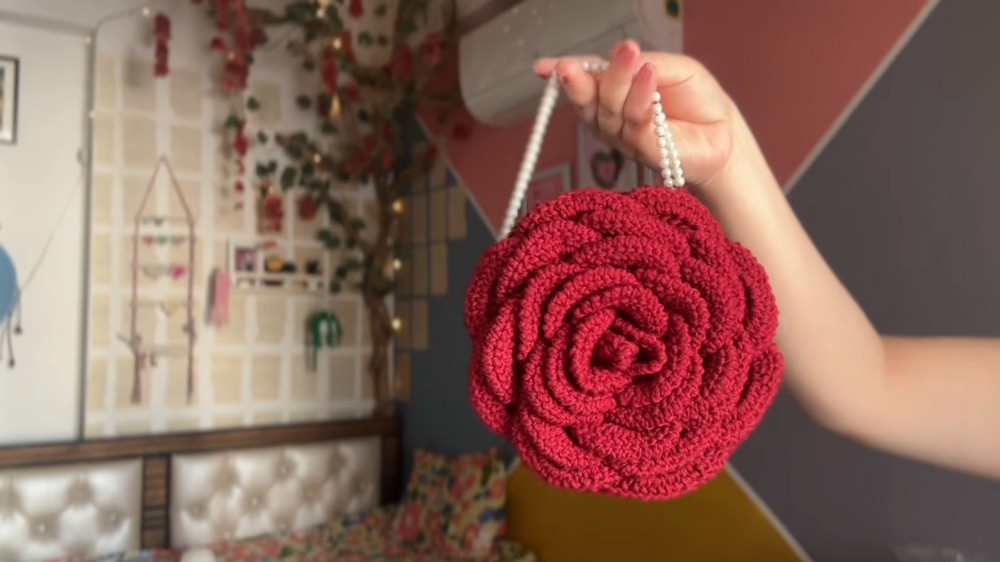
Conclusion
Congratulations! You've completed your Pedaled Round Bag. The unique floral motif adds sophistication, while the durable construction ensures functionality. This bag is both a practical accessory and a work of art, making it perfect for gifting or using as a statement piece.
Pattern Corrections
- Skipping Stitches: Ensure to closely follow the correct stitch skips for each round and petal layer (e.g., skip 3, 4, or 5 stitches as indicated).
- Petals: If petals seem uneven, double-check stitch counts for accuracy.
Tips for Success
- Customizing Size: Add more rounds to the base for a larger bag. Adjust the petal skips proportionately.
- Uniform Petals: Use stitch markers to ensure consistent petal placement.
- Sturdier Bag: Use a cotton blend or a lined structure for durability.