Inspire joy effortlessly through this Free Crochet Doll Anya Pattern that's offering a delightful companion with sweet features and cozy appeal.
There’s something truly special about creating a handmade doll that carries personality and charm in every stitch. The Free Crochet Doll Anya Pattern offers just that—a delightful way to bring a sweet, cuddly friend to life through your crochet hook. Many crocheters love making dolls like Anya because they’re not only fun to make but also become treasured keepsakes or gifts for children and collectors alike.
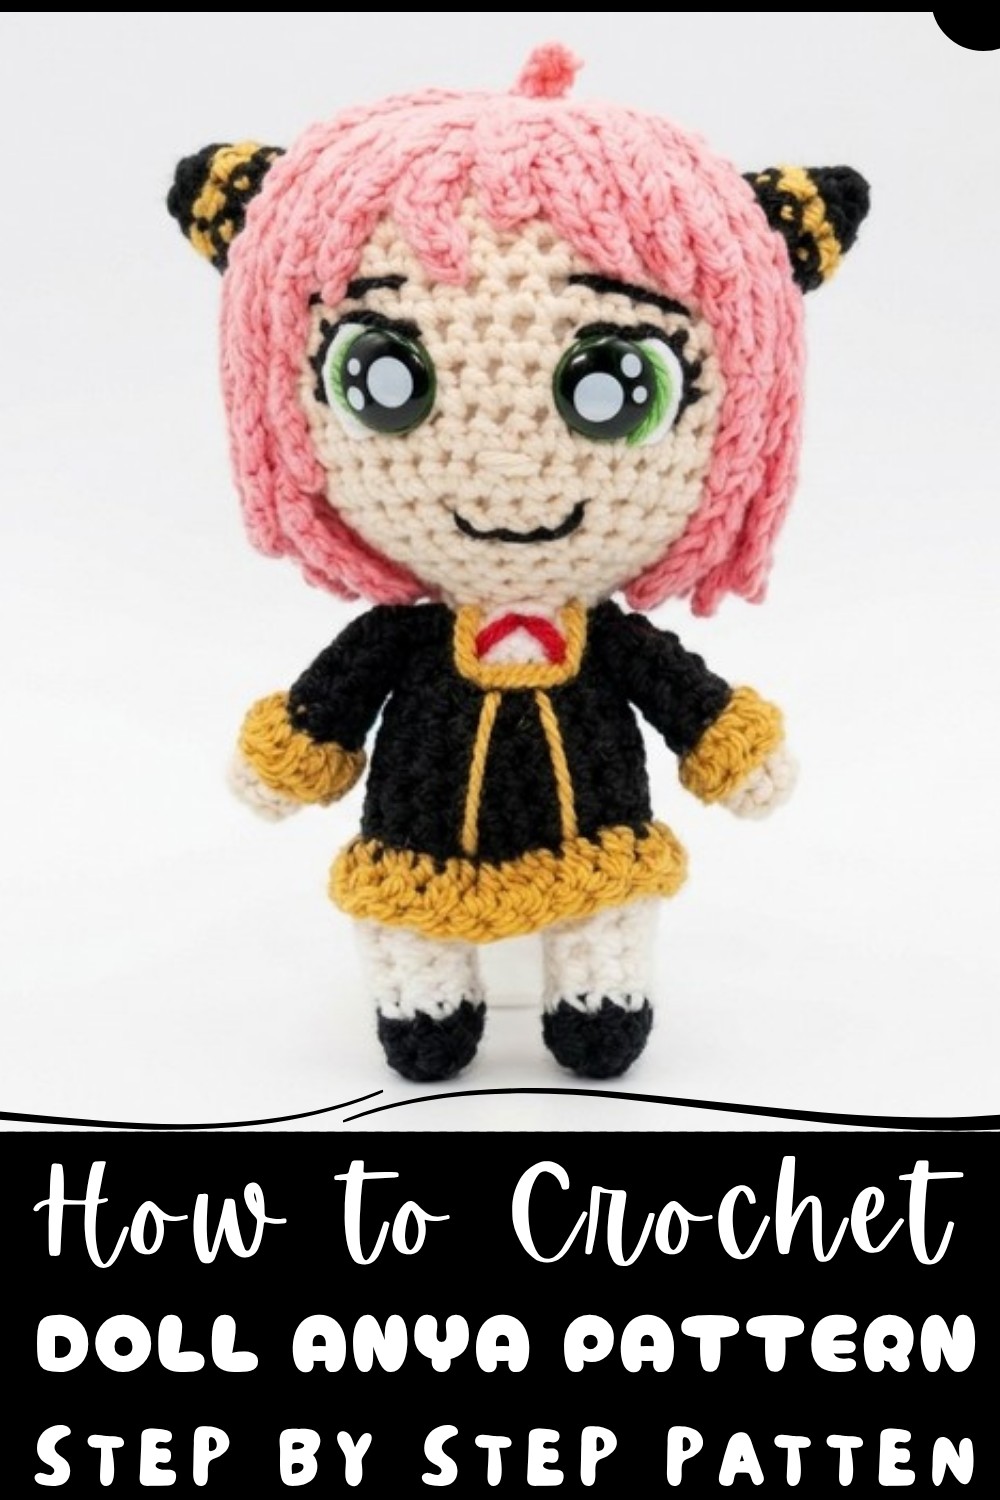
This crochet doll features a soft, cuddly texture achieved through tightly worked stitches and gentle, durable yarn—perfect for little hands to hold or for display on a shelf. Anya has a beautifully balanced shape, with a rounded head, slender arms, and legs that make posing and play easy. The pattern allows for lots of customization, from hair colors and styles to outfit choices and facial expressions, so your Anya can be truly one-of-a-kind.
Free Crochet Pattern Doll Anya With Ease
Whether you’re a beginner ready to try amigurumi for the first time or an intermediate crocheter looking for a charming new project, this pattern suits a range of skill levels. Working through Anya’s design, you’ll practice essential skills like single crochet, increasing, decreasing, and simple embroidery for facial details. The instructions guide you gently along, making the process relaxing and enjoyable.
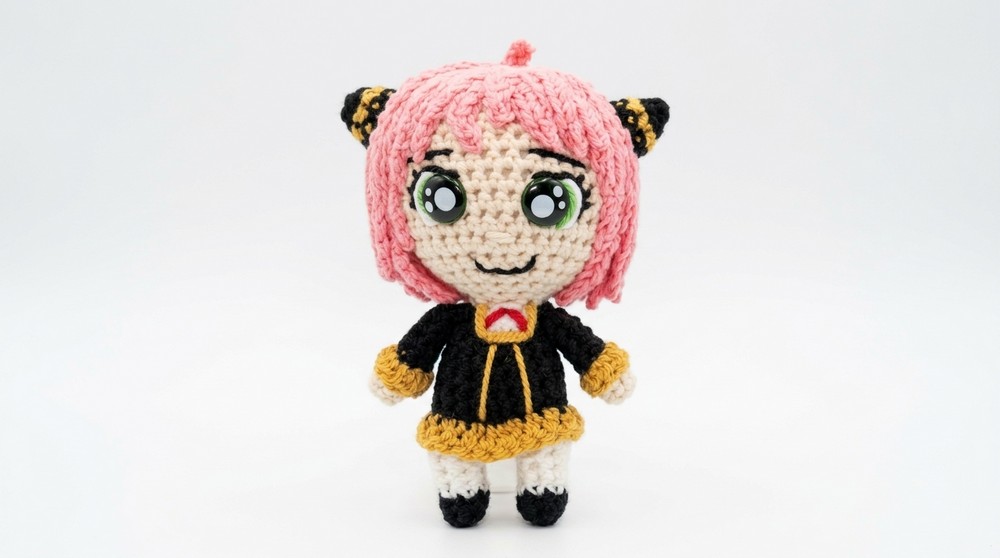
What makes this project especially fun is seeing your doll take shape stitch by stitch, transforming a ball of yarn into a sweet, personal creation. Plus, finishing Anya gives you a beautiful, handmade doll that can brighten any room or become a heartfelt gift. Sharing your creation with friends or family spreads warmth beyond the yarn and stitches—just one of the many joys of crocheting dolls with the Free Crochet Doll Anya Pattern.
Crochet Doll Anya Pattern (Spy Family)
Create a charming crochet doll named Anya inspired by the popular anime Spy Family. This beginner-friendly amigurumi pattern guides you through making the legs, joining them to form the body and dress, adding detailed facial embroidery, arms, and layered hair. The doll features vibrant colorwork replicating Anya's distinct look, combining simple stitches for a professional finish.
Pattern Highlights
- Legs: Two separate black crochet pieces worked as tubes, then joined.
- Body and Dress: Utilize color changes and stitch variations to create Anya’s clothing.
- Head: Rounded head shaped with continuous rounds, detailed with embroidered expressive eyes.
- Arms: Small, neat tubes with color transitions matching dress sleeves.
- Hair: Layered pink strands sewn onto the head for Anya's signature style.
- Facial Features: Realistic embroidery using multiple colors for eyes and mouth.
Notes for Beginners
- Use a stitch marker to mark the start of your rounds.
- Work in continuous spiral rounds or joined rounds as specified.
- Pay close attention to color changes and working in loops only, as noted.
- Use safety eyes as directed for stability and appearance.
- Weave in yarn ends securely and hide inside the doll for a clean look.
- Stuff parts firmly but not overstuffed to keep shaping smooth.
- Take your time with embroidery, it creates a huge impact on the doll’s expression.
Skill Level
Suitable for beginners with basic crochet knowledge or those familiar with:
- Magic Ring (adjustable ring) start
- Single Crochet (sc), Increase (inc), Decrease (dec)
- Slip Stitch (sl st)
- Color Change
- Basic Embroidery
Materials
- Yarn: Black, white, mustard, raw skin tone, pink, green (DK/sport weight)
- Hook Size: 3.5 mm or 4 mm (adjust depending on your yarn)
- Safety Eyes: 12 mm
- Fiberfill Stuffing
- Yarn Needle
- Embroidery Needle
- Stitch Marker
- Scissors
- Pins (for positioning hair and parts)
Measurements / Sizing
- Height: Approximately 20–25 cm tall
- Head circumference: Suitable for 12 mm safety eyes
- Arms & legs: Proportioned small tubes for balanced look
Gauge
- Approximately 20 sc per 10 cm with DK yarn
- Gauge flexibility is okay due to amigurumi nature
Stitch Abbreviations
| Abbreviation | Meaning |
|---|---|
| ch | Chain |
| sc | Single Crochet |
| inc | Increase: 2 sc in one stitch |
| dec | Decrease: 2 sc stitches together |
| sl st | Slip Stitch |
| magic ring | Adjustable Ring Foundation |
Special Techniques
Magic Ring
Create a loop, crochet the required stitches inside, then pull tight to close the ring.
Working in Inner Loop Only
For texture and shaping, insert the hook in the inner loop only instead of both loops.
Step-by-Step Crochet Pattern
Legs (Make 2)
- Using black yarn:
Round 1
- Chain 2.
- Work 6 sc in the second chain from the hook to form a ring.
- Join with sl st to first sc. (6 sts)
Round 2
- Chain 1,
- Work 1 sc in each stitch around (6 sts),
- Join with sl st.
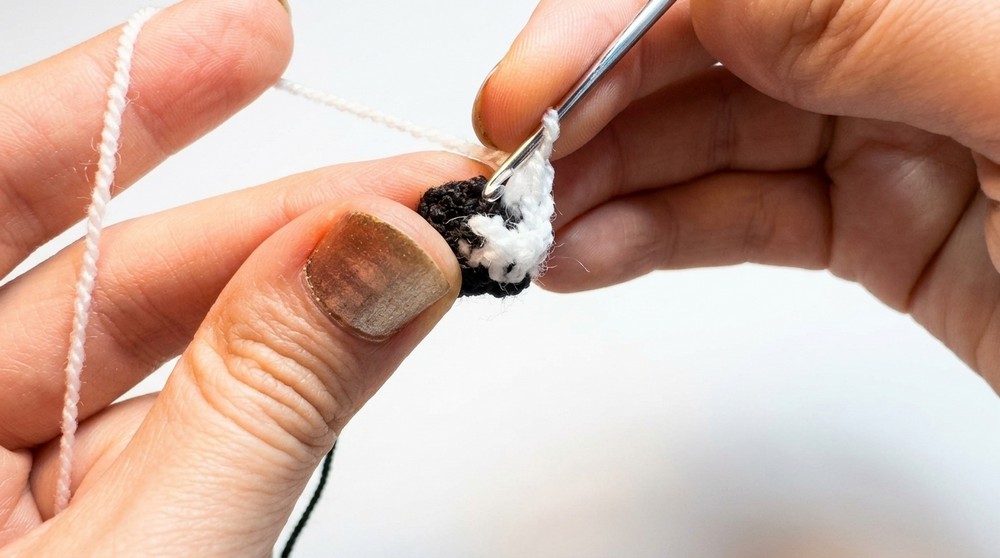
Round 3
- Chain 1,
- 6 sc in each stitch,
- Close with sl st.
- Use a clamp or your fingers to pull short strands inward to avoid obstruction for later rounds.
Rounds 4 and 5
- Chain 1, 6 sc each around, join with sl st.
Round 6 (Increase Round)
- Chain 1,
- Repeat 2 sc, 1 inc around (8 total points of 2 sc + 1 inc),
- Close with sl st.
Finish
- Cut yarn and fasten off.
Joining the Legs and Continuing the Body
- Attach black yarn at any stitch on one leg.
- Tie a knot to secure.
- Chain 2.
- Insert hook through any stitch on the other leg, slip stitch to join legs.
Round 7
- Chain 1,
- Work 8 sc over stitches on first leg,
- Work 8 sc over 2-chain joining section,
- Work 8 sc over stitches on second leg,
- Join round with sl st.
Round 8 (Inner Loops Only)
- Chain 1,
- Work 20 sc into inner loops only around,
- Join round with sl st.
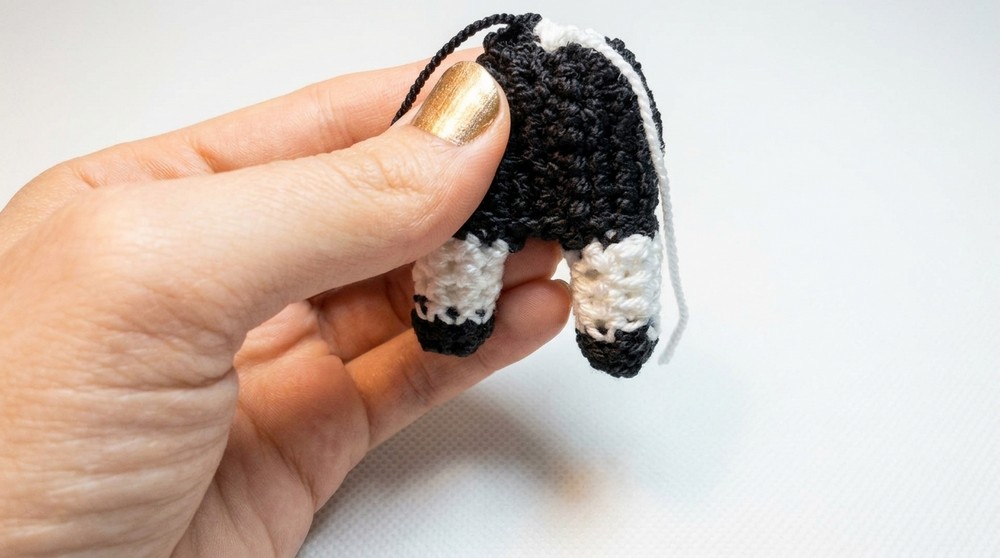
Working the Dress and Body
Round 9
- Chain 1,
- Work 20 sc normally (both loops),
- Close round.
Round 10
- Chain 1,
- Work 8 sc, then decrease (dec) over next 2 stitches:
- Insert hook in inner loop of first stitch and then whole next stitch, yarn over, pull through two loops, yarn over, pull through remaining loops.
- Repeat to total 18 stitches.
- Close round.
Shaping the Legs and Filling
- Work rows incorporating decreases and color changes, alternating between black and white yarn, following the shape of thighs and dress.
- Use tweezers to insert fiberfill stuffing carefully inside legs before closing.
Body Top and Neck
- Switch to raw or skin color yarn.
- Tie in with a knot; begin increasing and shaping following this sequence:
- Chain 1, 2 sc, 1 dec or 2 sc, 1 inc as directed for shaping.
- Work 18 sts and above to create neck and torso.
Head Construction and Eye Placement
- Continue rounds working in skin tone yarn for the head.
- Add 12 mm safety eyes about 8 rows below neck, spaced 5 stitches apart.
- Use stitch markers to ensure correct placement and spacing.
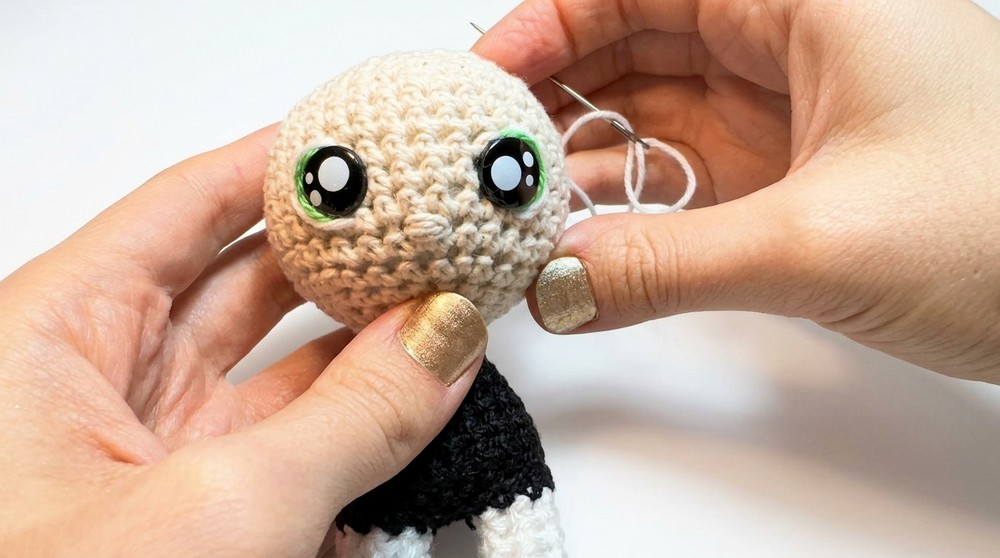
Facial Embroidery (Eyes, Nose, Mouth)
- Use green, white, black, and ecru embroidery thread.
- Follow this sequence for expressive eyes:
- Outline iris in green, layer whites, then add pupil and eyelashes using black.
- Add subtle nose details below eyes by threading yarn through head multiple times.
- Stitch mouth with black thread just below nose, creating slight oval shape.
- Knot and weave in ends inside head.
Arms (Make 2)
- Begin with ecru yarn:
- Chain 2,
- Work 6 sc in the second chain from hook; join round.
- Change yarn to mustard and black as you go for sleeve detail.
- Work several rounds of sc, alternating between full stitches and inner loop only for texture.
- Finish by crocheting an edge of half stitches in mustard yarn around.
- Leave long yarn tails for sewing; securely attach arms to sides of body.
Hair Construction and Attachment
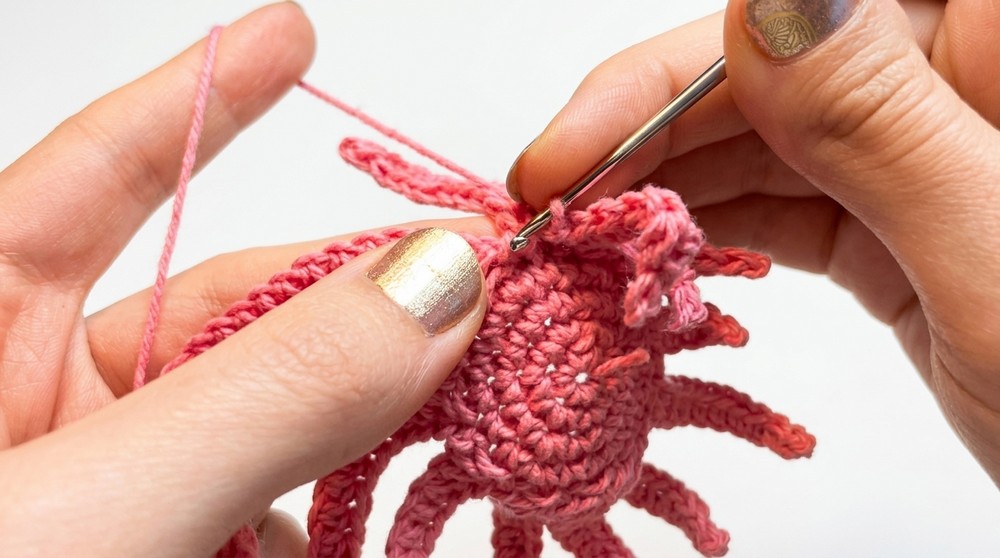
- Use pink yarn to crochet multiple strands of hair:
First Layer
- Short strand: 11 chains, then slip stitch and single crochet for texture.
- Longer strands: 15 chains, slip stitch, then 12 half stitches; repeat seven times.
- Bangs: Short 6 chain strands with slip stitches, single crochets, and half stitches; repeat to cover forehead.
Second Layer
- 8 chains, slip stitch, single crochet, and 5 half stitches strands layered behind first layer.
Finishing
- Sew strands on head with yarn needle, arranging bangs on the front and longer strands at back, pin to secure before sewing.
Bow and Final Details
- Using red yarn, crochet a simple bow with chains and slip stitches.
- Attach bow at neck area using sewing and pins.
- Weave in and hide all loose ends inside the doll.
Assembly and Finishing Touches
- Sew all parts firmly together: arms, legs, and hair.
- Adjust facial embroidery if needed for balance and symmetry.
- Ensure all yarn ends are woven in for durability.
- Fluff hair strands gently to add volume and natural look.
Finished Size
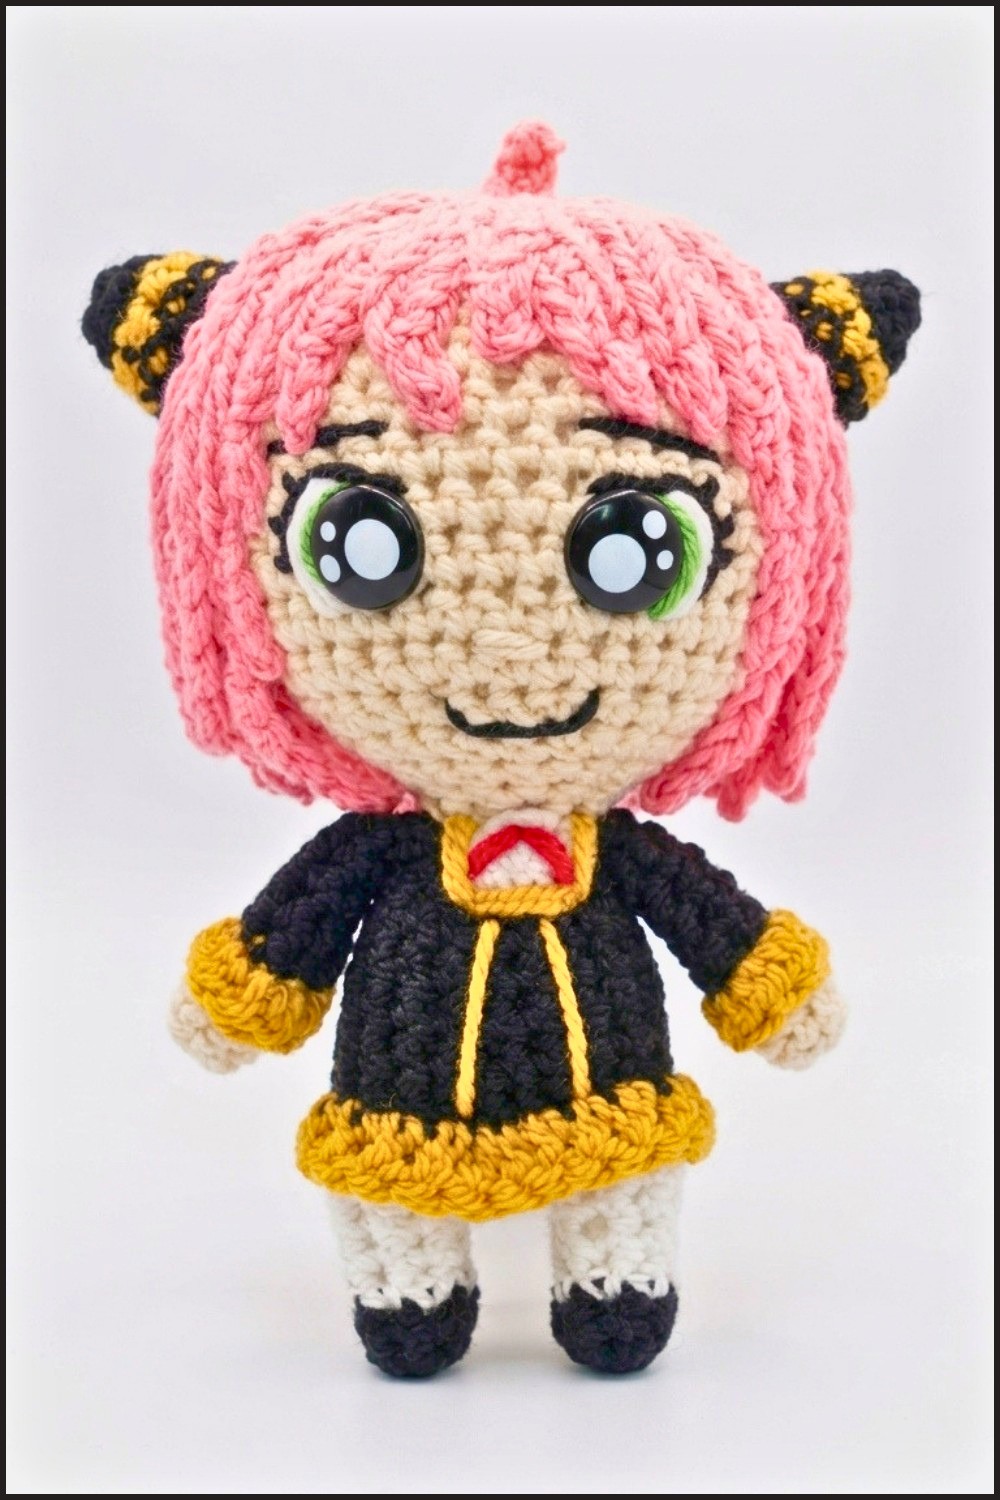
- Approximately 20-25 cm tall depending on yarn and hook size used.
- Balanced proportions with detailed face and layered hair give a charming representation of Anya.
Conclusion
This friendly crochet pattern combines basic amigurumi techniques with fun color changes and embroidery to bring Anya from Spy Family to life. Detailed instructions, stitch highlights, and tips have been provided to help beginners follow along with ease. Take your time with each step, especially when embroidering the facial features, as they truly give the doll her personality.