Not every sweater in stores feels right, and that frustration often pushes you to try something handmade instead. That’s when a Free Crochet sweater pattern becomes more than just instructions; it turns into a practical solution for comfort and personal style. With the right crochet sweater pattern, you can stitch a cozy pullover, oversized cardigan, or lightweight top using simple stitches and your favorite yarn.

This sweater work beautifully for layering over jeans, pairing with skirts, or wearing at home on chilly evenings. The purpose is clear: create a custom-fit garment, improve your crochet skills, and enjoy the lasting comfort of something thoughtfully handmade.
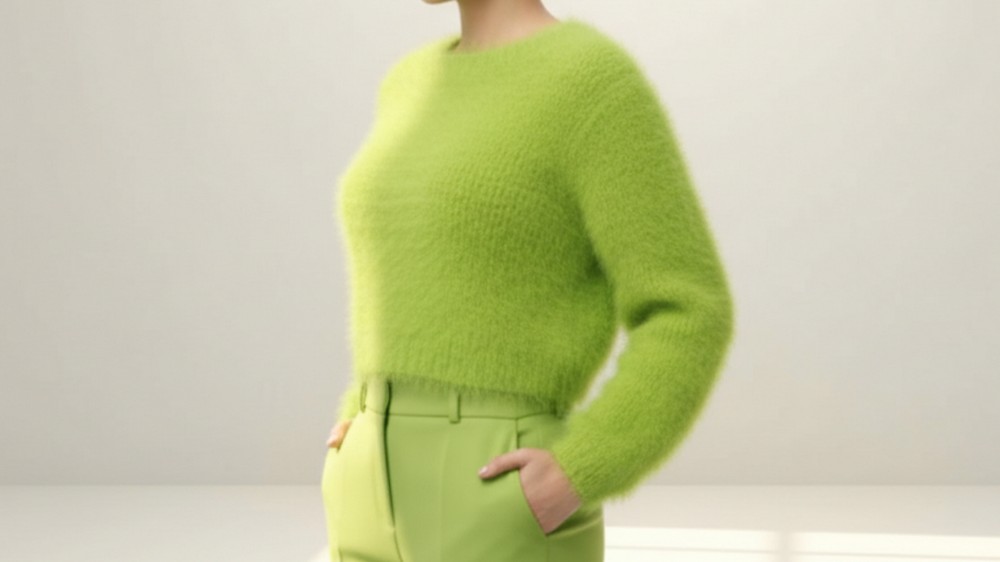
Effortless Crochet Sweater Pattern That Looks Great
Essential Materials
- Yarn:
- The designer used Tessilan Bravissimo or other similar yarn.
- Alternatives: Baby King, Justin Baby, or higher-quality options like cashmere for a luxurious feel.
- Approximate yarn requirements for size 42:
- Body: 220 g of yarn (170 g if using Arita Slim).
- Choose yarns in the DK to worsted weight category (~4.0–5.5 mm crochet hook thickness).
- Crochet Hooks:
- 6 mm hook: For most of the project (body).
- 5 mm hook: For borders.
- 4 mm hook: For tighter edging, used for ribbing.
- Measuring Tape:
- To measure sizes (neckline circumference, sweater body, and sleeves).
- Scissors
- Tapestry/Wool Needle:
- Used for weaving in loose ends and sewing seamlines.
- Stitch Markers:
- To mark important points, such as increase stitches and division points for front, back, and sleeves.
Decent Crochet Sweater Pattern
In this detailed pattern, you will learn how to create a stylish cropped, top-down sweater using simple crochet techniques. The flexible top-down design allows for easy adjustments to suit all sizes and preferences. You can make the sweater longer by crocheting additional rows for the body or customize the sleeves and neckline for a variety of styles.
Skill Level
Beginner to Intermediate
- Basic crochet stitches used: slip stitch, single crochet, double crochet, treble crochet.
Final Measurements
This pattern is adjustable to any size. The model in the tutorial creates a size 42 cropped sweater (32 cm body length). To make a full-length sweater, add more rows to achieve your desired length. Sleeve length is also customizable.
Abbreviation Key
- CH = Chain
- ST = Stitch
- SC = Single Crochet
- DC = Double Crochet
- TR = Treble Crochet
- SL ST = Slip Stitch
- Inc = Increase (2 or more stitches worked into the same stitch)
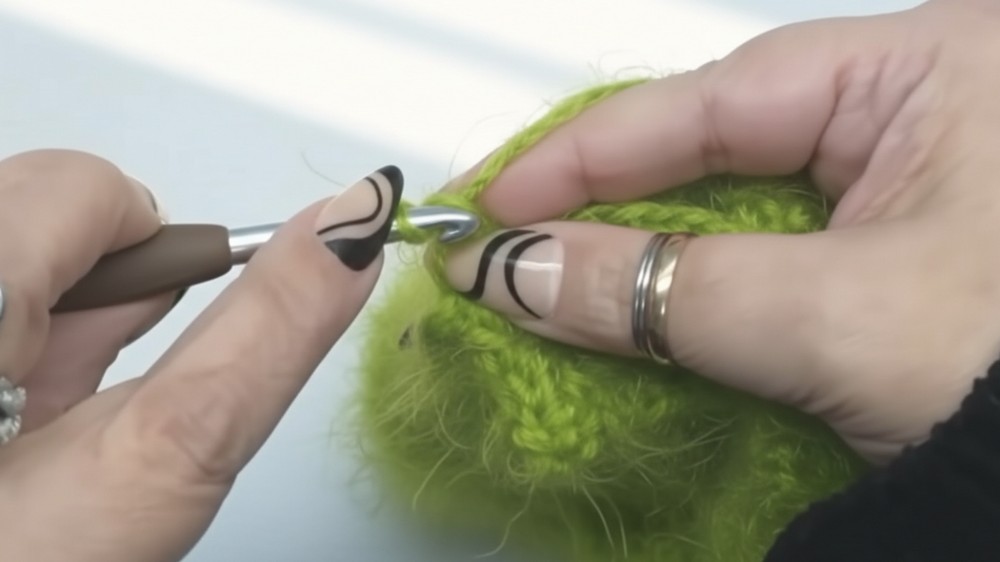
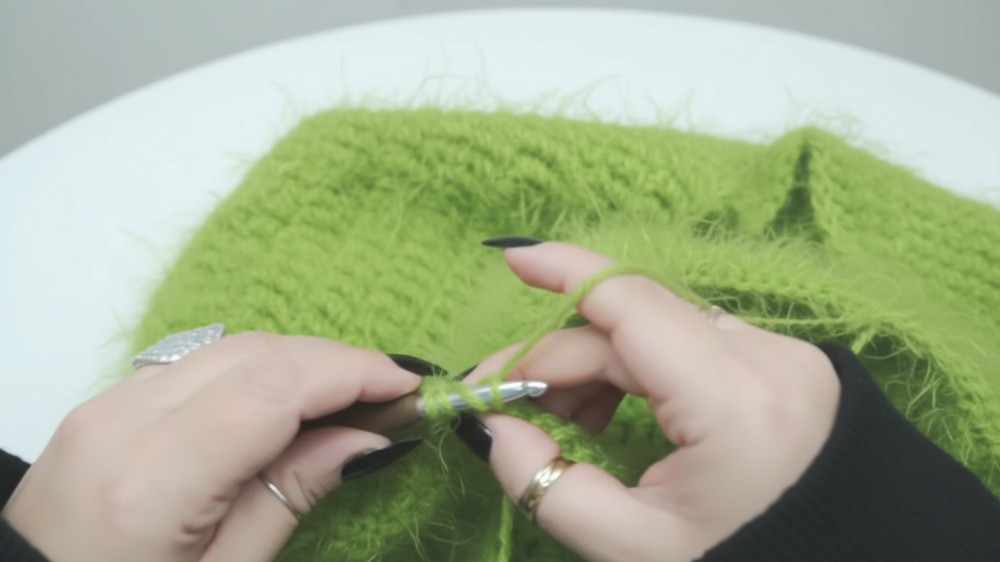
Crochet Instructions
Step 1: Create the Ribbed Neckline
- Foundation for Neckline Ribbing:
- Begin with CH 5 (for a short ribbed neckline, adjust to desired height for taller necklines).
- Add 1 extra CH (total of 6).
- Crocheting the Ribbed Rows:
- Row 1: Skip the first extra chain. Begin in the second chain from the hook. Work SL ST (slip stitch) into each chain across. (5 STs total).
- Row 2: CH 1, turn the work. Work into the back loop only for ribbing texture. SL ST into each stitch across (5 STs).
- Repeat Row 2 for 56 cm or until the ribbed strip measures 1 cm more than the head circumference. Ribbing should be stretched slightly for an accurate fit.
- Joining the Ribbing Strip:
- Once the strip is long enough, fold it in half (width-wise).
- Sew or SL ST the edges together to create a circular ribbed band.

Step 2: Establish the Yoke (Top of the Sweater)
- Picking Up Stitches on the Ribbing:
- Turn the ribbed neckline inside out (to expose the reversed side).
- Work around the circular neckline, evenly picking up stitches by inserting your hook into each prominent rib. Ensure the stitch count is divisible by 6.
- Stitch Distribution for the Yoke:
- Use a multiple of 6 stitches to divide as follows:
- 4 STs for increases: 1 stitch placed in each corner.
- The remaining stitches divided as:
- 13 STs per sleeve.
- Divide rest evenly between front and back.
- Use a multiple of 6 stitches to divide as follows:
- Begin Round 1:
- Replace the first DC with 3 aligned SC in one stitch (to mimic the height of a DC).
- Continue working DC across, following your calculated stitch distribution.
- Increases:
- At each corner, work 3 DC into the same stitch (this creates an increase). Insert a stitch marker into each center increase position to track your corners.
Step 3: Extend the Yoke
- Continue working in DC, repeating the increase pattern at each corner marked by the stitch markers.
- Measure as you go: Crochet until your yoke measures 12 cm (from neckline edge to armpit level).
- Transition to Treble Crochet (TR):
- After reaching the yoke’s desired height, switch from DC to TR for a looser and more relaxed effect.

Step 4: Divide for Sleeves and Body
- Divide the Yoke:
- Place the sleeve stitches on spare yarn or stitch holders.
- Join the front and back panels at the armpit to create the body opening.
- Sleeve Depth:
- To make looser sleeves, measure and extend your yoke until the desired sleeve depth is reached before dividing.
Step 5: Crochet the Body
- Crochet the Body Length:
- Continue working in the round for the body section using TR.
- Adjust the body length to preference (e.g., 32 cm for a cropped top or 50+ cm for a full sweater).
- Add Border (Optional):
- If creating a cropped version, add a ribbed border (like the neckline):
- Switch to a 5 mm hook for ribbing.
- Use FPDC (Front Post Double Crochet) and BPDC (Back Post Double Crochet) to create a textured ribbing effect around the hem.
- If creating a cropped version, add a ribbed border (like the neckline):
Step 6: Work the Sleeves
- Reattach yarn to the underarm.
- Work regular TR stitches around the sleeve-hole opening.
- Follow the pattern to create fitted, loose, or flared sleeve styles.
- For cropped sweater sleeves: Stop at 3–4 rows.
- For long sleeves: Continue working until the desired sleeve length.
- Add ribbed borders to cuff with 5 mm or 4 mm hook, following the FPDC/BPDC pattern.

Tips for Success
- Yarn Choices: Use fluffy yarn for a soft and cozy effect. Avoid dense or stiff yarns that reduce stretch.
- Elasticity: Always stretch-check while measuring; the ribbing is designed to fit snugly but should still be comfortable when worn.
- Blocking: Block the final project to even out the stitches and enhance its overall texture.
- Experimentation: The top-down design is highly adaptable—adjust lengths and distributions as needed.
Customization Ideas
- Color Variations:
- Use gradient yarn or color-blocking techniques for a unique look.
- Try stripes by switching colors every few rows in the yoke or body.
- Oversized or Fitted Look:
- Extend the body length for a loose, oversized sweater.
- Add shaping with decreases to create a more tailored fit.
- Embroidery or Appliqué:
- Add unique designs to the body or sleeves using embroidery or small crocheted appliqué.
Conclusion and Final Remarks
This top-down sweater is versatile, cozy, and tailored to fit your exact size and style preferences. Its top-down design allows for easy adjustments, while the combination of double crochet and treble crochet creates a textured yet lightweight fabric. Whether cropped or extended into a full-length sweater, it makes a beautiful addition to any wardrobe.