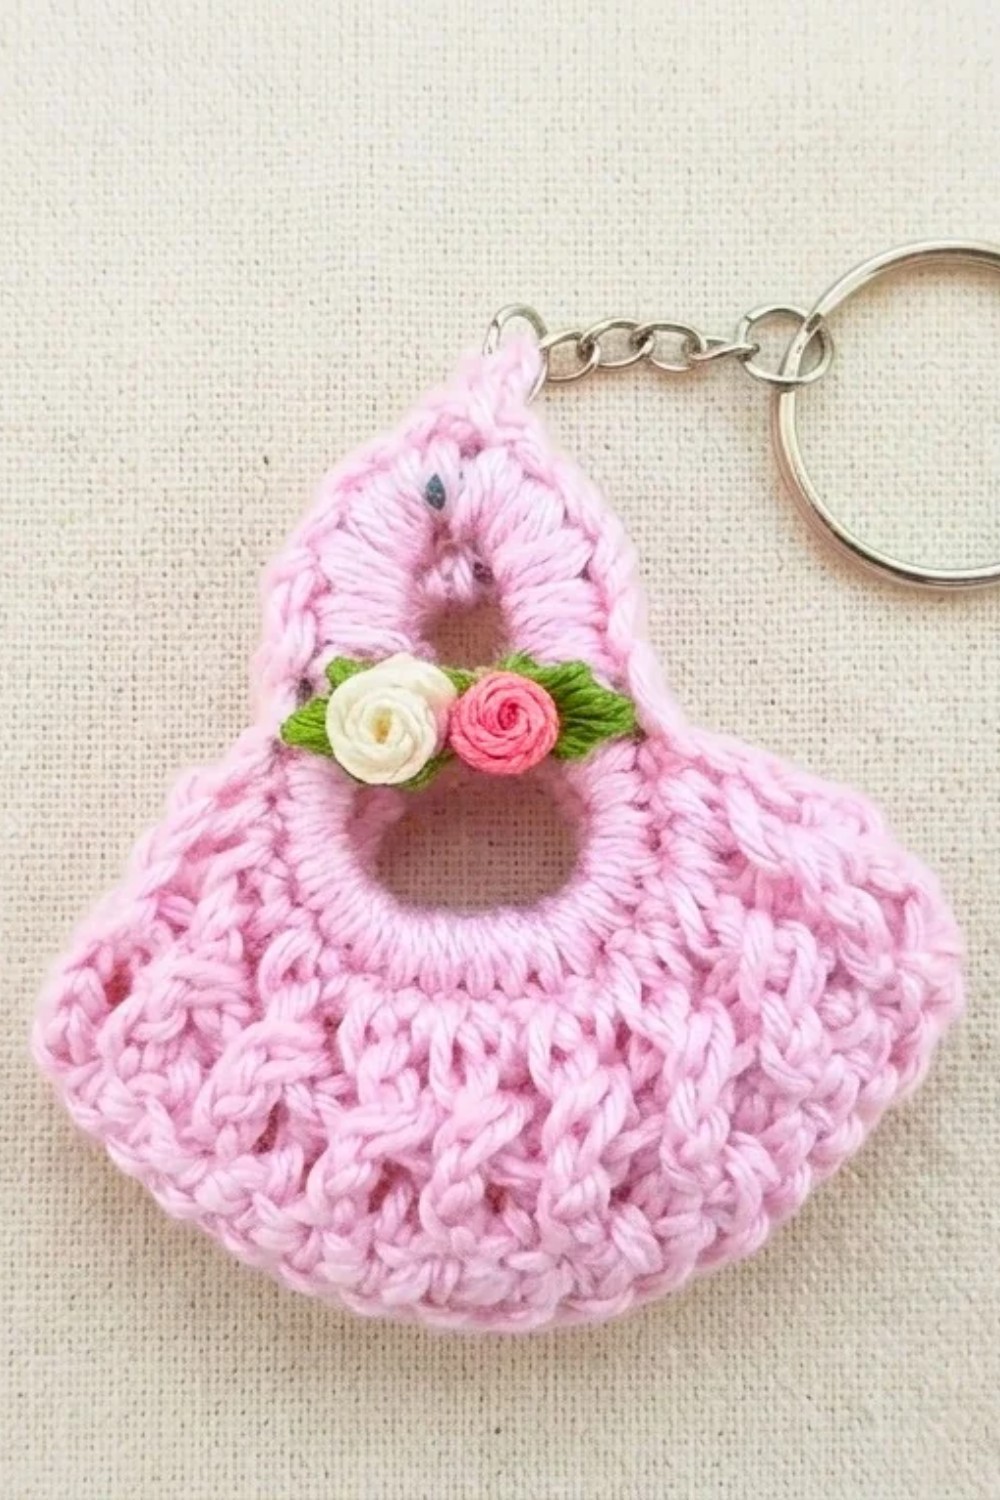
Personalize your keys with this Crochet Mini Purse Keychain Free Pattern and finish a small accessory with neat stitches and cute details.
If you're looking for a delightful and functional accessory project, the crochet keychain by Mônica Moda Crochê offers an inspiring and charming solution. Full credit goes to Mica Guimarães, who expertly guides viewers through this unique tutorial on her YouTube channel. Her design combines everyday materials with skilled crochet techniques, creating a mini purse keychain that’s both stylish and practical. The Crochet Mini Purse Keychain Pattern provides a perfect blend of creativity and convenience, ideal for anyone wanting a small yet attractive accessory.
Adorable Crochet Mini Purse Keychain Free Pattern For Bag Charm
This petite accessory reflects a playful yet elegant style, perfect for adding a splash of personality to your keys, handbag, or even as a thoughtful gift or party favor. Its small size ensures it fits comfortably in your hand or pocket, making it an excellent companion during any season. Whether you’re heading to a casual outing or want to brighten up your daily essentials, this mini purse keychain complements a variety of looks and occasions effortlessly.
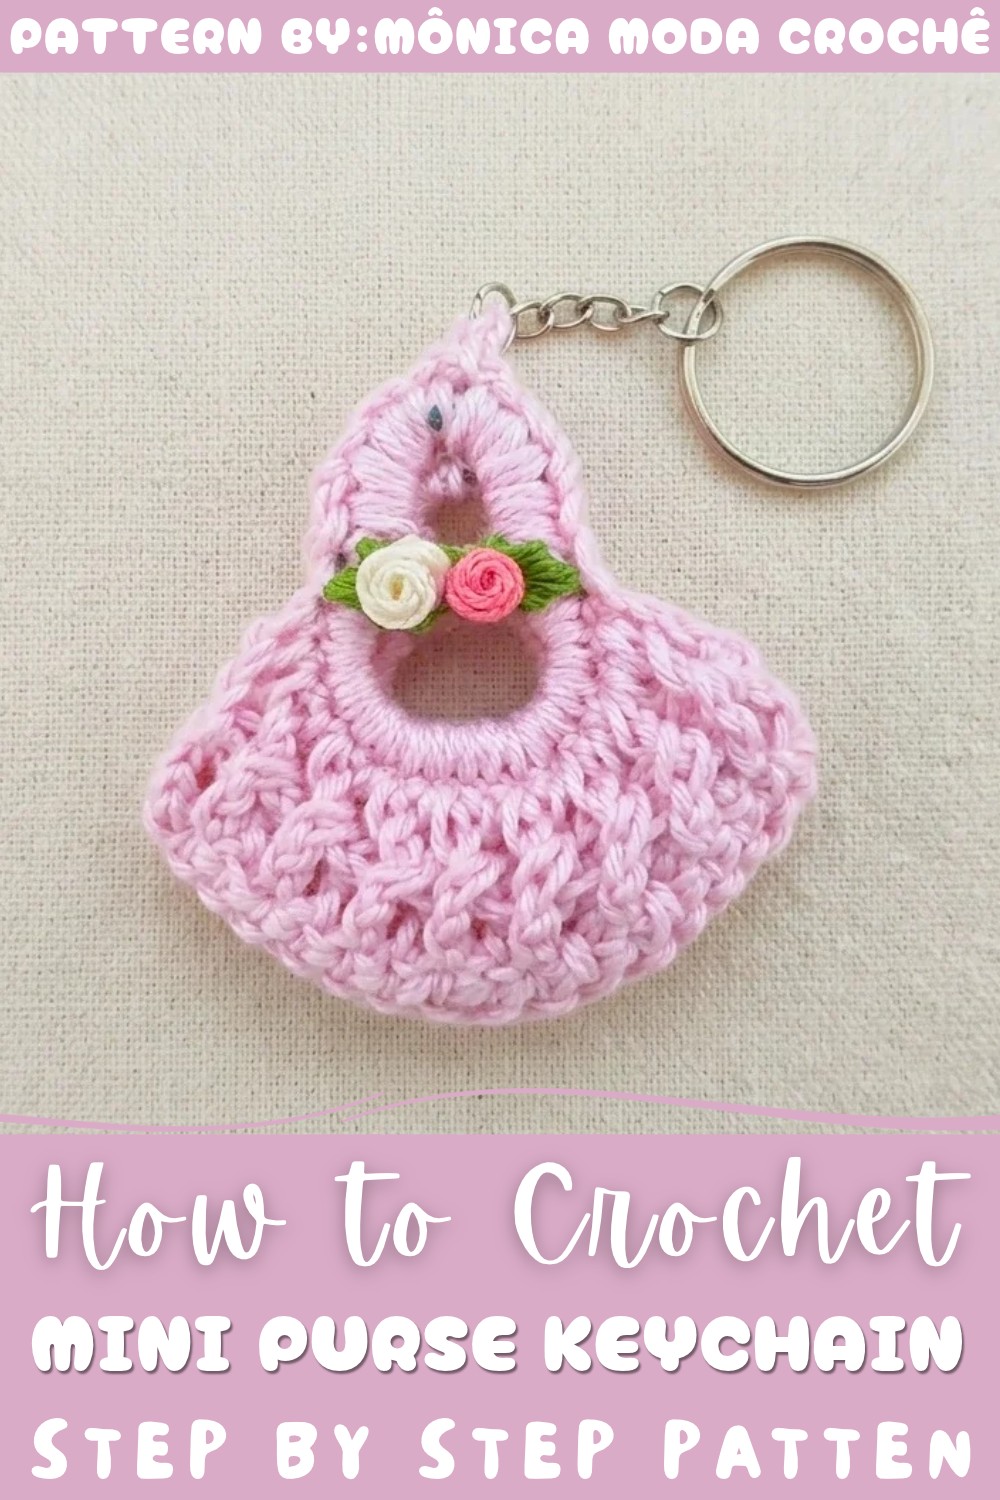
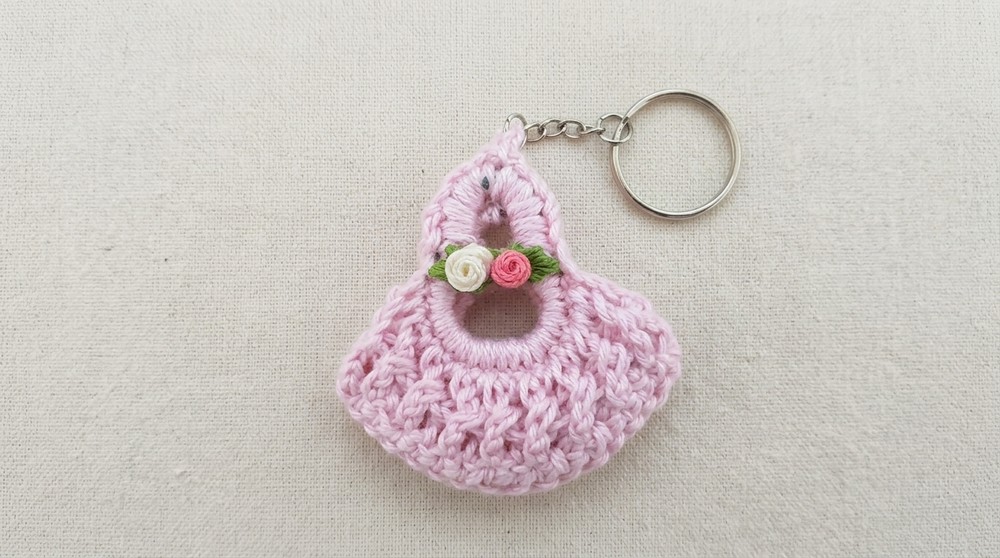
Texturally, the mini purse showcases a mix of smooth and raised stitches that create a lovely relief effect, adding depth and tactile interest. The stitching alternates between front and back loop double crochets, lending the piece subtle dimension and resilience. The design is thoughtfully shaped around recycled can tabs, cleverly hidden beneath the yarn cover, allowing the purse to hold its form while remaining lightweight.
Adding to its appeal, delicate polymer clay decorations adorn the purse’s surface, enhancing the overall charm without overpowering the design. The finished piece is secured with a sturdy key ring attachment, making it both functional and visually appealing. This project invites you to explore a delightful blend of materials and textures—perfect for anyone eager to bring a bit of whimsy and usefulness to their everyday accessories.
Charming Crochet Mini Purse Keychain Free Pattern
A keychain pouch with a hint of handmade charm stands out as both functional and stylish. This compact accessory uses upcycled aluminum pull tabs and vibrant cotton yarn to form a small yet sturdy pouch ideal for daily essentials like coins, keys, or small treasures. Each element, from the structured ribbing to the textured panels, is thoughtfully constructed for maximum durability and appeal. Adorned with delicate miniature flowers and anchored with a metal keychain ring, this pouch combines practicality with decorative detail. The process is approachable for those familiar with basic crochet stitches, and it offers a practical way to utilize leftover materials. Whether clipped to a bag or carried on a set of keys, this accessory merges resourcefulness and aesthetic value seamlessly.
Quick Overview Of Pattern
- Cover two can pull tabs with single crochet to create sturdy handles.
- Work the pouch body directly onto the pull tab with double crochet and textured crochet ribbing.
- Make two identical panels for the front and back of the pouch.
- Seam both panels together using single crochet along the bottom curve.
- Decorate with floral embellishments and glue for a cute finish.
- Close the top and add a keychain ring so the pouch can be used as an accessory.
- Enjoy your finished mini crochet pouch!
Notes
- This project is ideal for upcycling aluminum can pull tabs, offering both sustainability and creativity.
- Single crochet stitches are used to cover tabs, double crochet for the pouch body, and alternating front/back post double crochets provide the textured ribbing.
- Assembly requires careful alignment of panels for a smooth finish.
- Adjust the number of stitches as needed if working with different tab sizes.
- Decorative accents are optional but add a personal, whimsical touch.
Skill Level
Beginner to Advanced Beginner
This design requires familiarity with basic crochet stitches and is perfect for those comfortable with both single and double crochet, as well as front/back post technique.
Materials
- Yarn: Charme yarn (100% cotton), baby pink or any color of your choice
- Crochet Hook: 4.0 mm (size 4, nickel-plated recommended)
- Pull Tabs: 2 sardine can or soda can tabs, cleaned and dried
- Keychain Hardware: 1 metal keychain ring (with or without chain)
- Embellishments: Cold porcelain / polymer clay (biscuit) mini flowers and leaves
- Adhesive: Universal craft glue
- Notions: Scissors, tapestry needle
Measurements / Sizing
- Finished Size: Roughly 5–6 cm wide and 6–7 cm tall (including handle), depending on tab and yarn thickness.
- Capacity: Perfect for coins, a small keepsake, or a lip balm.
Gauge (and Stitch Pattern if applicable)
- Gauge: Not critical; ensure your stitches are tight enough for sturdy fabric.
- Primary Stitch Pattern: Single crochet, double crochet, alternating front and back post double crochet.
Stitch Abbreviations (US Terms)
- ch – chain
- sl st – slip stitch
- sc – single crochet
- dc – double crochet
- FPdc – front post double crochet
- BPdc – back post double crochet
Special Stitches
- Front Post Double Crochet (FPdc): Yarn over, insert hook from front to back and around the post of the designated dc from the row below, yarn over and finish a dc as usual.
- Back Post Double Crochet (BPdc): Yarn over, insert hook from back to front and around the post of the designated dc, yarn over and finish a dc as usual.
The Crochet Pattern
Creating the Pouch Panels (Make 2)
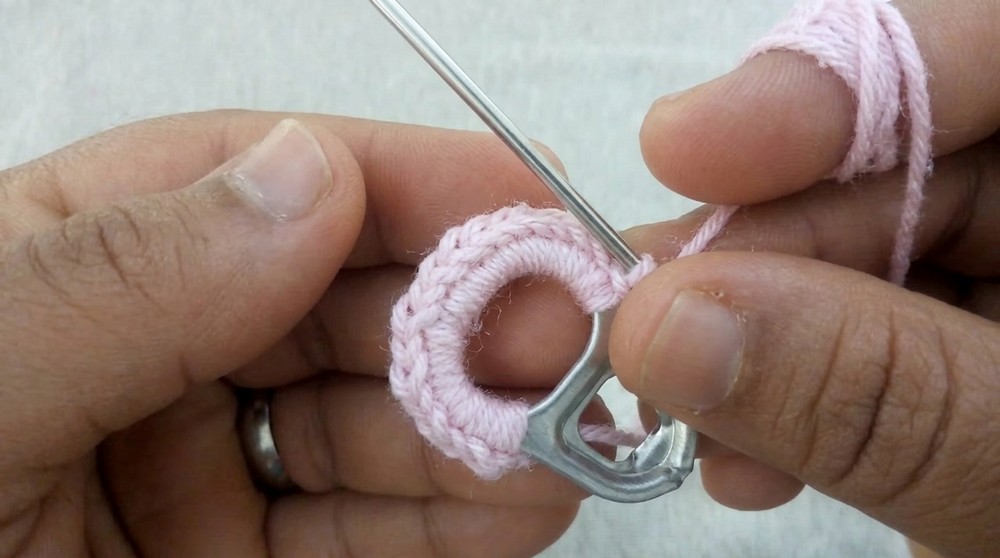
Round 1: Covering the Pull Tab (Handle Section)
- Form a slip knot and place it on your hook.
- Hold a sardine (or soda can) pull tab with the large hole at the bottom and small hole at the top.
- Larger Section (Bottom):
- Insert your hook through the large hole and work 18 sc evenly around the bottom half of the tab.
- Smaller Section (Top):
- Without cutting the yarn, move up to the smaller top hole and work 10 sc evenly into the upper arch of the tab.
- Finishing the Round:
- Join with a sl st to the first sc made in the large section.
Row 2: Pouch Body Base
- Ch 3 (counts as your first dc).
- Work 1 dc into each of the next 17 sc across the larger bottom section of the panel (leaving the small top section unworked).
- At the end, you should have 18 dc total along the bottom edge.
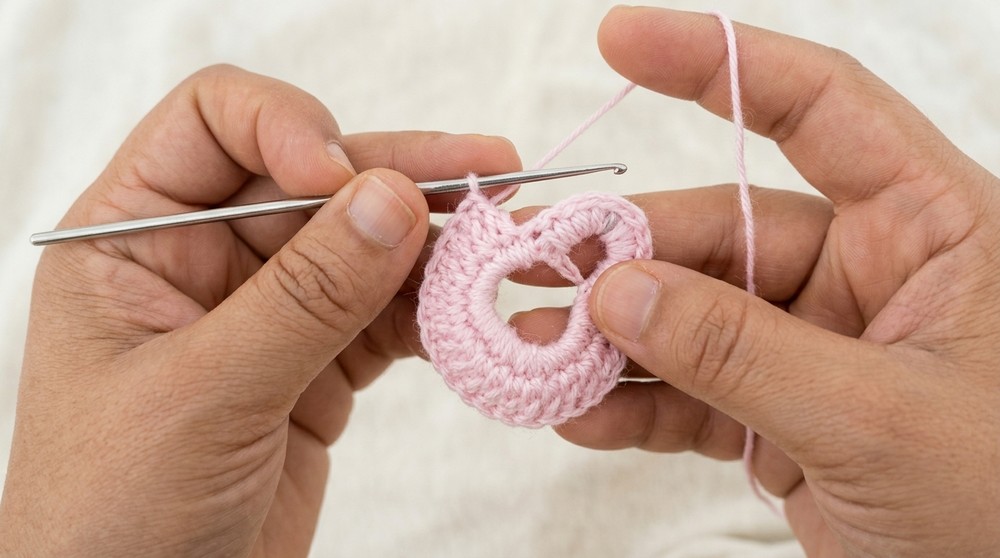
Row 3: Textured Ribbing (Post Stitches)
- Ch 3 and turn your work.
- Skip the first stitch at the base of your turning chain.
- Alternate Post Stitches:
- BPdc around the post of the 2nd dc,
- FPdc around the post of the 3rd dc;
- Continue alternating BPdc and FPdc across every post until you reach the last stitch.
- Finish the row by working 1 regular dc into the top of the 3rd chain from the previous row.
- Fasten off and weave in your yarn tail on this first panel.
Repeat all steps above to make a second identical pouch panel, but do not cut the yarn on the second panel.
Assembly & Finishing
Joining the Two Panels
- Place both pouch panels together, right sides (textured side) facing out and wrong sides facing in.
- With your working yarn at the corner of the second panel, insert your hook through the aligning stitches of both panels.
- Work 1 sc evenly along the bottom curved edge, moving stitch for stitch through both layers to neatly seam them shut.
- At the end of the curve, ch 1, cut the yarn, and weave in the tail securely inside the pouch.
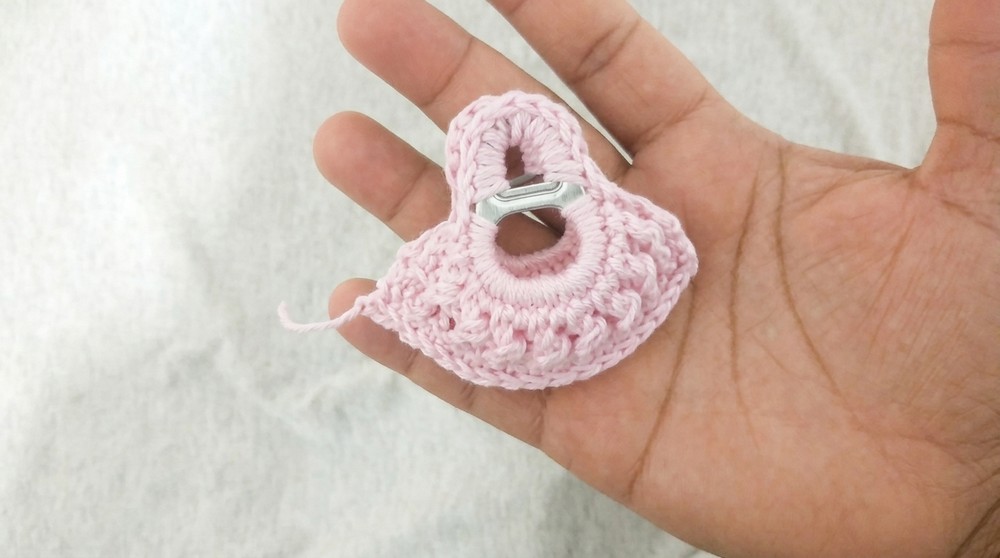
Decorating the Pouch
- Apply dots of universal glue to the back of your miniature cold porcelain (biscuit) flowers and leaves.
- Gently press the decorations onto the front of the pouch just below the pull tab handle; let dry completely.
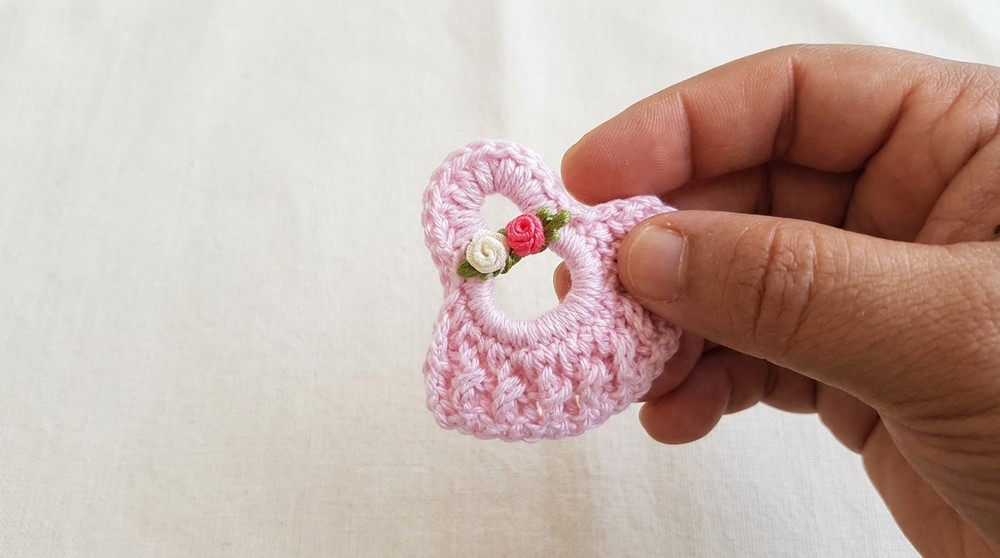
Attaching the Keychain Ring & Closing the Top
Note: If making as an open party favor pouch, skip this section. For a secure keychain, follow the steps below:
- Make a slip knot and place on hook.
- Align both small handle sections (the top 10-sc arches of each panel) together.
- Insert hook through the top center stitch of both panels; join with a sl st.
- Ch 1.
- Hold your metal keychain ring at the top center. Insert hook through the ring, yarn over, and pull the loop through.
- Ch 1 to secure the ring in place.
- Sl st back into the first ch made after attaching ring.
- Work one more sl st into the top space of the pull tab handle to anchor the ring securely.
- Ch 1, cut the yarn, and weave the end neatly inside the pouch.
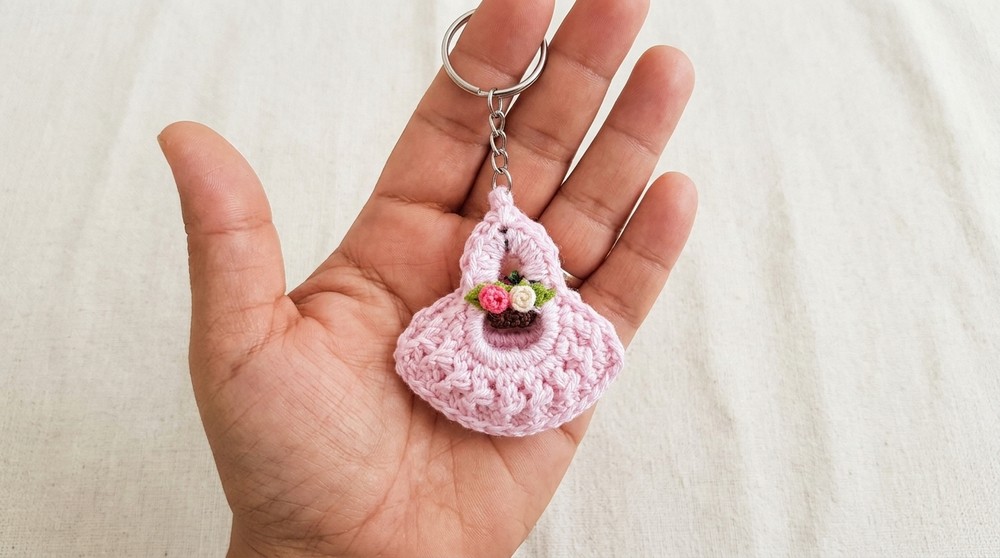
Assembly & Finished Size
- Your mini pouch should be sealed at the bottom, with both handles joined and ring securely attached at the top.
- Affix all embellishments and make final adjustments by hiding any visible yarn tails.
- Finished Size: Approx. 5–6 cm wide × 6–7 cm tall.
Conclusion and Ending Words
Completing this miniature keychain pouch evokes a sense of accomplishment and attention to detail. Every component—from the upcycled pull tab handle to the intricate ribbed texture—serves a functional and visual purpose, demonstrating how everyday items can be repurposed into charming, useful pieces. The pouch offers a small but satisfying challenge, inviting care and focus through each step of assembly and finishing. Decorative touches such as floral embellishments further personalize the final result, making the accessory unique to its maker. Once attached to a bag or keyring, the pouch not only holds small items securely but also serves as a reminder of inventive reuse and skillful handwork. Such a thoughtful project brings warmth and character to the items used every day.