Stitch colorful squares with this Crochet Granny Square Free Pattern and join them into a lovely blanket that feels special in any room.
Creating vibrant, eye-catching designs with simple stitches has a timeless appeal that continues to inspire many. On the Mônica Moda Crochê YouTube channel, Mônica Guimarães offers a detailed tutorial featuring variegated yarn that beautifully highlights the charm of this technique. Perfect for various projects, the Crochet Granny Square Pattern holds great gifting potential, as these colorful squares can be combined to create personalized, heartfelt presents. Additionally, their decorative value enhances any living space, providing warmth and a touch of handmade charm.
Quick Crochet Granny Square Free Pattern Using Leftover Yarn
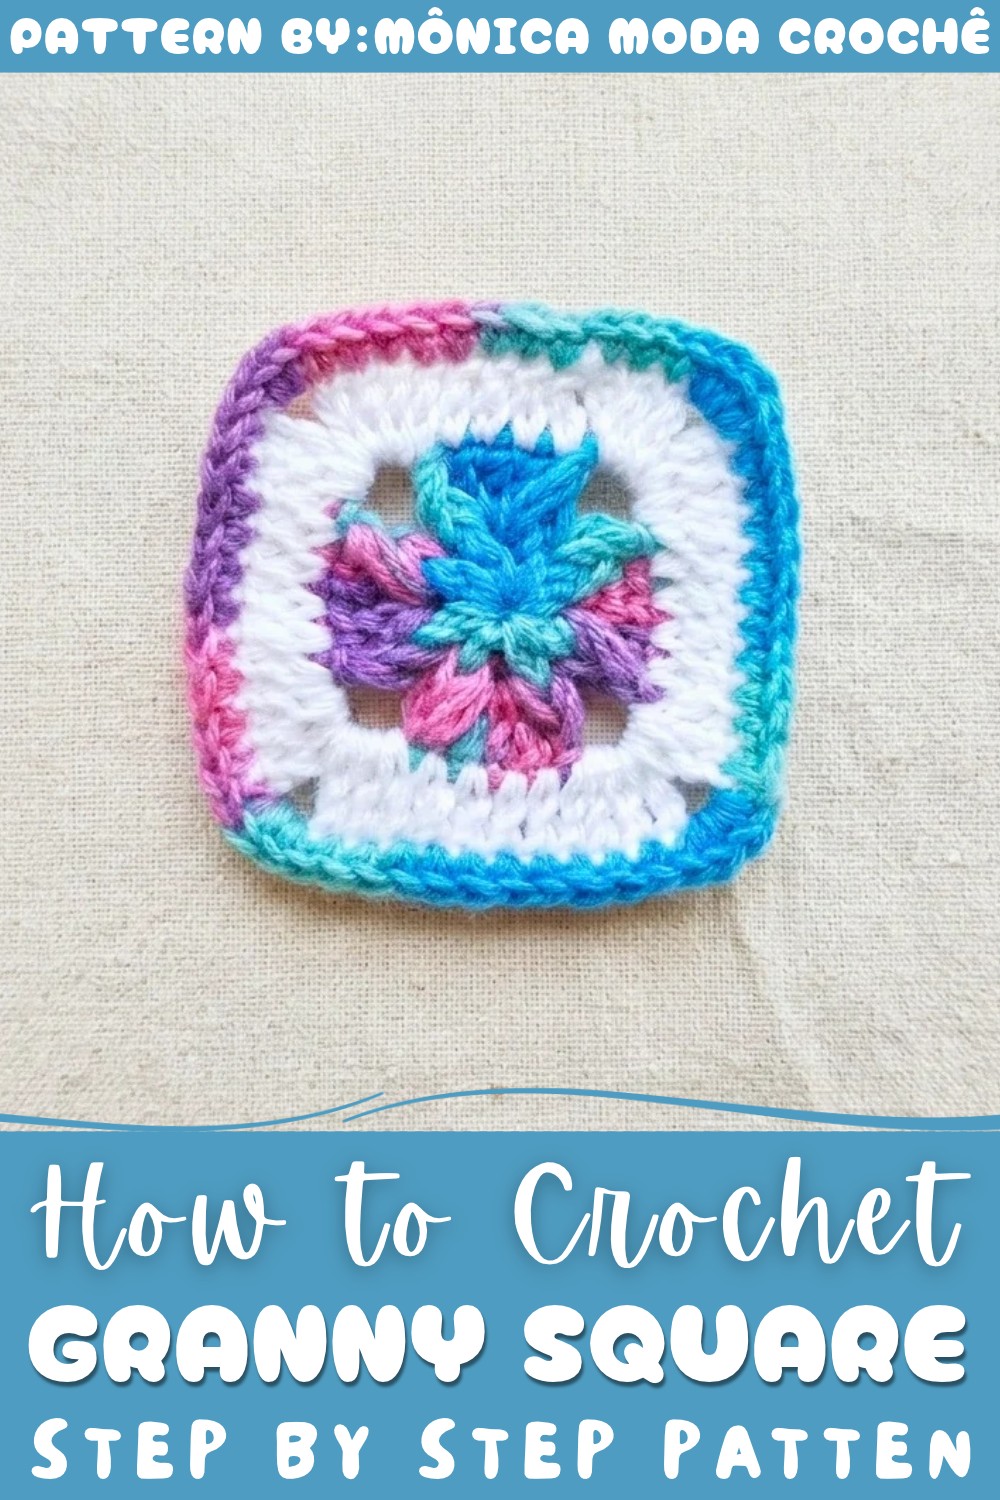
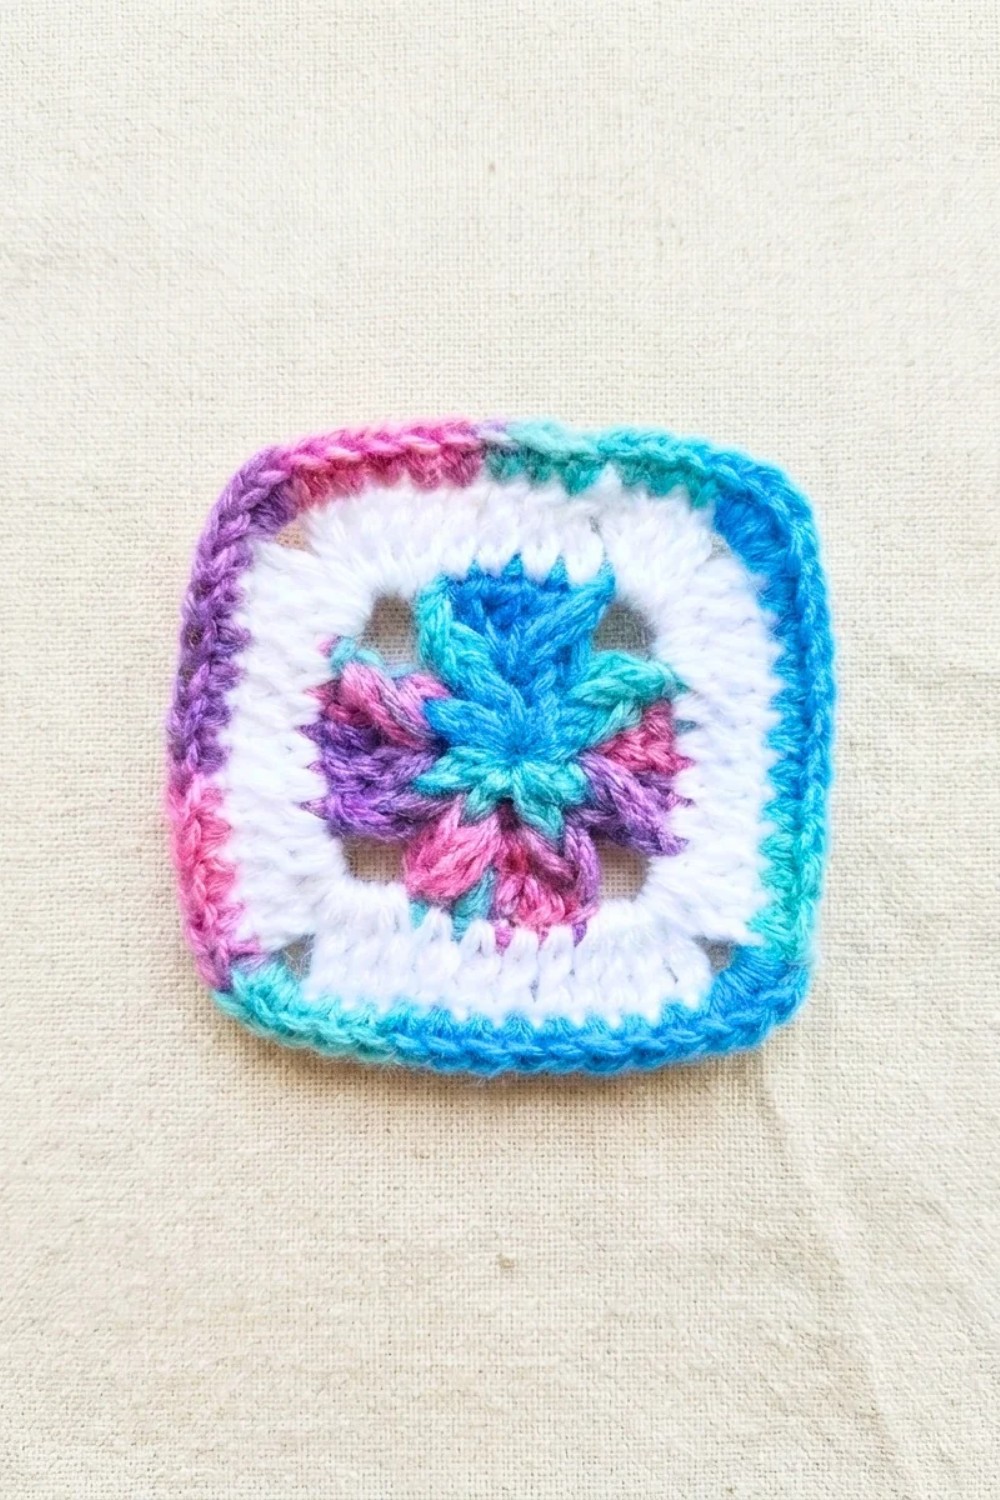
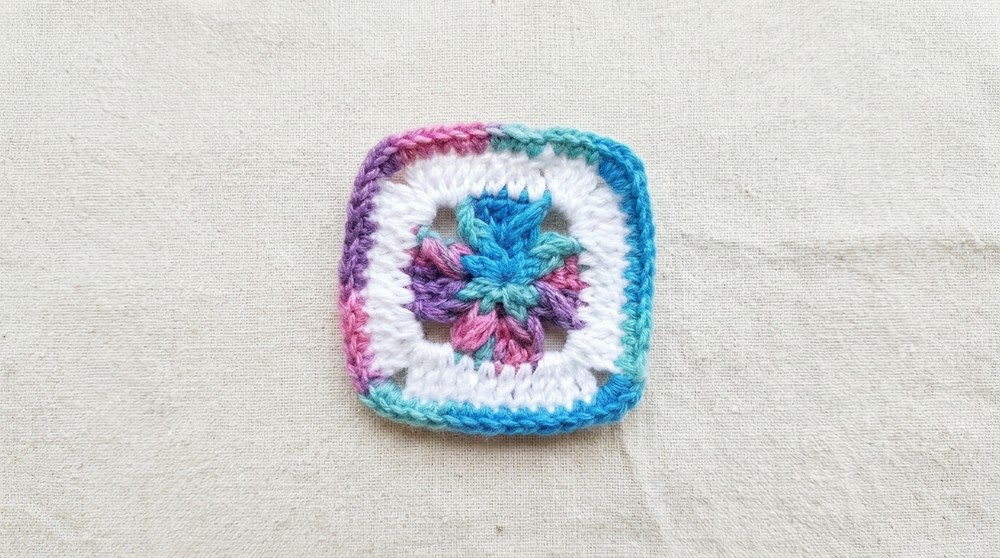
This pattern stands out with its distinct texture and neat shape. The square’s structure is firm but flexible, created by alternating stitch techniques that produce a rhythmic and textured surface. The pattern’s signature V-shaped stitch clusters form striking geometric details that catch the eye, while the variegated yarn adds depth and vibrancy with smooth color transitions. The finished granny squares have a cozy and inviting feel, making them ideal for adding both comfort and style to home décor or apparel.
Whether used to assemble a colorful throw or to craft unique accessories, the Crochet Granny Square Pattern combines tradition with a fresh aesthetic. Its balanced blend of texture, appearance, and practicality makes it suitable for anyone looking to create decorative items with a timeless appeal and personal flair. The design embraces simplicity without sacrificing sophistication, making it a delightful project with stunning results.
Charming Crochet Granny Square Free Pattern
Today’s motif features a delicate fusion of color and texture, structured in four approachable rounds. The pattern begins from a tidy center ring, grows outward with post stitch clusters, and squares off into a classic motif with crisp borders and sophisticated corners. Using both variegated and white yarns, this project demonstrates how color interplay and post-stitch texture can refine a simple square. Throughout each step, you’ll be guided clearly to achieve crisp corners, textured post-stitch petals, and a harmonious, finished square—perfect for blankets, bags, or other creative applications. This motif is suitable for using up leftover yarns or highlighting a beautiful colorway, and focuses on building skills from basic stitches to post-stitch textures, making it rewarding for a broad range of crocheters.
Quick Overview Of Pattern
- Foundation: Work a center ring with 5 chains, joined.
- Round 1: Form wheel with eight double crochets separated by chain spaces.
- Round 2: Shape square structure: alternate front post dc clusters and triple dc groups, plus chain-3 corners for definition.
- Round 3: Attach contrasting yarn, create “Triple V Stitch” corners, and work classic square sides.
- Round 4: Border all edges with single crochets for a neat finish.
Notes
- This pattern is written in US crochet terminology.
- Substituting similar weight yarns will affect finished size and appearance.
- Try to maintain a consistent tension throughout for uniform texture and straight sides.
- Variegated yarn creates unique color permutations for every motif, enhancing visual interest.
- Use leftover solid scraps as accents to maximize materials.
- Pattern is worked in the round; turning directions is not necessary.
Skill Level
Advanced Beginner to Intermediate
- Proficiency in working in the round, front post double crochet, and post-stitch clusters is recommended. Basic familiarity with increases and pattern reading is helpful. Suitable for those wanting a gentle challenge but not requiring advanced techniques.
Materials
- Yarn: Charme yarn (100% cotton)
- Color A: Variegated "Mermaid" colorway
- Color B: Solid white (scrap or full ball)
- Crochet Hook: Size 4 nickel-plated steel (approx. 2.5mm or 4.0mm depending on regional sizing)
- Notions: Scissors, tapestry needle for finishing
Measurements / Sizing
- Finished Square: Approximately 10x10 cm (may vary based on tension and yarn thickness)
- Motif thickness: About 3–4 mm
Gauge (and Stitch Pattern if applicable)
- Gauge is not critical for this motif; aim for a flat, non-wavy square.
- All stitches are worked into either rings, spaces, or around posts as specified.
Stitch Abbreviations
| Abbreviation | Meaning |
|---|---|
| ch | chain |
| sl st | slip stitch |
| sc | single crochet |
| dc | double crochet |
| fpdc | front post double crochet |
| fpdc2tog | front post double crochet 2 together |
| st(s) | stitch(es) |
| sp | space |
Special Stitches
Front Post Double Crochet Two Together (fpdc2tog/cluster):
- Yarn over, insert hook from front to back around the post of stitch as indicated.
- Yarn over, draw up a loop. (3 loops on hook)
- Yarn over, draw through 2 loops. (2 loops remain)
- Yarn over, insert hook from front to back around the same post again, yarn over, draw up a loop. (4 loops on hook)
- Yarn over, draw through 2 loops (3 loops remain)
- Yarn over, draw through all 3 loops to complete the cluster.
The Crochet Pattern
Foundation Ring
- With Color A (variegated), make a slip knot and ch 5.
- Insert your hook in the very first chain and join with a sl st to form a small center ring.
Round 1: Center Wheel
- Ch 4 (this counts as 1 dc and 1 ch-1 space).
- [Work 1 dc in the center of the ring, ch 1] repeat 7 more times so you have a total of 8 dc, each separated by a ch-1 space.
- After the last ch-1, join with a sl st into the 3rd ch of your beginning ch-4.
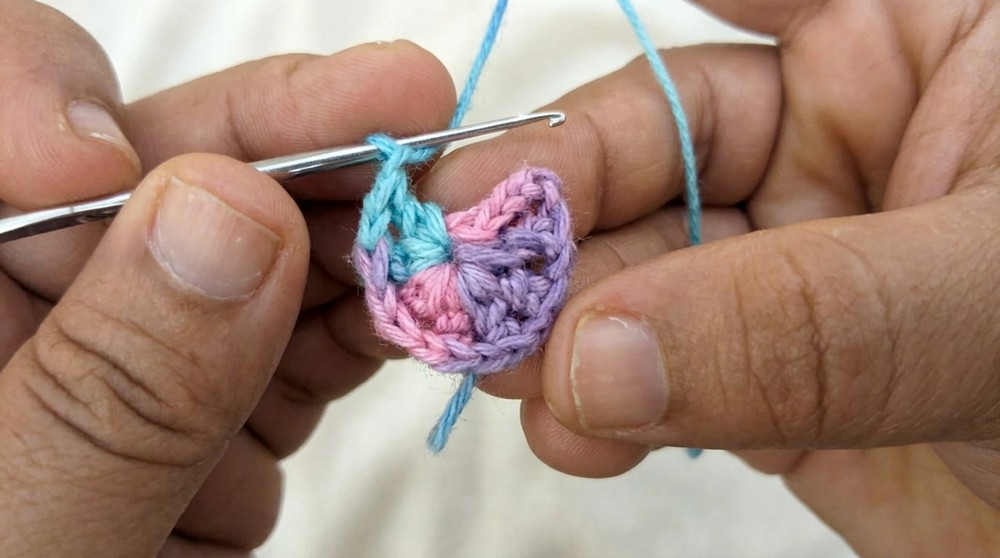
- This round establishes the spoke-like structure for later rounds.
Round 2: Textured Petals & Corners
- Ch 1 to start.
- Work fpdc2tog (front post dc cluster) around the post of the starting ch-3 of previous round.
- See Special Stitches for full details.
- Ch 3 (this is your first corner space).
- Next, work fpdc2tog around the next dc post.
- Into the next ch-1 space, work 3 dc (these form the side “petals”).
- Then, fpdc2tog around the next dc post.
- Ch 3 (second corner space).
- fpdc2tog around the next dc post, then 3 dc in the next ch-1 space.
- Repeat this alternation all around:
- fpdc2tog around post, ch 3, fpdc2tog around next post, 3 dc into next ch-1 space
- By the end, you will have 4 groups of 3 dc (one per side) and 4 ch-3 spaces (one per corner).
- Join with a sl st into top of the very first fpdc2tog cluster.
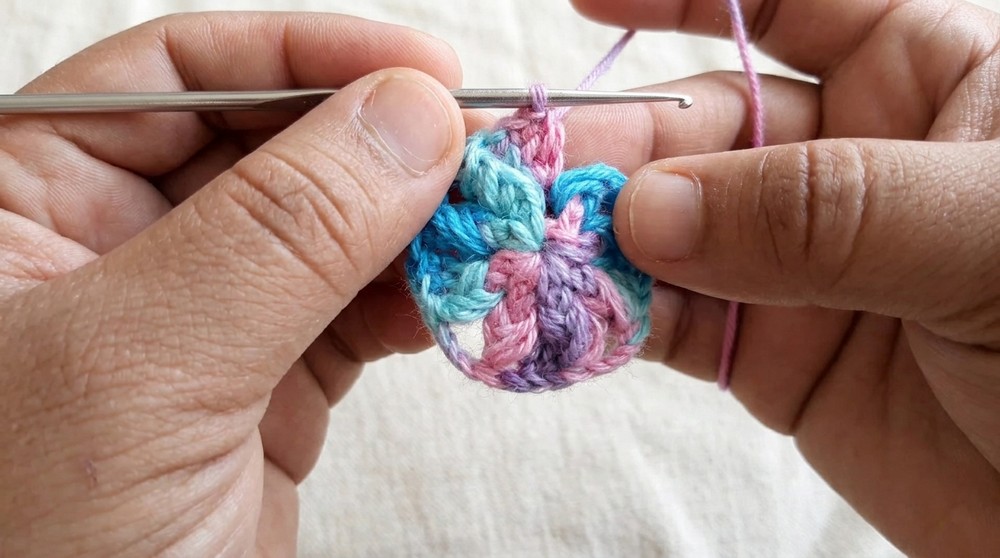
- Ch 1, fasten off Color A, and cut the yarn. Secure and weave in the end if desired.
Round 3: Squaring the Motif
- Attach Color B (white) to any ch-3 corner space with a sl st.
- Into the same corner space, ch 3 (counts as 1 dc), 2 more dc (3 dc in total), ch 2, and 3 dc again—all into the same space. (This is your “Triple V Stitch” corner.)
- To work the side:
- Into the top of the first fpdc2tog cluster, work 1 dc.
- Into each of the next 3 dc from Round 2, work 1 dc in each.
- Into the top of the next fpdc2tog cluster, 1 dc.
- (This creates a straight, solid side of 5 dc.)
- For each next corner, repeat: 3 dc, ch 2, 3 dc in corner space, then work 5 dc across the next side (as above).
- Continue this sequence all the way around.
- Join with a sl st to the top of the beginning ch-3 to complete the square.
- Ch 1, fasten off Color B, and cut the yarn.
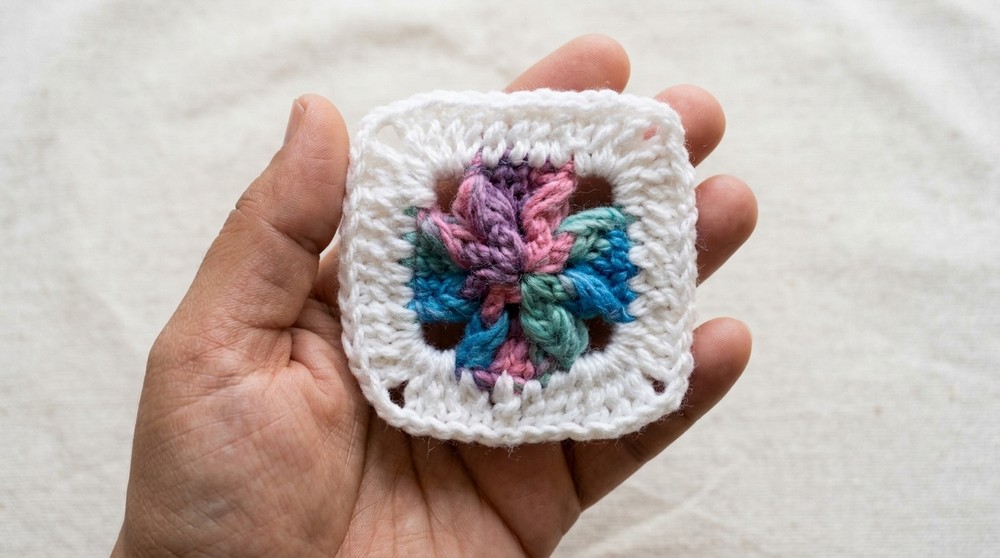
Round 4: Border & Finishing
- With Color A, make a slip knot and join with a sl st into any ch-2 corner space.
- In that corner, work 3 sc.
- Moving across the next side, work 1 sc into each of the 11 dc stitches:
- This includes the 3 corner dc, 5 side dc, and 3 dc from the next corner.
- Into the next ch-2 corner, work 3 sc.
- Repeat this process:
- 3 sc in every corner ch-2 space
- 1 sc in each dc along the sides (total: 11 per side)
- Join with a sl st to the first sc of the round.
- Ch 1, fasten off Color A, and cut the yarn.
- Weave in all loose ends neatly on the wrong side with a tapestry needle for a professional finish.
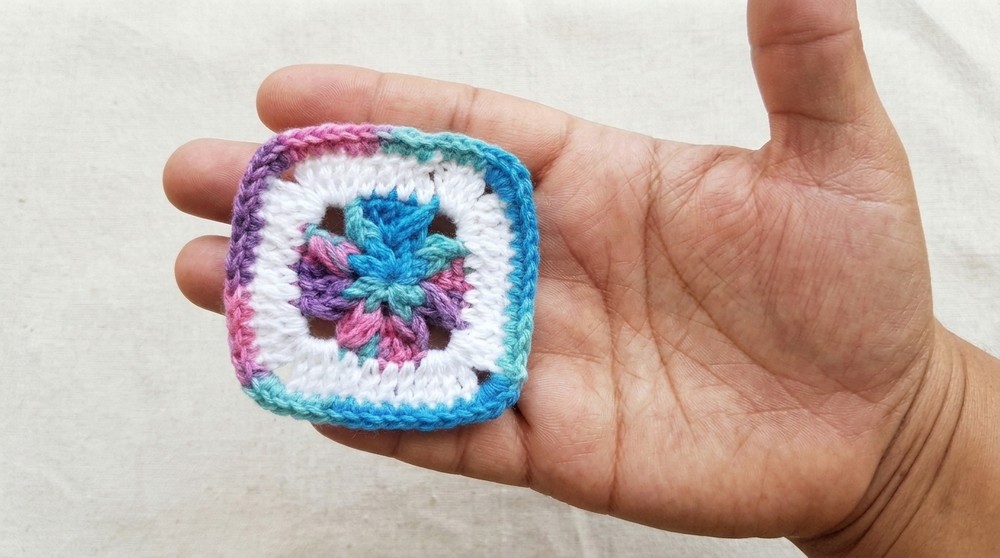
Assembly & Finished Size
- No separate assembly required. The motif is complete after Round 4.
- Block gently, if desired, to ensure square shape—light steam blocking yields crisp edges and esthetic uniformity.
- Square should measure close to 10 x 10 cm.
Conclusion and Ending Words
Every round of this motif brings distinct texture and visual appeal, achieved through strategic use of post stitches and dynamic color placement. The combination of front post double crochets and triple groups develops a subtle raised structure, while crisp corners and strong side edges provide a clean, geometric finish. Completing the border with single crochets in the variegated yarn unifies the design, presenting a lively but balanced square. This pattern stands out for its clean transitions and decorative finishes, as well as for its thoughtful use of both leftover and specialty yarns. Whether joined together for a larger project or used as a singular decorative accent, this square brings a contemporary flair to the classic granny motif, combining skill-building stitches with customizable color arrangements for countless creative possibilities.