Personalize your backpack with this Crochet Flower Keychain Free Pattern and attach a pretty blossom that adds a playful touch to school days.
There’s something truly delightful about small, handmade accessories that brighten up everyday items, and a crochet flower keychain fits perfectly into that charming category. These petite floral accents bring a touch of warmth and personality to your keys, bags, or even as sweet little gifts for friends. Thanks to the thoughtful tutorial and design shared by Mônica Guimarães on her YouTube channel Mônica Moda Crochê, making your own is easier than ever. If you’re looking to add a splash of playful elegance to your essentials, the crochet flower keychain pattern is a wonderful project to try.
Delightful Crochet Flower Keychain Free Pattern For Handbags
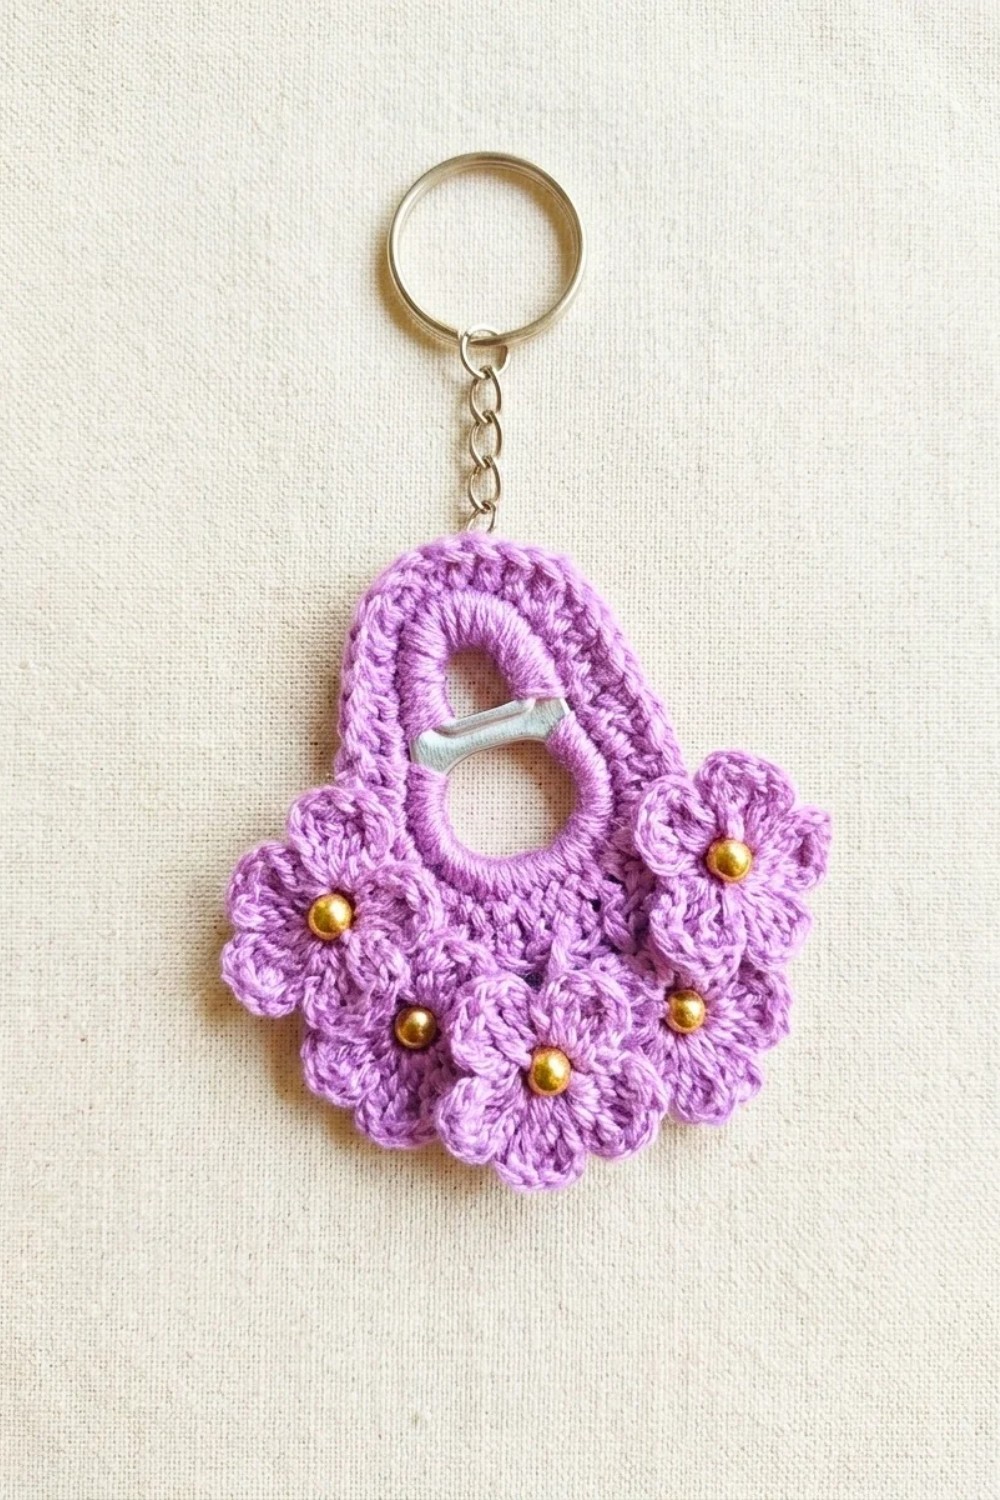
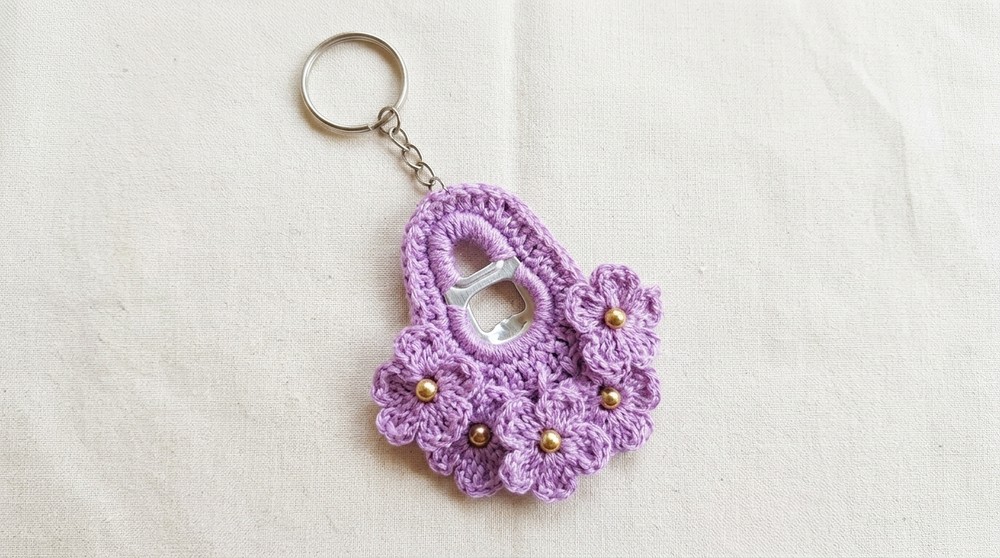
This keychain features delicate little blooms arranged around a repurposed can tab, creating a unique base that blends sustainability with creativity. The flowers have a soft and textured feel that’s pleasant to touch and visually appealing. The round shape of the can tab complements the floral design beautifully, making the piece sturdy yet lightweight enough to carry every day.
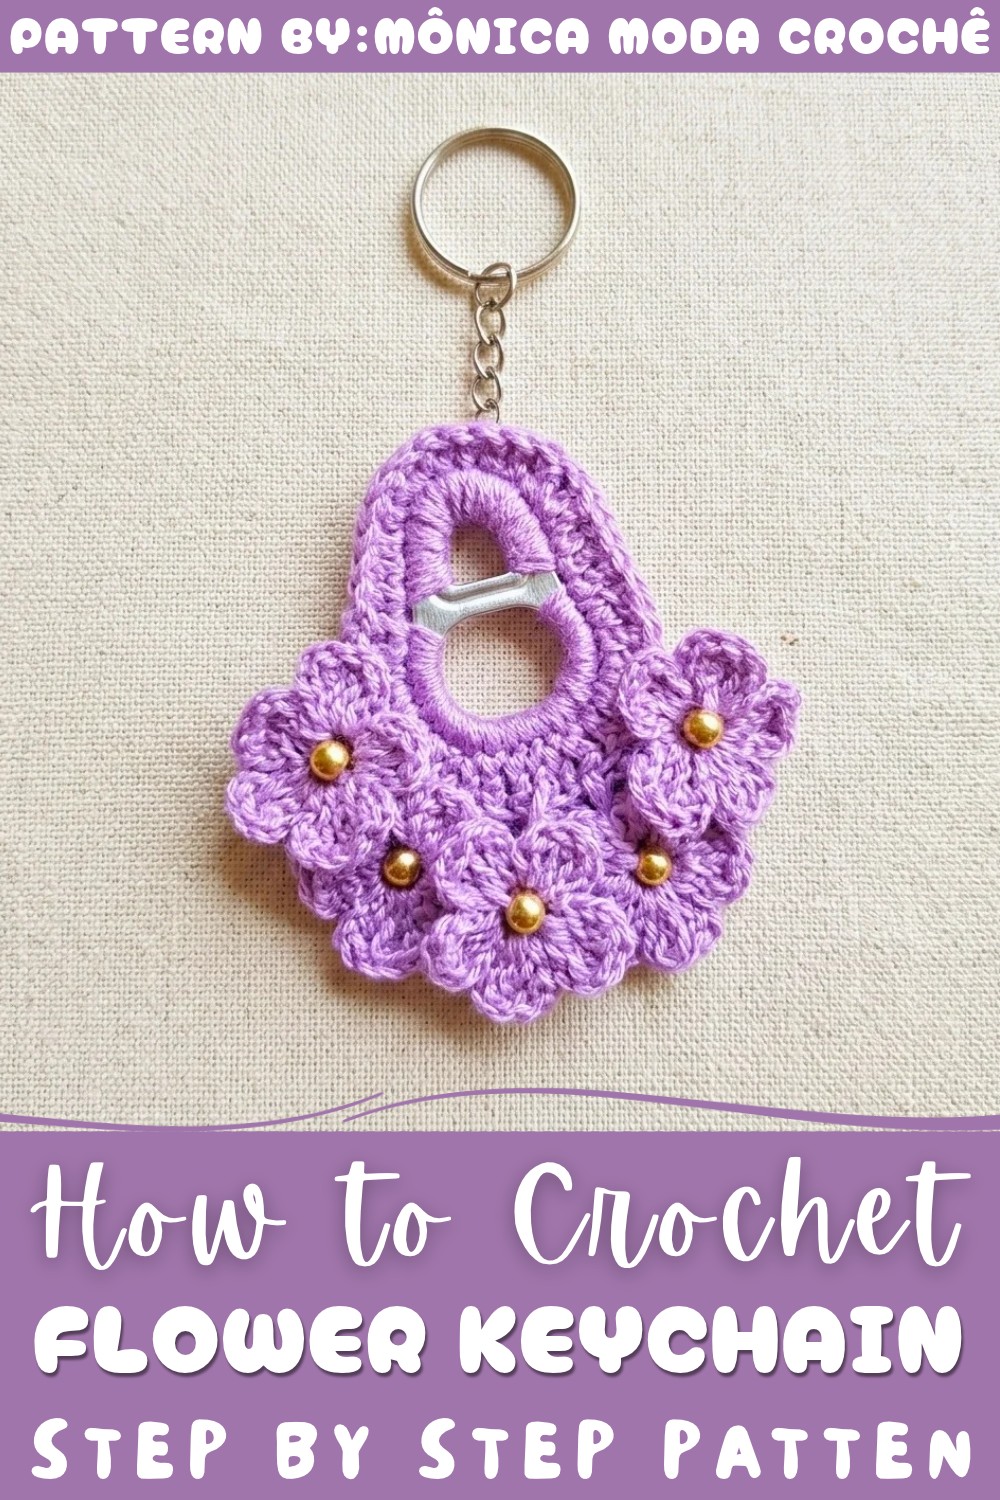
What’s great about this project is its versatility. You can personalize it by choosing different yarn colors or adding little beads or pearls to the flower centers for a sparkly touch. Plus, the size of the keychain makes it practical—not just decorative—helping you locate your keys faster or decorate your bag zipper in style.
Whether you’re just starting out with yarn or have been working with it a while, you’ll find this project rewarding and approachable. Along the way, you’ll get comfortable working in rounds, shaping petals, and attaching embellishments, all skills that open doors to other creative possibilities. If this sounds like a fun and lovely addition to your accessory collection, why not give it a go? Check out the free pattern and step-by-step video by Mônica for all the details to bring your own crochet flower keychain to life!
Vibrant Crochet Flower Keychain Free Pattern
Change a humble aluminum can tab into an elegant floral keychain using only a scrap of Anne cotton yarn, a few pearls, and a handful of basic crochet techniques. This eco-conscious project combines upcycling with delicate crochet ornamentation, resulting in a charming and functional accessory. In this pattern, you'll cover the metal tab neatly with stitches, then craft five dimensional flowers accented with pearls, all before attaching your keyring for a professional finish. This makes for an excellent quick gift or craft fair favorite, showcasing both skillful detail and resourceful creativity.
Quick Overview Of Pattern
- Upcycle a can tab: Use basic stitches to cover a soda can pull tab as the base.
- Decorate with five flowers: Crochet five-petal dimensional flowers directly onto the base.
- Embellish with pearls: Sew a pearl at the center of each flower for sparkle.
- Create a functional keychain: Securely attach a metal keyring to the finished crochet piece.
- All steps use simple stitches and minimal supplies.
Notes
- Pattern uses US crochet terminology.
- Adjust the flower size by using thicker or finer threads as desired.
- It's important to keep your tension snug, especially when covering the metal base, for a neat look.
- Be sure to use small enough pearls to fit snugly in the flower centers without overbalancing the design.
- Save leftover scraps: the pattern is ideal for using up small leftovers and single pearls.
- Always double-check metal pieces for sharp edges before beginning.
Skill Level
Advanced Beginner
- This pattern is perfect for those comfortable with working in-the-round, basic stitches (single crochet, half double crochet, chains, and slip stitch), and with a little experience in sewing on embellishments. No advanced shaping required.
Materials
- Yarn: Anne cotton yarn or other light/sport-weight cotton thread
- Hook: Size 4 nickel-plated crochet hook (approx. 1.25–1.5 mm, standard for Brazilian steel hooks)
- Base: 1 clean aluminum soda/beverage can pull tab
- Hardware: 1 metal keyring with jump ring/clasp
- Embellishments: 5 small pearls (to embellish the center of each flower)
- Tools: Small tapestry needle (for sewing pearls), scissors
Measurements / Sizing
- Finished keychain: Approximately 4–5 cm wide and 7–8 cm tall (including flowers and ring)
- Each flower: About 1.5 cm in diameter (depends on yarn and tension)
- Can tab: Standard beverage tab fits perfectly
Gauge (and Stitch Pattern if applicable)
Gauge is not critical for this project. Your main stitch patterns are:
- Single crochet (sc): Used to cover the metal base
- Half double crochet (hdc): Used for the border and for flower petals
- Slip stitch (sl st): For joining, and finishing each petal
Stitch Abbreviations
| Abbreviation | Meaning |
|---|---|
| ch | chain |
| sl st | slip stitch |
| sc | single crochet |
| hdc | half double crochet |
Special Stitches
- Five-Petal Flower: All five petals are worked into the same chain space for a dimensional, layered look.
- Bead/pearl attachment: Pearls are sewn in place using a tapestry needle after the flowers are crocheted.
- Working into a metal base: Carefully push your hook through around the metal for secure coverage.
The Crochet Pattern
Covering the Can Tab Base
- Setup:
- Hold the can tab so the larger, wider hole is at the bottom (flowers will cluster here), and the smaller hole is at the top (keyring will attach here).
- Starting Stitch:
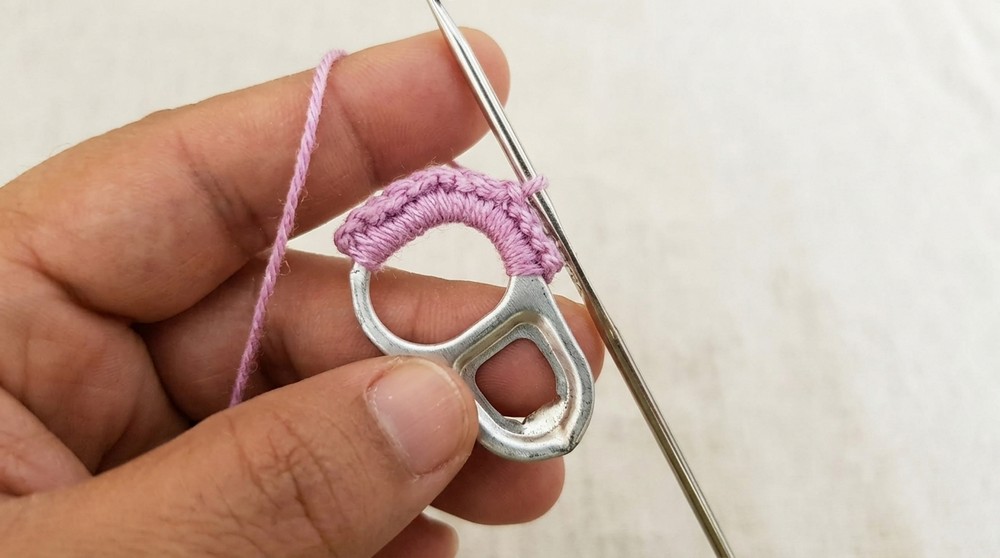
- Join your Anne yarn by inserting the hook into the top edge of the larger hole. Secure the yarn and work 1 single crochet (sc) to anchor.
- Filling the Bottom Hole:
- Continue working single crochet (sc) stitches tightly around the entire inner edge of the bottom hole. Use small, even stitches and push each stitch close together so the metal is hidden.
- Transitioning to the Top Hole:
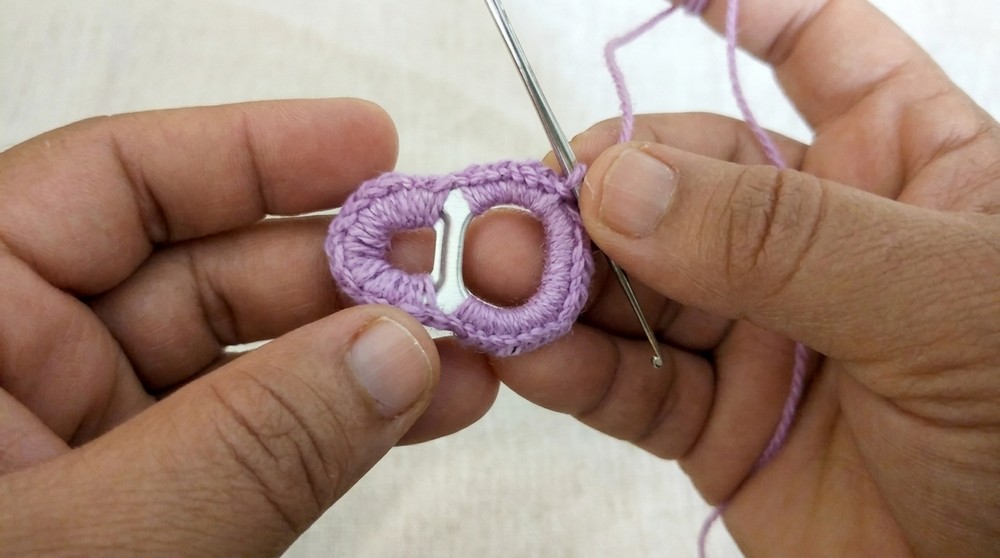
- Without breaking yarn, move directly to the smaller hole at the top. Work sc all the way around this hole, covering the metal as before.
- Joining:
- Once both holes are wrapped and you meet your starting point, join with a slip stitch (sl st) into the very first single crochet.
- Tip: Keep stitches snug—this base is the foundation for the rest of the project.
Outer Border Round
- Starting Chain:
- Chain 2 (ch 2). This acts as your first half double crochet (hdc) of the round.
- Working Around the Base:
- Continue by working 1 hdc into each single crochet around the entire perimeter of your now-covered can tab.
- Completing the Perimeter:
- Ensuring you place 1 hdc into every sc, go all the way around the border until you reach your starting point.
- Closing the Round:
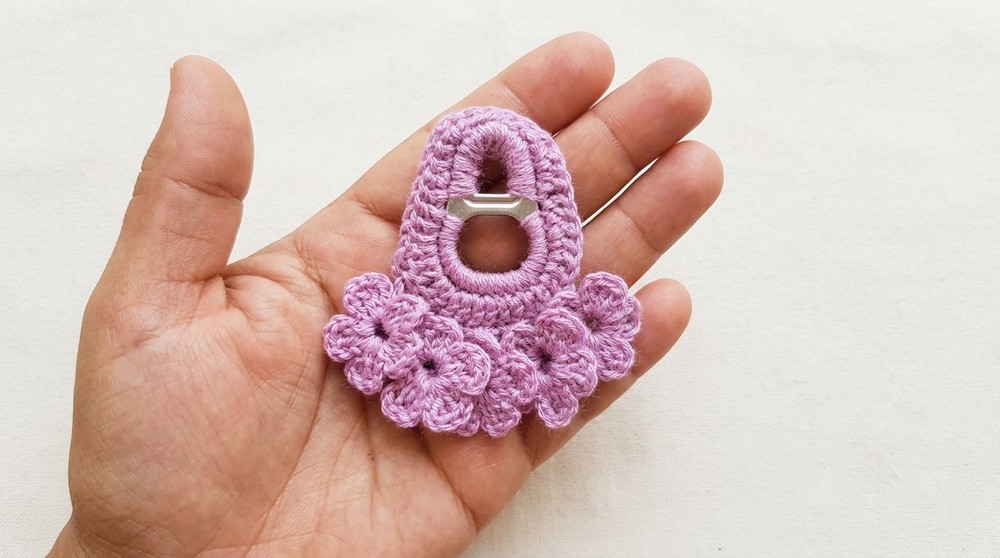
- Join with a slip stitch (sl st) in the top of your initial ch 2. Try to finish your round at the bottom right side of the wide base—this makes it easier for placement of the first flower.
Crocheting the Five Dimensional Flowers
Along the curve at the bottom (wide edge) of your can tab, you’ll attach 5 flowers, each with five petals:
First Flower
- Stem Chain:
- Chain 7 (ch 7).
- Base of Flower:
- Yarn over, hdc in 4th chain from the hook (the first three chains form the ‘stem’ space).
- Petal 1:
- In the same chain, hdc, ch 3, sl st in same spot.
- Petal 2:
- Still in the same chain: ch 3, hdc, hdc, ch 3, sl st.
- Petals 3–5:
- Repeat the sequence from petal 2 (ch 3, 2 hdc, ch 3, sl st) three more times, all into the same chain space. You’ll now have five petals sitting in a dimensional cluster.
- Anchoring Flower 1:
- Chain 3 to create a short stem.
- Skip 1 stitch along the bottom hdc border and sl st into the next stitch to anchor the flower.
Flowers 2, 3, 4, and 5
- Repeat Sequence:
- For each new flower: ch 7, hdc in the 4th chain from the hook, create five petals as before into the same chain.
- After each flower: ch 3, skip 1 stitch on the can tab border, and sl st into the next stitch to anchor.
- Finishing the Crochet:
- After the fifth flower, finish with a final ch 3 and sl st, then ch 1, cut your yarn (leave a long end if you want to sew with it), pull through, and gently adjust the petals for best appearance.
Attaching the Pearls
- Threading:
- Thread a tapestry or beading needle with matching yarn or sewing thread.
- Securing at the Back:
- Bring the needle up from the back through the base of the first flower (through the three-chain stem if possible to keep the thread hidden).
- Attaching Pearl 1:
- Pass the needle up through the flower center, thread one pearl, and take the needle down through the opposite side of the center to secure it.
- On the back, make a tiny knot or securing stitch.
- Attaching Pearls 2–5:
- Move along the back to the next flower, repeat the process, and continue until all five pearls are sewn in place.
Adding the Keyring and Final Finishing
- Position the Thread:
- From the back of the motif, weave your needle up the back of the can tab to the center top.
- Sewing on the Keyring:
- Open the jump ring/clasp, attach it to the top (small) hole of the tab.
- Using your threaded needle, sew through the crochet stitches and around the ring several times, pulling tightly to secure.
- Weaving in Ends:
- Tie off your thread and weave in all loose yarn ends neatly along the back.
- Trim any excess yarn.
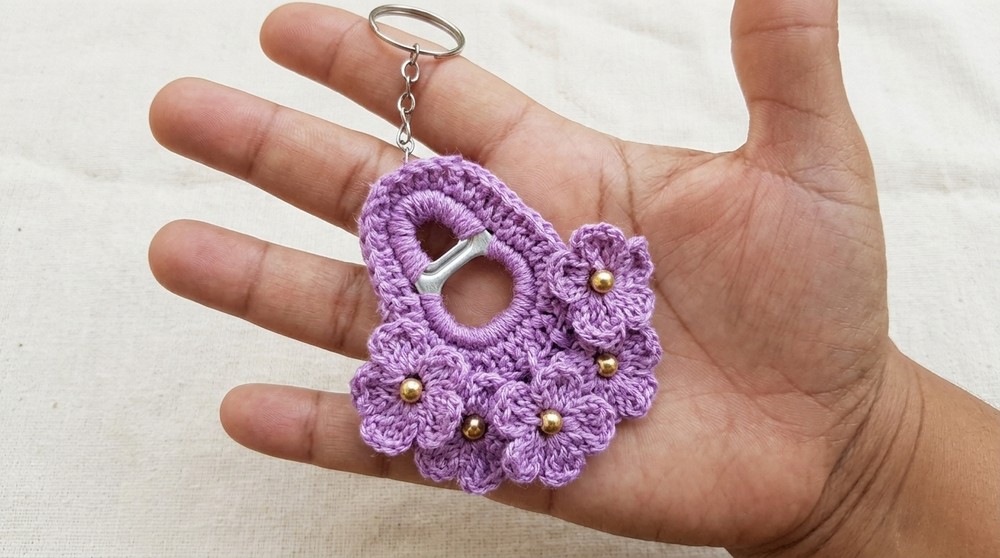
Assembly & Finished Size
- No additional assembly required—your keychain is complete after the pearls and keyring are added.
- Finished size is approximately 4–5 cm wide by 7–8 cm tall (with ring).
- The flowers should sit evenly aligned along the lower curve, pearls sparkling from each center.
Conclusion and Ending Words
Through this simple and resourceful project, you've elevated an everyday item into a unique floral keychain. The playful combination of compact crochet, lustrous pearls, and eco-friendly materials brings charm and function together flawlessly. Each step, from wrapping the tab to sewing on the finishing touches, builds skill and creativity in working with nontraditional bases. This keychain is perfect as a handmade gift, a personal accessory, or a stylish upcycled statement in your everyday carry. Enjoy your finished piece, and use the basic techniques here as inspiration for further creative upcycling projects.