Personalize your everyday keys using this Crochet Bear Keychain Free Pattern and finish a playful little yarn charm in colors you truly love.
There's something truly delightful about tiny, handmade treasures that brighten up everyday items, and keychains are no exception. A perfect example is the adorable Crochet Bear Keychain Pattern, generously shared by Yanet pupo crochet on YouTube. This charming project changes simple thick wool into a cute, miniature bear that easily attaches to your keys, bag, or backpack. Giving full credit to Yanet pupo crochet for the tutorial and design, this pattern provides an accessible way to create a soft, plush bear keychain that's both visually appealing and functional.
Playful Crochet Bear Keychain Free Pattern For Bag Charms
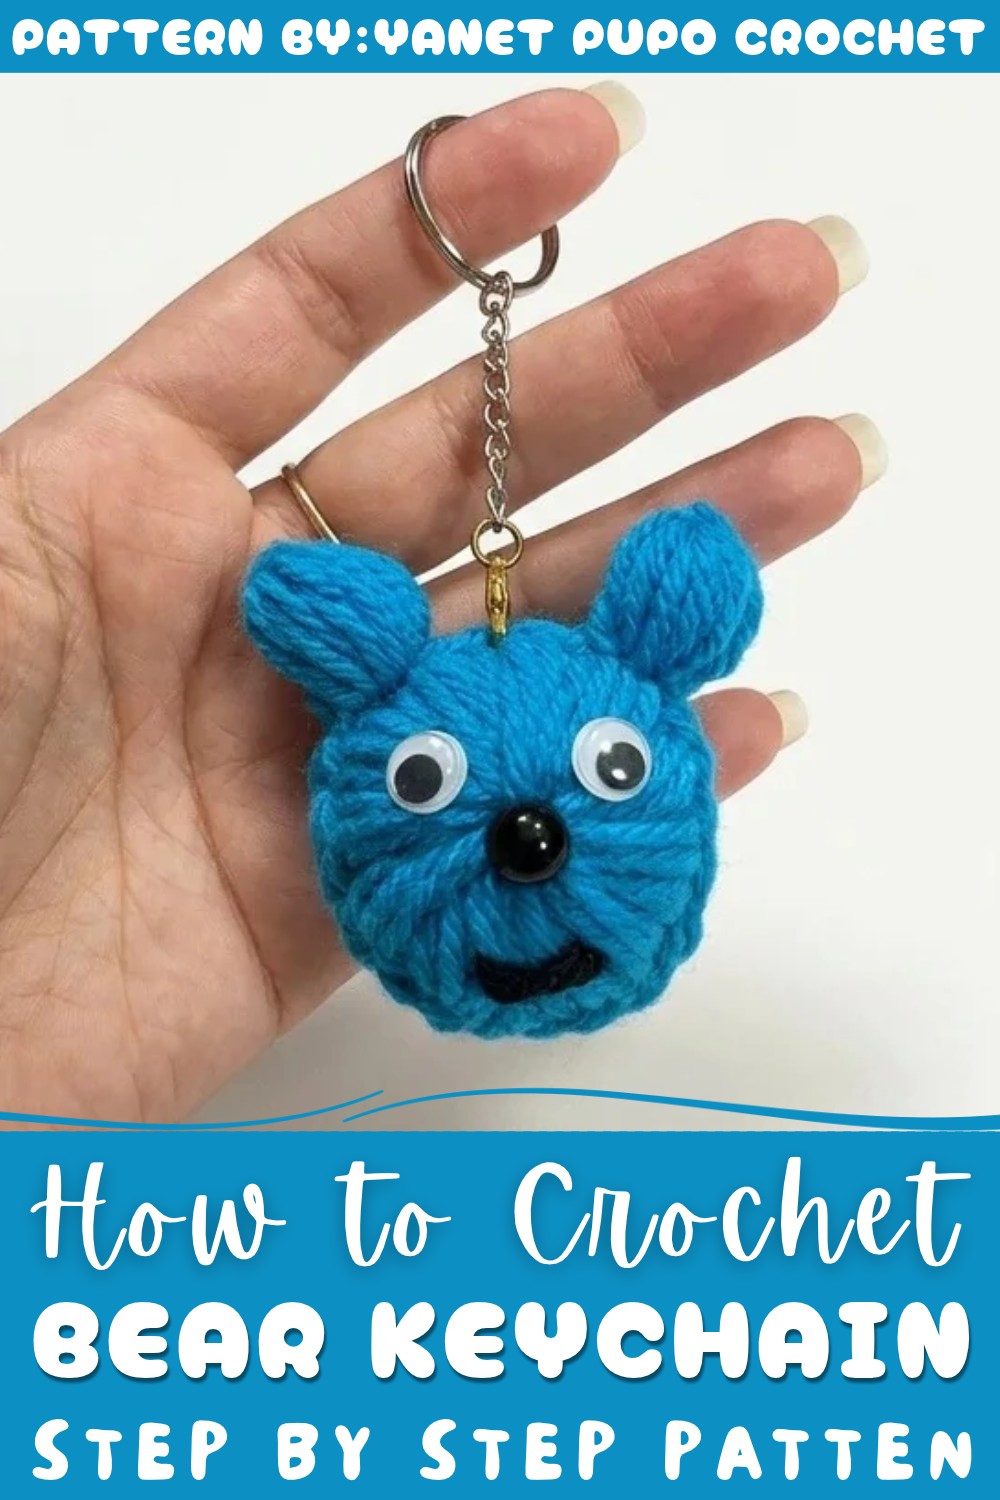
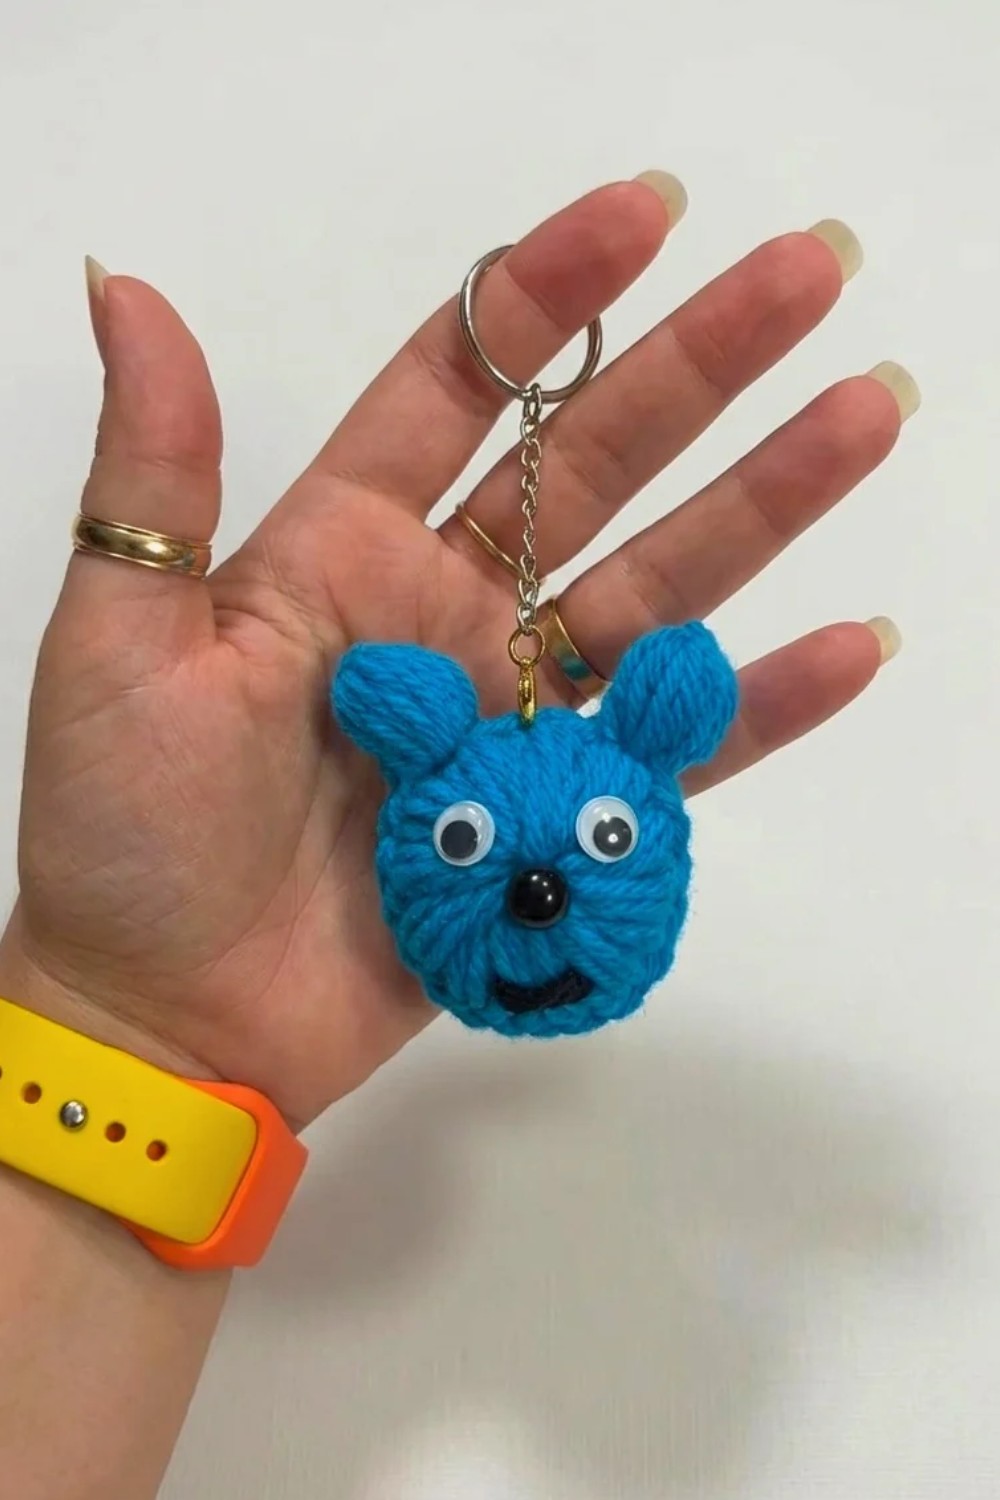
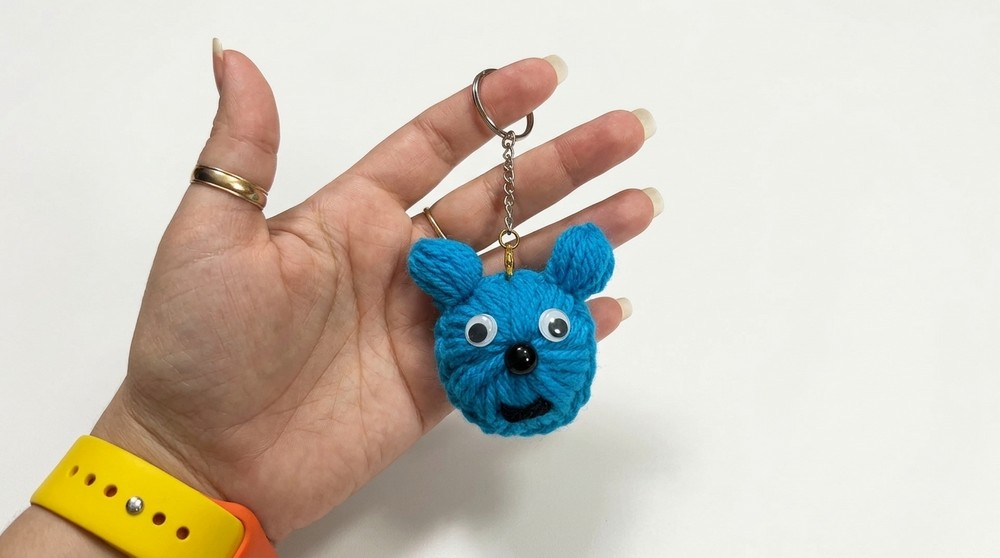
The Crochet Bear Keychain Pattern results in a small, round bear featuring a soft texture from the 4mm thick wool used, giving it a plush feel that’s comforting to touch. Its shape is cleverly formed by joining two crocheted pieces, creating a neat, three-dimensional figure with standout features like tiny ears and a detailed face. With black plastic eyes and a pearl nose fixed onto the face, the bear carries an expressive personality, enhanced further by a stitched mouth that adds character. This keychain is perfect not only as a personal accessory but also as a heartfelt gift for loved ones or as a charming decorative accent. Its compact size makes it portable and useful, ensuring your keys stay easy to find while adding a fun and friendly vibe to everyday items.
Whether you attach it to your own collection or share it as a unique present, this little bear carries warmth and cheer in its simple yet eye-catching design. Its combination of softness, durability, and adorable styling makes it a wonderful everyday companion or a special keepsake to gift.
Crochet Bear Keychain Free Pattern
Small handmade accessories catch attention with their cute details and unique appearance, and a crochet bear keychain offers both. This guide shows you how to stitch an adorable little bear using thick wool and basic crochet techniques. Start by crocheting the head, then shape the rounded ears and finish the face with sweet, expressive details. Follow each step to give your bear a neat shape and a lovely finished look. You only need a small amount of yarn for this project, and you can complete it in a short time. Attach the finished bear to your keys, handbag, or backpack, or share it as a thoughtful birthday gift. Choose different yarn colors, try new facial expressions, and give each bear its own personality. This easy project helps you turn simple stitches into a charming everyday accessory that you can stitch again in many different styles.
Quick Overview of Pattern
- Form two circular pieces as the base for the bear’s head.
- Seam the two discs together using slip stitch joins around the perimeter.
- Crochet two gathered ears directly along the joined seam.
- Add a pearl or plastic nose, attach plastic eyes, and embroider the mouth.
- Complete assembly with a keychain ring for everyday usability.
Notes
- The project is worked in rounds, and the starting tail plays an important role in closing the magic ring.
- Any acrylic or wool yarn of similar thickness may be used. However, proper tension is vital for firm, neat stitches.
- All facial embellishments should be attached securely for durability.
- The number of loops for each group and the symmetry of ears significantly affects the final shape.
- Hot glue offers added security for pieces such as eyes and nose but can be sewn on as well.
- Because this pattern is worked using groups/loops rather than standard chain and stitch increases, familiarize yourself with the unique grouping method before beginning.
Skill Level
Beginner to Advanced Beginner
Knowledge of slip stitch and working in the round is required. Techniques for tightening a magic ring and embroidering simple facial details are introduced but not complex.
Materials
- Thick wool yarn (4 mm thick): Approx. 10 grams, color of choice
- Crochet hook: Aluminum, 3.50 mm
- Scissors
- Yarn or plastic needle: For weaving in ends and embroidery
- Stitch markers (helpful but optional)
- Face details:
- 1 small black pearl (or plastic safety nose)
- 2 small plastic safety eyes (substitute with black thread if necessary)
- Black sewing or embroidery thread for mouth
- Hot glue gun: Optional, for fixing face parts
- Keychain ring
Measurements / Sizing (with schematic)
- Diameter of head: Approximately 4–5 cm
- Ear span: Adds approx. 1–1.5 cm on each side
- Finished keychain: Width around 6–7 cm, height around 5–6 cm not including the ring
Schematic:
- Two flat discs joined edge-to-edge form a filled circle (head).
- Two gathered, semicircular ears are placed on top edge.
- Face details are centered.
Gauge (and Stitch Pattern)
- Gauge: Not critical, but aim for firm, closed fabric.
- Stitch Pattern:
- Main groups: Gathered loop clusters (see Special Stitches)
- Edging: slip stitch join
- Ears: Heavily gathered puff worked in the same space
Stitch Abbreviations
| Abbreviation | Stitch Name |
|---|---|
| ch | chain |
| sl st | slip stitch |
| sc | single crochet |
| st(s) | stitch(es) |
Special Stitches
- Gathered Loop Cluster:
Yarn over, insert hook in same space, pull up loop (to set height); repeat required number of times (4 for rounds, 7 for ear), then yarn over and pull through all loops on hook at once, complete with slip stitch or knot.
The Crochet Pattern
Forming the Head Base (Make 2)
Round 1 – Start and Clusters:
- Cross the yarn over your finger, pull up the loop, leaving a 2 cm (¾ inch) tail.
- Do not knot; this tail will help close the ring tightly.
- Pull up a loop to begin; now, in this loop:
- Work 4 times into the hoop:
- Yarn over, insert hook into ring, pull up to about 1.5–2 cm (matching previous heights). Repeat until you have 4 such loops on hook.
- Yarn over, pull through all loops on hook for a cluster.
- Secure with a slip stitch to close this group.
- Work 4 times into the hoop:
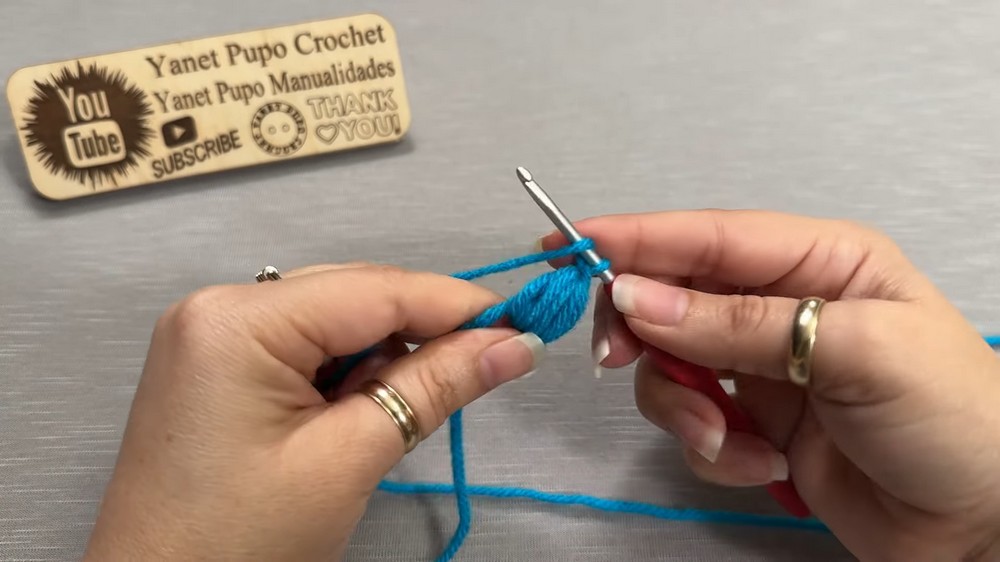
- Repeat from * four times until you have a total of 11 groups (clusters) forming a full round.
- At completion, join with a slip stitch to the first chain/group beginning the circle.
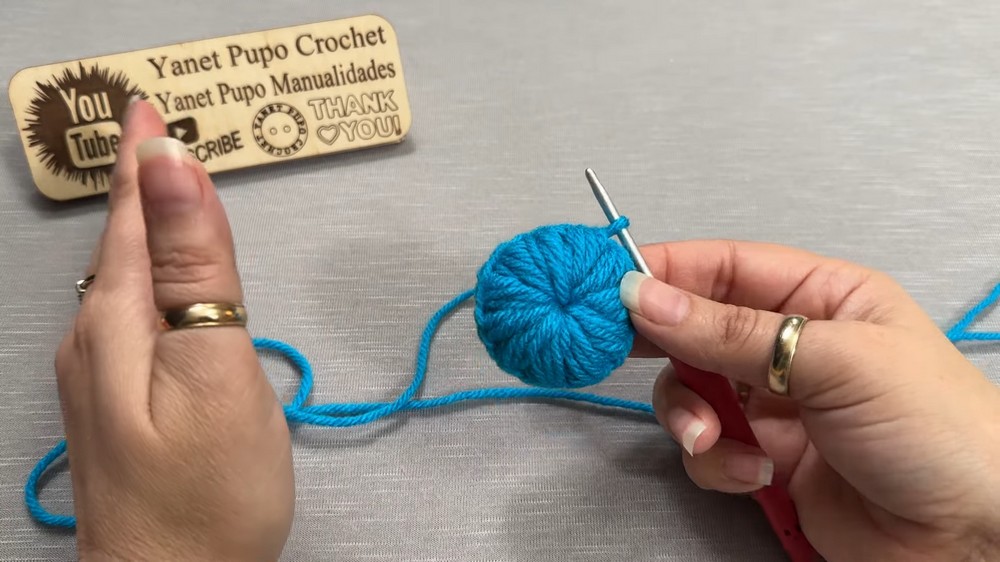
Closing the Magic Ring:
- Take the beginning tail left from step one.
- Pull the tail gradually and tightly to close the central hole. Do so gently to prevent snapping the yarn.
- Secure with a knot.
- Cut the yarn, leaving a short end behind the disc.
- Make a second identical piece using the same steps.
Joining the Two Head Pieces
Seaming Together:
- Place the two discs back-to-back, ensuring that any yarn tails are tucked inside.
- Holding edges even, insert hook through the matching edge stitch/group on both discs.
- Slip stitch join:
- Grab new yarn, pull through both layers, slip stitch to join.
- Repeat going stitch-by-stitch all the way around, joining the full circumference.
- This step secures the head fully and hides all tails inside for a neat look.
Crocheting the Ears
First Ear:
- Where the seam ended, stretch the working yarn to match the height of the main clusters.
- In that same space (between disc edges):
- Work 7 gathered loops:
- Yarn over, insert, pull up, repeat for a total of 7 times in the same place (creating a very full cluster).
- Yarn over and pull through all loops at once.
- Work 7 gathered loops:
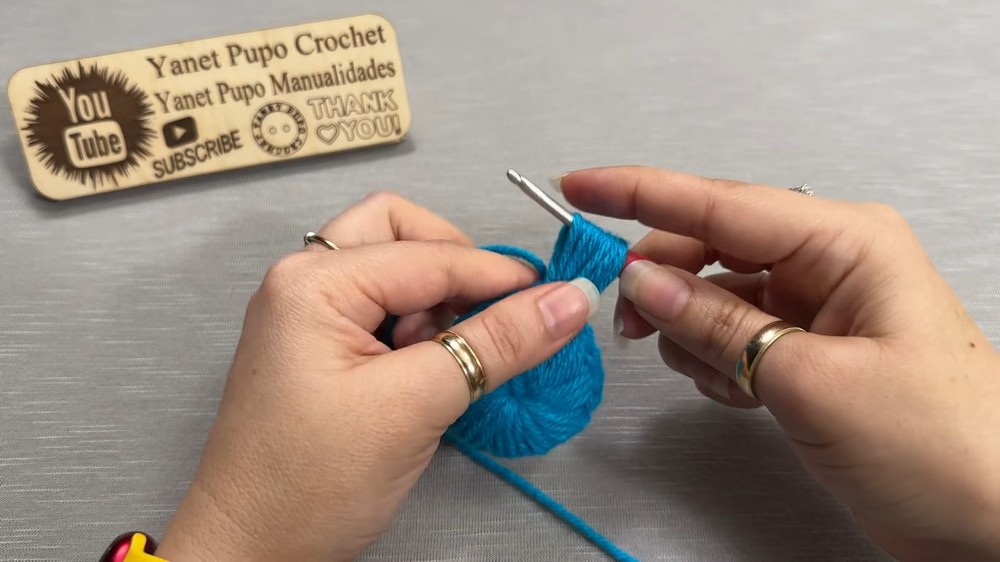
- Tighten well, cut the yarn, and knot firmly to secure.
- Hide the tail by drawing it inside the head using the crochet hook; trim flush.
Second Ear:
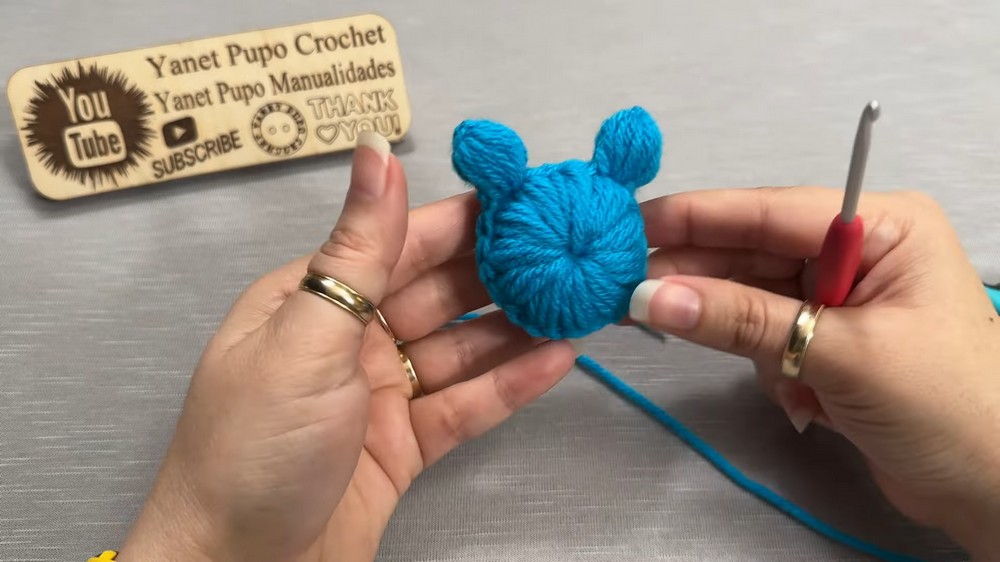
- Attach yarn about 4 stitches away from the first ear (ensuring even spacing for facial symmetry).
- In that spot:
- Repeat the exact process: stretch to match height, work 7 gathered loops, pull through all, secure with double knot.
- Hide and trim tail as before.
Decorating the Bear’s Face
Snout/Nose:
- Take a black pearl bead or a small plastic nose.
- Use hot glue to fix it at the horizontal center of the bear’s face.
Eyes:
- Position eyes just above the snout.
- Attach or glue them in place evenly; safety eyes can be pressed carefully through the fabric for extra security.
Mouth:
- Thread a short length of black embroidery thread onto the needle.
- Pass the thread directly beneath the nose, bringing out at one end of the smile and returning just under the pearl.
- Wrap a second time for definition, then tie and cut the thread flush.
Attaching the Keychain
Final Assembly:
- Select the topmost central point between the ears.
- Fasten the keychain ring securely; use a jump ring or simply pass the keychain’s clip through if wide enough.
Assembly & Finished Size
- Confirm both ears are firm and facial features are symmetrically placed.
- Tug gently to reshape if needed.
- The finished bear keychain should measure approximately 6–7 cm wide, with ears protruding slightly and the head approximately 4–5 cm in diameter.
- The keychain is now ready for use, gifting, or sale.
Conclusion and Ending Words
A small crochet bear keychain needs only a few basic materials and simple stitches, making it a lovely accessory for everyday use. You can choose different yarn colors, change the facial expressions, or attach small accessories to give each bear a unique look. Tight, even stitches help the bear hold its shape, while cute rounded ears and a sweet little face give it a playful appearance. Attach a keychain ring to turn your finished bear into a handy charm for keys, handbags, or backpacks. Once you finish your first bear, you can stitch more in different colors for birthday presents, thoughtful gifts, or small business orders. This simple project combines a useful everyday accessory with an adorable handmade design that people of all ages can appreciate.