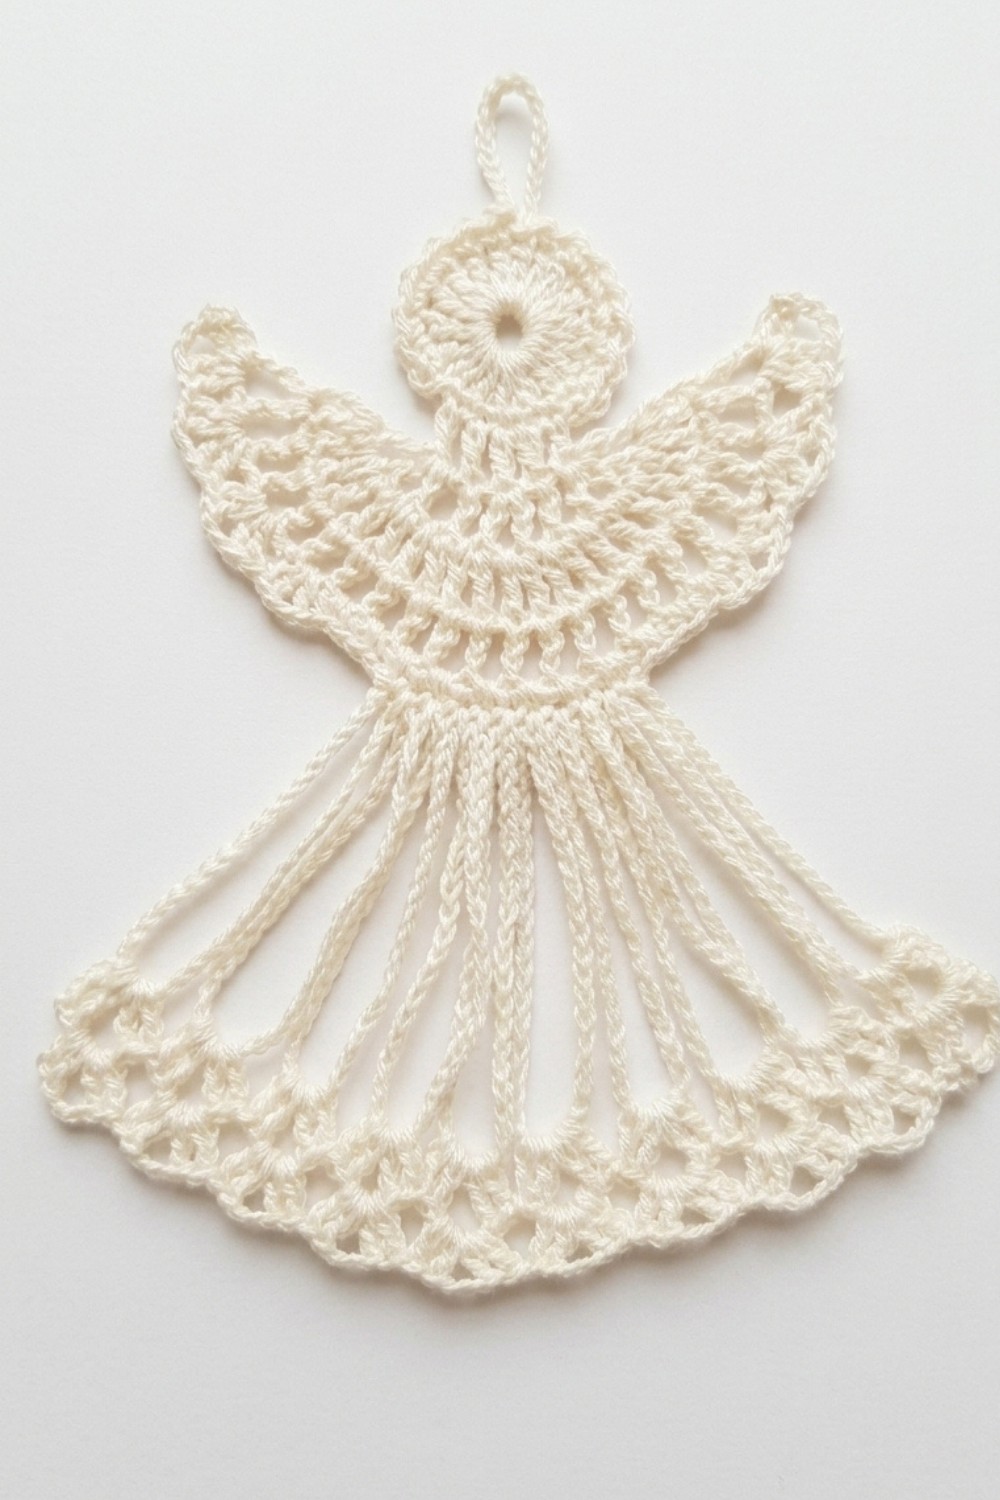
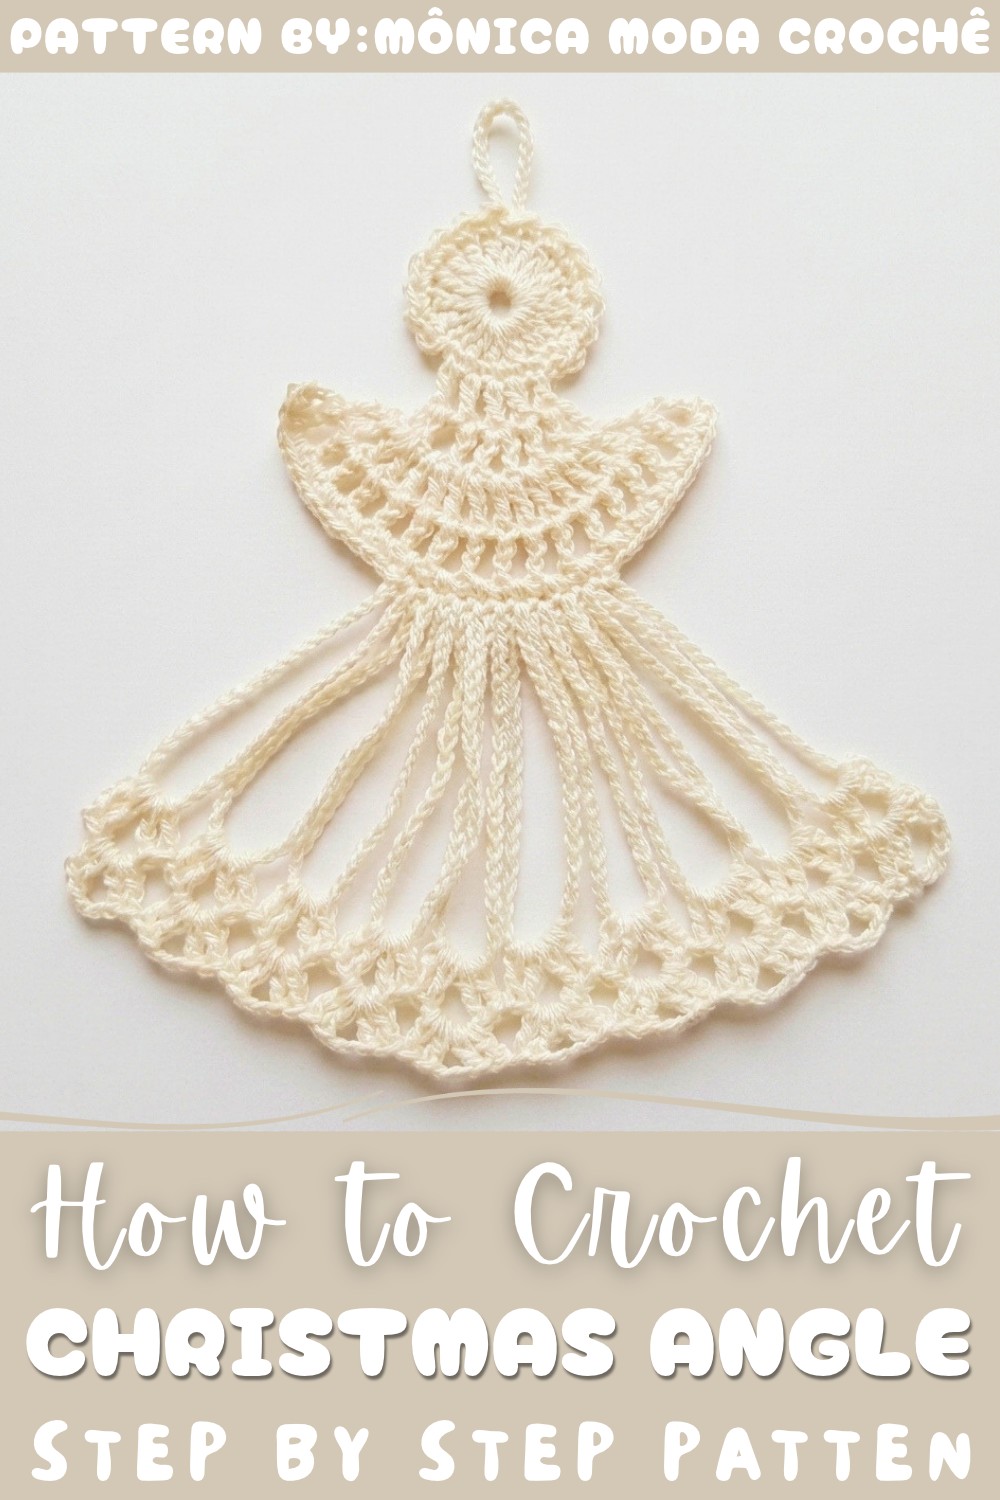
Decorate your tree with this Crochet Christmas Angel Free Pattern and hang a sweet handmade figure among your holiday ornaments.
There’s something truly magical about adding handmade touches to your holiday décor, and a delicate crochet angel fits that bill perfectly. These charming figures bring a warm, nostalgic charm to any Christmas setting, whether perched atop a tree or nestled among twinkling lights on a mantel. People love making them because they offer a lovely balance of elegance and coziness, capturing the spirit of the season in a small, charming piece. The Crochet Christmas Angel Pattern, originally designed and beautifully demonstrated by Mônica Guimarães on her YouTube channel Mônica Moda Crochê, lets you create your own angelic decoration that is both visually stunning and heartfelt.\
Heavenly Crochet Christmas Angel Free Pattern For Tree Ornaments
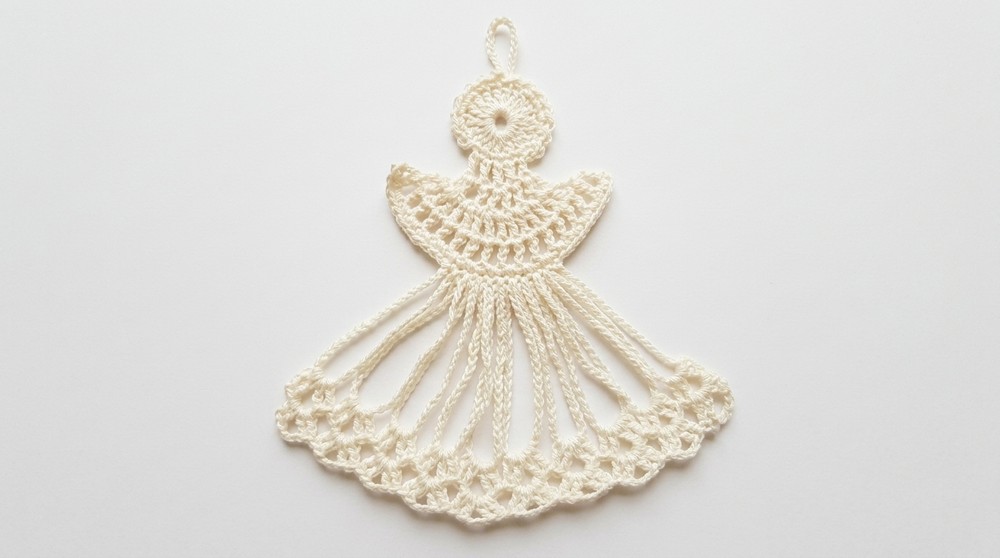
This project results in an angel with a graceful, flowing silhouette and a beautifully textured body created through layers of loops and delicate stitches. The shape elegantly mimics traditional angel wings and robes, giving it a timeless, airy appearance that’s delightful to display. It’s wonderfully versatile—you can adjust the size by switching yarn thickness or add a bit of stiffener to make it stand sturdier if you prefer. Whether you stick to soft cream hues for a classic look or try out different colors for a more personalized touch, these angels can easily match your holiday style.
Ideal for those with some experience in double crochet and chain stitches, the project offers a satisfying challenge without being overwhelming. While following the pattern, you’ll gain confidence in working with loops and increasing stitches to shape your piece beautifully. It’s a lovely way to build new skills while making something truly special for your home.
If you’re ready to add a heartfelt, handmade touch to your festive décor this year, be sure to check out the free Crochet Christmas Angel Pattern. It’s an inspiring project that brings both joy and beauty into your holiday season.
Elegant Crochet Christmas Angel Free Pattern
Crochet Christmas angels are delicate, decorative motifs worked with purposefully arranged stitches to give them dimension and symbolic form. This pattern presents an angel with a graceful body, beautiful arched wings, and a detailed skirt, using Anne yarn and a nickel-plated hook. The motif begins from a compact ring, builds up the wings and halo, and transitions smoothly into the body, ending with a scalloped, looped skirt. Optional stiffener can be used to give lasting shape to your finished piece. By focusing on precise stitch placement and regular loop formation throughout, the resulting angel can enrich holiday decor, serve as a special gift, or be used for memorable keepsakes. All instructions below follow the video’s flow and visuals.
Quick Overview Of Pattern
- Starts with a closed ring foundation
- Builds tall vertical stitches for the motif’s structure
- Side loops and large arcs represent the wings and decorative base
- Angel’s central body is shaped using increases over rows
- Skirt is formed by looping chains and shell stitch edging
- Border is worked for completeness
- Stiffener may be added for structure
Notes
- Anne yarn is recommended for classic size; Cléia or other fine yarns yield a smaller, more delicate result.
- Crocheting tightly maintains structure—especially important for skirt loops and shells.
- Yarn tails are hidden inside stitches for neat finishing.
- Loops must be kept untwisted when forming the skirt’s edging.
- Stiffener is optional; air dry fully if applied.
Skill Level
Advanced Beginner / Intermediate
Ability required:
- Working in the round
- Making large loops, shells
- Basic increases and decreases
- Familiarity with chaining, slip stitch, single and double crochet
Materials
- Yarn: Anne, cream color (Cléia for smaller angels)
- Crochet Hook: Nickel-plated, size 4
- Scissors
- Crochet stiffener/hardener (optional for shaping)
- Tapestry needle for finishing ends
Measurements / Sizing
- Angel height: Approx. 12–14 cm (with Anne)
- Skirt diameter: Usually 9–12 cm
- Adaptable by changing yarn or hook size
Gauge & Stitch Pattern
Gauge is not crucial; focus on uniform tension and structural stability.
Primary stitches:
- Chain (ch)
- Slip stitch (sl st)
- Single crochet (sc)
- Double crochet (dc)
Stitch Abbreviations
| Abbreviation | Stitch |
|---|---|
| ch | Chain |
| sl st | Slip Stitch |
| sc | Single Crochet |
| dc | Double Crochet |
Special Stitches
Shell Stitch:
In specified loops: 2 double crochets (dc), chain 3, 2 double crochets (dc).
The Crochet Pattern
Round 1: Base Ring and Foundation Stitches
- Begin with 8 chains (ch).
- Join the last chain to the first with a slip stitch (sl st), forming a closed ring.
- Chain 3 (ch 3) (counts as first double crochet (dc)).
- Work 19 double crochets (dc) into the circle (total: 20 including ch 3).
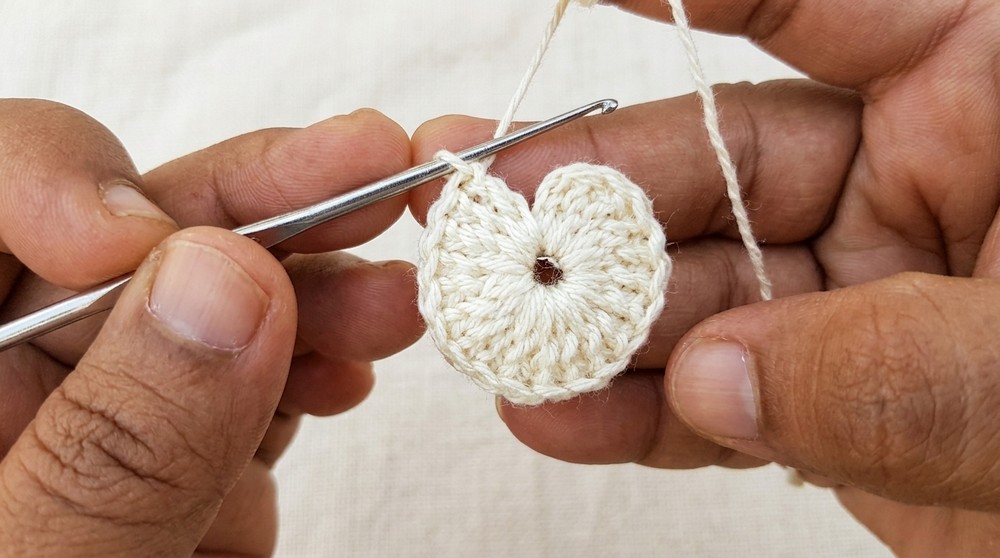
- Join the round by inserting hook into 3rd chain of your initial ch 3; complete with a slip stitch (sl st).
Round 2: Wings and Halo
- Chain 3 (ch 3) for starting the loops.
- Skip one stitch; make a single crochet (sc) in the next double crochet.
- Chain 2 (ch 2), skip one base stitch, make a single crochet (sc) in the next.
- Repeat this process, continuing to form 7 little arcs (loops) along one half of the circle–each loop consists of:
- Chain 2 (ch 2), skip one stitch, single crochet (sc).
- When 7 loops are completed, in the next stitch, work a chain of 20 (ch 20) to form the halo/head loop, securing with a slip stitch (sl st) in the same stitch.
- On the opposite side, create 7 more loops:
- Chain 2 (ch 2), skip one base stitch, single crochet (sc)—repeat until 7 are formed.
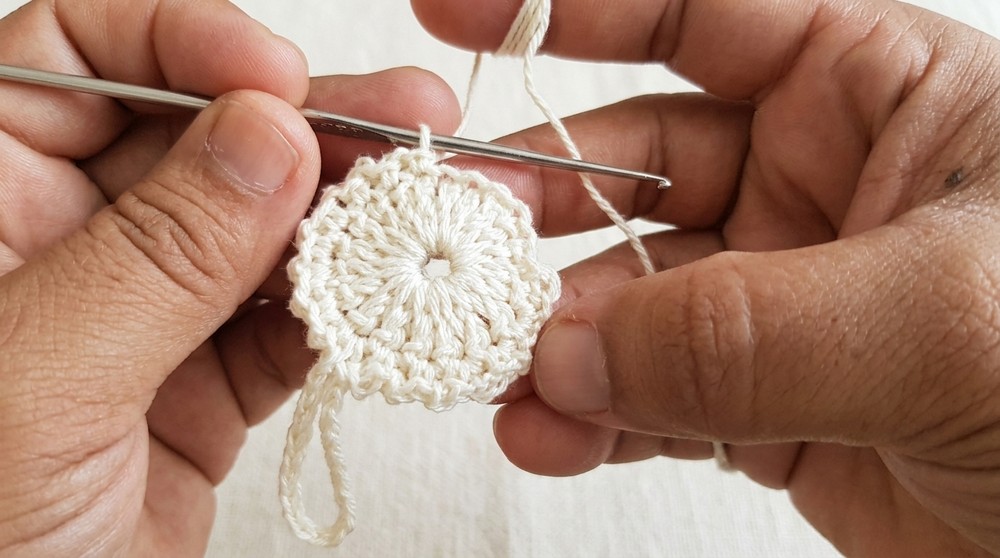
- End with a slip stitch (sl st) in the next stitch to anchor.
Body Formation: Rows 1–5
Row 1
- Chain 4 (ch 4) (counts as a tall stitch plus chain space).
- Work 1 double crochet (dc) into the next base stitch, separated by chain 1 (ch 1).
- Continue across:
- 1 double crochet (dc) in next base, chain 1 (ch 1).
- Repeat until 5 double crochets (dc) are made, each separated by chain.
Row 2
- Chain 4 (ch 4), turn.
- Into the same base point, work 1 double crochet (dc) to create an increase.
- Chain 1 (ch 1), double crochet (dc) in next base stitch.
- Continue, making increases (2 dc separated by chain in one stitch) at regular intervals:
- Increases occur in the first, third, and last double crochet stitch.
- End row by working into the turning chain.
- You now have additional width in the body.
Row 3
- Chain 4 (ch 4), turn.
- Into first stitch, work another double crochet (dc) (increase).
- Chain 1 (ch 1), double crochet (dc) in next stitch.
- At the third and final double crochets, work increases (2 dc in these stitches, separated by chains).
- Continue across, repeating increases.
Row 4
- Chain 4 (ch 4), turn.
- Work in established pattern:
- Double crochet (dc) in the first, chained space, dc in the next.
- Add increase at row’s end by working two dc in last stitch, separated by a chain.
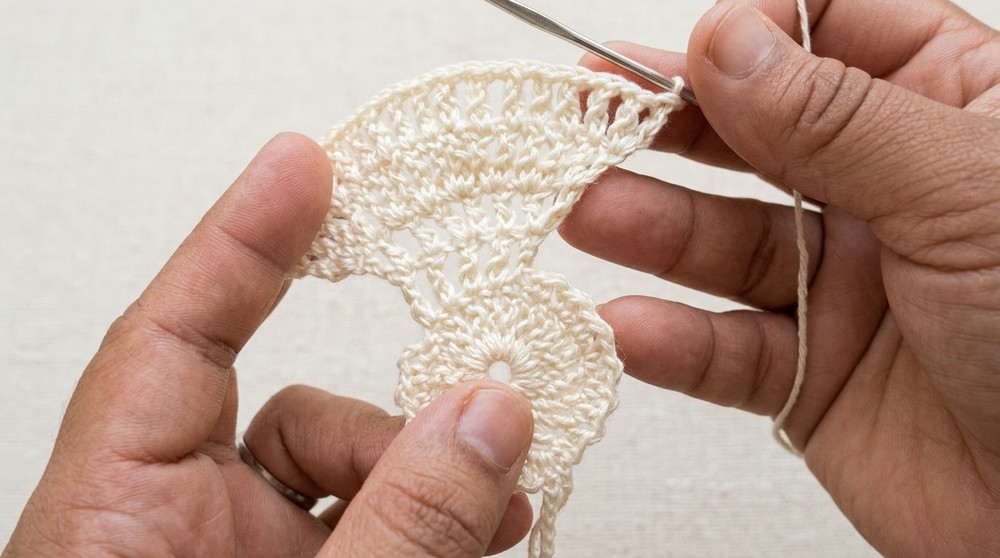
Row 5 (Single Crochet Border)
- Chain 1 (ch 1), turn.
- Work a row entirely in single crochets (sc):
- 1 sc in each double crochet (dc), 1 sc in each chain space.
- Continue until end of row.
- Fasten off and cut yarn.
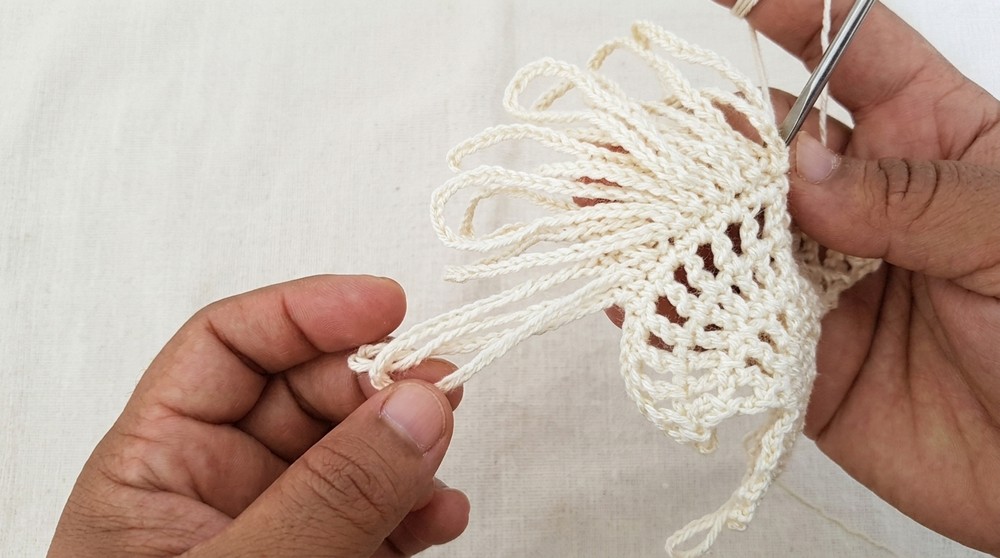
Skirt Loops
Attaching Yarn
- Attach yarn with a slip stitch (sl st).
- Count 12 single crochets (sc) in from edge to find starting placement.
- Secure with a slip stitch (sl st).
Skirt Arcs
- From placement point:
- Chain 40 (ch 40), secure to next base point with slip stitch (sl st).
- Repeat this process, creating 10 large hanging loops across bottom of body.
- Fasten off yarn.
Edging the Skirt Loops
Working the Loops
- Reattach yarn to first large loop with slip stitch (sl st).
Arc Pattern: (Shell Stitch sequence in each loop)
- In each loop:
- Work 2 double crochets (dc)
- Chain 3 (ch 3)
- 2 double crochets (dc)
- Move to next loop, repeat sequence (2 dc, ch 3, 2 dc) for all 10 loops.
- Avoid twisting loops for symmetry.
Final Border Row
Finishing Row
- Turn work; slip stitch to 3-chain space of first shell.
- In each 3-chain space of shells:
- Chain 3 (ch 3) (counts as first stitch)
- 1 double crochet (dc)
- Chain 3 (ch 3)
- 2 double crochets (dc)
- Repeat for each shell until end of row.
- Fasten off.
Finishing
- Weave in all yarn ends with tapestry needle.
- Shape angel’s form gently.
- Apply crochet stiffener/hardener if desired, allow to dry.
Assembly & Finished Size
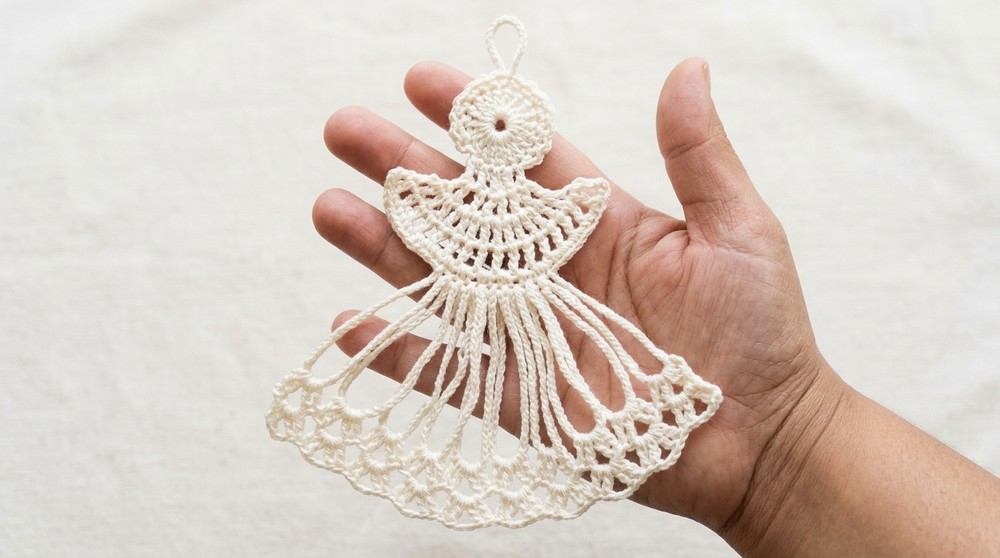
- Angel is fully formed as a flat motif—no further assembly required.
- Finished size: approximately 14 cm height, 9–12 cm skirt diameter.
- Works well as ornament, wall decor, or table centerpiece.
Conclusion and Ending Words
The crochet Christmas angel combines vivid visual detail with elegant structure. Each thoughtfully placed stitch—from foundation ring to scalloped skirt—adds strength and grace, allowing the motif to maintain its shape and symbolism. Arched wings and a central halo are highlighted by the softness of Anne yarn and the stability of the shell-edged skirt. The optional application of stiffener fortifies the motif, ensuring longevity for future seasons. Suitable for advanced beginners and those comfortable with increases, the angel brings a sophisticated look to festive decorations. Its completed form offers both durability and visual appeal, serving as a cherished accent in holiday displays. By combining traditional stitchwork with practical finishing techniques, this angel holds both meaning and beauty throughout the holiday period and beyond.