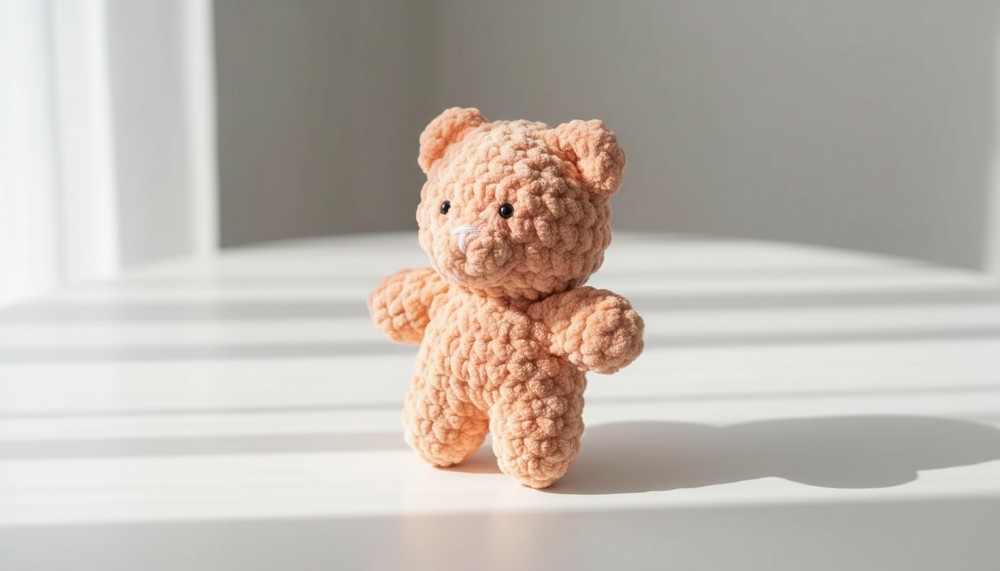
There’s something special about gifting or owning a handmade creation that feels truly personal. A crochet bear plushie pattern allows you to create an adorable, huggable keepsake perfect for children, loved ones, or even yourself. Whether it’s used as a baby shower gift, nursery decor, or a comforting buddy, this plush toy is more than just an accessory—it’s a symbol of care and creativity.
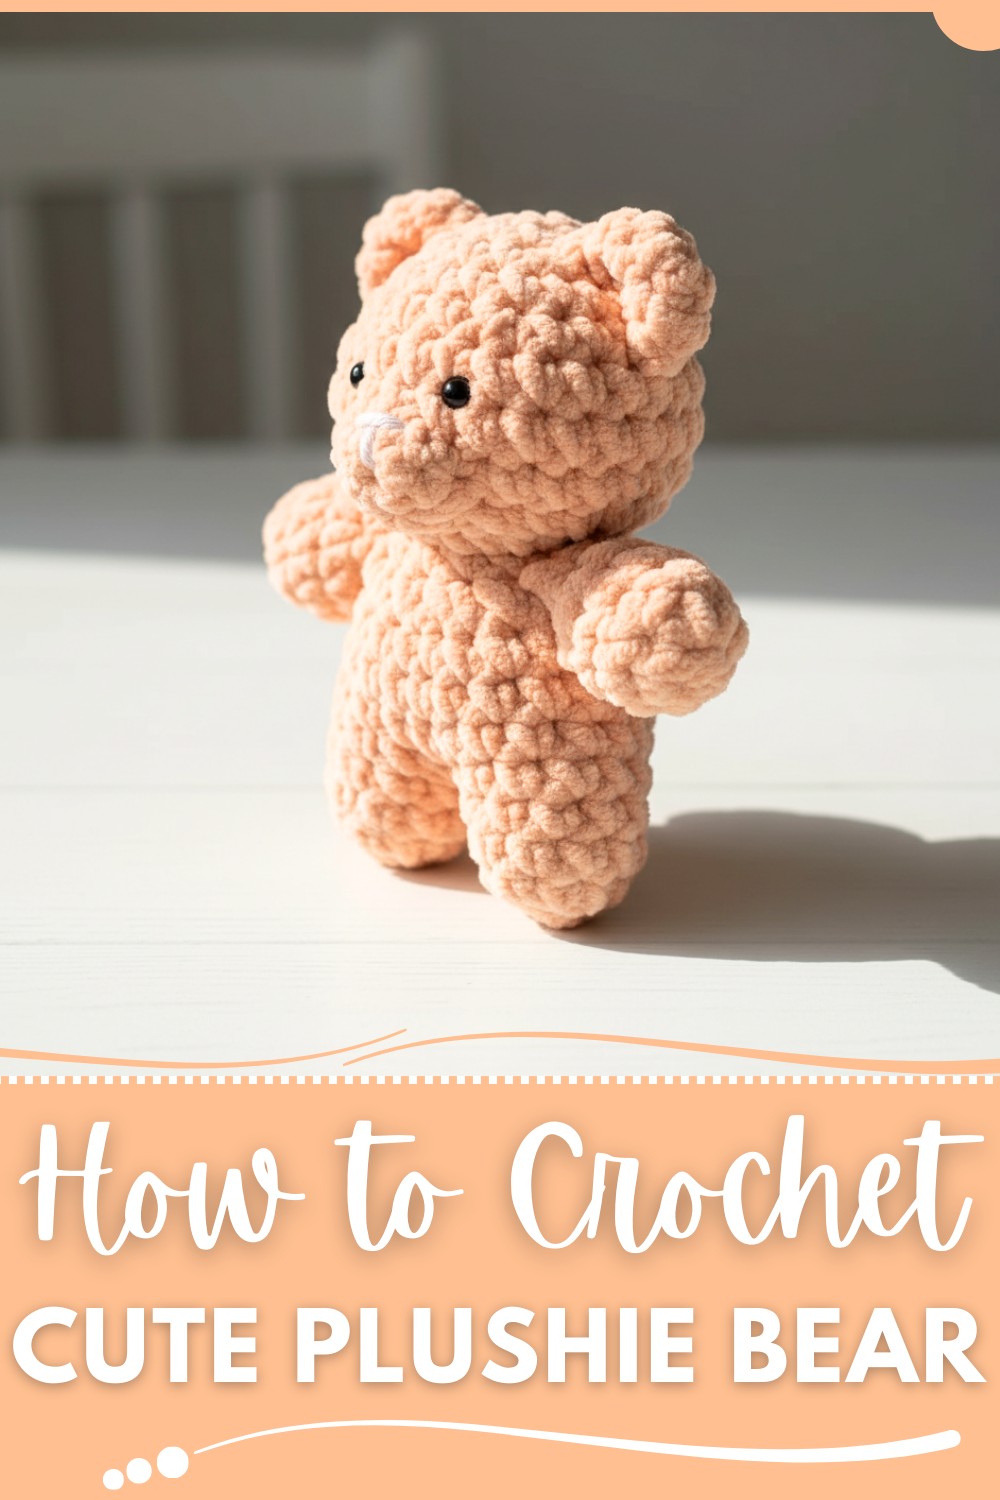
You can customize its size, colors, or add fun details like bows or scarves to make it extra unique. With soft yarn and simple stitches, you’ll have a cuddly creation that’s lightweight and easy to style in any space. Functional and sentimental, the crochet bear plushie makes every stitch worth the effort.
Simple Crochet Bear Plushie You’ll Fall in Love With
Materials Needed:
- Yarn:
- Weight: Worsted-weight yarn (size 4) or any preferred weight.
- Color A: Baby Peach for the body.
- Color B: White or contrasting color for embroidery.
- Optional: Color C for scarf/hat/accessories (e.g., red or green).
- Hook: Crochet hook size 3.5 mm (E) or appropriate for your yarn choice.
- Stuffing: Polyester fiberfill.
- Safety eyes: 6-8 mm (optional).
- Yarn needle: For sewing and hiding ends.
- Scissors: For cutting yarn.
- Stitch markers: To mark the beginning of each round.
- Embroidery thread: For detailing the nose and mouth.
Gauge:
- 10 single crochet stitches x 10 rows = 4 cm square (with worsted-weight yarn and 3.5mm hook).
- Gauge is not critical for this project, but your tension will affect the bear’s size.
Crochet Cute Little Bear Pattern
This guide is a detailed, step-by-step written pattern derived from the video instructions you provided. Follow along to recreate this adorable crocheted bear. The pattern includes all necessary details, tips, and optional add-ons to make your project enjoyable, even for beginners.
Finished Size:
When using the recommended yarn and hook size, the finished bear will measure approximately 10-15 cm (4-6 inches) in height, depending on your tension and material.
Abbreviations (US Terms):
- st(s): Stitch(es)
- sc: Single crochet
- ch: Chain
- sl st: Slip stitch
- inc: Increase (2 sc in one st)
- dec: Decrease (worked across 2 stitches)
- MC: Magic circle/ring
Special Techniques:
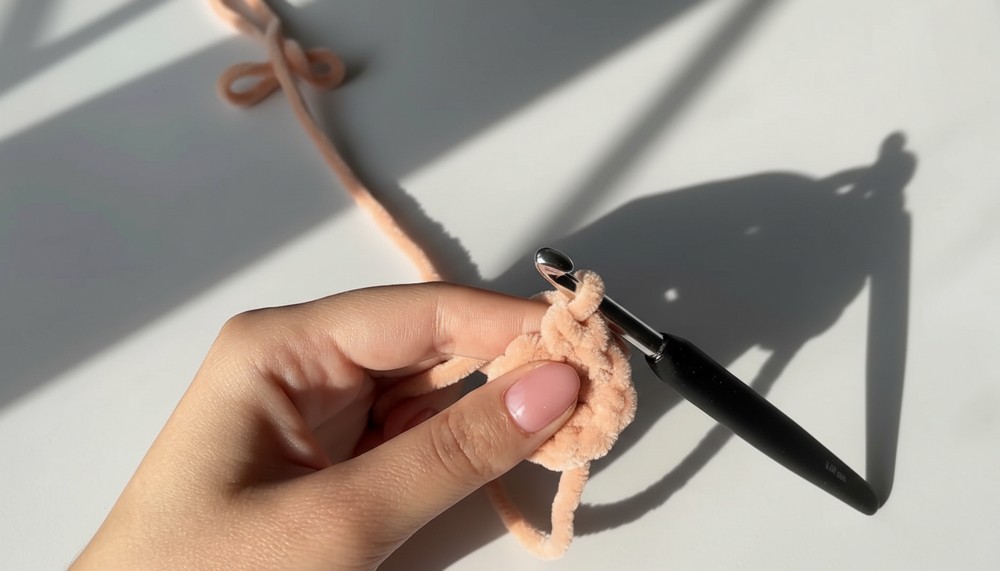
- Magic Circle (MC): Used to start the bear's body parts. Wrap yarn around your fingers, insert the hook into the loop, and pull up a loop. Yarn over and make 1 chain to secure.
- Invisible Decrease: Insert hook into the front loop of the next two stitches, yarn over, and pull through both loops. Yarn over and pull through all loops on your hook.
Pattern: Cute Little Bear
1. Arms (Make 2):
- Row 1: Begin with a magic ring (MC), chain 1, and make 7 sc into the ring. Pull the tail to tighten. (7 sts)
- Row 2-3: Make 1 sc in each st around. (7 sts)
- Optional: Use a stitch marker on the first st of each row for ease.
- Finish: Slip stitch into the first sc, chain 1, and cut the yarn, leaving a 10 cm tail for sewing. Tighten the center of the magic ring and then hide the yarn tail inside.
Tip: Repeat this process to create the second arm.
2. Legs (Make 2):
- Row 1: Start with a magic ring, chain 1, and make 4 sc into the ring. Tighten. (4 sts)
- Row 2: Work 1 inc in each st around. (8 sts)
- Row 3-4: Make 1 sc into each st around. (8 sts)
- Optional: Add a stitch marker to indicate row starts.
- After Leg 1: Finish the leg as before: slip stitch, chain 1, cut yarn, and hide tail.
- After Leg 2: Do not finish off! Chain 1 and join it to Leg 1 to begin forming the body.
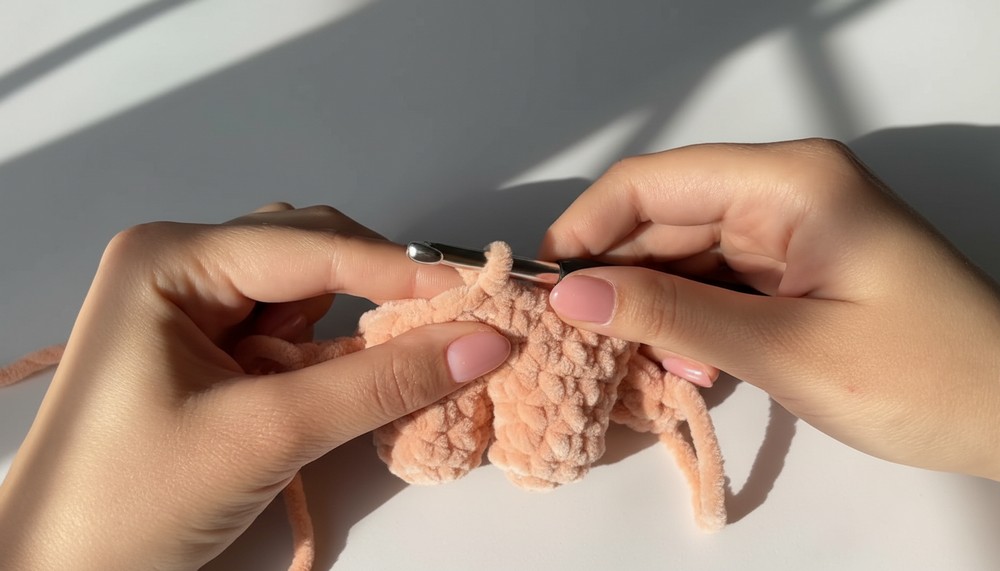
3. Body:
- Row 5: Work 8 sc around Leg 1, 1 sc into the connecting chain, 8 sc around Leg 2, and 1 sc in the connecting chain. (18 sts)
Tip: Add a stitch marker to keep track of row beginnings. - Row 6: Make 1 sc in each st all the way around. (18 sts)
- Row 7: Attach the arms.
- Begin by working 4 sc across the body.
- Holding the arm, crochet 7 sc through the stitches of the arm and body.
- Work 8 sc across the body, then attach the second arm in the same way.
- Finish the row with 4 sc. (18 sts + arms)
- Row 8: Crochet 7 sc across each arm and 18 sc across the body, for a total of 32 stitches.
4. Body Shaping:
- Row 9-10: Begin decreases to shape the body.
- Row 9: Work 1 dec in each st (using front loops only). (16 sts)
- Row 10: Again, 1 dec in each st. (8 sts)
5. Head:
- Row 11: 1 inc in each st around. (16 sts)
- Row 12: 1 sc, 1 inc – all around. (24 sts)
- Row 13-15: Work 1 sc in each st. (24 sts)
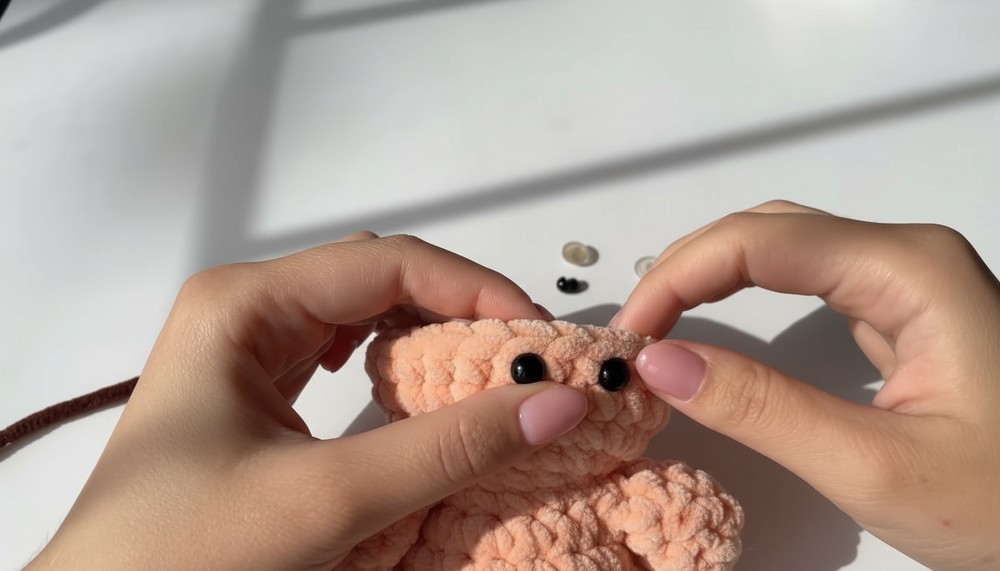
- Optional: Insert safety eyes between Rows 14 and 15, spaced 3 stitches apart.
- Row 16: 4 sc, 1 dec. (20 sts)
- Row 17: 3 sc, 1 dec. (16 sts)
- Row 18: 2 sc, 1 dec. (12 sts)
- Stuff the head and body firmly with fiberfill during dec rows.
- Row 19 (Final): 1 dec in each st. (6 sts)
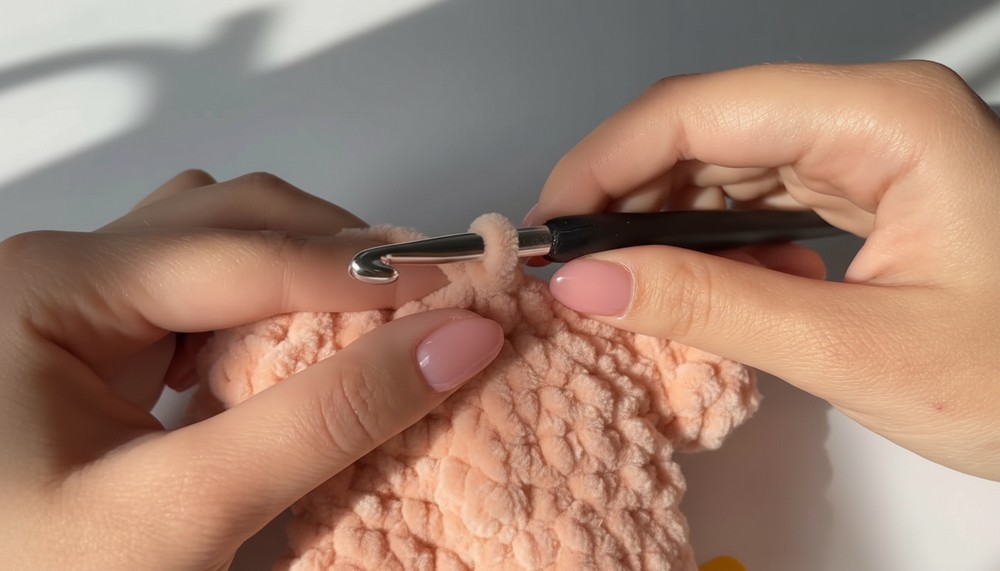
6. Finishing:
- Slip stitch into the first st, chain 1, and cut yarn, leaving a long tail.
- Using a needle, weave the long tail through the final 6 sts and pull to close the opening securely.
- Make a small knot and insert the needle through the head, pulling it to hide the tail inside.
7. Ears (Make 2):
- Row 1: Begin with a MC, chain 1, make 8 sc into the ring, and pull tight.
- Row 2: Make 1 sc in each st around. (8 sts)
- Slip stitch, chain 1, and cut yarn, leaving a long tail for sewing.
Sew the ears evenly to the head, aligning near the second-to-last row.
8. Nose (Optional):
- Row 1: Start with a MC, make 6 sc, and join with a slip stitch.
- Leave a long tail and sew the nose to the bear’s face, centered between the safety eyes.
9. Embroidered Details:
- Using white yarn or embroidery thread, embroider the mouth and highlight the nose. Begin from the side of the head, working symmetry into the design.
Optional Add-ons:
- Scarf & Hat: Create a mini scarf or beanie using simple chains and single crochets. Free patterns for accessories can make your bear unique.
- Customization: Use yarns of different textures/colors, or add outfits and embellishments to personalize the bear.
Tips for Success:
- Keep your stitches consistent. Tighter stitches yield a neater finish but may make it harder to insert the hook.
- Stuff the pieces firmly for the best shape but avoid overstuffing, which may stretch the stitches.
- Use stitch markers to track rows for precision.
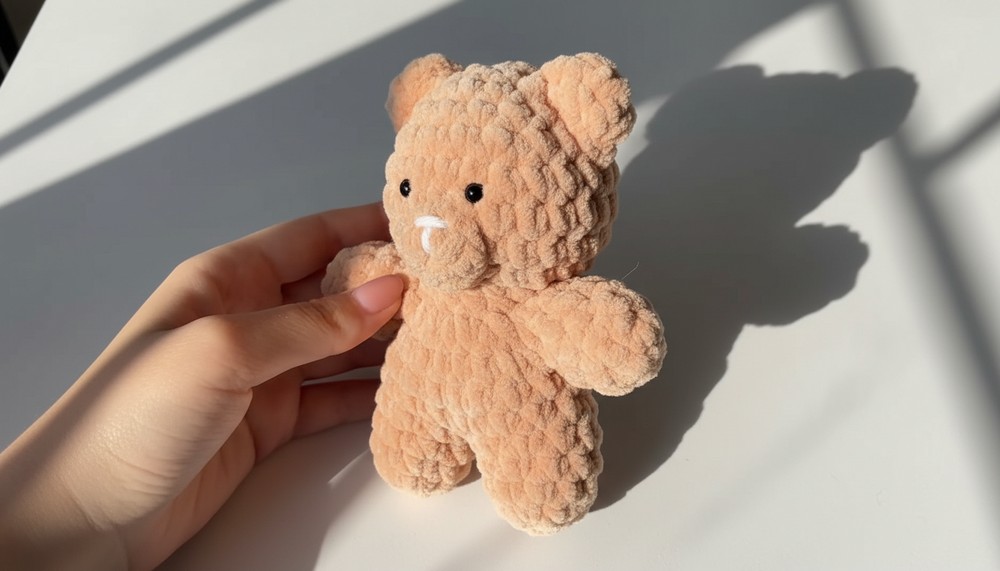
Conclusion:
Congratulations! Your crocheted bear is now complete. This charming project makes for an adorable gift, keepsake, or decoration. Adjust the design and colors to suit your preference or the season.