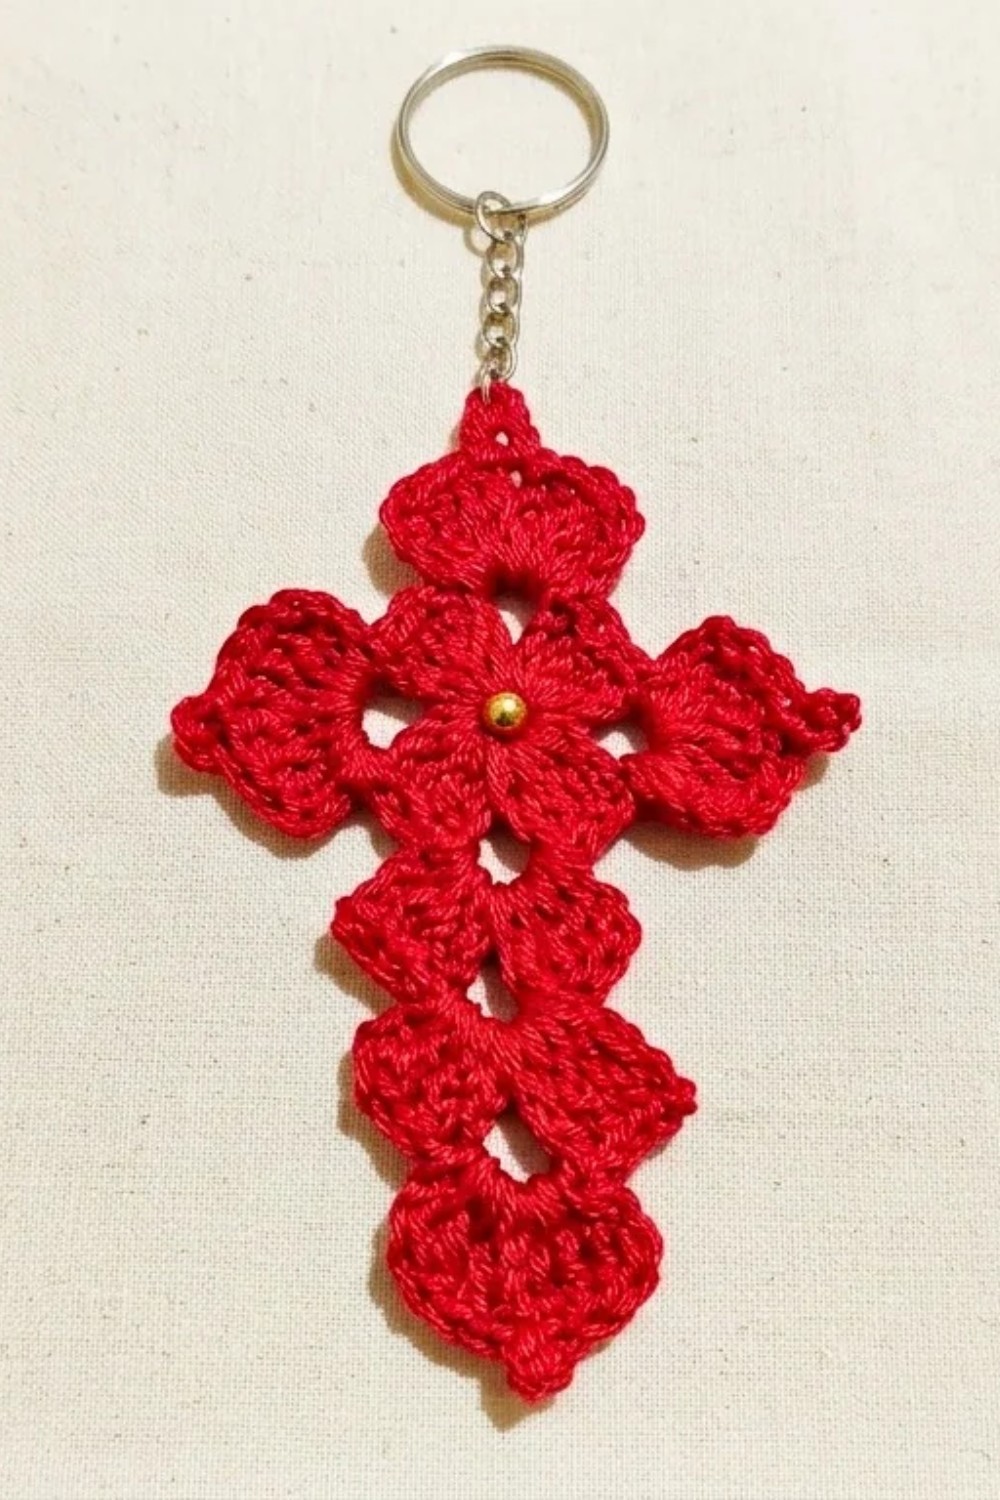
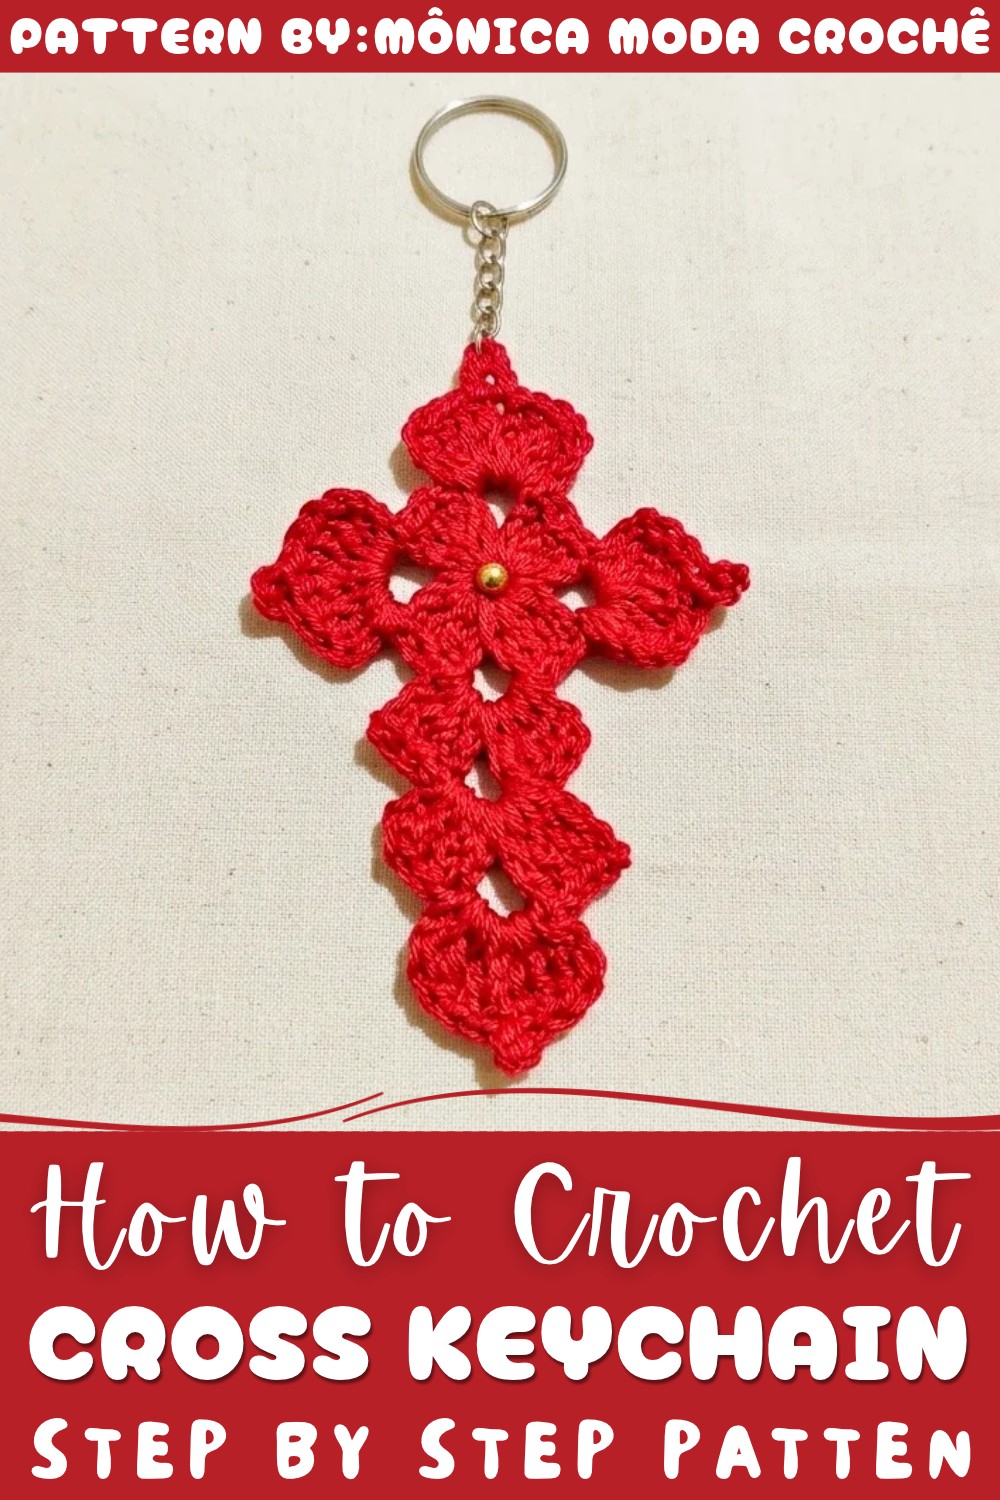
Carry a little reminder of your faith with this Crochet Cross Keychain Free Pattern and clip this piece to the bag you use every day.
Find the charming simplicity of a timeless accessory with this delightful project shared by Mônica Moda Crochê. Perfectly blending style and personal touch, this design captures the essence of meaningful décor with ease and elegance. The Crochet Cross Keychain Pattern offers a wonderful way to create something both beautiful and functional—ideal for adding a special accent to your everyday essentials or gifting to loved ones during special occasions.
One-Color Crochet Cross Keychain Free Pattern Using Leftover Yarn
This keychain’s classic cross silhouette brings a cozy, heartfelt vibe that's suitable year-round and fits seamlessly with a variety of personal styles. Whether clipped to your keys, attached to a Bible, or used as a decorative bookmark, it complements casual wear and more thoughtful moments alike. Its versatility makes it a thoughtful accessory for holidays, church events, or as a heartfelt keepsake for family and friends.
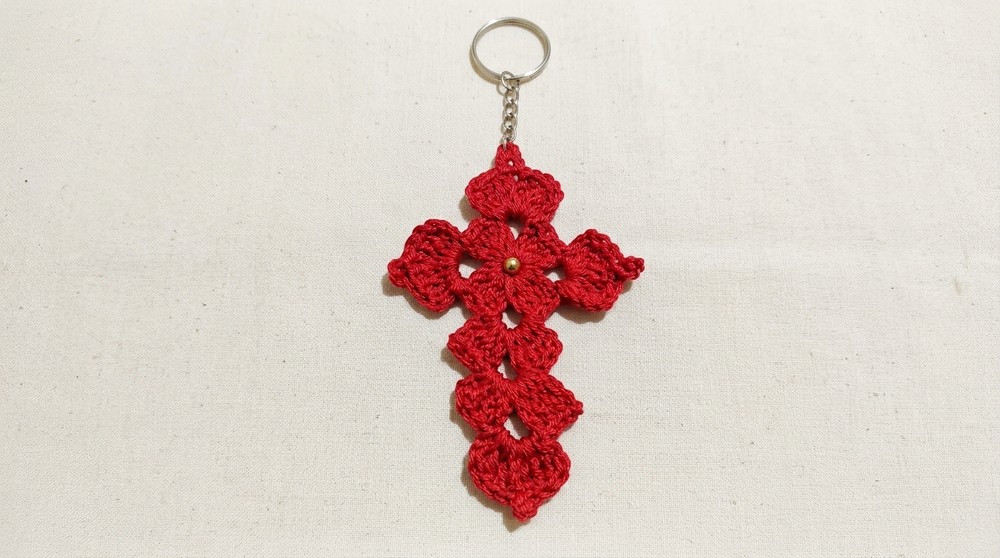
Texturally, the piece stands out with a combination of well-defined double crochet stitches interspersed with delicate picot details, creating an intricate yet sturdy fabric that feels both soft to the touch and durable for everyday use. The subtle pearls sewn in add a refined shimmer without overpowering its minimalist spirit, offering an elegant contrast that catches the eye.
Designed with both simplicity and charm in mind, this keychain pattern enhances any set of keys, bag, or book while inviting you to experiment with colors and accents. This lovely project beckons you to dive into the full tutorial and explore the satisfying process of bringing this beautiful accessory to life, perfect for anyone looking to add a meaningful handmade touch to their daily life.
Pocket-Size Crochet Cross Keychain Free Pattern
This crochet cross keychain stands as a distinctive symbol of thoughtful handwork and elegant simplicity. Its construction features a well-balanced interplay of clustered stitches, picots, and subtle embellishments to achieve a graceful silhouette. Each round is built to provide a sense of rhythmic repetition, reinforcing both structure and symmetry. The addition of a pearl at the center enhances the charm and gives an appealing focal point, elevating the motif beyond ordinary accessory status. Subtle color choices and fine finishing touches present endless options for personal expression. Compact and lightweight, the cross is suited for daily use or as a cherished gift. Whether added to keys, bags, or even used in home decor, its reflective beauty and delicate construction are sure to stand out gracefully.
Quick Overview Of Pattern
- Create a central foundation ring using chain stitches.
- Form four clusters of double crochets, separated by corner spaces.
- Work three arms of the cross (top, right, and left) with picot-tipped shells.
- Build and extend the bottom stem with extra rows and finishing picot.
- Attach pearls to the center for embellishment.
- Add a hanging loop and secure the keyring at the top.
Notes
- Maintain even tension for a consistent, flat shape.
- Each cluster and picot forms visual anchors; count stitches carefully.
- You may use alternate yarn colors or pearl colors to personalize.
- Keyring joining uses a discrete loop at the top for strength.
Skill Level
Beginner to Intermediate
Familiarity with foundation rings, basic double crochet, slip stitch, and picot (ch 3, sl st) is required. The cross is worked in joined and flat rows; assembly is simple and ideal for those wishing to practice decorative finishes.
Materials
- Main Yarn: Círculo Charme (red/white, or any DK/light worsted 100% cotton)
- Sewing Thread: Círculo Cléa (thin, matching for pearl attachment)
- Hook: Nickel-plated, size 4 (approx 1.25 – 1.5 mm)
- Embellishments: 2 small pearls (approx. 4 mm, for center)
- Hardware: 1 metal keyring or keychain clasp
- Notions: Tapestry needle, sewing needle, scissors
Measurements / Sizing
- Finished cross: Each arm is roughly 4–5 cm; total length (including bottom stem) is about 8–9 cm.
- Width: Approx. 4–5 cm at the arms.
Gauge
As this is a motif, gauge is not critical. All stitches should be snug enough so that picots and clusters are well-defined and pearls do not pull through the center.
Stitch Abbreviations
| Abbreviation | Definition |
|---|---|
| ch | chain |
| sl st | slip stitch |
| dc | double crochet |
| picot | picot (ch 3, sl st at base) |
| st(s) | stitch(es) |
Special Stitches
- Picot: Ch 3, sl st into the base of the previous stitch (at the top of the shell or arm for a decorative tip).
The Crochet Pattern
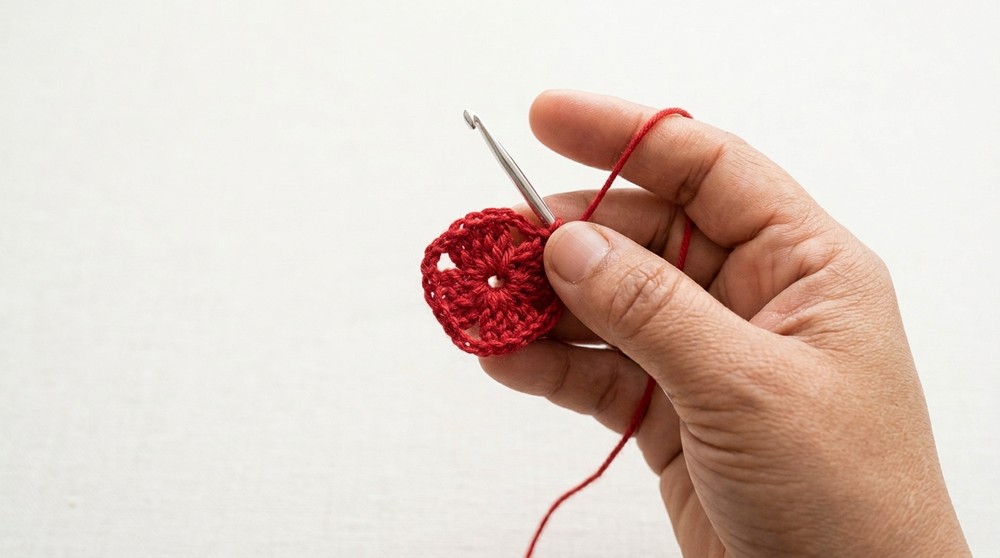
CENTER RING (ROUND 1)
- Foundation Ring:
- Ch 5.
- Join with a sl st into the first ch to form a small ring.
- First Cluster:
- Ch 3 (counts as 1 dc).
- Work 3 dc into the center (total: 4 dc).
- Corner & Second Cluster:
- Ch 3 (corner space).
- Work 4 dc into the ring.
- Repeat for Third & Fourth Clusters:
- (Ch 3, 4 dc) two more times.
- After completing four clusters of 4 dc, each separated by ch-3 spaces, join with a sl st to the top of the beginning ch-3 to close the round.
TOP AND SIDE ARMS OF THE CROSS (ROUND 2)
Move to First Corner Space:
- Sl st across the top of next 3 dc, then sl st into the next ch-3 corner space.
Top Arm (with Picot)
- Ch 3 (counts as 1 dc).
- Work 3 dc into the same ch-3 space (total: 4 dc).
- Picot: Ch 3, insert hook into the base of these chains, sl st to form picot.
- Work 4 more dc into the same ch-3 space (total: 8 dc, separated by picot).
- Ch 2, sl st into the same ch-3 space (to anchor arm).
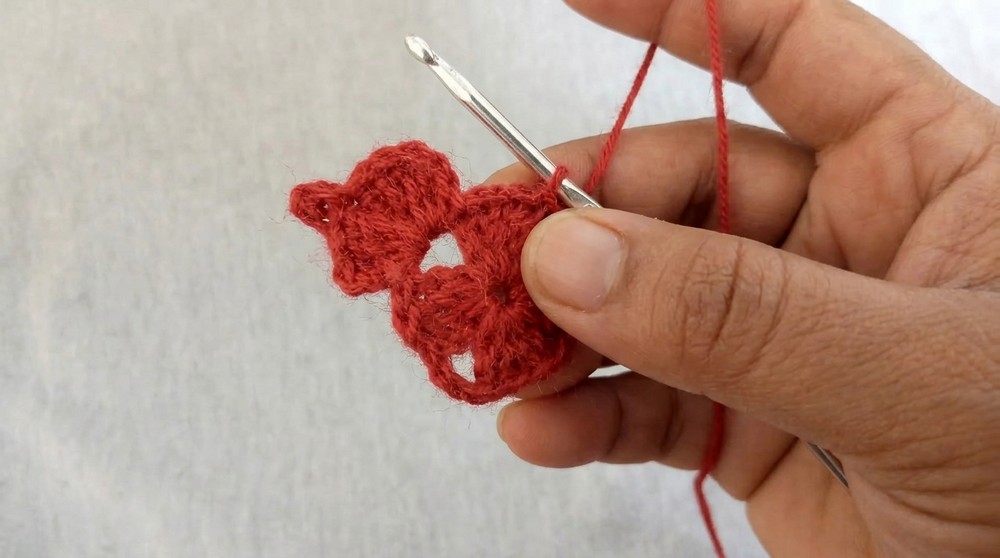
Transition to Right Arm:
- Work 1 sl st into each of the next 4 dc of the base cluster,
- Sl st into next ch-3 corner space.
Right Arm (with Picot)
- As with the top arm:
- Ch 3, 3 dc, ch-3 picot, 4 dc, ch 2, sl st in the same space (to anchor).
Transition to Bottom Stem Base:
- Sl st across next 4 dc of base cluster,
- Sl st into next ch-3 corner space (now at the stem base).
EXTENDED BOTTOM STEM OF THE CROSS
Stem Row 1:
- Ch 3 (counts as dc), 3 dc into same space,
- Ch 3, work 4 dc into the same space (do not work a picot here).
Row 2:
- Ch 1, turn,
- Work sl st into each of the 4 dc to reach the center ch-3 space,
- Sl st into the space.
- Into the ch-3 space: Ch 3, 3 dc, ch 3, 4 dc.
Row 3 (Final Point with Picot):
- Ch 1, turn,
- Sl st into each of 4 dc to center ch-3 space,
- Sl st into space.
- Into ch-3 space: Ch 3, 3 dc,
- Picot: Ch 3, sl st into base (forms tip of stem),
- 4 dc, ch 2, sl st into same space to anchor.
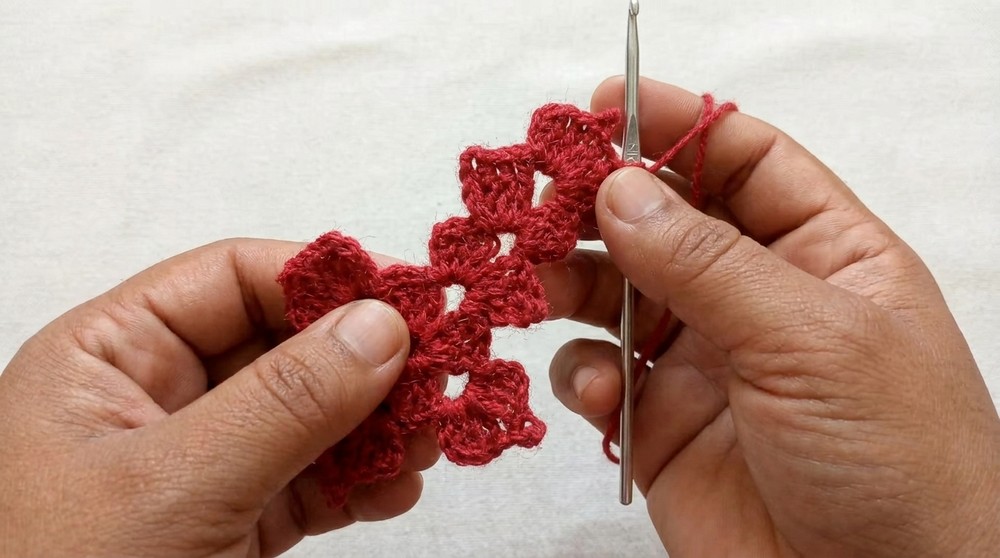
Return up the Stem:
- Sl st into each of the next 4 dc along side of last stem row,
- Continue sl st up side edge of previous stem rows as needed, until reaching the remaining ch-3 corner space on the central ring.
LEFT ARM AND FASTENING OFF
Left Arm (in 4th ch-3 space):
- Sl st into the final unworked ch-3 corner,
- Ch 3, 3 dc, ch-3 picot, 4 dc, ch 2, and sl st into the same space.
Finish:
- Sl st across the final 4 dc to return to the start,
- Ch 1, cut yarn, weave in ends securely.
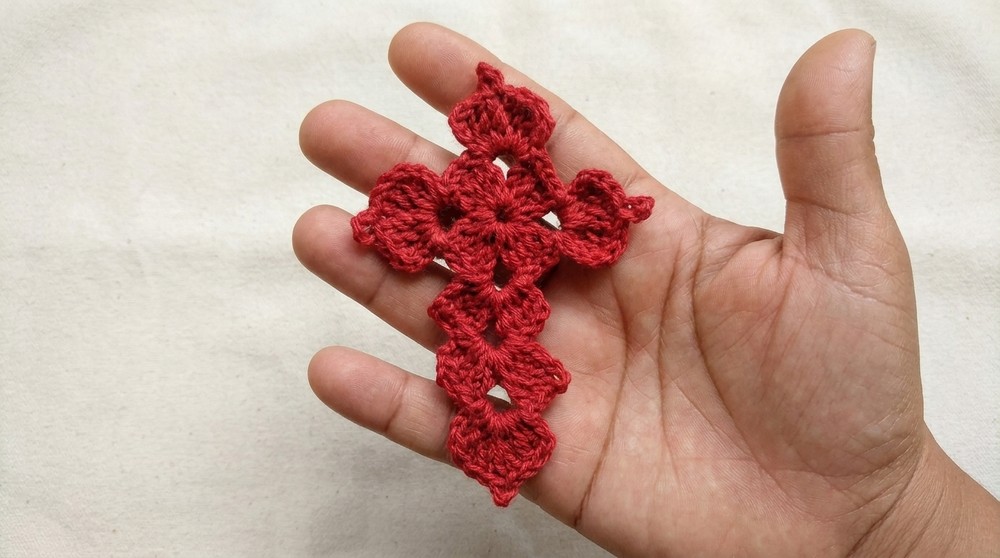
Assembly & Finished Size
1. Attaching the Center Pearls
- With sewing needle and Cléa thread, position one pearl on the front and one on the back center.
- Sew through the ring’s center so both pearls are held firmly, knot and hide threads.
2. Attaching the Keyring
- Attach a slipknot of Charme yarn with a sl st into the top picot.
- Ch 1,
- Pass hook through the keyring and pull up a loop,
- Ch 1 to fasten,
- Sl st back into ch below the ring,
- Work another sl st into the top picot,
- Ch 1, cut yarn, and weave ends neatly into the back.
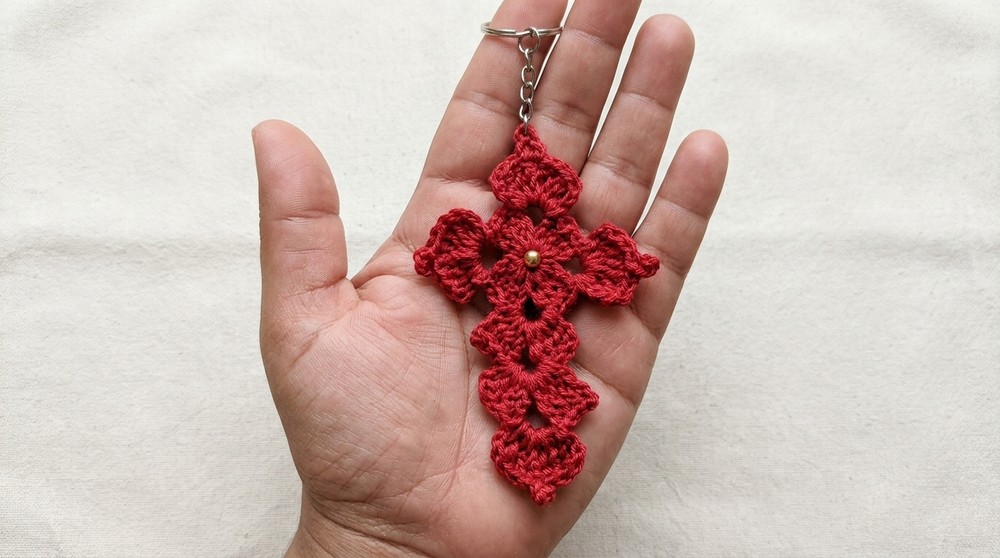
Finished cross: Length: about 8–9 cm, width 4–5 cm.
Conclusion and Ending Words
Through the thoughtful progression of stitches and careful finishing, this crochet cross keychain emerges as a heartfelt accessory suited to a range of uses, from keepsakes to personal tokens. The interplay of structure and embellishment highlights traditional crochet elements while introducing a modern, eye-catching twist. Each section draws together fundamental skills, allowing for results that are both visually appealing and structurally sound. The final touch of pearl detailing and a neatly secured keyring underscores the attention to detail that distinguishes handmade accessories. This compact design easily finds a place in anyone’s everyday essentials, offering a touch of comfort, faith, or style whenever it is in hand. With attention paid to every stitch, the result is both enduring and deeply meaningful.