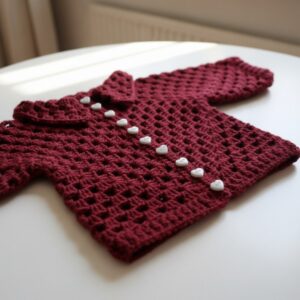
Making a Crochet Granny Square Cardigan is like piecing together a quilt, where each square brings its own flair to the final masterpiece. By creating this cardigan, stitch by stitch, you're not just making a garment; you're weaving comfort and self-expression into every loop.
Crochet Granny Square Cardigan

The process is simple, soothing, and perfect for those quiet evenings or moments of leisure. With each square you complete, you're closer to having a unique cardigan that's as practical as it is charming.
Materials Needed:
- Yarn: Aite 100% acrylic (50g, 140m), Colors: Cream (3057), Brown-like (31882), and Hobby We Heart Yarn classic acrylic (50g, 150m, or 164 yards), Color: Number 4.
- Crochet Hook: 5mm (H8 US)
- Scissors
- Stitch Markers
- Darning Needle
- Tape Measure
Sweater Body:

Starting Your Sweater:
Begin with a magic circle.
- Chain 2, which counts as your first double crochet.
- Work 2 additional double crochets into the circle.
- Chain 1, then work another set of 3 double crochets into the circle.
- This forms a cluster. Repeat clusters to create 4 corners of your square.
- Pull the circle tight and join with a slip stitch to form your square.
Building the Granny Square:
- Chain 2; this counts as a double crochet. Complete 2 more double crochets in the same gap for a 3 double crochet cluster.
- Skip to the next gap, create another 3 double crochet cluster.
- In corners, work 3 double crochets, chain 1, and 3 more double crochets into the same gap.

- Continue around and slip stitch to join the end of the round.
Expansion and Color Change:
- Repeat the second step process, increasing at each corner, to expand your square.
- After 4 rows of each color, change the yarn to the next color. To change color, cut the yarn leaving a tail, join the new color, and secure.
Size Measurements:
- Measure across your bust or desired width of the sweater and continue the granny square to match this measurement.
- Construct a second identical panel for the back of the sweater.
Joining Panels & Creating Sleeves:

Joining Front and Back:
- Place panels right sides together, align edges and join using your chosen method (slip stitch or sew).
- Leave openings for the neck and armholes.
Sleeves:
- Pick up and evenly distribute stitches around the armhole.
- Follow the granny square stitch pattern, working in rounds.
- Decrease stitches at intervals for the sleeve tapering towards the cuff.

Finishing the Sleeves:
- Alternate colors every 4 rows to match the body pattern.
- After achieving the desired sleeve length, work a ribbing pattern (front post and back post double crochets).
Neckline & Bottom Edge:

Neckline:
- Pick up stitches around the neckline.
- Work a few rounds of front post and back post double crochets for a neat finish.
Bottom Edge:
- Similarly, work on the bottom edge of the sweater to mirror the neckline finishing.
Final Touches:
- Weave in all ends securely.