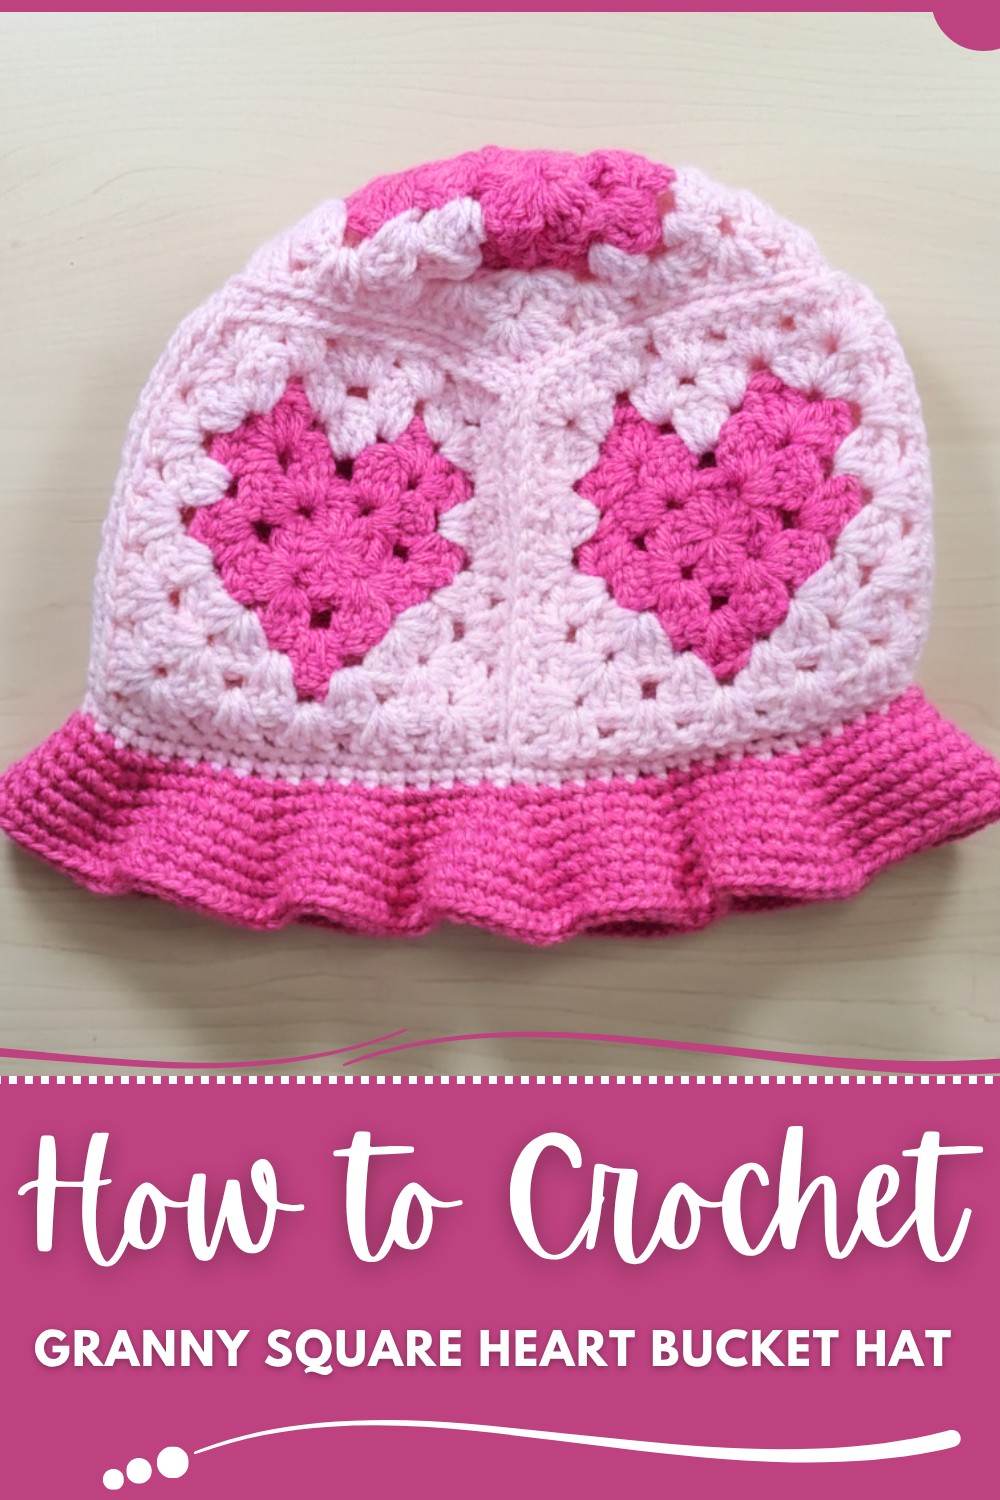
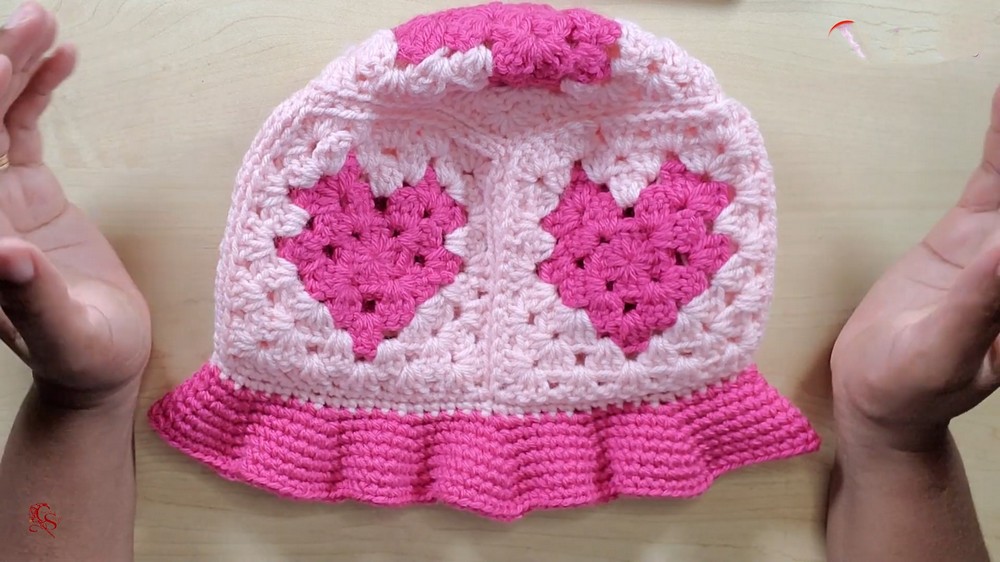
Show off charm with free crochet granny heart bucket hat pattern that offers comfy fit, heart motifs and suits casual outfits and sunny days.
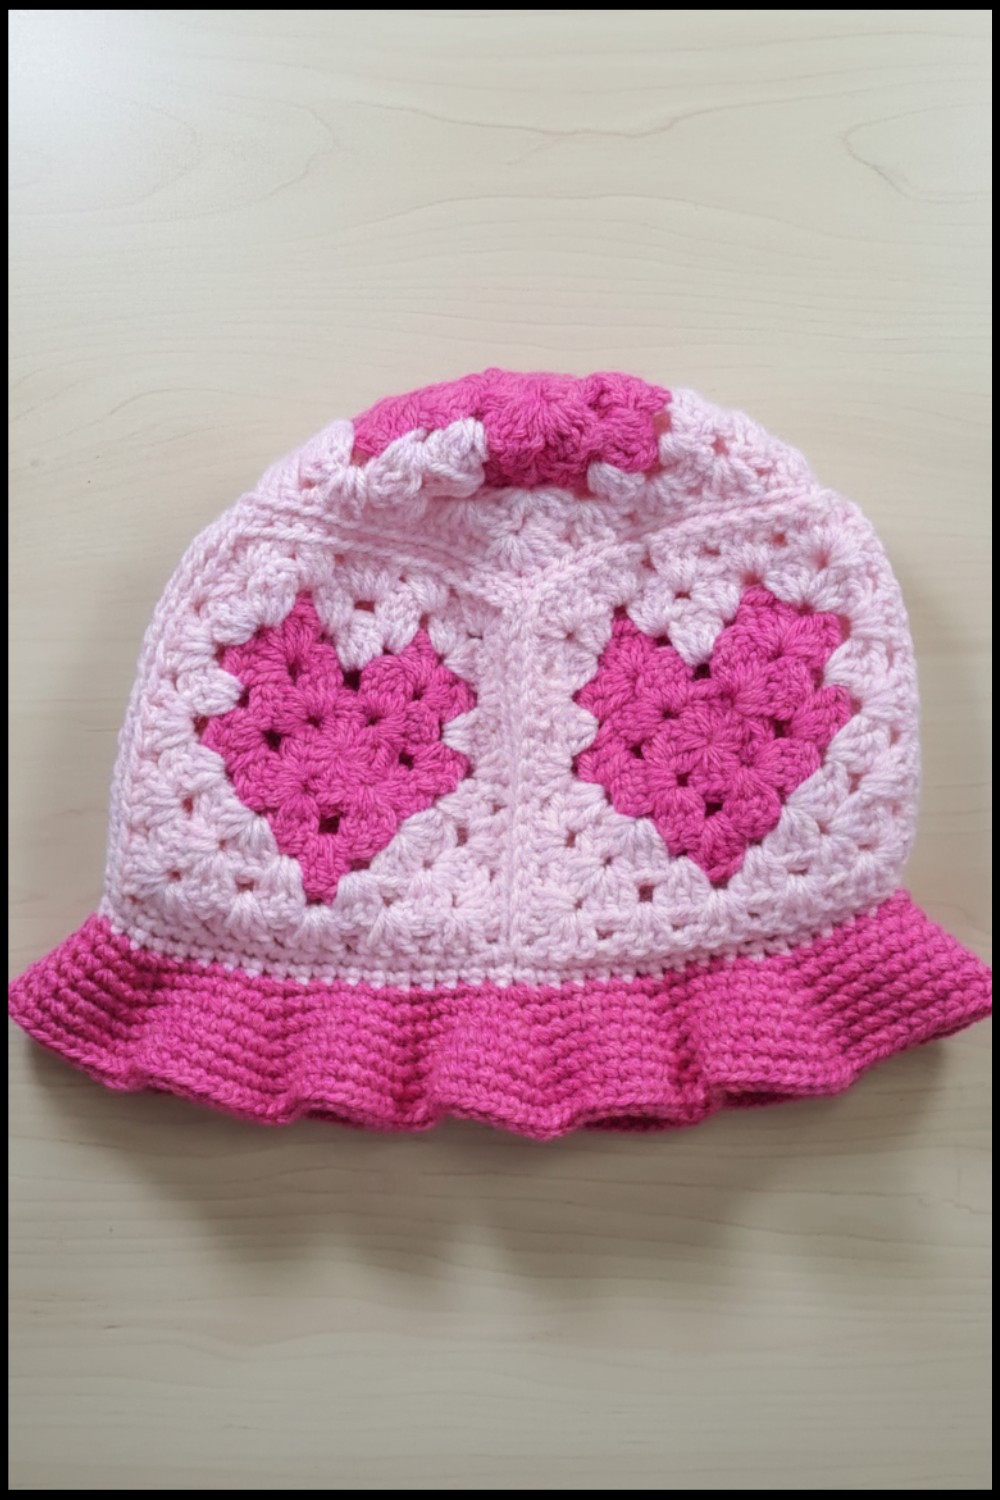
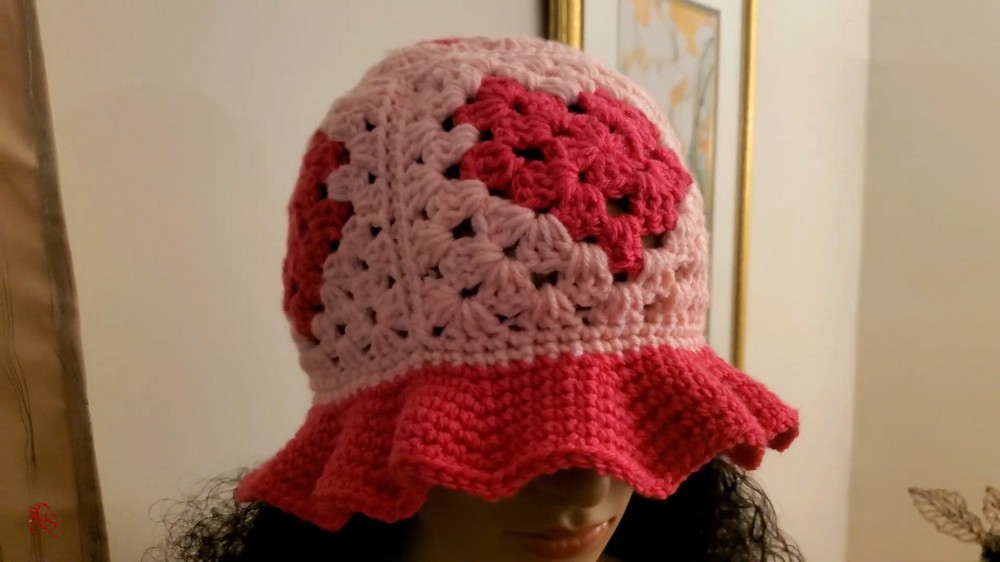
It is not just an ordinary hat that you can forget easily. The Crochet Granny Heart Bucket Hat pattern turns simple yarn into something truly special with soft heart shapes that gently decorate the surface and give it a sweet handmade charm. It looks stylish and unique while still feeling light and comfortable to wear in daily life. People enjoy using it for sunny days outdoor walks beach trips shopping or casual meetups because it offers both shade and fashion together. Its strong structure helps the hat keep its shape even after regular use which makes it long lasting and reliable.
Free Crochet Granny Heart Bucket Hat Pattern That Stands Out
Another beautiful benefit is how beginner friendly it is so new makers can learn easily and feel proud of their work. You can choose soft pastel colors or bright shades to match your mood and style making each piece one of a kind. It also works wonderfully as a thoughtful handmade gift for loved ones bringing joy care and warmth. This bucket hat adds beauty comfort and creativity while turning simple stitches into something truly meaningful and wearable every day.
Granny Square Hat Pattern
Materials Needed
- Yarn: Worsted weight yarn (#4), in various colors as desired for granny squares and brim.
- Hook: 5.0 mm crochet hook (or 4.5 mm for a smaller hat).
- Notions: Yarn needle (for seaming and weaving ends), scissors, stitch markers (optional).
Key Abbreviations
| Abbreviation | Meaning |
|---|---|
| ch | chain |
| sl st | slip stitch |
| sc | single crochet |
| BLO | back loop only |
| st(s) | stitch(es) |
| rep | repeat |
| RS | right side |
| WS | wrong side |
Special Notes
- US crochet terminology is used throughout.
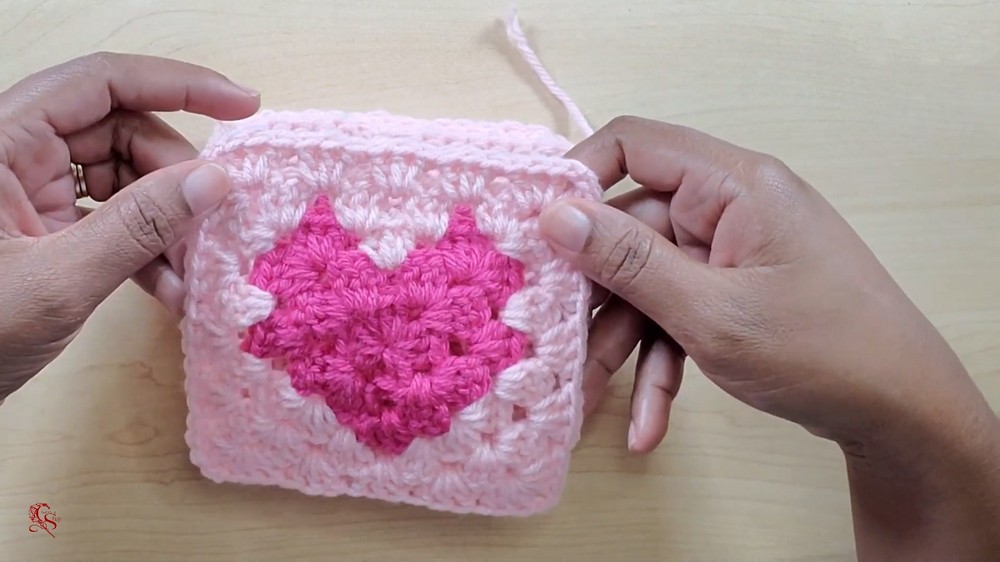
- Each granny square measures approximately 5 inches wide.
- A 5.0 mm hook is recommended for standard adult fit; use a 4.5 mm for a snugger hat.
- This pattern requires you to first make 5 granny squares. For a classic granny square, use your preferred method, or refer to an earlier tutorial if needed.
- When assembling, pay careful attention to orientation, especially if your squares have directional motifs (e.g., heart shapes).
Pattern Instructions
1. Make Granny Squares
- Make 5 granny squares, each 5” wide using worsted weight yarn and a 5.0 mm hook.
- Fasten off and weave in any center ends. Leave a long tail on at least one side for sewing.
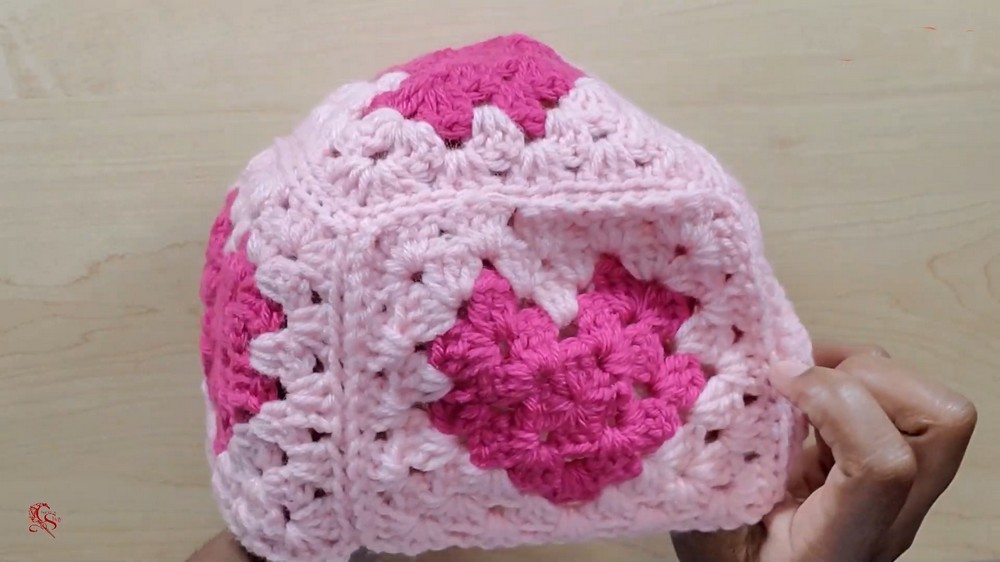
2. Assemble the Hat (Joining Squares)
Step 1: Form the Hat Body (Side Panels)
- Lay out 4 squares in a straight row.
- With WS facing you, seam the squares together to form a strip.
- Use a yarn needle and remaining yarn tails.
- Insert the needle through the back loop of the square facing you and the front loop of the adjacent square.
- Sew without pulling too tight.
- After finishing a seam, gently tug to lay the stitches flat.
Step 2: Form the Tube
- Fold the strip of 4 joined squares so the short sides meet and form a tube.
- Seam the ends together using the same back loop/front loop method.

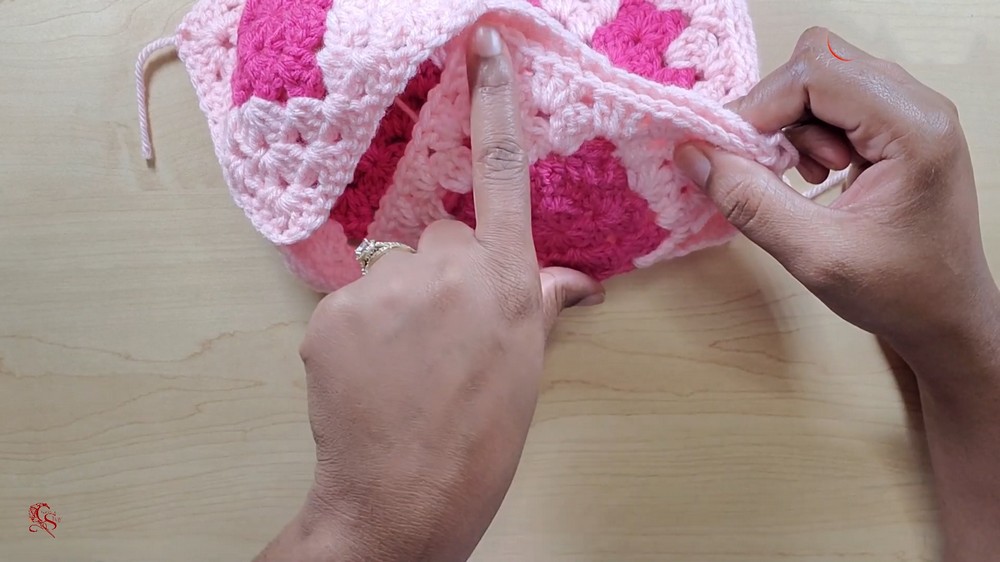
Step 3: Attach the Top Square (Crown)
- Place the 5th square on top, aligning corners and sides.
- Ensure motif direction (if any) is correct.
- Sew each side of the top square to each open top edge of the tube, using back loop/front loop seaming.
- Sew all around, closing the “crown” of the hat.
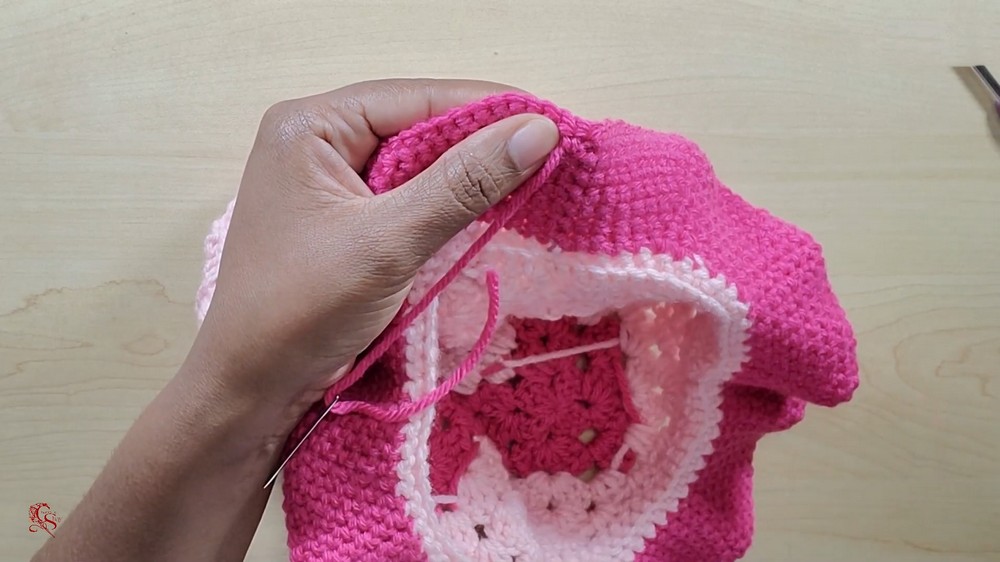
3. Weave in All Seams
- Weave in all remaining ends on the inside of the hat for a polished finish.
4. Work the Brim
Step 1: First Row (Pick Up Stitches)
- Join yarn to any chain-1 space (corner of a square) at the open edge (bottom of hat).
- Ch 1, work 1 sc in each stitch around the base of the hat, spacing them evenly—work into stitches and corners as needed.
- Join with a sl st to the first sc.
Step 2: Second Row
- Ch 1, working in the front loops only (FLO), sc in each stitch around.
- Join with a sl st to the first sc.
Step 3: Add Color (optional)
- If changing color, join new yarn in FLO of any stitch before closing the previous round.
Step 4: Begin Increases
- Ch 1. Sc in next 4 sts, 2 sc in next st; rep from * to * around. (If you have extra sts at the end, just sc in them.)
- Join with a sl st to the first sc.
Step 5: Continue Increase Rows
- Ch 1. Sc in next 5 sts, 2 sc in next st; rep around.
- Join with a sl st.
- Ch 1. Sc in next 6 sts, 2 sc in next st; rep around.
- Join with a sl st.
- Continue this pattern, increasing the number of single crochets between increases by 1 each round.
- Work until you have completed a total of 7 rounds after picking up stitches or reached your desired brim width.
5. Finish
- Fasten off.
- Using the yarn needle, weave in all final ends neatly inside the hat.
Conclusion
You have completed a stylish Granny Square Hat! This project combines the classic appeal of granny squares with a practical and trendy hat design. The pattern is easily customizable by changing the color, size of the squares, or brim width.
Pattern Corrections & Tips
- Square Orientation: Always check the direction of motifs (hearts, stripes, etc.) before final seaming, especially for the crown square, to ensure the design faces up.
- Even Seaming: When sewing, don't pull the yarn too tightly—allow the seams to lay flat for comfort and appearance.
- Sizing: Adjust square size or hook size for a larger or smaller hat.
- Brim Customization: Add more or fewer rows to the brim to achieve desired width.
Tip:
If your brim is rippling or wavy, you may have added too many increases—try reducing the frequency (for example, every 7 or 8 stitches between increases as the brim grows).