Show your support for Dreamwastaken with this free crochet Dreamwastaken keychain pattern, a fun and unique way to create your own fandom-inspired accessory.
If you want to make a very cute and fun keychain, this project is just right for you! The Free Crochet Dreamwastaken Keychain Pattern lets you crochet a small and pretty keychain inspired by Dreamwastaken, a popular design loved by many. It’s a great way for beginners and kids to start learning crochet because it is simple and quick to finish.
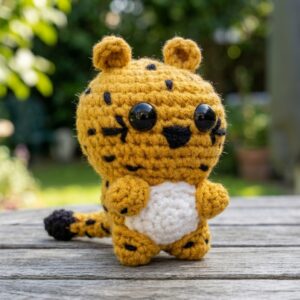
Crochet Dreamwastaken Keychain Free Pattern for Gamers
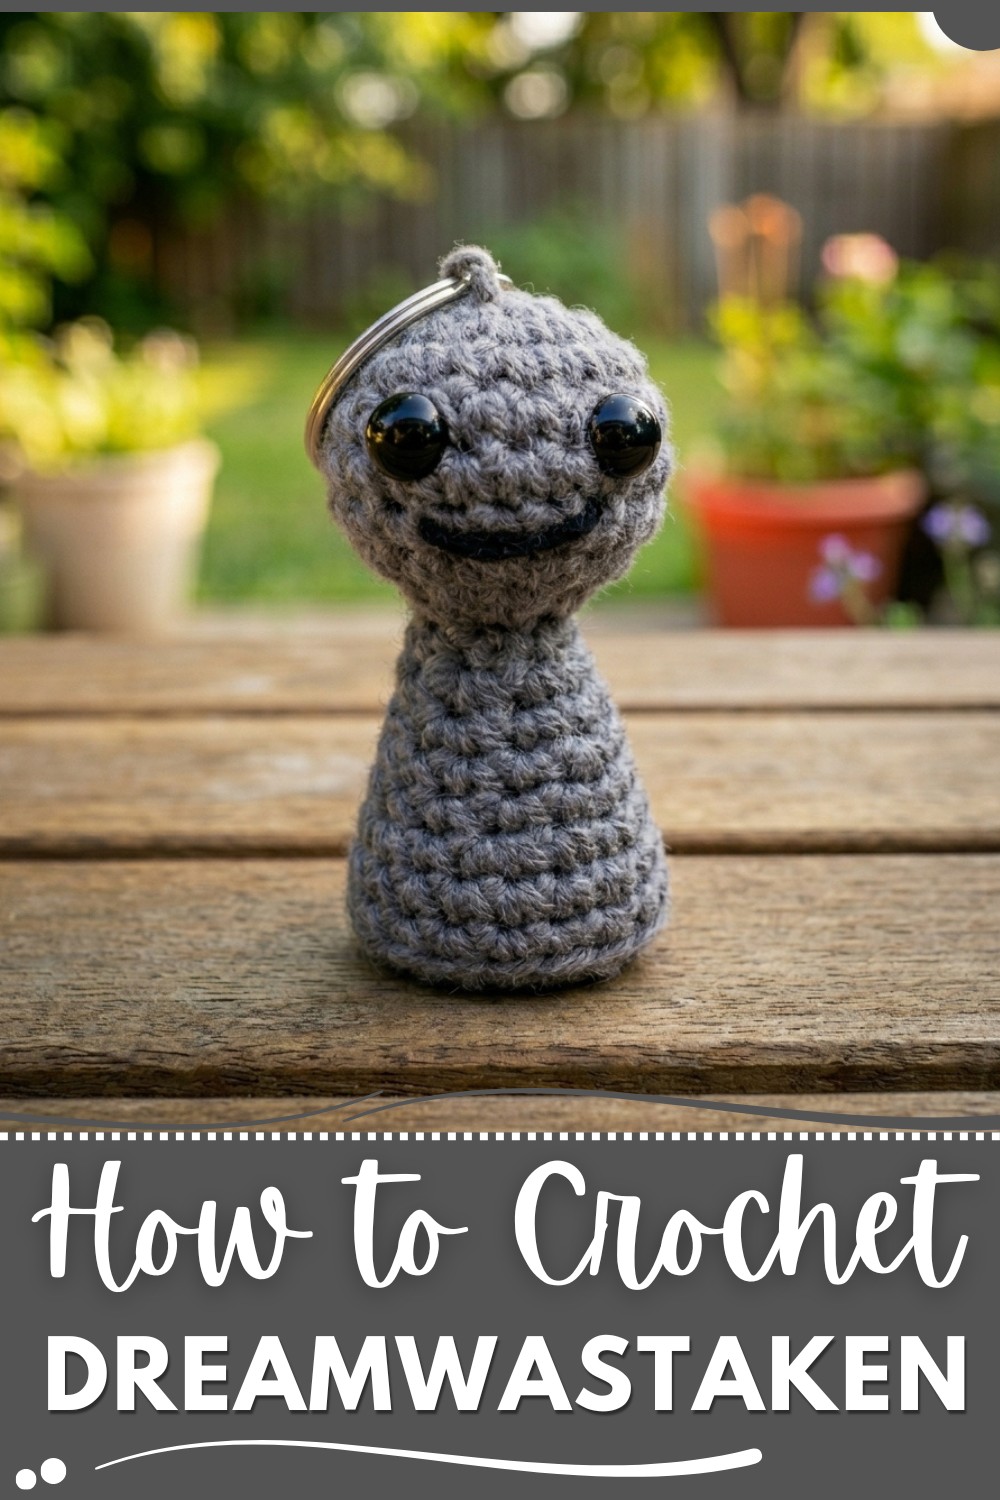
This keychain is really beautiful because you can choose your favorite colors to make it look just how you want. You might pick bright colors like blue, green, or yellow, or soft colors like pink and white. You can even mix colors to make it special! The size of the keychain after you finish will be about 3 to 4 inches, which is perfect to carry with your keys, hang on your backpack, or use as a fun charm on your pencil case.
To make this keychain, you mainly use the single crochet stitch, which is easy to learn and helps make the piece tight and strong. You will need a small hook, and it's best to use soft acrylic yarn since it is gentle to work with and comes in lots of colors. The keychain is made by crocheting in rounds, then stuffing it lightly to keep the shape.
With this pattern, you can also make other small things, like bag charms, zipper pulls, or cute gifts for friends. It’s a wonderful little project to practice your crochet skills and create something fun to keep with you. Whether you’re new to crochet or just love making small toys, this keychain is a happy and easy choice.
Dream Keychain Amigurumi Crochet Pattern
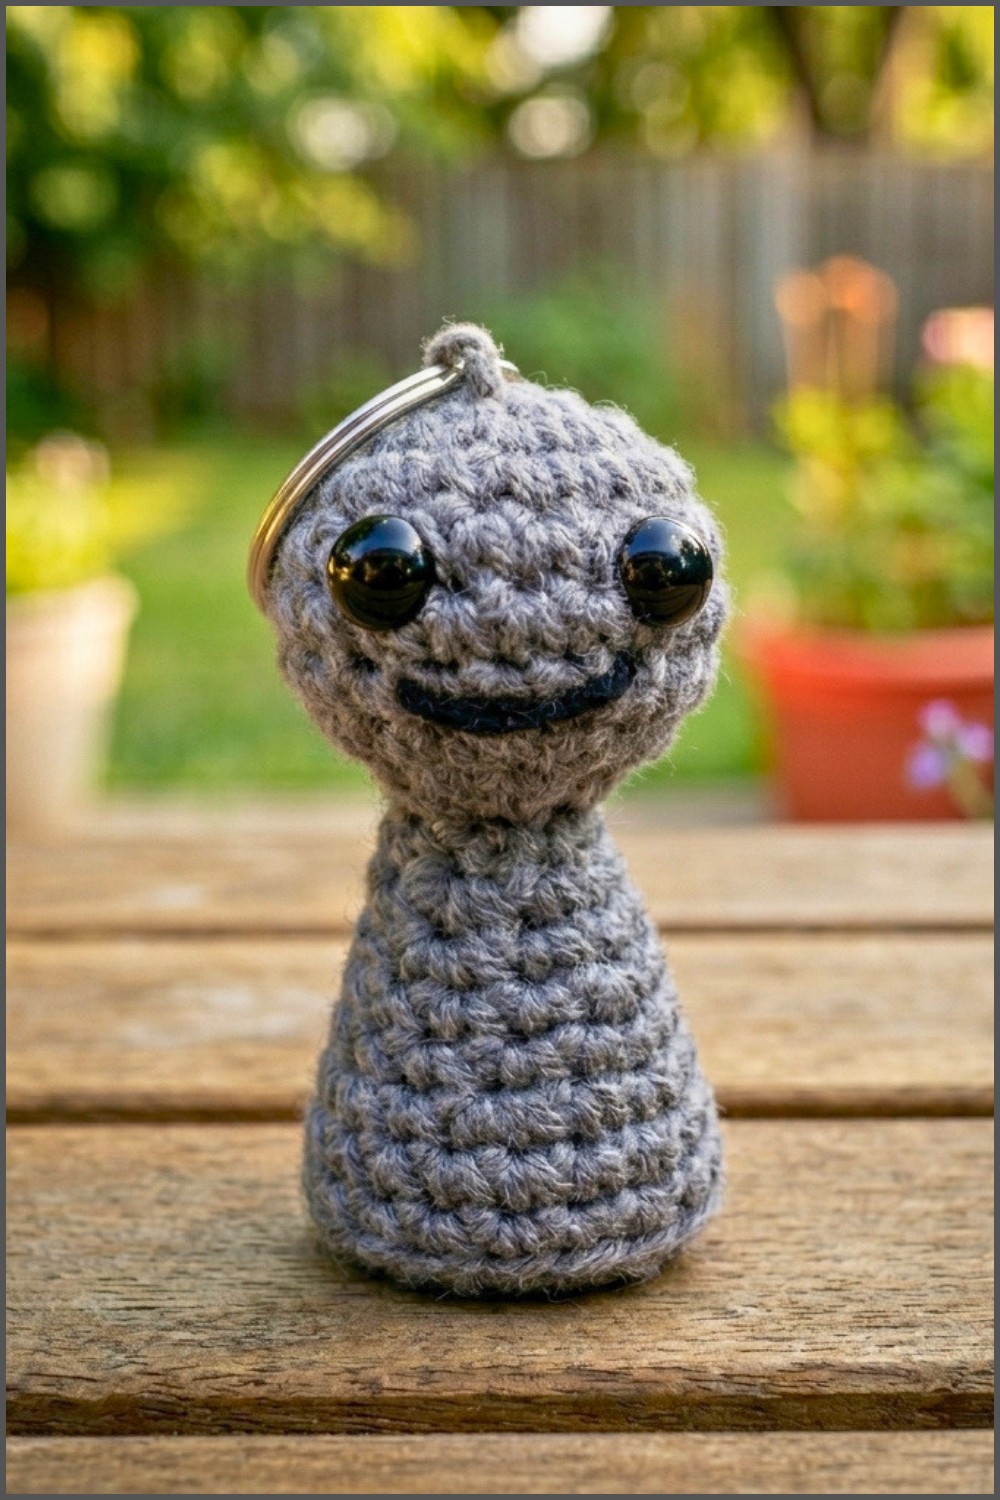
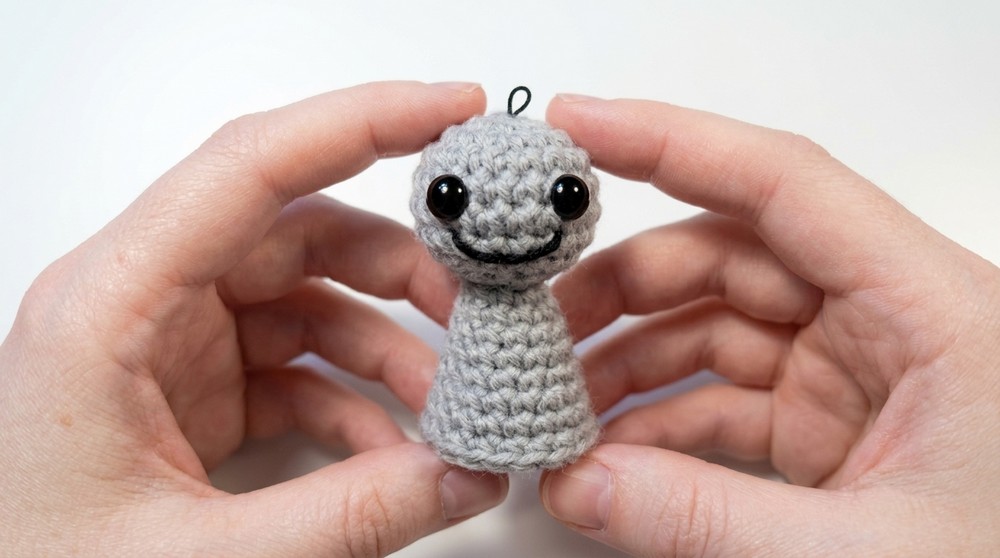
Crochet your very own miniature Dream amigurumi, perfectly sized as a 2.5” keychain plush. This pattern is designed for simplicity and portability, a fun tribute for fans and a charming way to accessorize your bag or keys. The project is constructed in pieces (head, body), worked predominantly in rounds using basic crochet stitches and invisible decreases for a smoothly shaped figure. Minimal materials are needed, and your finished Dream will come alive with embroidered or safety eyes and a cheeky smile.
Skill Level & Terminology
Skill Level:
Beginner—confident beginner. You should know single crochet (sc), increases and decreases, and the magic ring.
Techniques Used:
- Magic ring (circle)
- Single crochet (sc)
- Invisible decrease
- Working in the round
- Crochet assembly and basic embroidery
All instructions use standard US crochet terminology.
Materials & Tools
- Worsted weight yarn, small amount in gray
- Scrap of black yarn or embroidery thread (for smile)
- 3.25 mm crochet hook
- Pair of scissors
- Yarn needle
- Stitch marker
- Polyfill stuffing (or white yarn scraps)
- 2 safety eyes (or black felt and glue/embroidery thread)
- Keychain hardware (optional) or a scrap of white yarn for a loop
Gauge
Not essential for amigurumi, but your stitches should be tight enough that stuffing does not show.
If you are new to amigurumi, work a practice swatch:
10 sc x 10 rows ≈ 2” x 2”
Abbreviations List
- MR = Magic Ring
- sc = Single crochet
- inc = Increase—2 sc in the same stitch
- dec = Decrease—see special stitch instructions
- sl st = Slip stitch
- st(s) = Stitch(es)
Special Stitch Instructions
Invisible Decrease (dec):
Insert hook through front loops only of the next two stitches, yarn over, pull through both front loops (2 loops remain on hook), yarn over, pull through both.
Pattern Overview: Getting Started & Stitches Used
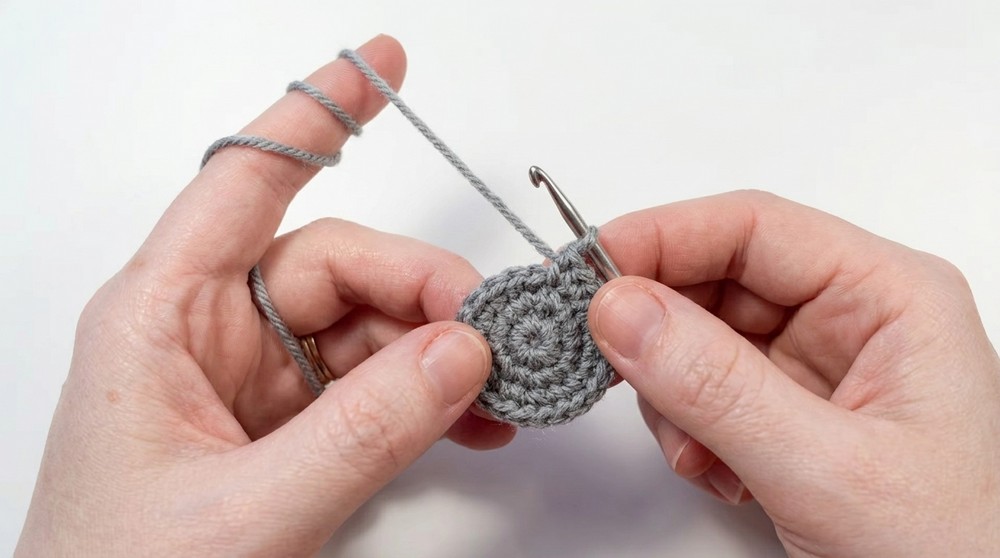
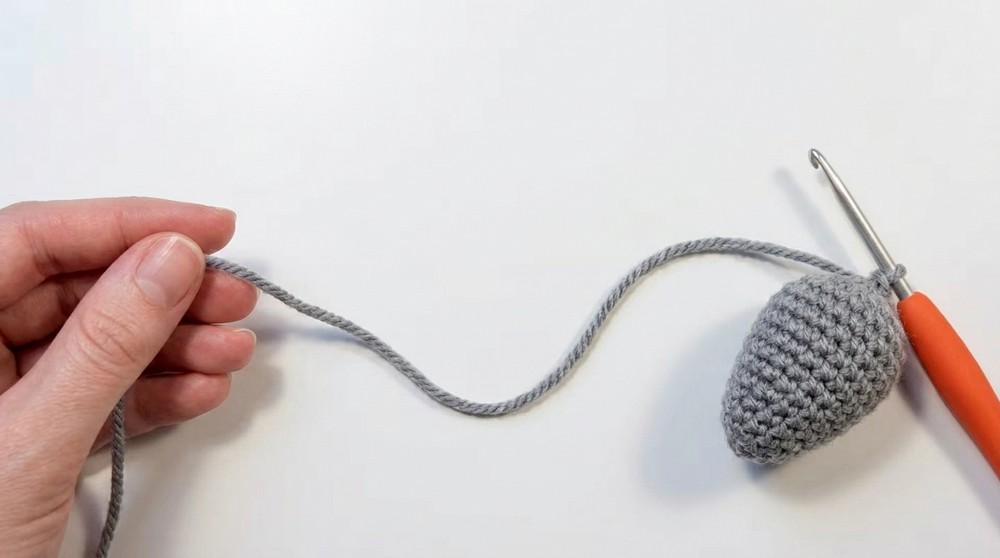
To begin this pattern, you'll start with the magic ring technique, which allows you to crochet seamless spheres for the head and a smooth cylinder for the body. The project uses only basic stitches: single crochet for the structure, increases for shaping rounds, and invisible decreases for smooth reductions in size. You’ll work both pieces in continuous spiral rounds, using a stitch marker to note the start of each round. Once you have the head and body, you’ll practice some simple sewing and embroidery for assembly and finishing.
The Pattern Itself
Head
- Round 1: With white, MR, 6 sc into ring. (6)
- Round 2: Inc in each st around. (12)
- Round 3: (Inc, sc) around. (18)
- Rounds 4–6: Sc in each st around. (18 for 3 rounds)
Your head shape is forming. If you’re new to patterns, you create a flat circle in the first 3 rounds, then work even to build height and create the sphere.
- Round 7: (Dec, sc), repeat around. (12)
- After this round, insert safety eyes (or sew eyes) between rounds 4 and 5, leaving a gap of 3 sc (total: 5 stitches with eyes at each end).
- Stuff head firmly, shaping as you go.
- Round 8: Dec around x6. (6)
- Sl st in next st. Fasten off, leaving a long tail for sewing.
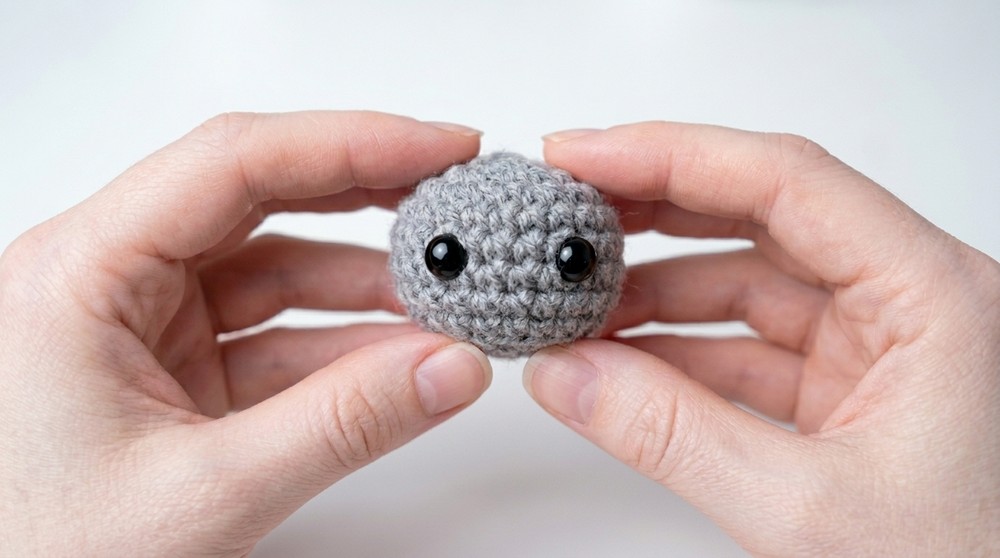
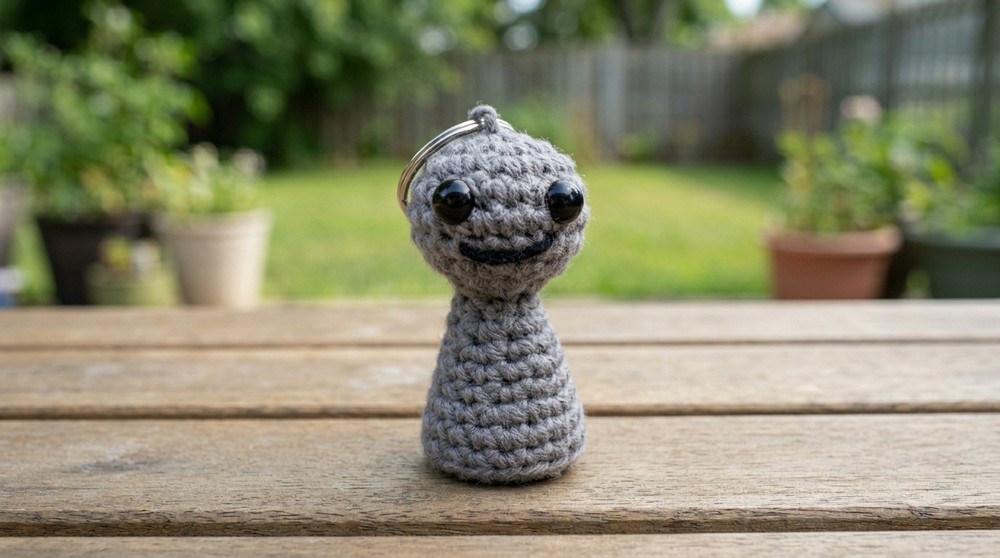
Your amigurumi head is now complete—a perfect little sphere!
If written format isn’t for you: Start with a circle, increase for size, then work evenly for height; decrease to close, stuffing before final closure.
Body
- Round 1: With white, MR, 4 sc. (4)
- Round 2: (Inc, sc) twice. (6)
- Round 3: (Inc, sc, sc) twice. (8)
- Round 4: Sc in each st around. (8)
- Round 5: (Inc, sc) around. (12)
- Rounds 6–7: Sc in each st around. (12 for 2 rounds)
- Round 8: (Inc, sc) around. (18)
- Rounds 9–10: Sc in each st around. (18 for 2 rounds)
- Round 11: Sc in back loop only in each st around. (18)
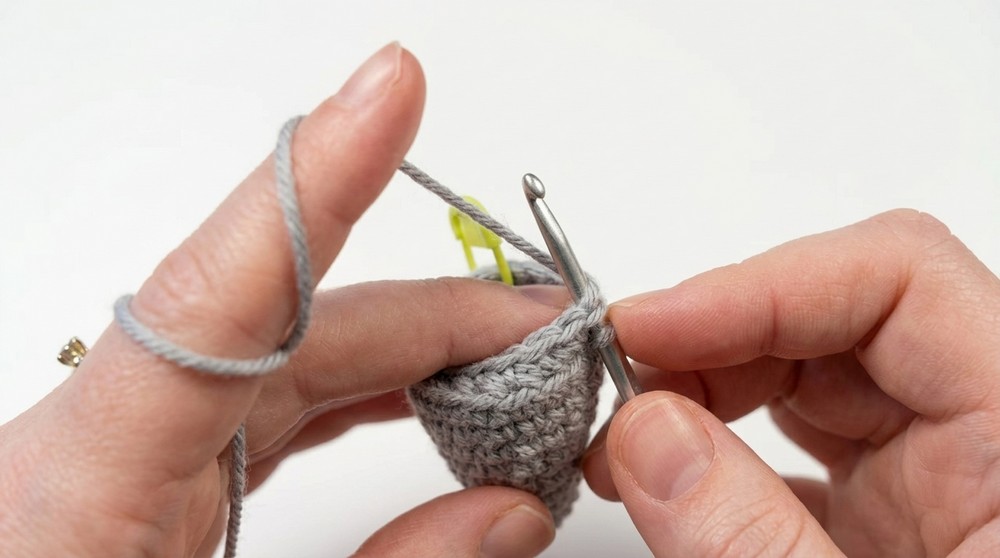
After this round, stuff body up to the ridge made by the back loops for a neat, flat base.
- Round 12: (Dec, sc) around. (12)
- Round 13: Dec around x6. (6)
- Sl st in next st, fasten off with a tail.
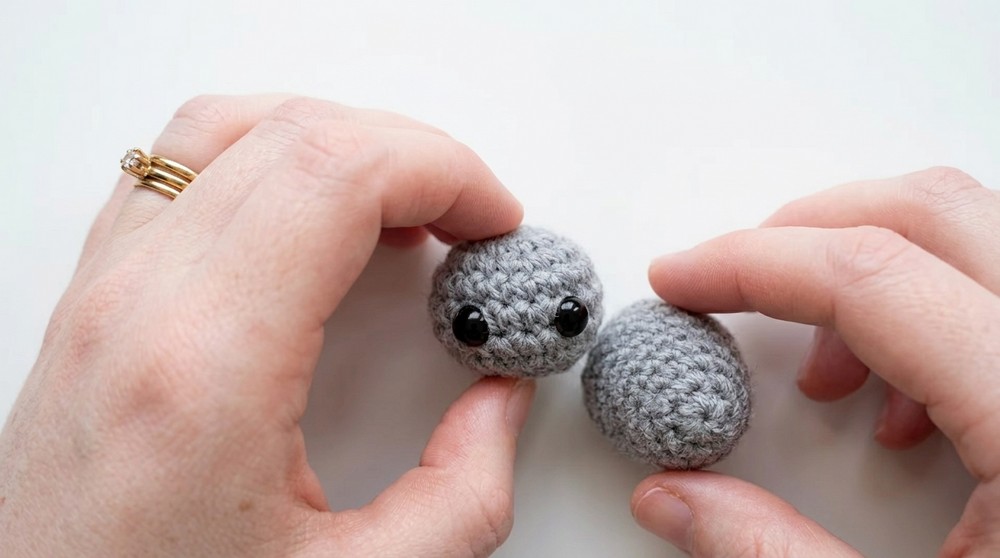
Your Dream’s body is compact and round, perfect to attach to a keychain or display as a plush.
Summary for non-pattern readers: Create a tiny oval, work increase rounds, then even rounds for the cylinder, add stuffing, close flat with back loop and two decrease rounds. The back-loop round helps it sit flat!
Finished Size
Approx. 2.5 inches (6.5 cm) from head to base when worked in worsted yarn with a 3.25mm hook.
Assembly & Finishing
- Use yarn needle and the long tail from the head to sew head to body.
- Align: Not directly on the point, but along the first increase round of the body for security.
- Embroider a smile between/just below the eyes with black yarn or embroidery thread:
- Bring needle out under one eye, in under the opposite, and back out in the center one row lower; pull to form a smile.
- Make a tack in the center down to create a cheerful arc, and weave in ends.
- Attach safety eyes securely or glue felt circles if desired.
- Attach your keychain:
- Option 1: Stitch a short loop of yarn at the top of the head and tie a knot for an instant yarn keychain (bury knot in head).
- Option 2: Use a small lobster clasp/keychain finding and secure it through the loop.
- Weave in all ends; gently shape Dream.
- Double-check all small parts are secure if giving to children.
If written instructions aren’t your favorite:
Just stitch the head on slightly off the body’s point, embroider a simple smile under the eyes, and knot/tuck a single yarn for the keychain.
Conclusion
With a handful of basic stitches and minimal yarn, you can create an expressive mini Dream plush perfectly sized for a keychain or charm. This project is approachable for beginners, a great stash-buster, and a sweet way to practice increasing/decreasing in the round and simple embroidery. You can experiment by adjusting the yarn weight or changing facial expression for a personalized Dream.