Enjoy a free crochet amigurumi candy pattern that helps you create adorable handmade treats, perfect for adding charm and creativity to your decor.
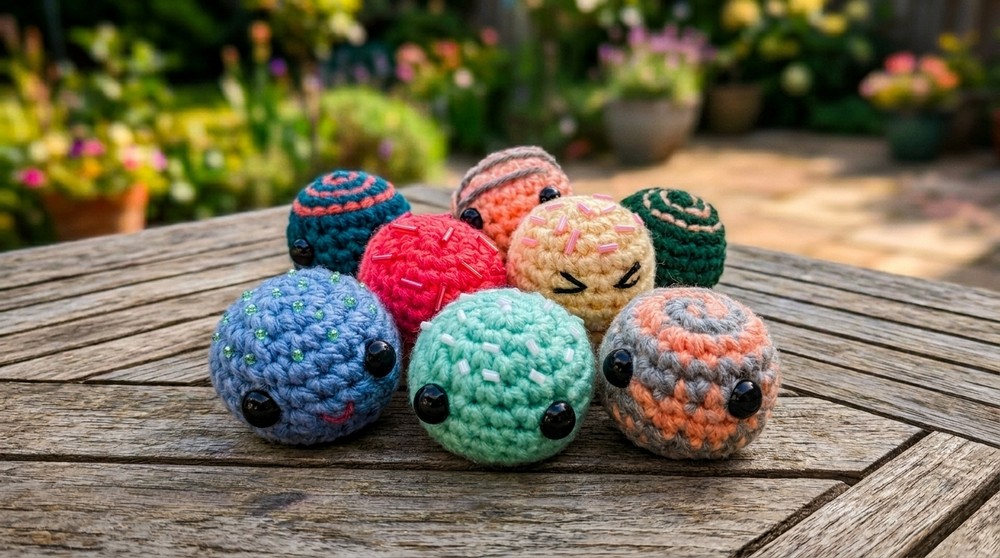
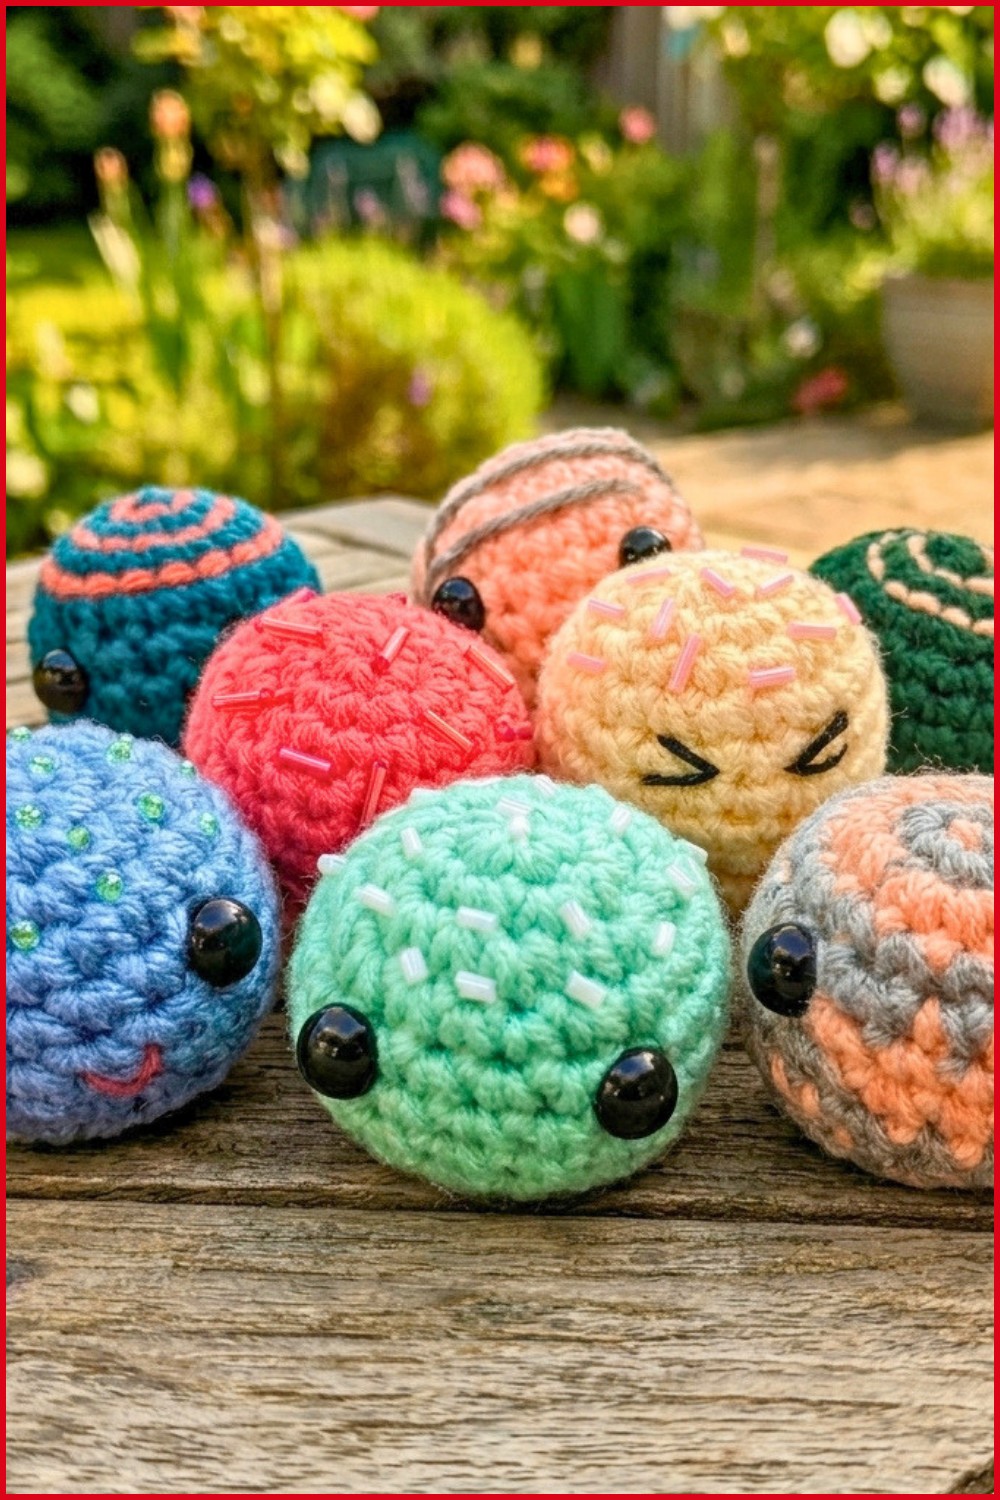
I love making small crochet projects that are fun and quick to finish. One of my favorite sweet little crochets is a cute candy-shaped toy that brightens up any space. The Free Crochet Amigurumi Candy Pattern is perfect for creating this charming item. With just a few small changes in colors and details, you can also make other candy shapes or even little gift boxes, making it a versatile pattern to try.
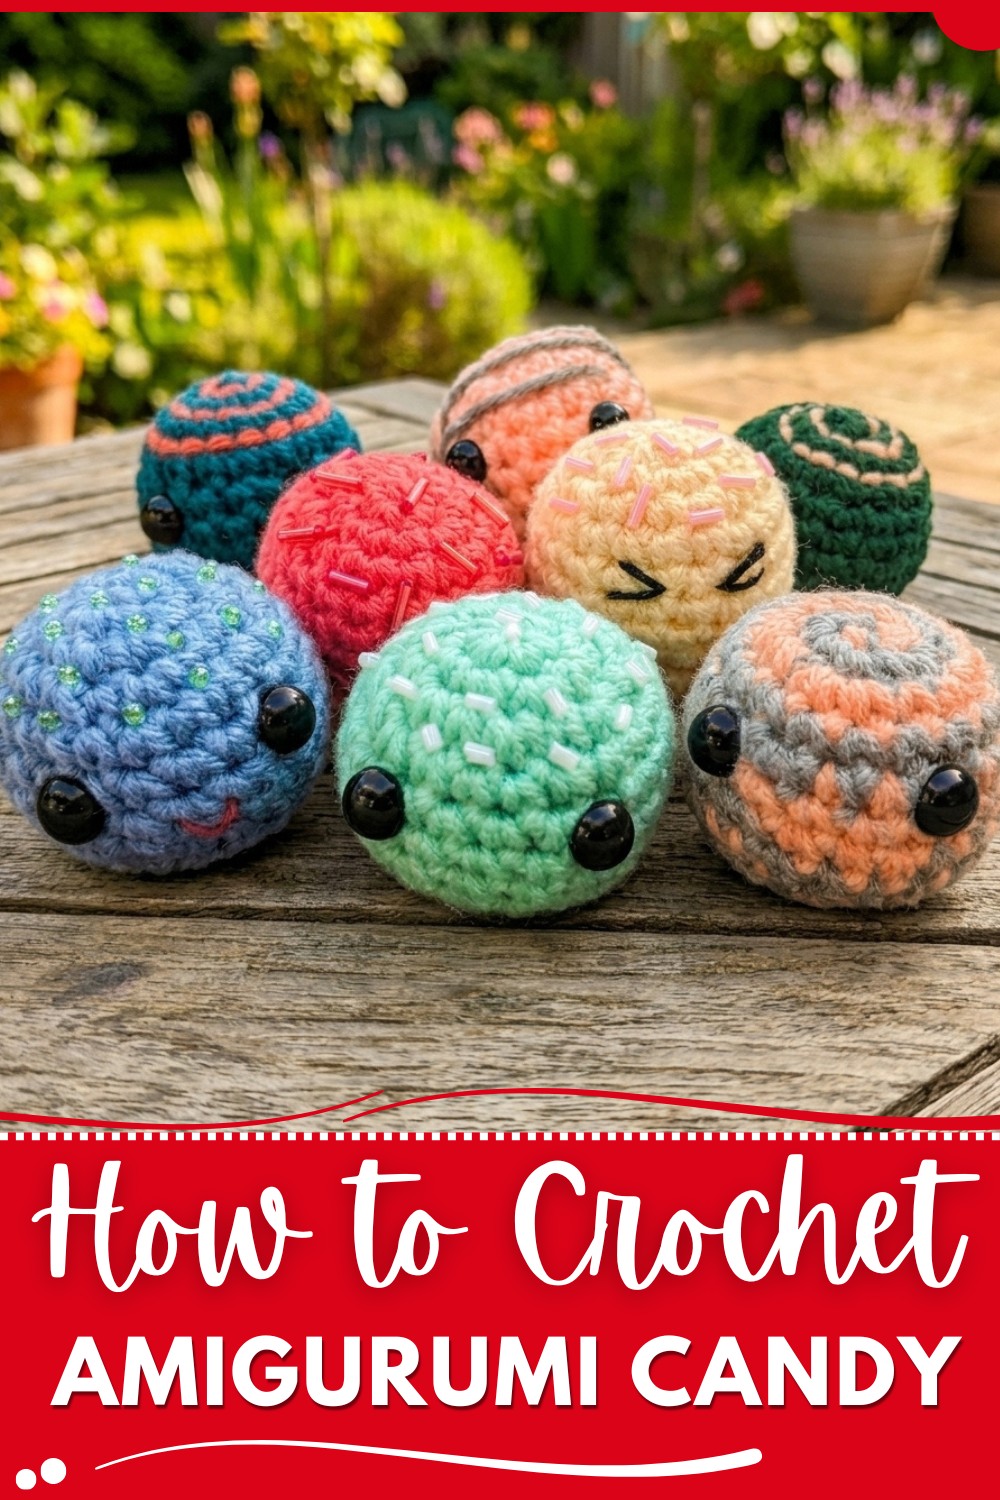
Free Crochet Amigurumi Candy Pattern Cute Desk Decor
This amigurumi candy looks super sweet and colorful. Its round, smooth shape makes it easy to hold and cuddle, and the soft yarn gives it a nice, plush feel. The project has a playful style with bright, cheerful stripes or swirls that really catch your eye. Its compact size is perfect for decorating desks, shelves, or even to use as a keychain charm. The standout feature is its twisted wrapper ends, which give it a realistic candy look that’s both fun and adorable.
To make this project, you crochet the candy body in one piece, shaping it into a round form. The ends are created by adding simple twists that look like candy wrappers. The main stitch used throughout is single crochet, which provides a tight and neat fabric that holds its shape well. This pattern is great for beginners who have a basic understanding of crochet, as it uses simple stitches and easy shaping techniques.
The Free Crochet Amigurumi Candy Pattern makes a wonderful handmade gift, a cute decoration for birthdays or holidays, and even a lovely collectible for anyone who enjoys sweet-themed projects. If you want a fun and easy project to brighten your day or someone else’s, this candy pattern is a perfect choice that brings lots of joy with every stitch.
Amigurumi Candy Crochet Pattern
Before You Start
- Read through the pattern completely before beginning.
- Gather all materials and tools first.
- Use a stitch marker to easily keep track of your rounds.
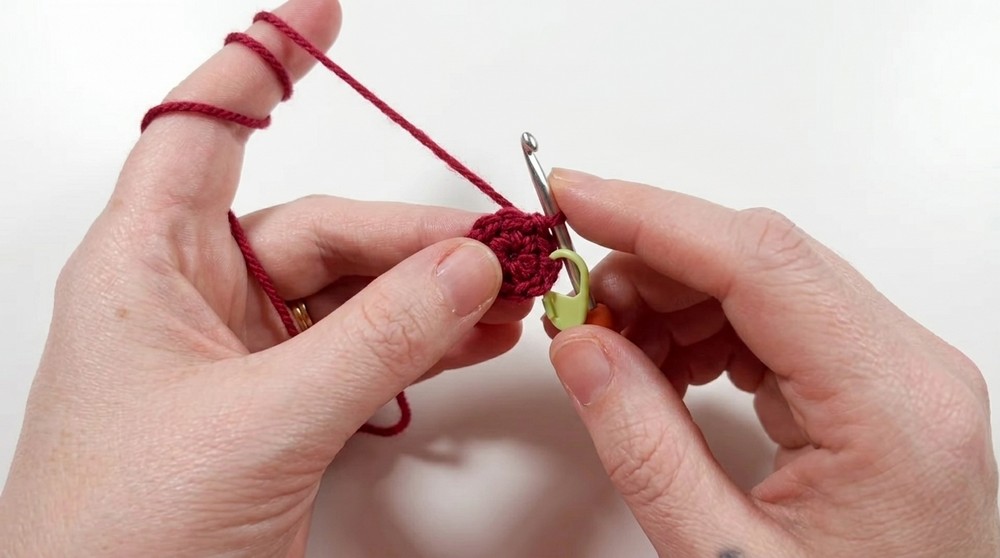
- Practice the magic ring if you struggle with it, as this is the foundation of the piece.
- Keep your stitches tight for a smooth, puffy finish.
Pattern Notes
- Amigurumi is worked in continuous spiral rounds unless specified.
- The base pattern makes a classic dome-shaped candy, but details can be added after.
- Safety eyes can be substituted with felt, embroidery, or omitted for non-facial candies.
- The project is perfect for using up small scraps of leftover yarn.
- Stuff moderately—too much and the shape will turn round rather than “candy dome”.
How I Made the Crochet Pattern
- Started with a flat magic ring and expanded evenly for a rounded top.
- Built height with straight rounds for the dome shape.
- Added a decrease section to shape the candy, then closed flat.
- Included a back loop only round for a crisp base edge.
- Offered variations for decoration with beads, felt, or embroidery.
Skill Level
Beginner. If you know single crochet, increases, decreases, and how to work in the round, you’re ready!
Finished Size
- Approx. 1.5"–1.75" (4–4.5 cm) across, 1" (2.5 cm) tall using worsted weight yarn and 3.25 mm hook.
Materials
- Worsted weight yarn (color of your choice; sample uses white for visibility)
- 3.25 mm crochet hook
- Polyfill stuffing
- Scissors
- Yarn needle
- (Optional) Safety eyes, beads, sparkles, embroidery thread, E6000 or suitable glue, toothpick, and candy “paper” cup
Measurements / Sizing
- Diameter: approx. 1.5"–2"
- Height: approx. 1" when finished and lightly stuffed
Gauge
Gauge is not critical for amigurumi.
For reference (optional):
9 sc x 8 rows = 2" x 2" (5 x 5 cm) in the round.
Stitch Abbreviations
- MR: Magic Ring
- sc: single crochet
- inc: increase (2 sc in one stitch)
- dec: decrease (see Special Stitches)
- ss: slip stitch
- st(s): stitch(es)
- BLO: back loop only
Special Stitches
Invisible Decrease (dec):
Insert hook under front loops of next 2 sts, yarn over, pull through both loops (2 remain on hook), yarn over, pull through both.
The Pattern!
How to Start & Stitches Used
Begin with a magic ring for a seamless dome; single crochet for all stitches. You’ll use basic increases to form the shape, work straight rounds for height, use a single round of back loop only stitches for a crisp edge, then decrease and close. Embellish as desired after finishing.
Candy Base
- Round 1: MR, 6 sc (6)
- Round 2: inc in each st around (12)
- Round 3: (inc, sc) x6 (18)
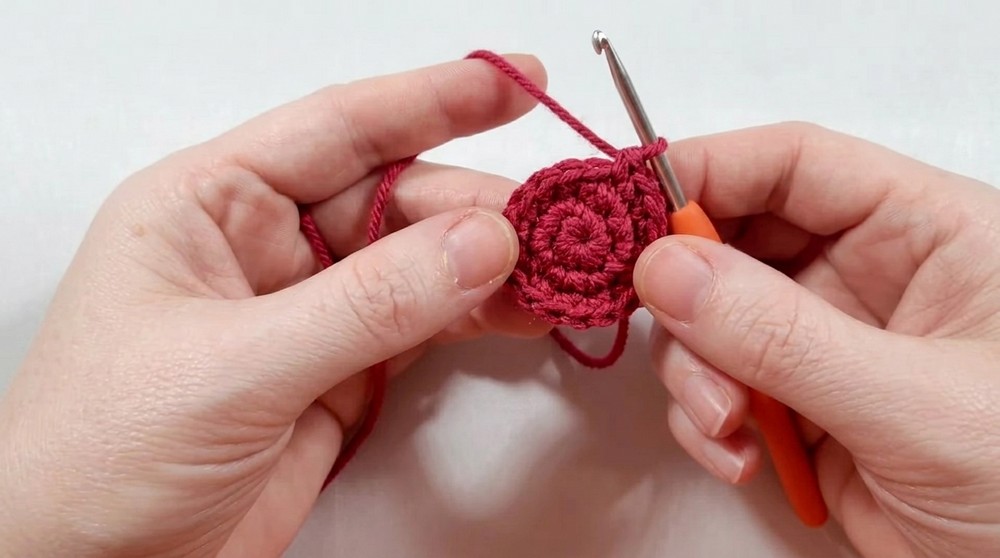
At this point, you’ve created a flat circle. Next, you’ll shape the candy by working evenly and then begin the closing.
- Rounds 4–8: sc in each st (18) (work straight for 5 rounds)
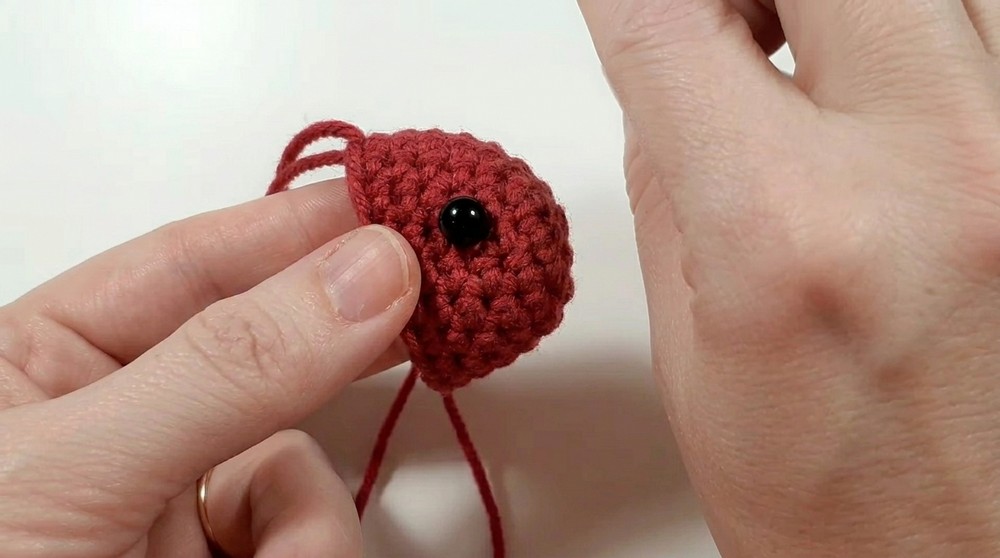
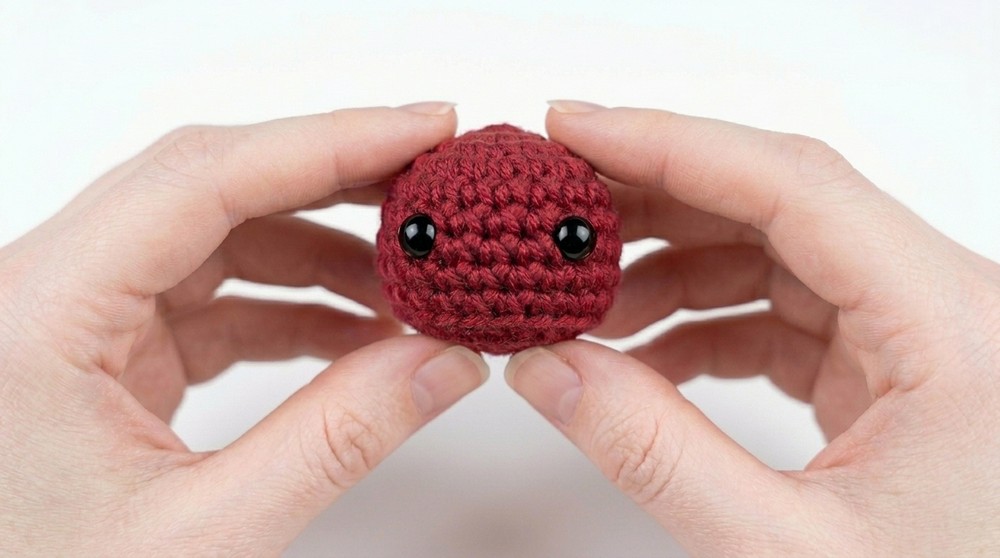
You now have the dome height! This is a great place to add the face: Place safety eyes between rounds 5 and 6, about 3 stitches apart. Stuff lightly for a domed shape—do not overstuff.
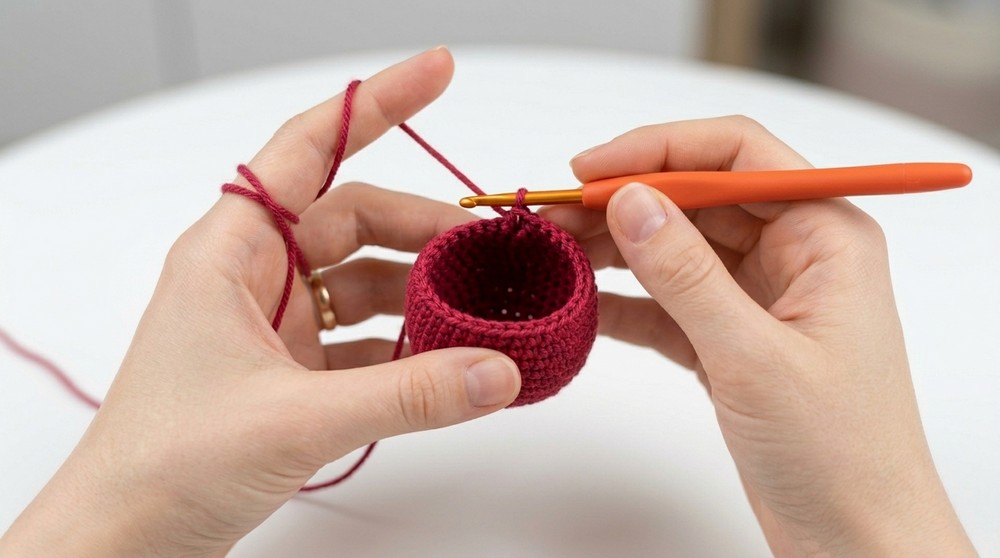
- Round 9: BLO, sc in each st (18)
This back loop only round creates a defined line for the candy base, allowing it to sit flat.
- Round 10: (dec, sc) x6 (12)
- Stuff moderately, pressing the base to keep it flat. Fill gaps between eyes for a smooth facial shape.
Decrease with invisible decrease for a neat finish. Only fill to flatten candy, not into a ball shape.
- Round 11: dec x6 (6)
- ss in next st, fasten off.
Thread tail through remaining 6 sts, pull tight to close, and weave in through base for a neat finish. This makes your candy ready for decorating. Not a pattern reader? No worries—think: make a circle, add height, work the base’s crispy edge, then close it off and stuff as you go!
Assembly & Finishing
- Flatten the base before finishing closing and after stuffing for the classic "candy dome" shape.
- Use a yarn needle and tail to weave through the front loops of the last 6 sts. Pull to close.
- Pull tail up through candy and out the top, gently tugging to flatten the bottom further, then weave end in.
- Add safety eye backs and press to secure.
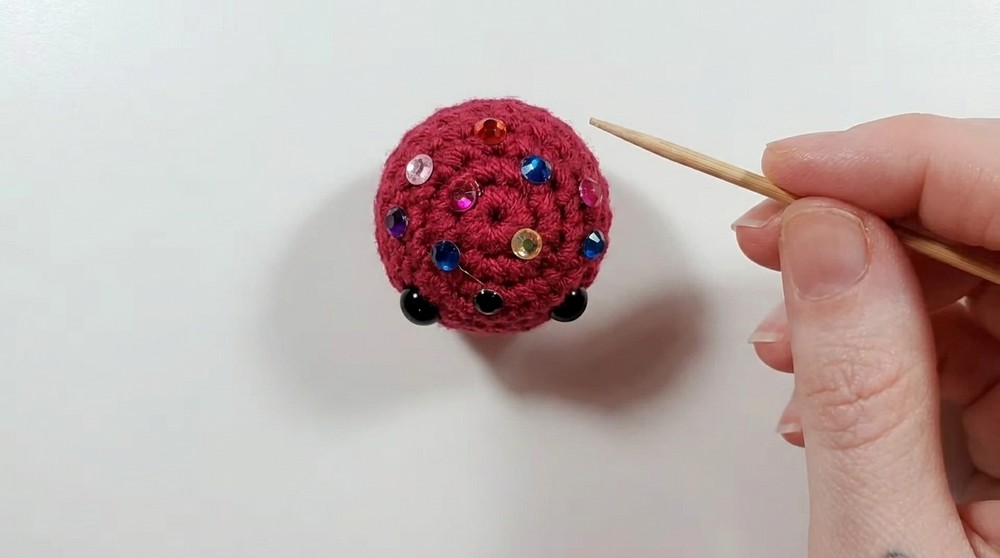
- Decorate as you like: glue on beads or sequins for sprinkles, embroider swirls or faces, or add yarn/piping for drizzle.
- Place in small paper candy cups for presentation.
Solution of Problem
Base not flat?
Flatten by pressing down with your palm and gently pulling the yarn tail upwards through the top before weaving it in. Avoid overstuffing to keep the shape as a dome.
What you can make by using these stitches
- Amigurumi bonbons or other “box of chocolate” pieces
- Keychains or bag charms
- Play-food for children’s kitchens
- Mini stress toys
- Holiday, party, or gift box fillers
Conclusion
This amigurumi candy base is perfect for last-minute gifts, party favors, or playful desk décor. With endless decorating possibilities, you’re only limited by your imagination—or your stash! Whether you add faces, sprinkles, or make elegant "truffles," you’ll find each piece is fast, fun, and satisfying.