
This crochet button-up V-neck vest is a charming and versatile piece to add to your wardrobe. Made from soft, lightweight yarn, it features a stylish V-neck and snug button closures at the front. This vest is perfect for layering over your favorite shirts or dresses to keep cozy while still looking chic.
Crochet Button Up V-Neck Vest

Whether you're heading to the office or out for a casual day, this crochet vest adds a touch of handmade elegance to any outfit. Its simple pattern and classic design make it a delightful project for both beginner and experienced crocheters alike.
Materials:
- Number 2 weight yarn, 100% soft cotton (or equivalent to sport weight yarn)
- 3mm crochet hook
- Stitch markers
- Tape measure
- 10mm buttons
Measurements:
- Measure your waist or where you want your vest to end. (Example: 64 cm)
- Measure your buttons (Example: 1 cm), then add a few mm to allow space for buttonholes (Example: 1.5 cm total).
Calculating Front Panels:
- Subtract button width from waist measurement (64 cm - 1.5 cm = 62.5 cm).
- Divide that number by 4 to calculate the width of the front panel (62.5 cm / 4 = 15.625 cm).
- Round the measurement to the desired fit (Example: round down to 15 cm for tight fit).

Making the Front Panel:
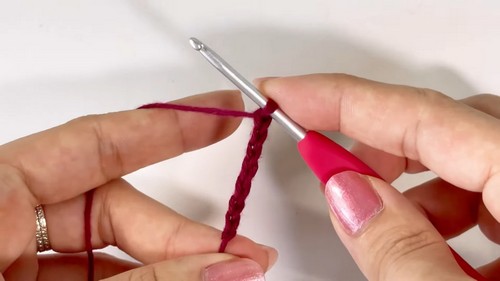
- Start with a slip knot and chain the height of the ribbing at the waist (Example: chain 7).
- Add one more chain for the turning chain.
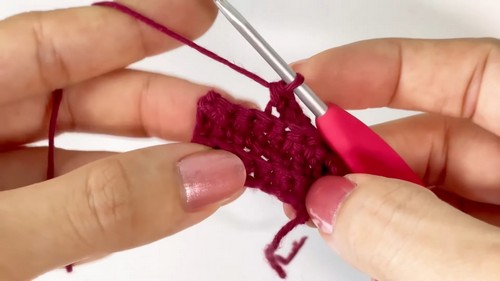
- Skip the first chain and work single crochets in the back loop only for the ribbing.
- Create rows by working single crochets in the back loops, chaining one, and turning the work at the end of each row until the ribbing is as wide as the front panel should be (Example: 15 cm).
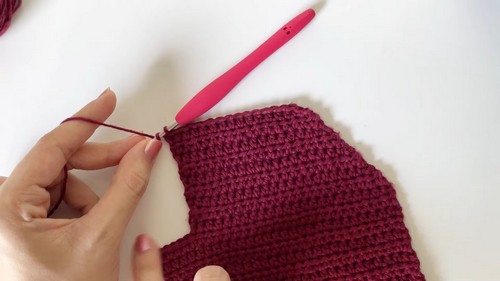
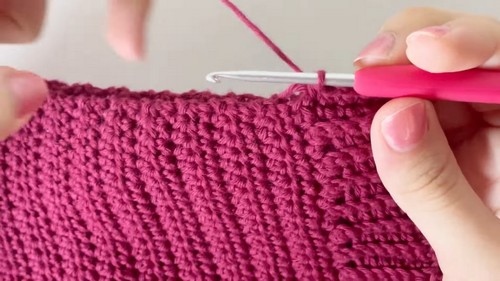
- Start working half double crochet stitches along the edge of the ribbing, one in each row.
- Continue working half double crochets until you reach the underarm. For V-neck and armhole shaping, you'll begin decreasing by skipping stitches.
- For the V-neck, start the decrease at your chosen row by half double crocheting two together at the end of each decreasing row.
Making the Back Panel:
- The back panel should be half of your waist measurement wide (Example: 32 cm for a 64 cm waist).
- Use the same initial ribbing as for the front panel.
- Work half double crochets until you reach the same height as the front panel armhole point.
- Skip the same number of stitches as for the front panel armhole.
- After reaching the vertical height of the front panel (without the shoulder), add rows to accommodate the shoulder width (Example: additional 4 cm in height).
Assembly:
- Lay out two front panels and one back panel with the wrong side facing up, aligning armholes and shoulders.
- Slip stitch the shoulders and side seams together.
- For armhole ribbing, pick up stitches around the armhole and work rows in single crochet back loop only until you have reached the desired width of the ribbing.
- Connect the end rows to form the ribbing loop by slip stitching or stitching them together.
Neckline and Button Ribbing:
- Pick up stitches around the neckline and work half double crochets, creating buttonholes on one side as needed to match your button placement.
- Sew buttons onto the opposite side corresponding to the buttonholes.
Final Steps:
- Weave in all loose ends.
- Block your garment if needed to set the shape and measurements.


