Crochet Bear Lovey Pattern For Newborns
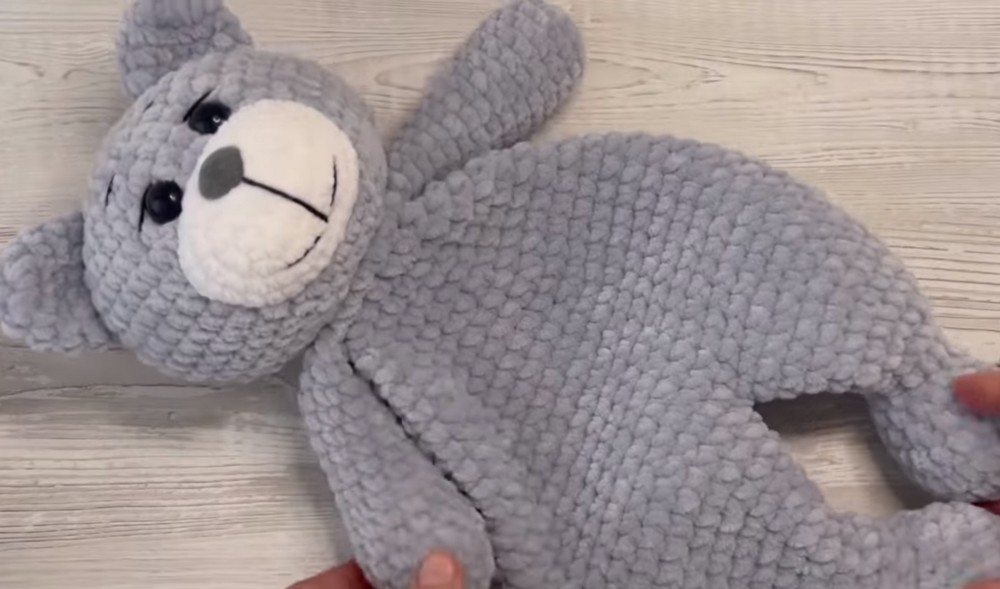
A Crochet Bear Lovey is a special, cozy little blanket that has a cute bear at the top, almost like a sweet friend for someone to hold onto. People adore these loveys because they aren’t just a plain old blanket or a regular stuffed animal; they’re a unique mix of both. This makes them perfect for snuggling and offers comfort, especially to little ones. The pattern we offer is quite easy and quick to follow and consists of two parts with videos. This creates a charming and comforting companion for babies and young children or anyone who loves a touch of warmth and comfort woven into their day. So, go through the easiest crochet pattern and start crocheting today!
Making Your Crochet Bear Lovey
Materials Needed:
- Chenille yarn in grey (2 balls) and a small amount in white
- 5 mm crochet hook (for the head, ears, and arms)
- 4 mm crochet hook (for the muzzle)
- Safety eyes and nose
- Stitch marker
- Holofiber for stuffing
Step by step Pattern
Bear Head:
- Start with a magic ring.
- Round 1: Chain 1 (counts as the first SC), then 6 SC into the ring. Join with a slip stitch – 7 stitches total.
- Round 2: Increase in every stitch around – 14 stitches.
- Round 3: Increase in every second stitch around – 21 stitches.
- Round 4: Increase in every third stitch around – 28 stitches.
- Rounds 5-7: Continue increasing uniformly in each round (increase in every fourth, fifth, and then sixth stitch in subsequent rounds) – you should have 49 stitches by the end of Round 7.
- Rounds 8-13: SC in each stitch around without increases for 6 rounds.
- Decrease Rounds: Start decreasing by making an invisible decrease at the beginning of the rounds. Decrease in every 6th, 5th, 4th, 3rd, 2nd, and then every stitch in subsequent rounds until close to shut. Stuff the head before fully closing.
- Position and attach safety eyes between Rounds 6 and 7, approximately 2 cm apart.
Muzzle:
- Start with a slip knot on a 4 mm hook, chain 6.
- Row 1: 2 SC in the second chain from the hook, then 3 SC, 4 SC in the last chain. Continue on the other side of the chain, 3 SC, and 2 SC in the last stitch – mark the first stitch of the round.
- Row 2: Increase in the first two stitches, 1 SC in the next three, increase in the next four, 1 SC in the next three, and increase again in the last two stitches.
- Next Rounds: Continue to increase as established, ensuring the muzzle is shaped correctly.
- Final Round: SC in each stitch around for a total of 30 stitches. Finish with an invisible join and leave a tail for sewing.
- Attach safety eyes and nose before attaching the muzzle to the head.
Ears (Make 2):
- Start with a magic ring.
- Round 1: 6 SC into the ring.
- Round 2: Increase in every stitch – 12 stitches.
- Rounds 3-5: SC in each stitch around for three rounds. Finish and leave a long tail for sewing onto the head.
Arms (Make 2):
- Start with a magic ring.
- Round 1: 7 SC into the ring.
- Round 2: Increase in every stitch – 14 stitches.
- Rounds 3-6: SC in each stitch around for four rounds.
- Decrease Round: Decrease twice, SC in the next five stitches, decrease again, and finish the round with SC in the last stitches.
- Rounds 7-15: SC in each stitch around for nine rounds. Finish, leave a tail for sewing, and lightly stuff the lower part of the arm.

For the complete pattern, watch the video tutorial given below:

