
Create a delightful Crochet Butterfly Top that's perfect for adding a whimsical touch to any outfit. With a simple crochet hook and some soft, colorful yarn, you can craft a beautiful piece that features charming butterfly wings as the centerpiece.
Crochet Butterfly Top
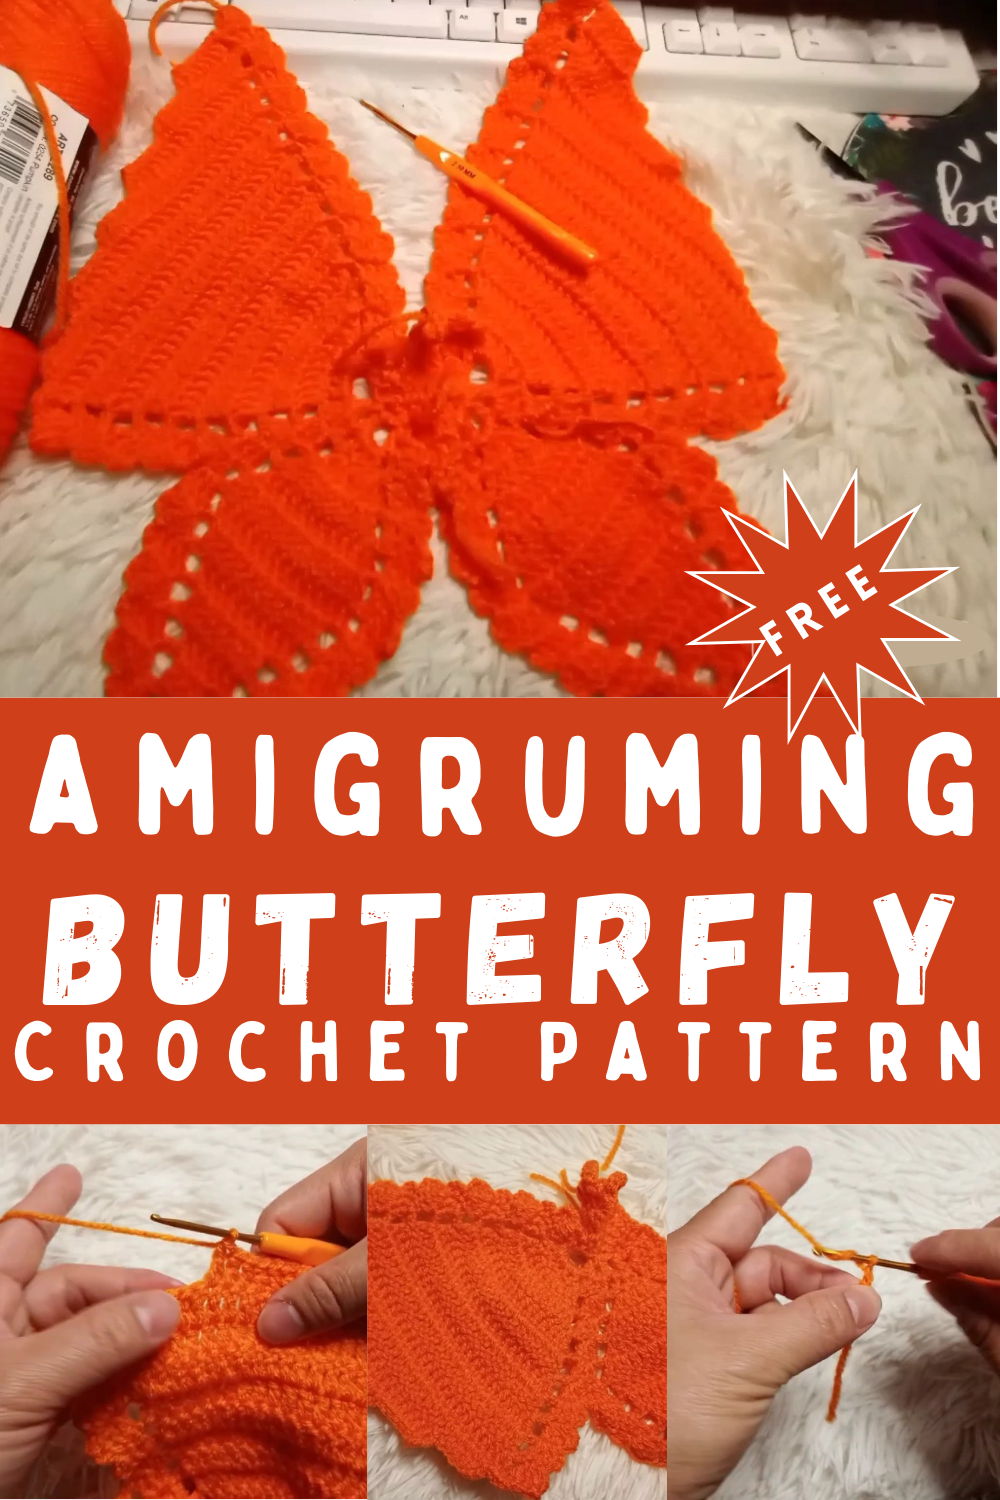
Whether you're strolling through a sunny park or attending a casual gathering, this handmade top will flutter with style and personality. The best part is the sense of accomplishment you'll feel wearing something crafted by your own hands. Every stitch brings the butterfly to life, making this top not just a garment but a conversation starter and an expression of your creativity.
Materials Needed:
- 2.5 millimeter crochet hook
- Light crochet yarn (suggested brand: Red Heart)
Pattern Instructions:
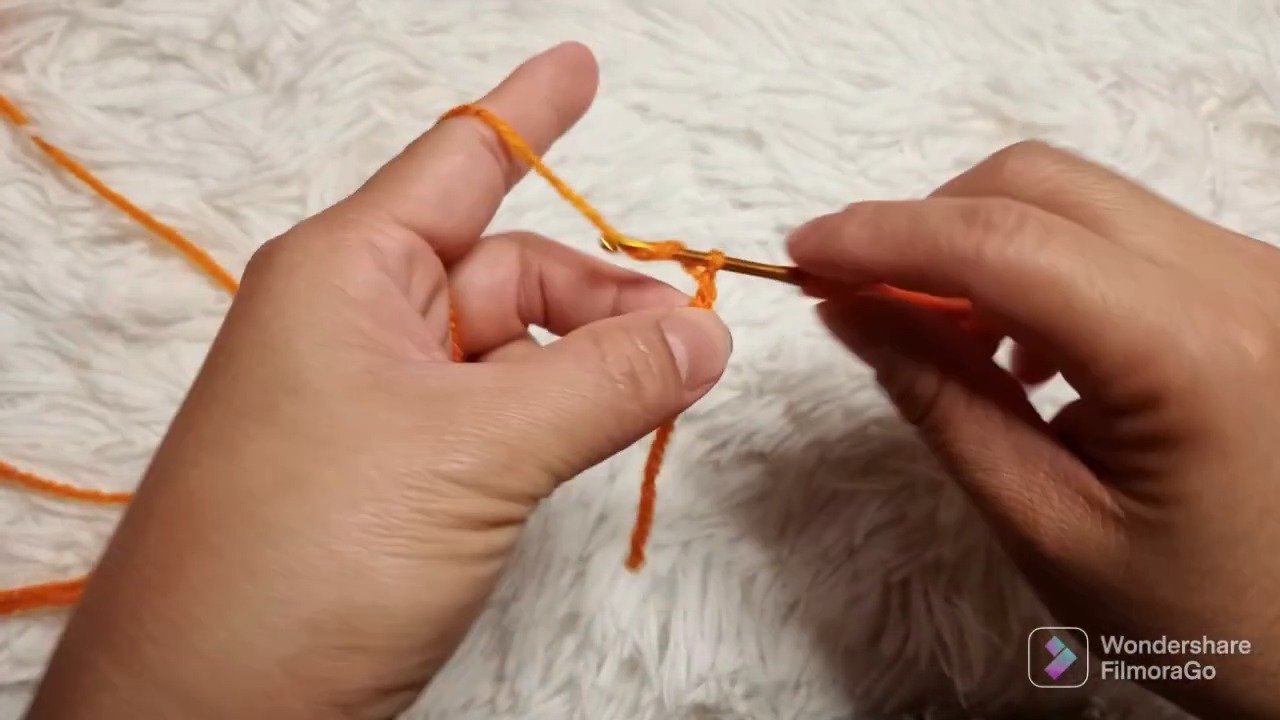
Start with a Slip Knot and Chain:
- Make a slip knot.
- Chain 4.
First Row:
- Make 2 double crochets in the first chain, for a total of 3 double crochets.
- Chain 3 and turn your work.
Second Row:
- Make 1 double crochet in each of the next 3 stitches, for a total of 4 double crochets.
- Chain 3 and turn your work.
Third Row:
- Starting from the second stitch (not the first), make 1 double crochet in each of the next 3 stitches, for a total of 4 double crochets.
- Chain 3 and turn your work.
Fourth Row (Increase Row):
- Single crochet in the first stitch.
- Double crochet in the next stitch.
- Double crochet in the next.
- Make two double crochets in the last stitch.
- Chain 3 and turn your work.
Fifth Row:
- Double crochet in the first stitch, make double crochets in the next two stitches, and then do two double crochets in the last stitch.
- Turn your work without chaining, slip stitch into the next stitch, and then chain 3.
Sixth Row:
- Double crochet in the next three stitches for a total of four double crochets.
- Chain 3, turn your work, and repeat the double crochet pattern.
Creating the Neck Strings:
- Chain 120 (for one string). Cut your yarn and repeat for a second string.
- Attach each string to opposite sides of your work by slip stitching them into place.
Creating Butterfly Antenna (Chain Length 120):
- Slip stitch into specified chains then chain 8; Make one half double crochet, then slip stitch six times.
- Repeat this process for the second antenna, then cut your yarn.
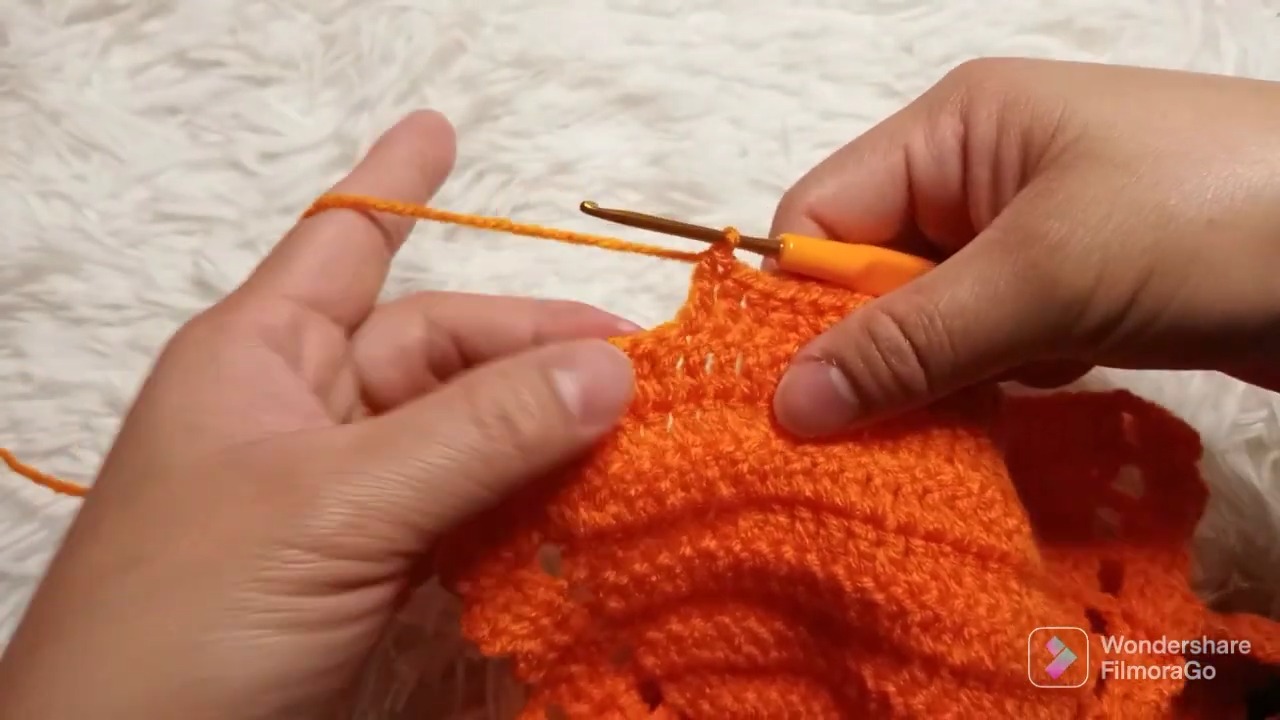
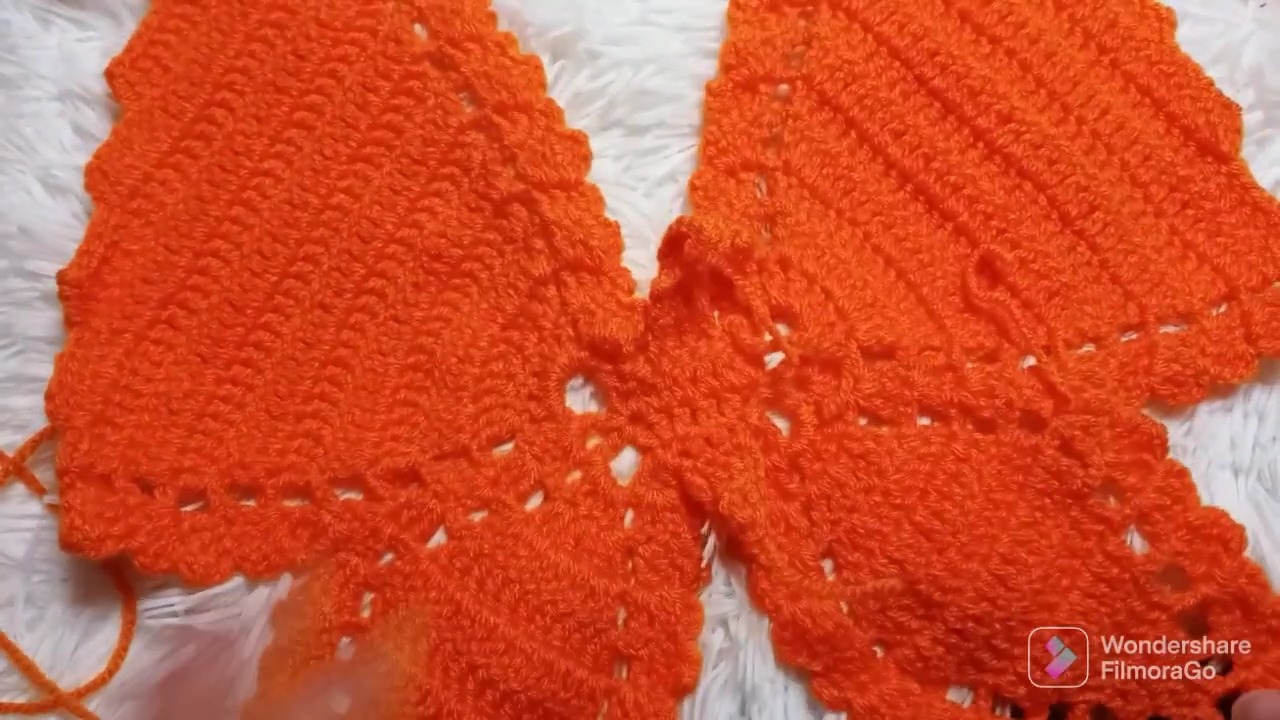
Making Butterfly Wings:
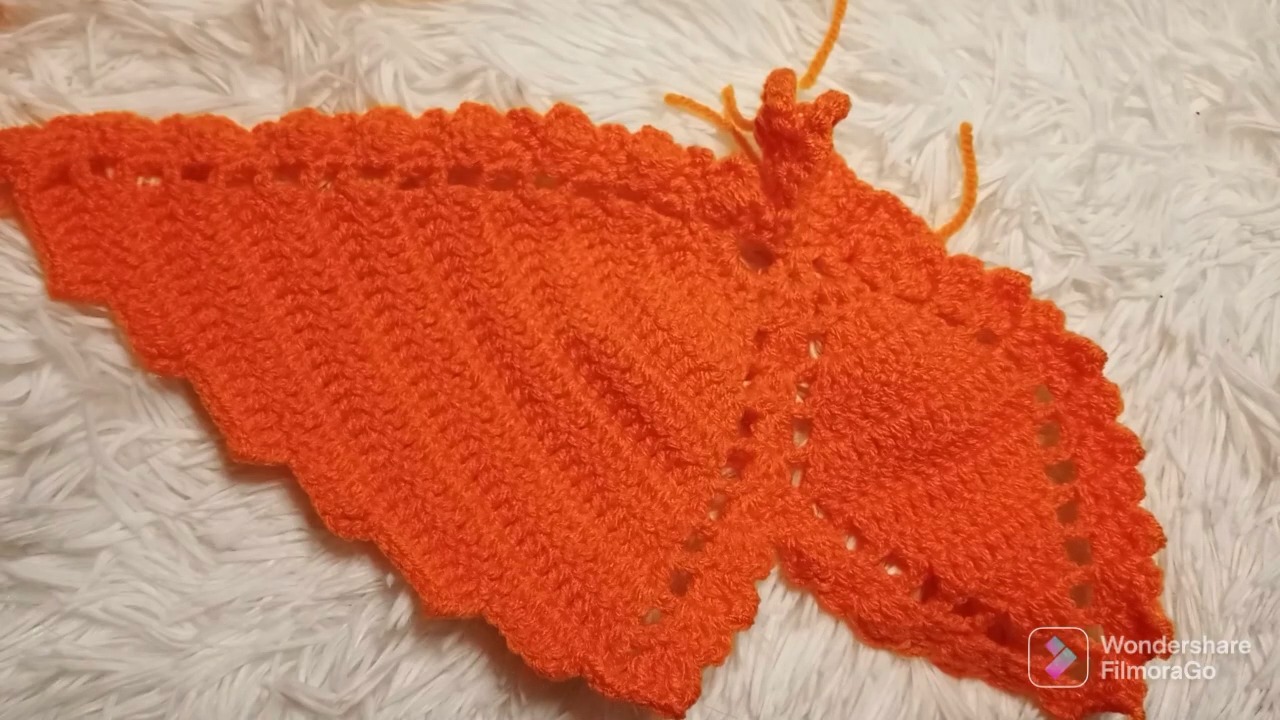
- The process involves attaching yarn to specific rows and making a series of double crochets and chains to shape the wings, including increases for shaping.
- Continually increase at the end of each row when instructed, following the pattern as it builds up the butterfly wings.
- The pattern describes creating the upper and lower wings with detailed instructions for each row, including where to increase or decrease stitches to shape the wings neatly.
Finishing Touches:

- After completing the wings, slip stitch to finalize the edging.
- You can opt to not add strings if you're not wearing the piece, but for wearable projects, chain 250, then cut your yarn.
- Fasten off and weave in all ends for a neat finish.


