

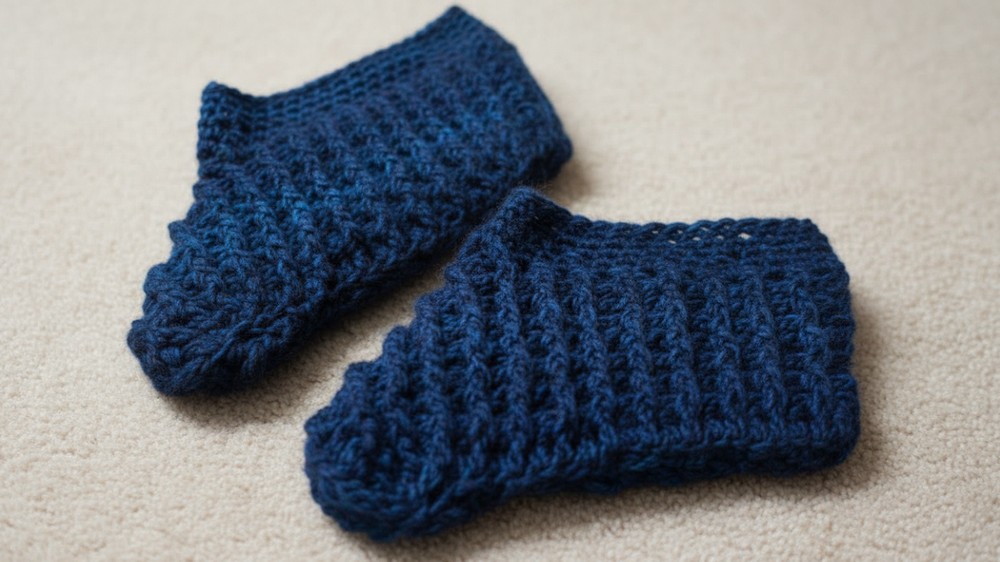
Quick Crochet Slippers to Warm Your Feet Instantly
Materials Needed
- Yarn:
- Lion Brand Ferris Wheel Yarn (medium-weight #4, 3 oz, 247 m per skein).
- A single skein or cake will suffice for one pair of slippers. Other worsted-weight yarns may be used, following hook size recommendations.
- Crochet Hook:
- US Size G (4.5 mm).
- If you're using different yarn, ensure the hook is compatible with its label recommendations.
- Additional Supplies:
- Measuring Tape (to measure foot size).
- Scissors (for cutting yarn).
- Tapestry or Darning Needle (to weave in ends and sew seams).
Stretchy Crochet Slippers - Step-by-Step Pattern
This detailed pattern introduces a pair of stretchy crochet slippers, perfect for all seasons. The designs incorporate alternating front post and back post double crochet stitches, creating a beautifully textured look combined with incredible elasticity. These slippers are easy to craft and can be customized to suit any size, yarn type, or preference.
Finished Size
Approximate dimensions:
- Slipper length: Customized to foot size (refer to the measuring step).
- Width: Approximately 3 inches (7.62 cm) unstretched but stretches significantly due to stitch flexibility.
- Fits various adult foot sizes when adjusted as per the instructions.
Pattern Instructions
Step 1: Creating the Base Row
Measure Foot Length:
- Measure the length of the foot using a tape measure to match the slipper length.
- Adjust to an even number when dividing chains into rows for the textured stitches.
Chain Foundation:
- Begin with a slip knot on your hook.
- Crochet chains equal to the measured foot length.
- Example: If the foot measures 8.5 inches, chain approximately 34 chains for an adult foot.
- Ensure the chain count remains even (adjust upward or downward slightly if needed).
Step 2: Foundation Row
- Double Crochet Setup:
- Work a double crochet in the fourth chain from the hook (this counts as your first double crochet).
- The skipped three chains also count as a stitch.
- Continue Across:
- Make 1 double crochet in each chain across the row.
- Be sure to maintain even stitch count for consistent texture patterns later.
- End of Row:
- Total Stitches: Adjust based on foot size. Example: 32 stitches for a foundation of 34 chains.
Step 3: Establishing Texture with Alternating Stitches
Row 2:
- Chain Two & Turn:
- Chain 2 at the start of each row. This does NOT count as a stitch but establishes height.
- Begin Alternating Post Stitches:
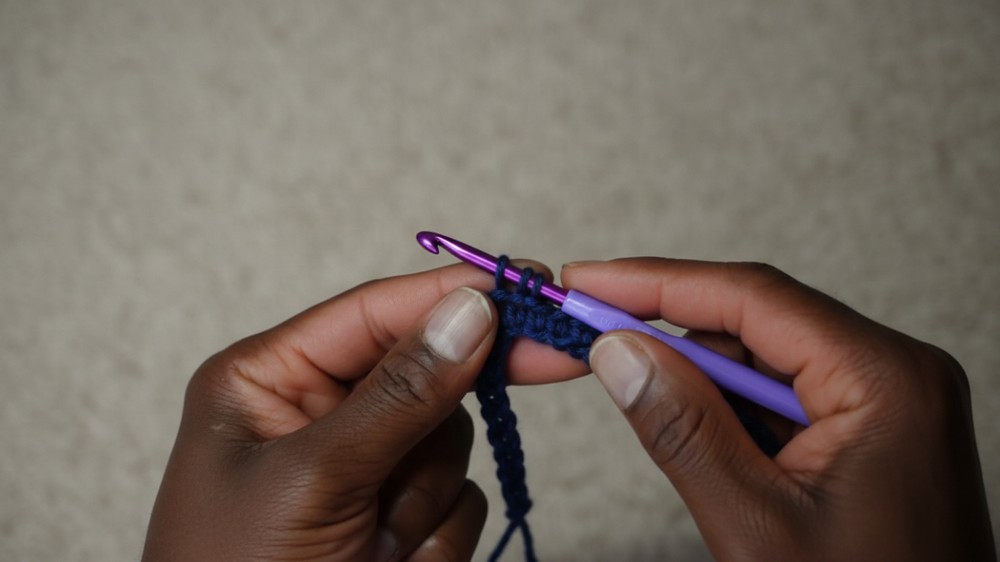
- Work alternating back post double crochet (BPDC) and front post double crochet (FPDC) across the entire row.
Back Post Double Crochet:
- Yarn over, insert the hook from the back around the post of the stitch (right side), then back to the back. Yarn over, pull up a loop, and complete the double crochet.
Front Post Double Crochet:
- Yarn over, insert hook from the front around the post (right side), come out on the front. Yarn over, pull up a loop, and complete the double crochet.
End of Row:
- Continue alternating BPDC and FPDC stitches across the row, ensuring consistent pattern.
- At the end, always work a regular double crochet into the top chain for stability.
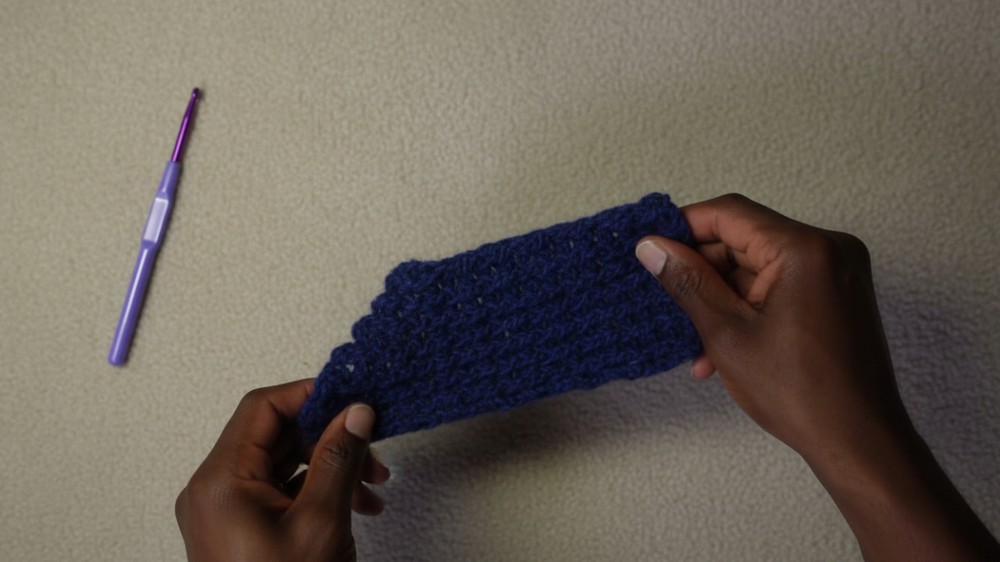
Step 4: Add Rows for Foot Panel
- Work 7 more rows (or more depending on the foot’s width/height requirement) using alternating BPDC and FPDC stitches.
- Check texture alignment:
- Always position back post stitches into recessed previous row stitches and front post stitches into raised stitches for consistent ribbing look.
- Final Width Check:
- Measure the panel as you progress, ensuring desired width is 3 inches unstretched or adjusted based on foot width.
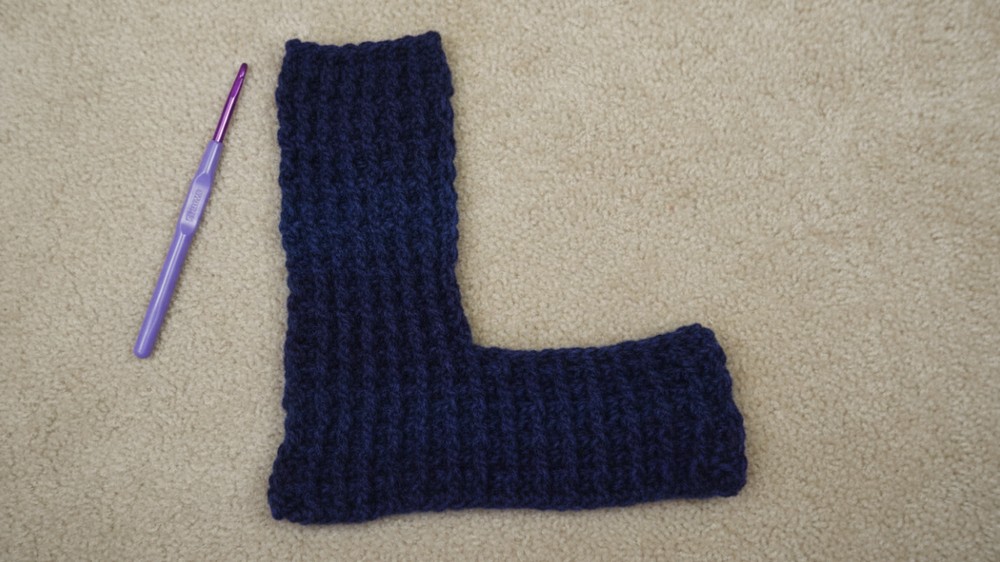
Step 5: Vertical Panel
- Row Division:
- To make the slipper fit snug at the heel, only crochet its half-width (i.e., 16 stitches out of 32 for the example).
- Chain 2, then work the first half of the stitches (16 total in this example).
- Work Alternating Texture Rows:
- Continue alternating BPDC and FPDC across this new vertical panel.
- Length Check:
- Crochet rows until the vertical panel matches the length of the slipper base when folded.
- Remember to stretch the piece slightly while measuring, as the ribbed design has significant elasticity.
Step 6: Assemble the Slipper
- Fold and Align:
- Fold the work so the vertical panel touches the base's other edge and matches perfectly.
- Ensure all seams align evenly.
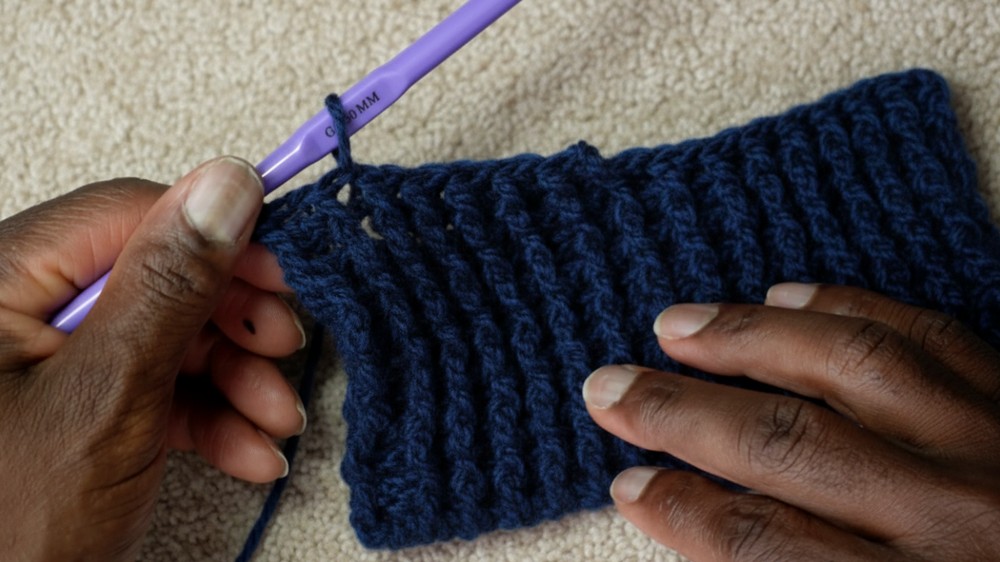
- Whip Stitch or Seam:
- Thread your darning needle and use an outside loop whip stitch to secure one seam, starting at one corner and moving down one side.
- Repeat the process across all seams.
- Important Note:
- Ensure seams are sturdy yet flexible to allow stretch and comfort.
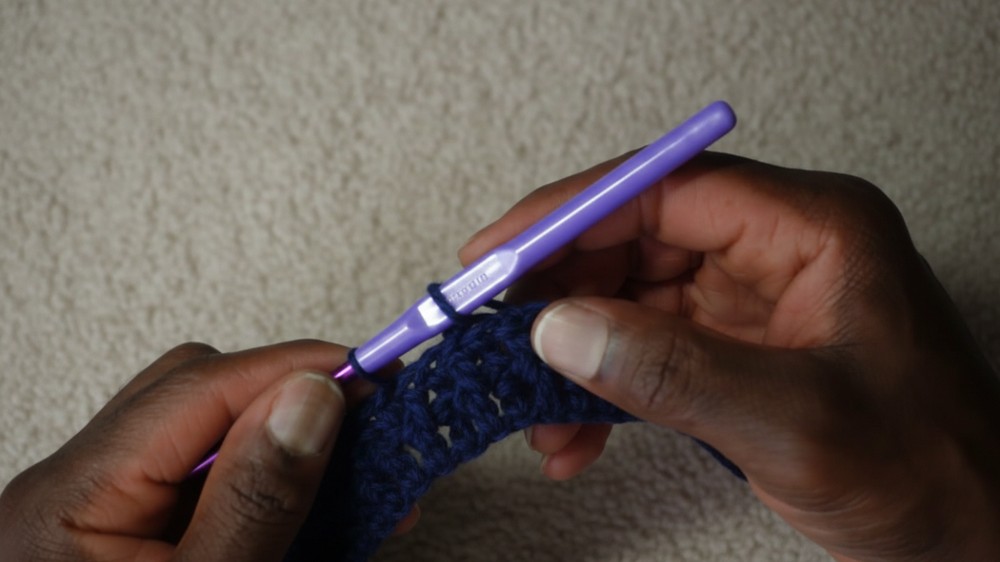
Step 7: Add Opening Trim
Single Crochet Round:
- Rejoin yarn at the heel center point.
- Work evenly spaced single crochets around the opening edge.
- Spread stitches neatly without creating gaps.
- Ensure no stitches are skipped.
- Close Gaps:
- If gaps appear near seams, add more single crochets to tighten the shape.
Decrease Round:
- To reduce slipper opening size, work SC2tog (single crochet two together) after every 5 single crochets.
- Continue this decrease pattern around the opening.
Additional Rounds:
- Add 2–3 rounds of single crochet without decreasing for extra strength and snug fit.
Optional: Work slip stitch edges for a secure, closed finish.
Customization Tips
- Yarn Choice: Use contrasting colors to highlight ribbing design or experiment with variegated yarns for added visual appeal.
- Height Adjustment: Add rows to vertical panels to create taller slipper boots for colder climates.
- Non-Slip Soles: Apply fabric paint or glue dots to create non-slip bottoms for hardwood floors.
Special Techniques
- Front and Back Post Double Crochet: Creates ribbed texture with excellent stretch and adaptability.
- Stretch Measurement: Always stretch your panels while measuring to ensure a snug fit.
- Whip Stitch Seam: Ideal for sturdy slippers without adding bulk to the seams.
Conclusion
Congratulations! You’ve created a pair of warm, stretchy crochet slippers with an elegant ribbed texture. Perfect for year-round wear, these are functional yet stylish and make a great gift.
Important Remarks:
- Final Look: The slippers should stretch comfortably to achieve a snug fit without slipping off.
- Project Time: Dedicated crocheters can finish a pair in approximately 3 hours.
- Care Instructions: Machine wash gently; air dry to retain shape.


