Refresh your ponytail with this Crochet Scrunchie Free Pattern, featuring soft ruffles and a gentle feel for school, work, and weekend looks.
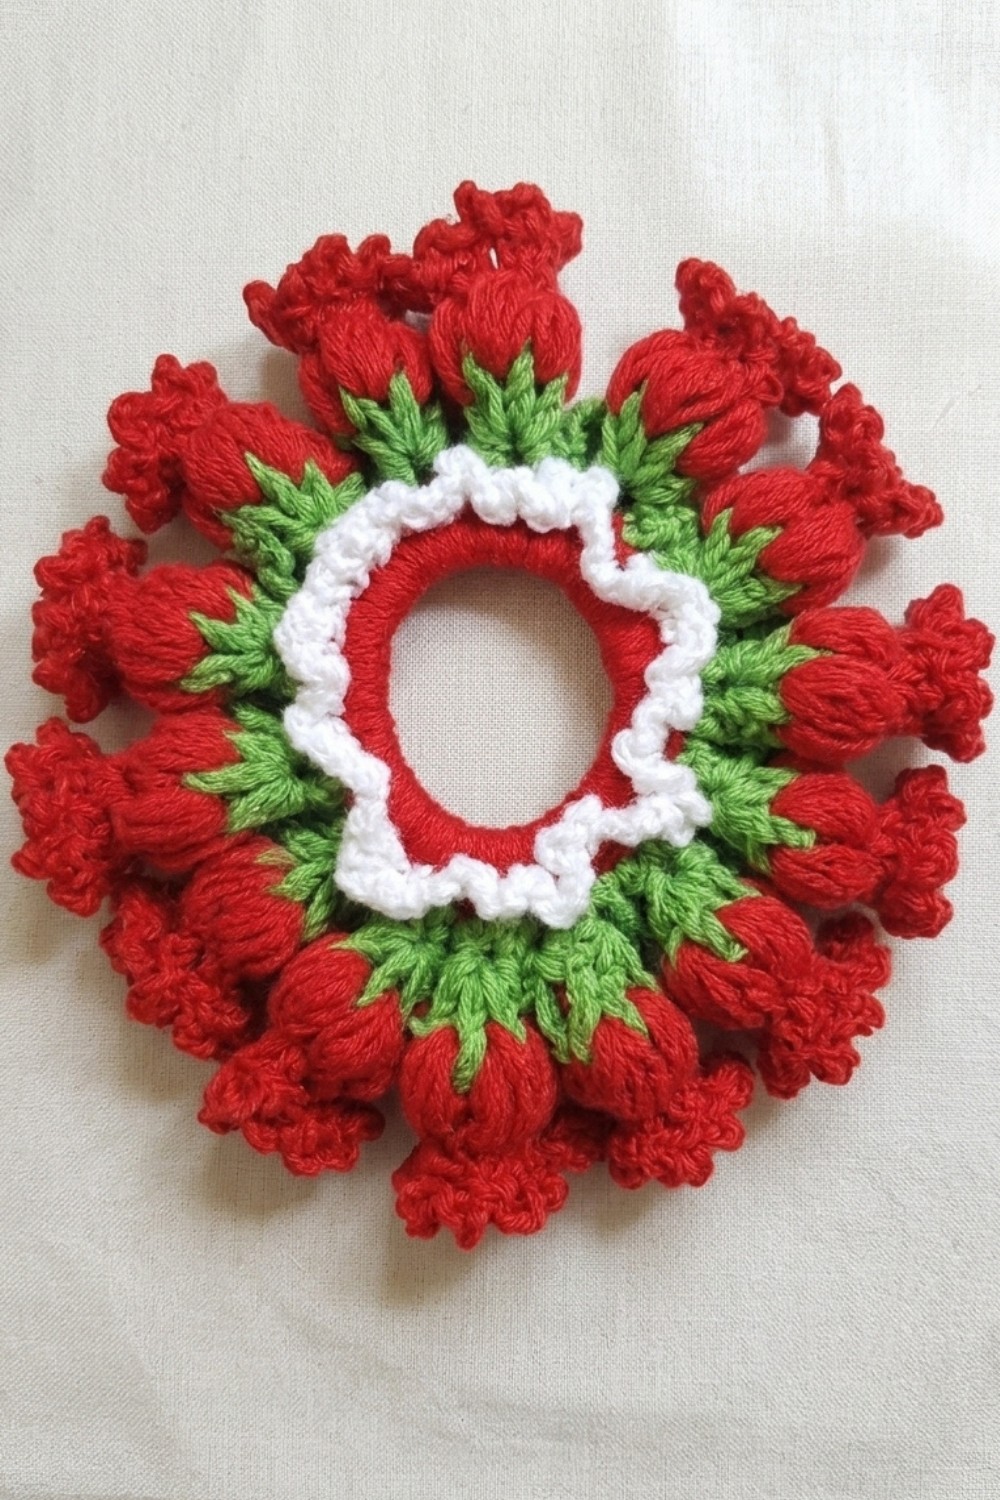
Find the charm and elegance of handmade hair accessories with this delightful crochet scrunchie project, brought to you by Mônica Moda Crochê. The creator beautifully demonstrates how to create a crocheted hair tie adorned with delicate flowers that blend style and comfort effortlessly. Soft to the touch yet sturdy, this accessory offers a comfortable fit that holds your hair gracefully without pulling or damaging strands. The crochet scrunchie pattern highlighted here is perfect for adding a quaint, feminine touch to your daily look or livening up your outfit for special occasions.
Trendy Crochet Scrunchie Free Pattern For Hair Accessories
Ideal for all seasons, this versatile scrunchie complements both casual and dressier ensembles. Whether you’re heading to work, a casual brunch, or an outdoor event, it adds a splash of color and personality to your hairstyle. Pair it with flowing dresses for a boho vibe in spring and summer, or with cozy sweaters during cooler months to brighten your look. Its charming flower accents make it a perfect gift or a delightful treat for yourself.
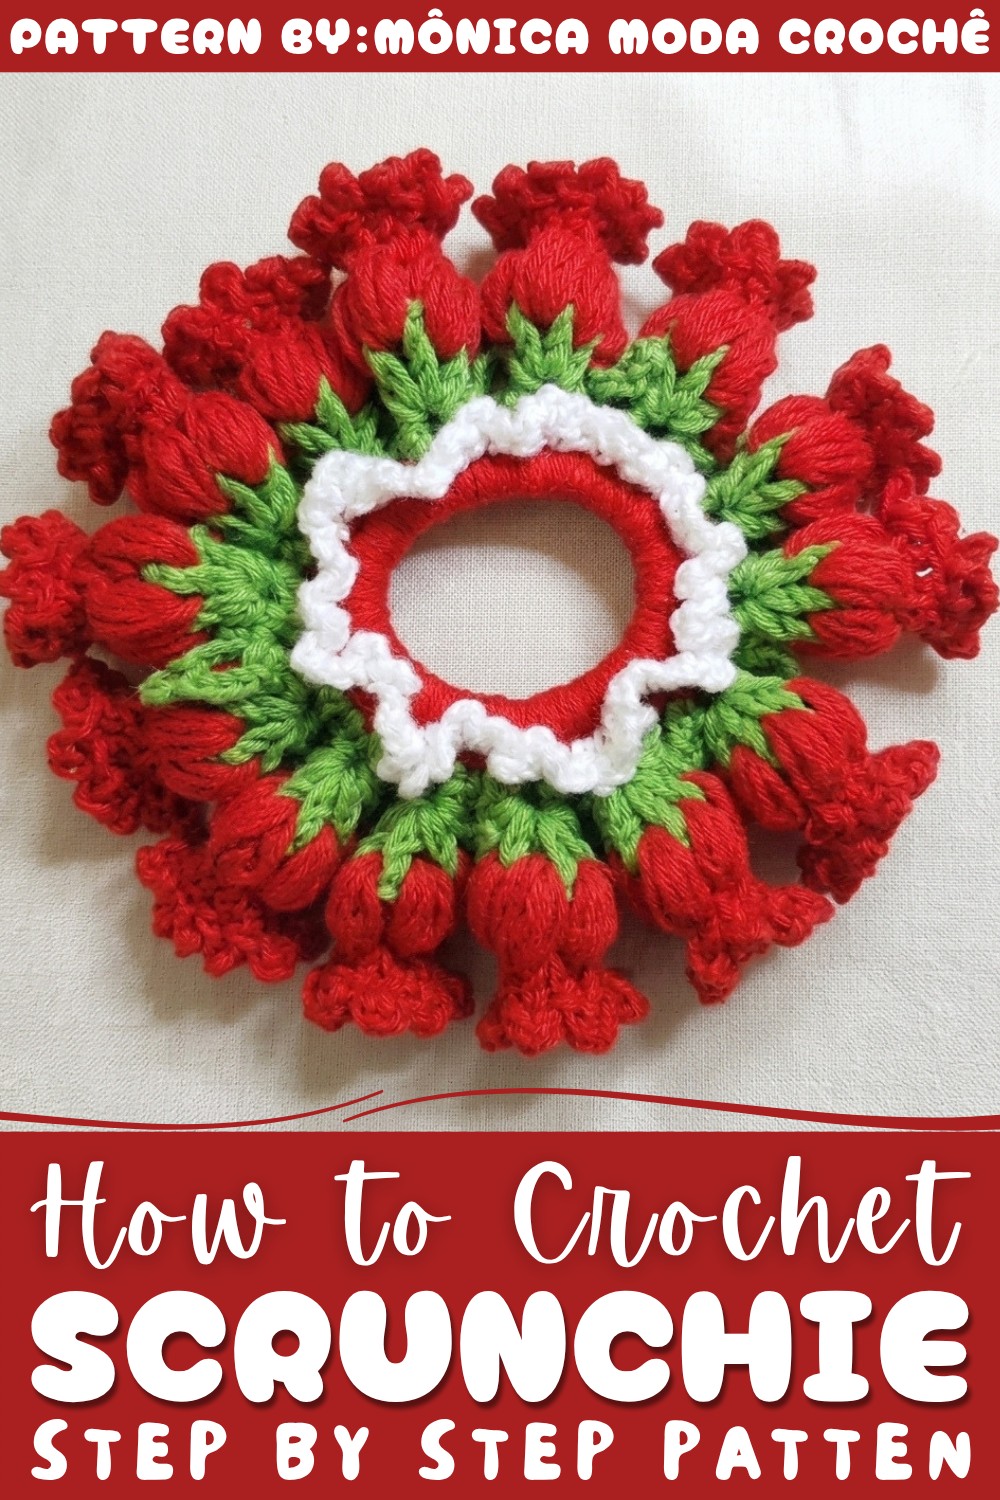
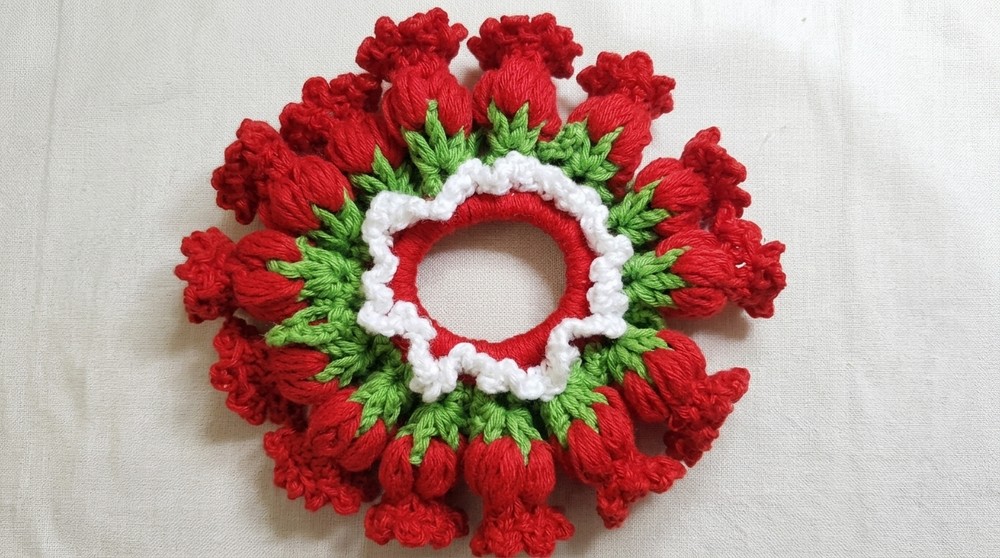
This scrunchie’s texture is a harmonious blend of softness and subtle structure, thanks to the carefully stitched loops and puff stitches that form miniature roses and leafy motifs. The standout feature is its intricate floral design, which brings a three-dimensional appeal and playful elegance. Layers of chain stitches and picot edges frame the flowers perfectly, creating a piece that’s as eye-catching as it is wearable. Ready to elevate your hair accessory game? Dive into the full crochet scrunchie pattern and bring this beautiful creation to life—your hair deserves this lovely touch.
Rose Crochet Scrunchie Free Pattern
In this lesson from Monica Moda Crochê, a vibrant floral scrunchie is produced using Charme yarn in red, green, and white. The process begins by securing a base around a hair tie, continues with leaf and flower foundations, and finishes with decorative roses. Every step is clearly explained to ensure that each part is worked in sequence and attached correctly, resulting in a functional yet beautiful hair accessory. With careful attention to rounds, loops, and transitions between yarns, this pattern brings bold color and delicate texture together. The following instructions walk through each phase, focusing on practical techniques and detailing every foundation, stitch, and embellishment for a cohesive, finished piece.
Quick Overview Of Pattern
- Begins with a single crochet foundation around a hair tie (red yarn)
- Leaf arches and flower bases (green yarn) built over base with chains
- White border outlines the scrunchie front with chain loops
- Red roses added last, made from puff stitches and petal edgings
- All yarn ends are hidden for neatness
- Includes picot stitches and puff stitch for texture and volume
Notes
- Secure yarn ends at each color change to prevent unraveling.
- Work single crochets tightly around the hair tie for stability.
- When attaching green and white yarn, use only the indicated loop for correct layering and texture.
- Count stitches carefully, especially on the flower base and leaf arches.
- Picot and puff stitches require attention for proper shaping.
Skill Level
Intermediate:
Basic crochet skills required (single crochet, chain, double crochet), as well as familiarity with puff and picot stitches. Precision in joining rounds and working in loops will enhance finish quality.
Materials
- Charme yarn: Red, Green, White
- Hair tie (scrunchie base)
- Size 4 crochet hook
- Scissors
Measurements / Sizing
- The finished scrunchie will fit most standard hair ties.
- The thickness and volume of flowers depend on yarn tension and puff stitch technique.
- Markers may be used for counting stitches if desired.
Gauge and Stitch Pattern
- Gauge is not crucial; aim for snug, uniform stitches throughout.
- Stitch pattern alternates between single crochet, chain, double crochet, puff, and picot.
Stitch Abbreviations
| Abbreviation | Term |
|---|---|
| sc | single crochet |
| ch | chain |
| dc | double crochet |
| sl st | slip stitch |
| lp | loop |
| st | stitch |
| picot | 3 ch, sl st into dc top |
| puff st | see ‘Special Stitches’ |
Special Stitches
- Puff Stitch: Yarn over, insert hook, pull up a loop; repeat 5 times (6 loops on hook); yarn over, pull through all, secure with chain.
- Picot: Ch 3, sl st into top two loops of dc.
The Crochet Pattern
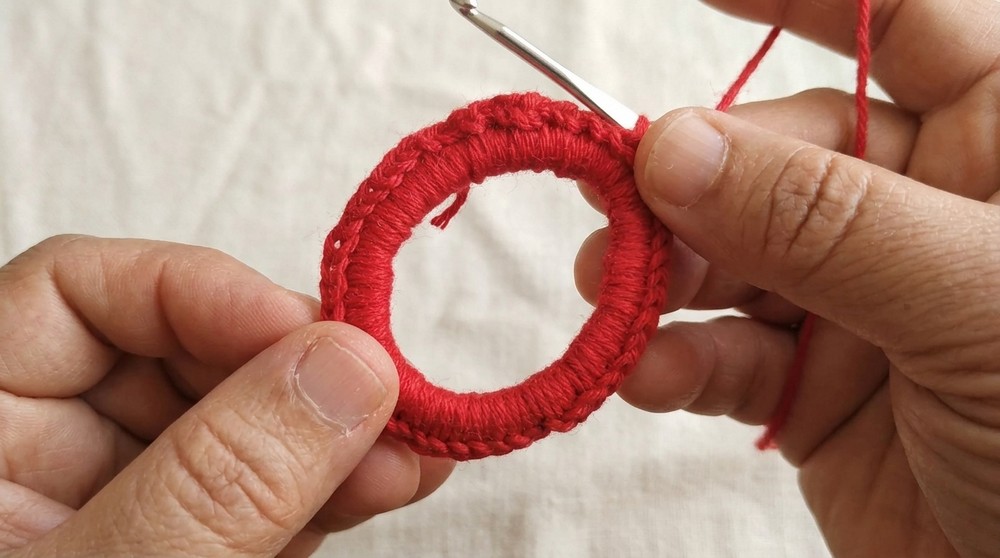
Base Foundation (Red Yarn)
- Step 1:
Start with red yarn; make a small knot and attach it directly to the hair tie using a single crochet (sc). - Step 2:
Continue working sc stitches tightly around the hair tie until you reach 56 sc. - Step 3:
Join to the first sc with a slip stitch (sl st), ch 1, cut the thread, and hide yarn ends securely.
Flower Base & Leaves (Green Yarn)
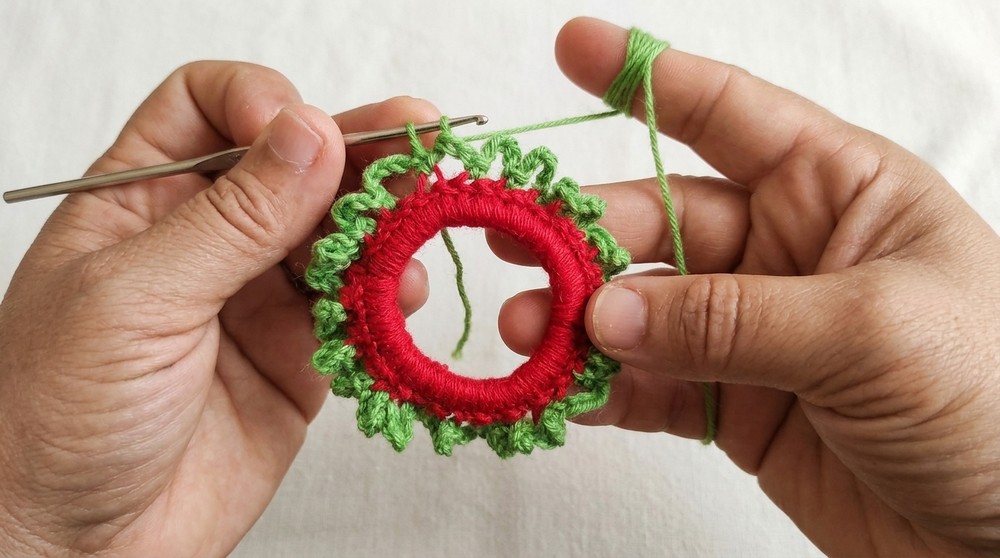
- Step 1:
Tie a knot with green yarn. Attach it to the second loop of the previous red base using a single crochet (sc). - Step 2:
Chain 5 (ch 5). Skip one st, pick up the next second lp and work a sc. - Step 3:
Repeat the process: (ch 5, skip st, sc into next second loop) all the way around the tie, forming arches for flowers and leaves.
- Step 4:
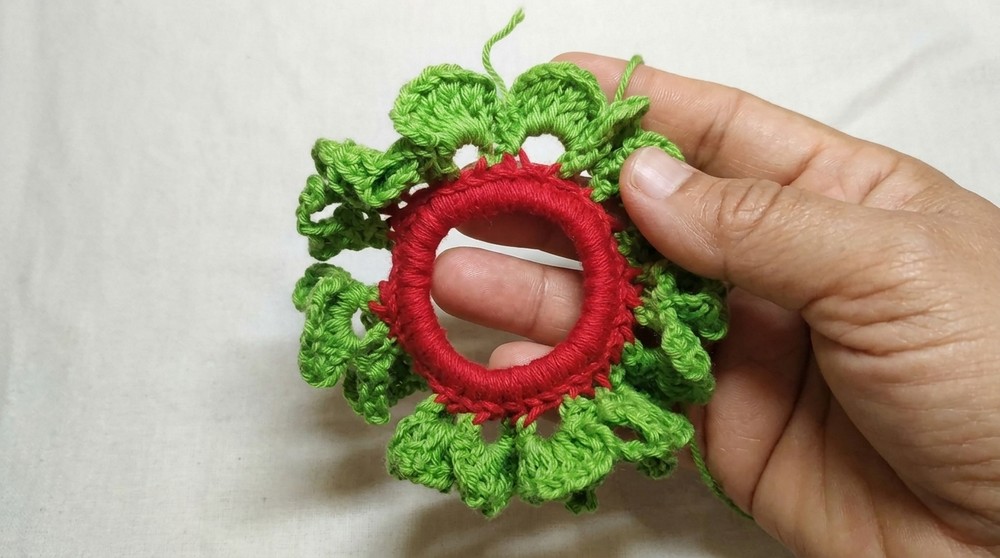
Finish the round with a sl st in the first sc. Work a sc inside the first arch (ring) to start rose foundations. - Step 5:
For rose foundation spaces:- Ch 3, then work 4 dc separated by ch 1 each into the ring.
- Ch 3, then sc in the same space.
- Step 6:
For leaf spaces:- Move to next arch; sc.
- Ch 7.
- Skip 3 ch, sl st (picot) in 4th ch.
- Ch 3, sc in the same place to form a leaf.
- Step 7:
Alternate the rose foundation groups (with 4 dc/ch 1) and leaf spaces (with picot/leaf structure) around the scrunchie. - Step 8:
Join with sl st to first sc, ch 1, cut thread, and hide all ends.
White Contour Border (White Yarn)
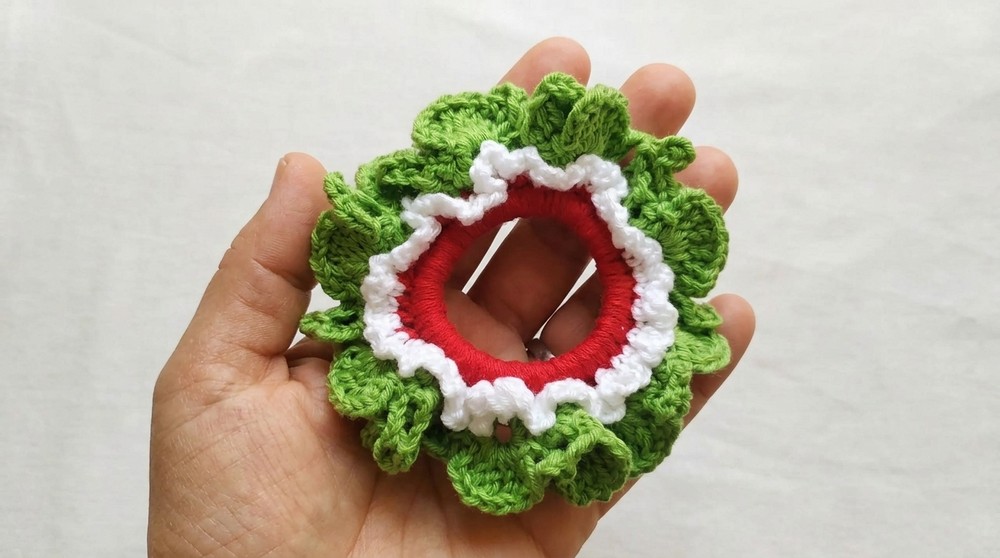
- Step 1:
Make a knot with white yarn and attach it to the front loop of the red base section. - Step 2:
Work a sc into the first front loop, then ch 3. - Step 3:
Move to the next front loop and work another sc. - Step 4:
Repeat this pattern: (ch 3, sc in next front loop), outlining the front red portion across the scrunchie. - Step 5:
Join with a sl st to the first sc, ch 1, cut thread, and hide ends.
Blooming Roses (Red Yarn)
- Step 1:
Knot red yarn and attach with a sl st in the middle space between the 3 starting chains (ch 3) and the first dc of any rose foundation group. - Step 2:
Ch 3.
Create 5 puff stitches (puff st) total, one in each available space of the foundation group.- Puff Stitch Method: Yarn over, pull up a loop from space, repeat 5 times into the same space, yarn over, pull through all loops, secure.
- Step 3:
Sl st into the very first puff st to close the base of each rose. - Step 4:
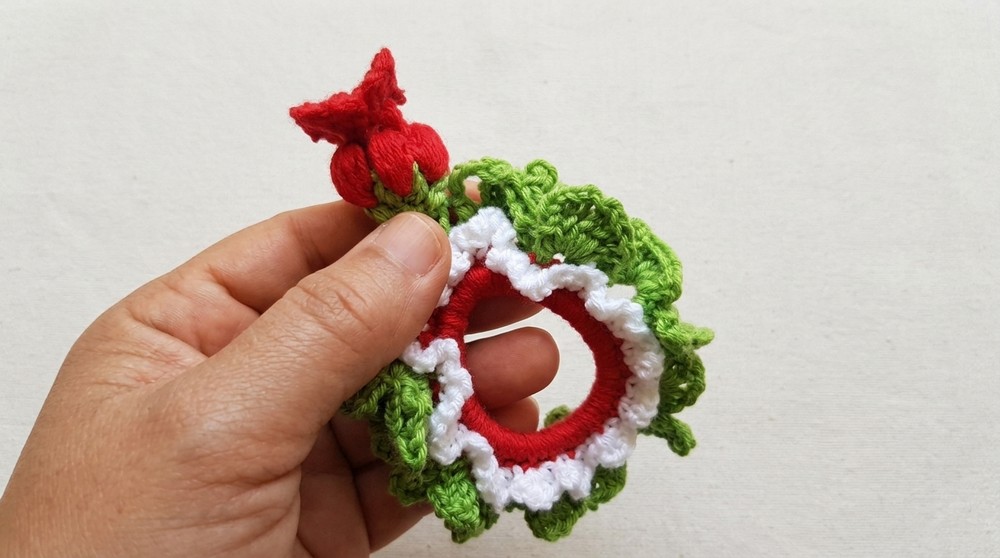
Petal edging:- In space between puff stitches: ch 3, dc.
- Make a picot (ch 3, sl st into top two loops of dc).
- Work a second dc into same space.
- Step 5:
Repeat the two-dc and picot pair in every space between puff stitches around the flower. - Step 6:
Join with a sl st to the third ch, ch 1, cut thread, and secure ends. - Step 7:
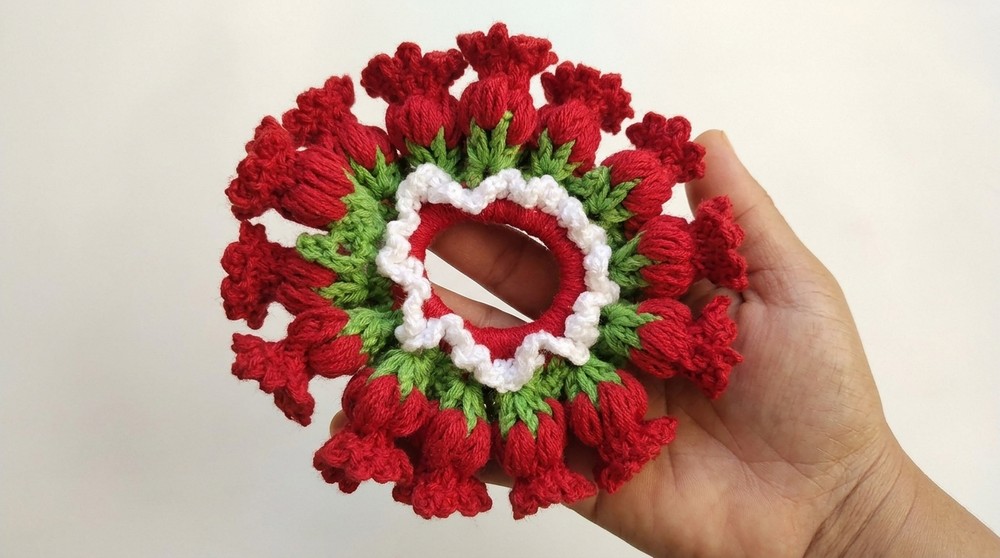
Repeat the rose-making steps for every remaining rose foundation space on the scrunchie until all roses are completed.
Assembly & Finished Size
- Hide all yarn tails and ensure each flower and leaf is tightly secured.
- The completed scrunchie has a diameter suitable for wrapping around a ponytail.
- Each rose sits atop a leaf arch, alternating for a consistent floral effect.
- White border is visible as delicate outlining.
- The scrunchie is ready for use or gifting.
Conclusion
Following these instructions systematically ensures a beautifully balanced floral scrunchie, where each color and texture complements the next. Single crochets anchor the hair tie, green arches supply leaf and flower bases, and the white border brings brightness. The final roses, paired with leafy arches, create dimensional interest and festive appeal. By sequentially joining rounds, alternating groups, and paying close attention to puff and picot stitch placement, crafters realize a scrunchie that combines sturdy structure with delicate ornamentation. With secure yarn ends and neat finishing, this accessory makes a joyful addition to any wardrobe, adaptable in color and style. Share the vibrant results, and keep experimenting for personalized flair.