Stitch a lovely bloom with this Crochet Flower Free Pattern, using soft yarn and neat petals for decorating bags, hats, and birthday gifts.
A little flower that brings a burst of sunshine wherever you go—a bright and cheerful bloom that looks soft and lovely. This delightful flower has petals that gently curl, layered so beautifully they look almost real. Perfect for wearing on your hair, pinning on a bag, or even adding charm to a jacket, this flower adds a touch of sweetness to any outfit. Designer Monica Guimarães, known for her creative ideas, shares this lovely creation on her YouTube channel, Mônica Moda Crochê. Thanks to her clear tutorial and thoughtful design, anyone can bring this favorite project to life. The Crochet Flower Pattern is at the heart of making this stunning piece.
Pretty Crochet Flower Free Pattern With Lovely Petals
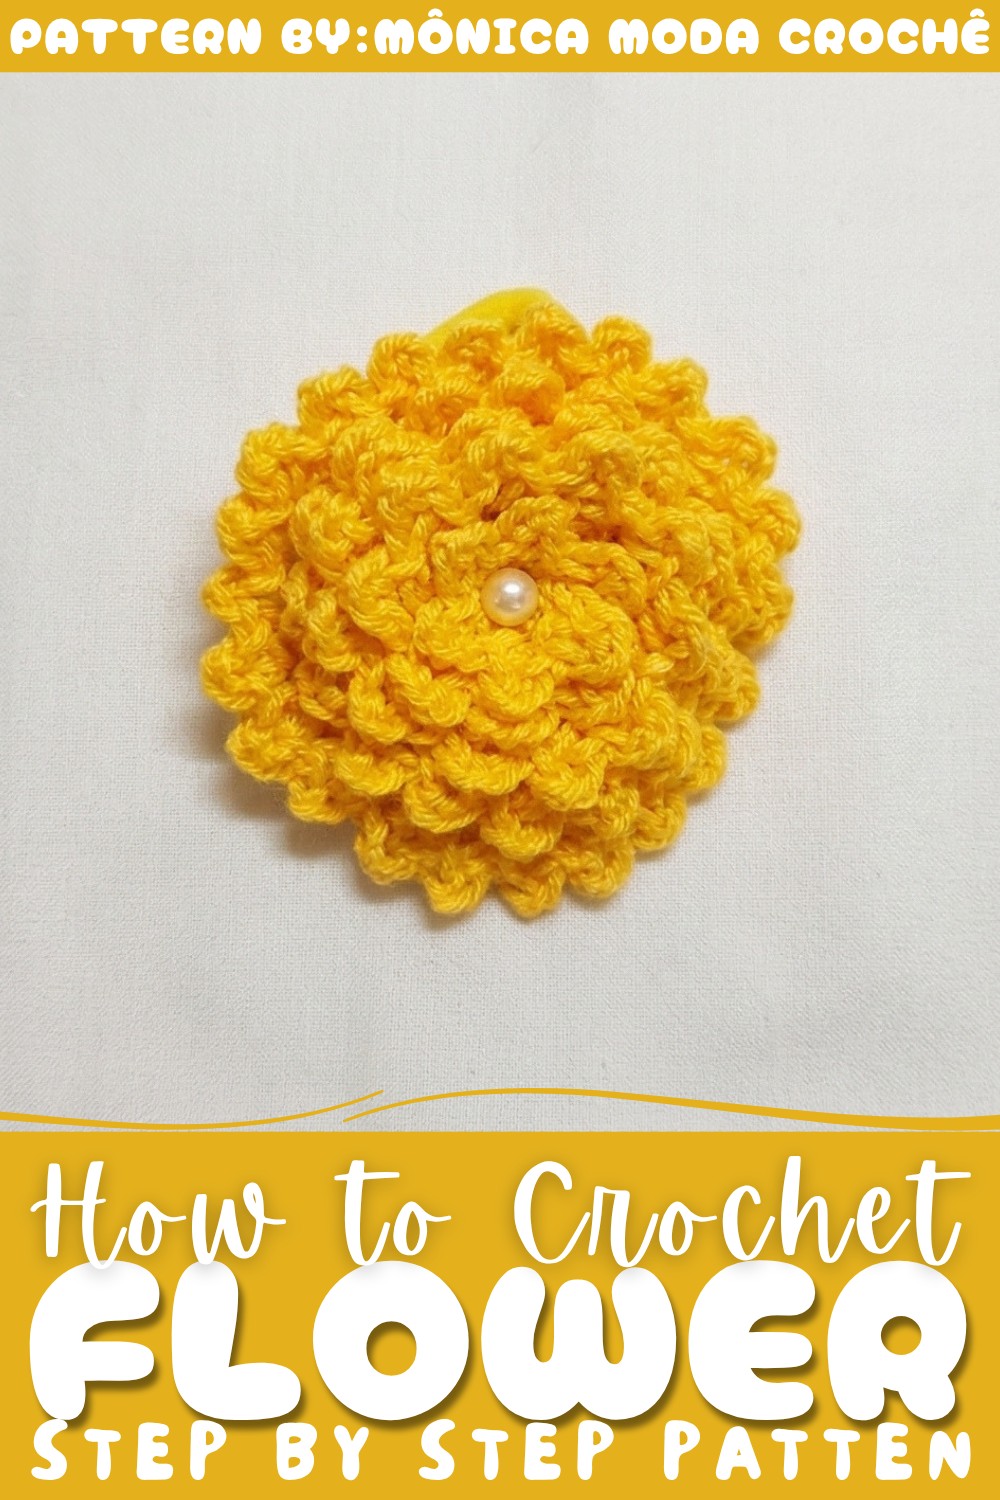
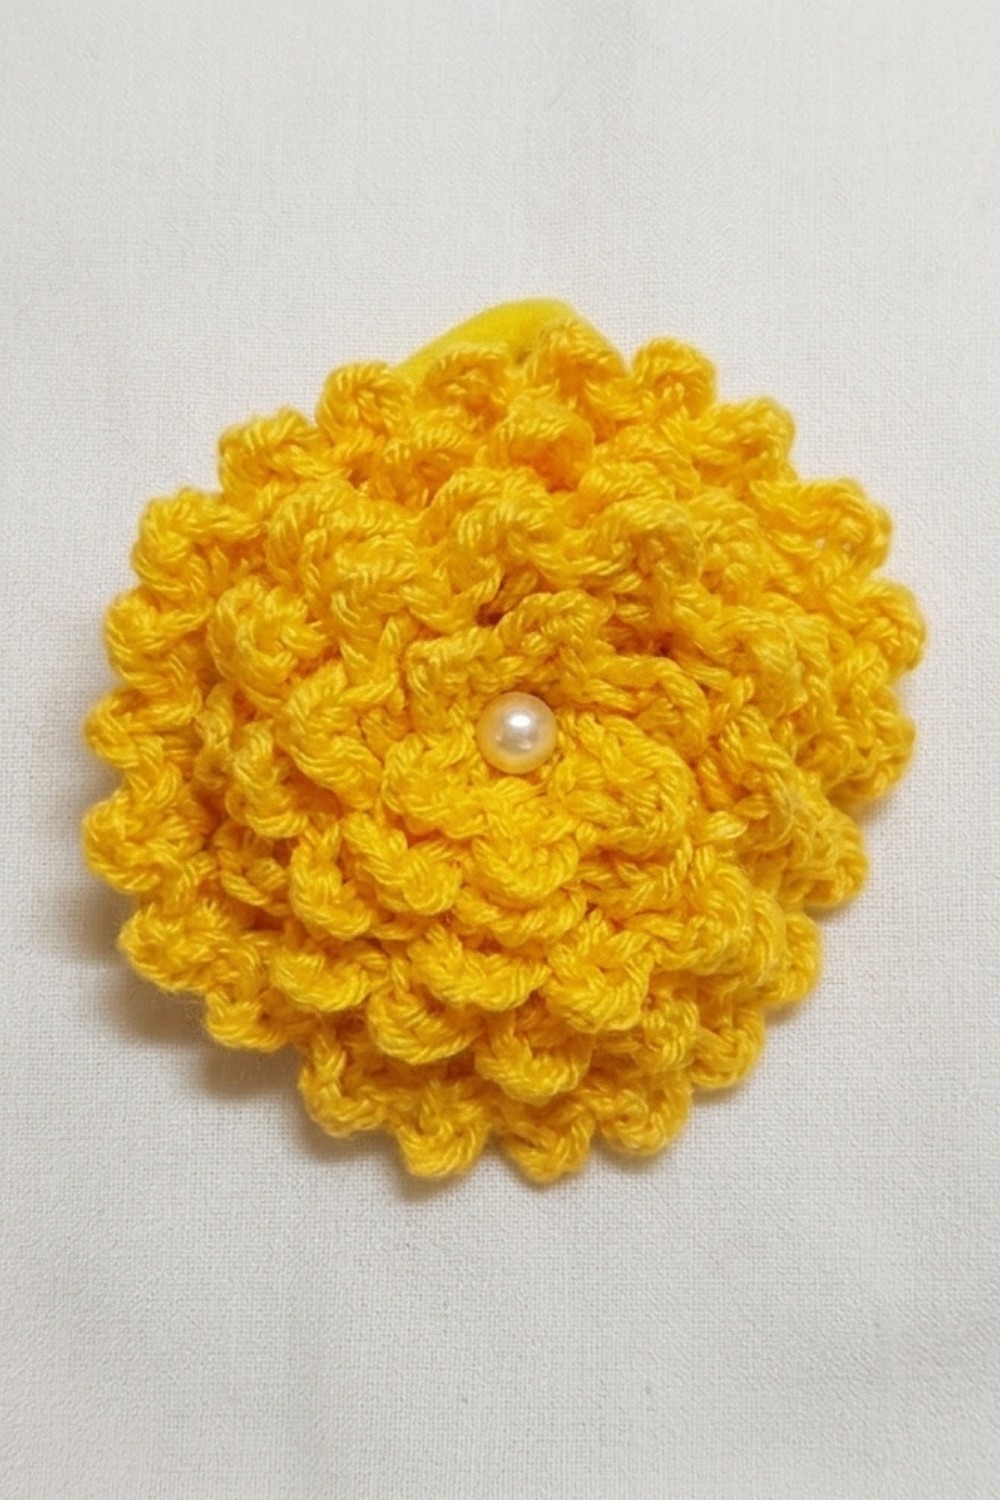
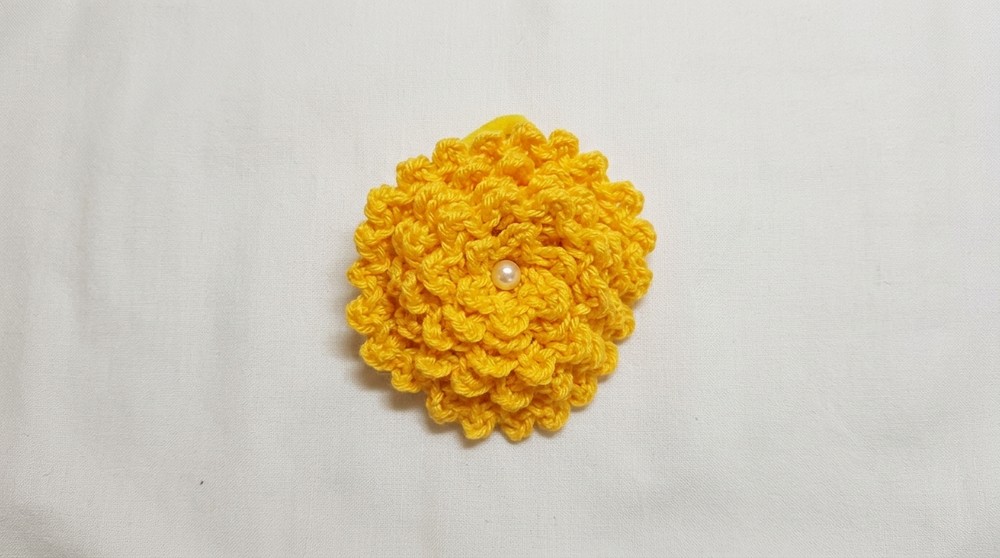
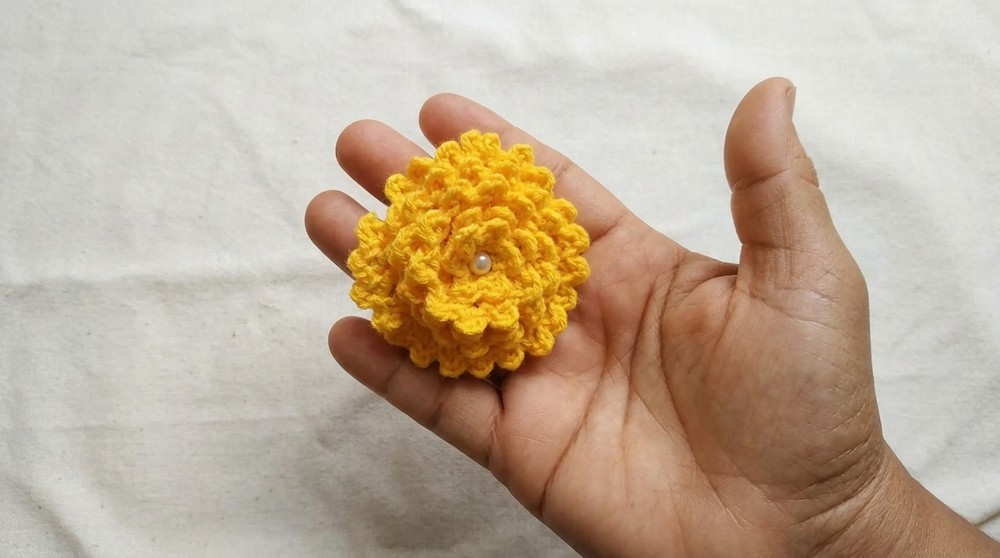
The finished flower shows off a round shape with friendly petals that look plump and soft. It has a small pearl in the center, making it sparkle just a bit—enough to catch the eye without being too flashy. The colors can be changed to fit your mood or style, which means this project is perfect for personal touches. Whether for gifts or personal use, this flower adds charm and gentle beauty to everyday items.
Besides brightening your accessories, this flower is easy and joyful to make. You don’t have to be an expert to try it out. The pattern offers clear steps, making it a wonderful beginner-friendly project. Plus, making something pretty with your own hands always feels special. Ready to add a colorful, happy flower to your collection? Dive in and create a lovely piece that spreads sunshine wherever you go.
Gorgeous Crochet Flower Free Pattern For Floral Gifts
The process of forming a flower from a simple strip of crochet stitches highlights the ingenuity found in textile artistry. This floral accessory begins with a straightforward sequence of foundational chains, single crochet stitches, and petal-inspired arches. Each stage relies on tried-and-true techniques, making it approachable for a broad range of skill levels. The design employs a bright, cheerful yarn and classic shaping to capture the look of a blooming calendula. A delicate pearl at the center adds a touch of luminosity, while an attached hair tie converts the flower into a functional decorative piece. This project demonstrates how ordinary materials—yarn, a bead, and a hair tie—can be configured into a graceful, visually compelling result. With each stitch, the strip evolves into something more intricate, offering satisfaction in every row and round worked.
Quick Overview Of Pattern
- Crochet a foundation chain of 65 stitches
- Work a single crochet row into each chain for structure
- Form the flower petals with an alternating double crochet, chain, single crochet pattern
- Finish the strip, leaving a long tail for sewing
- Roll your strip into a spiral, then sew to secure flower shape
- Attach a pearl at the center and a hair tie at the base for a complete, practical accessory
Notes
- Work with evenly spaced stitches for a tidy, uniform flower.
- Using a long yarn tail aids in assembling all elements securely.
- Adjust the tightness of your spiral to change the flower's fullness.
- If you prefer, you can glue the hair tie rather than sew it, but sewing offers better durability.
- This project works well with any DK or light worsted weight cotton yarn for best stitch definition.
Skill Level
Beginner to Advanced Beginner:
This pattern uses only the simplest stitches—chain, single crochet, and double crochet—making it highly accessible for newer crocheters. Minimal sewing/assembly experience is required.
Materials
- Yarn: Charme Line (canary yellow or color of your choice)
- Crochet hook: Size 4 (Boye/Nickel or similar)
- Tapestry needle (for sewing the flower, pearl, and hair tie)
- 1 pearl bead (for center)
- 1 hair tie (scrunchie band, for back)
- Scissors
Measurements / Sizing
- Finished flower diameter: Approx. 5–7 cm (varies with tension and yarn)
- Flower thickness: Approx. 2 cm
- Fits: Most standard hair ties/scrunchie bands
Gauge (and Stitch Pattern if applicable)
- Gauge is not critical for this decorative project.
- If using alternate yarn, ensure the strip can be rolled into a flower of your preferred size.
- Stitch pattern: Alternating double crochet, chain spaces (for petals), and single crochet anchor points.
Stitch Abbreviations
| Abbreviation | Description |
|---|---|
| ch | chain |
| sc | single crochet |
| dc | double crochet |
| sl st | slip stitch |
| st(s) | stitch(es) |
Special Stitches
- Double Crochet (dc): Yarn over, insert hook into stitch, yarn over and pull through (3 loops on hook), yarn over, pull through 2 loops (2 loops remain), yarn over and pull through remaining 2 loops.
- High Point: (Portuguese “ponto alto” = double crochet in US terms.)
The Crochet Pattern
Foundation Chain
- Begin by chaining 65 stitches using your chosen yarn and size 4 crochet hook.
- (Count carefully to ensure a perfectly formed flower spiral.)
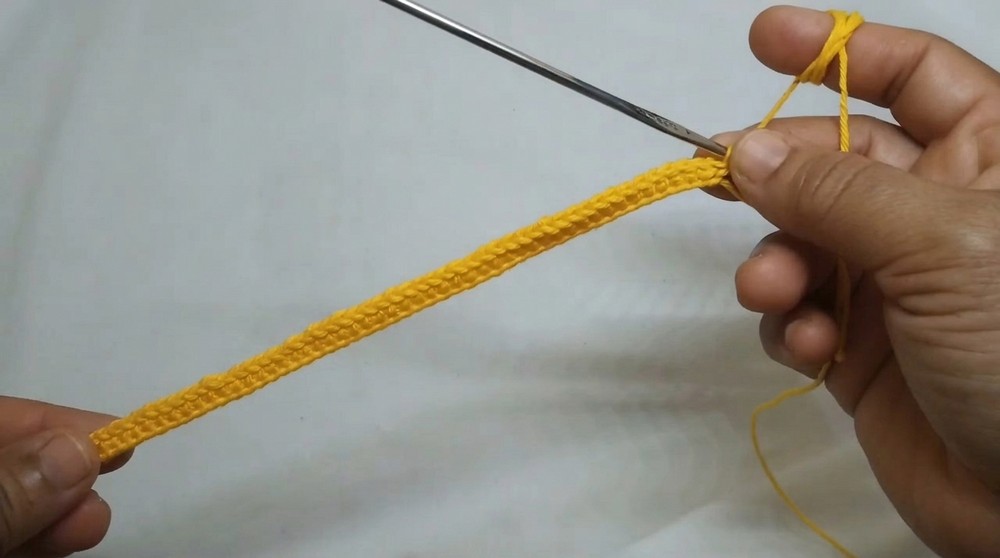
Base Row (Single Crochet Stitches)
- Skip the first chain from the hook.
- Insert hook into the second chain from your hook and make 1 single crochet (sc).
- Continue making 1 sc into each chain all the way to the end of the row.
- (You should have 64 single crochets at the end.)
Petal Row (Chain and Stitch Pattern)
- Chain 3, then turn your work.
- Into the first single crochet of the previous row, make 1 double crochet (dc).
- Chain 3 again.
- Into the next space, make 1 single crochet (sc).
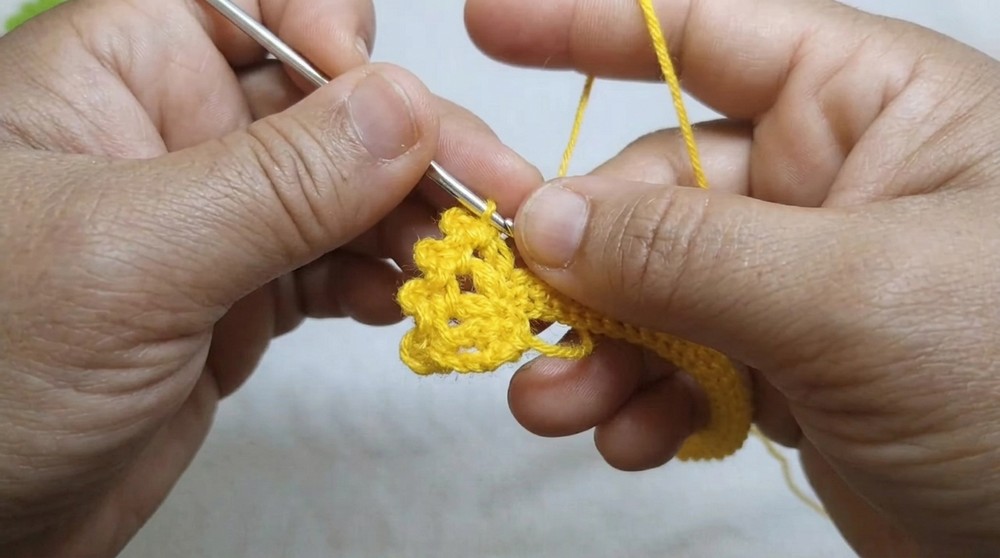
- Next, make 1 dc over the subsequent sc from the base.
- Chain 3, then make 1 sc into the next space.
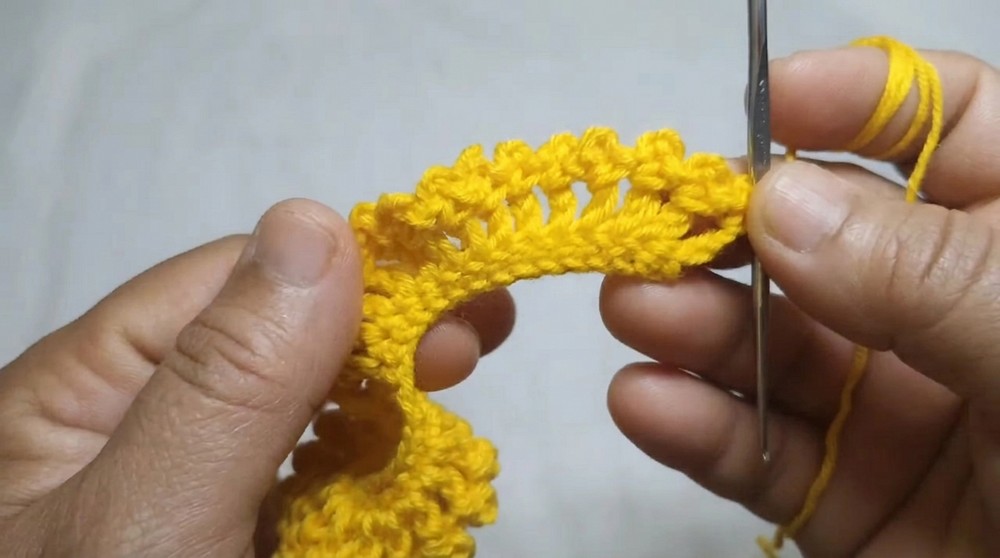
- Repeat: Continue this alternating sequence (dc, ch 3, sc into space) across the row until you reach the final base stitch.
- Your strip will now have a series of petals, formed by the chain loops and tall stitches.
Finishing the Strip
- Complete a slip stitch (sl st) inside the final chain space.
- Complete another sl st into the base single crochet point.
- Chain 1 to secure, then cut the yarn—leaving a long tail (20–30 cm) for sewing and assembly.
- (It helps to pull the yarn through the last loop to fasten securely.)
Rolling and Shaping the Flower
- Thread your long yarn tail onto a tapestry needle.
- Take the crocheted strip and roll it tightly from one end, gradually forming a spiral flower.
- (Adjust the tightness as desired for flower fullness.)
- When fully rolled, the petal edges should naturally overlap and create a realistic, layered effect.
Assembly & Finished Size
Sewing the Flower Base
- With the flower still on your tapestry needle, pass the needle back and forth through the inner layers at the base of the spiral to secure the structure.
- Make several passes to prevent the flower from unraveling.
Attaching the Pearl
- Bring the needle up through the very center opening at the top of the flower.
- Slide the pearl bead onto the needle and place it directly in the flower’s center.
- Pass the needle down through the pearl and flower base to anchor the bead.
- Make a few more stitches, if necessary, to keep the pearl aligned and tight.
Attaching the Hair Tie
- Turn the flower over and position the hair tie at the base.
- Using the same thread, sew through the hair tie band and flower base multiple times for security.
- If desired, you may glue the hair tie, but sewing is recommended for durability.
Securing and Weaving Ends
- Tie a small knot using the needle and the remaining thread beneath the flower.
- Use the needle to hide the tail inside the flower layers.
- Trim any excess yarn for a tidy finish.
Conclusion
The calendula flower hair accessory stands as a testament to the versatility and charm inherent in handwork. Its spiral construction and layered petals radiate vibrancy and texture, making it a delightful focal point for everyday wear or special occasions. Functional decisions, such as careful sewing through the flower’s core and secure attachment of the center bead, provide durability as well as aesthetic appeal. By following established techniques and focusing on detail, one achieves not only a beautiful ornament but also a reliable, wearable piece. Color selections, bead styles, and alternative fastening options offer countless ways to adapt this design according to personal preference. Share this cheerful floral accent with friends or incorporate it into your own styling to add a touch of artistry to daily life. The results showcase both creativity and technical proficiency in equal measure.