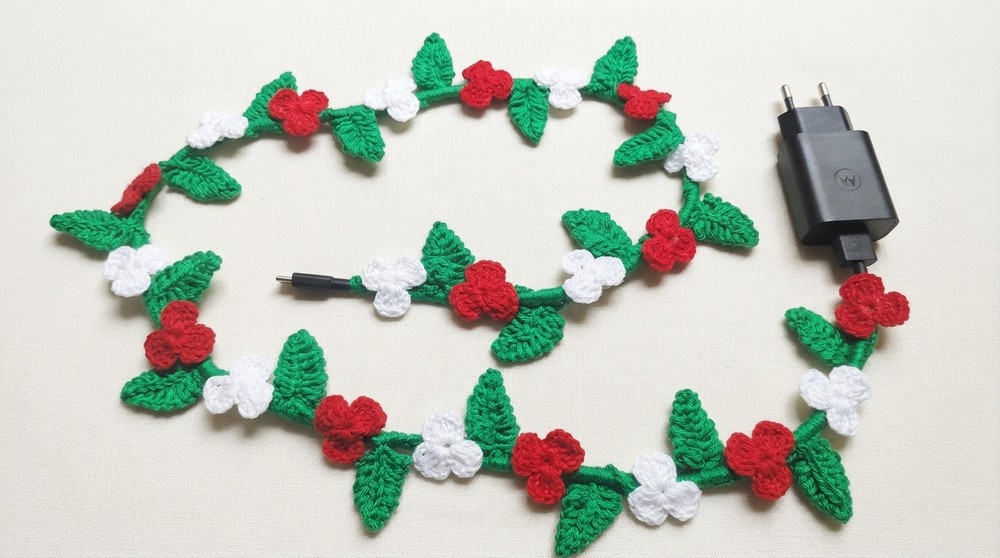
Wrap your charger with the Crochet Charging Cable Vine Free Pattern, a leafy decoration for phone cables, desk setups, and thoughtful little gifts.
Mônica Moda Crochê shares a fun idea for giving an everyday phone accessory a nature-inspired look with green yarn and delicate leaf details. The Crochet Charging Cable Vine is a decorative covering that turns an ordinary charging cord into something resembling a climbing plant. It is an interesting project for anyone who loves greenery and wants to give simple electronic accessories a personal touch.
Free Crochet Charging Cable Vine Pattern For Desk Decor
The vine features a long, narrow section with small leaves appearing along its length. Green yarn gives it a natural appearance, while the repeating leaf shapes form a lovely arrangement around the cord. You can choose light green for a fresh look or dark green for a richer finish. The finished decoration resembles a little plant growing around the cable.
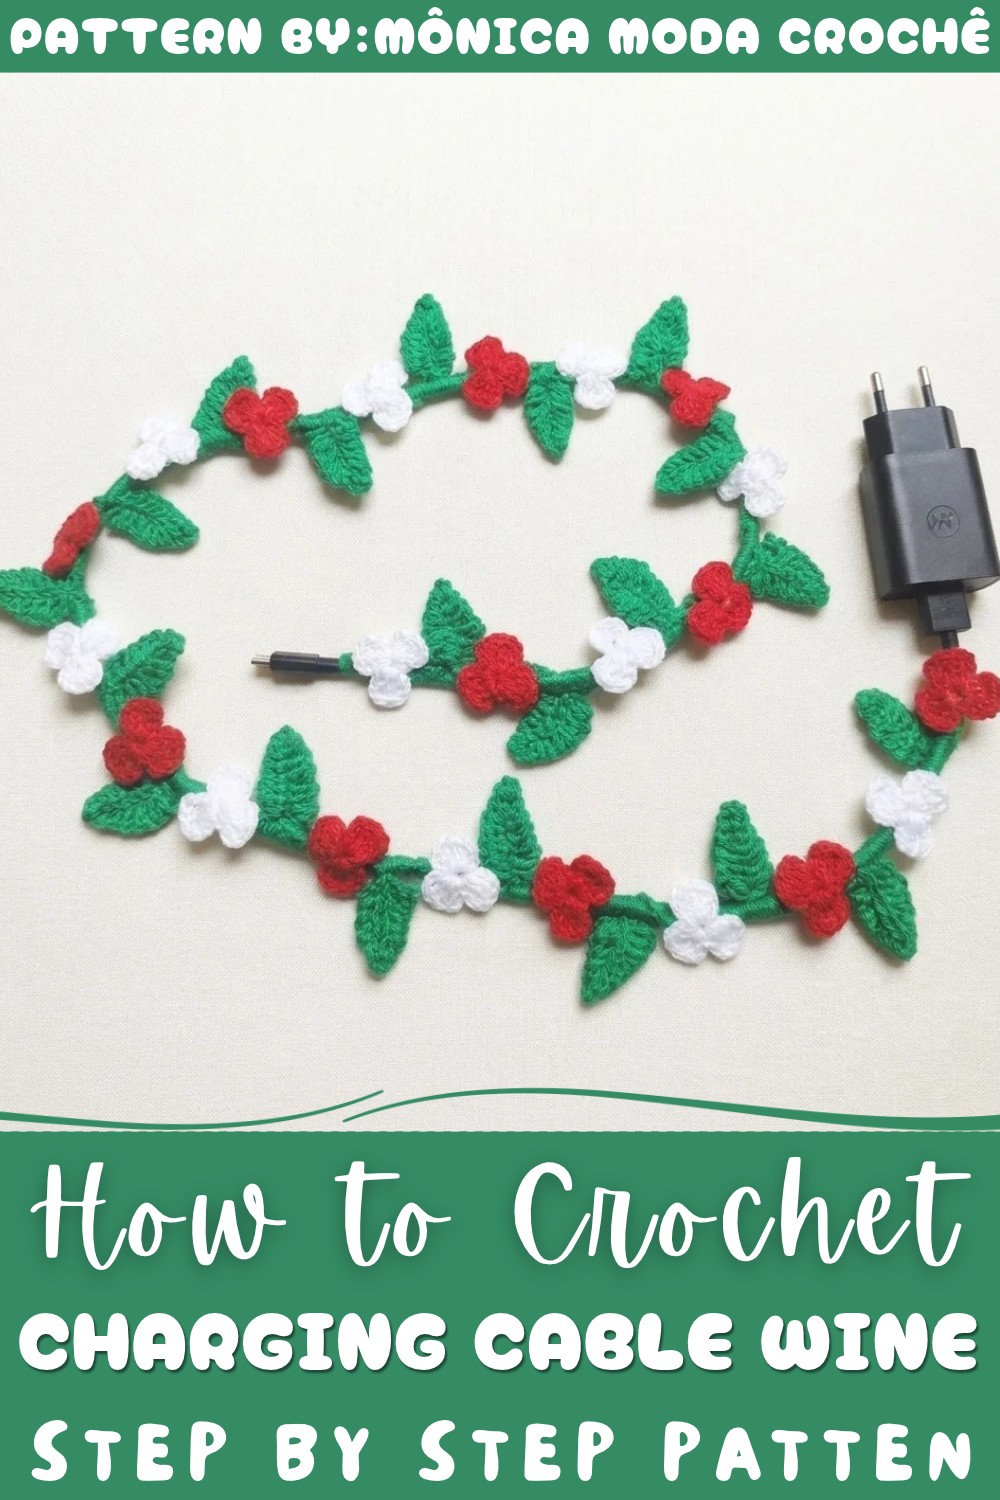
This accessory can give your desk or bedside charging area a more attractive appearance. It is also a fun handmade gift idea, especially when paired with a new charging cable. However, decorative yarn coverings can trap heat, so check the manufacturer's cable safety guidance and avoid using the covering while charging unless it is approved for that purpose.
The leafy design offers an unusual way to practice decorative crochet stitches while working on a small project inspired by nature.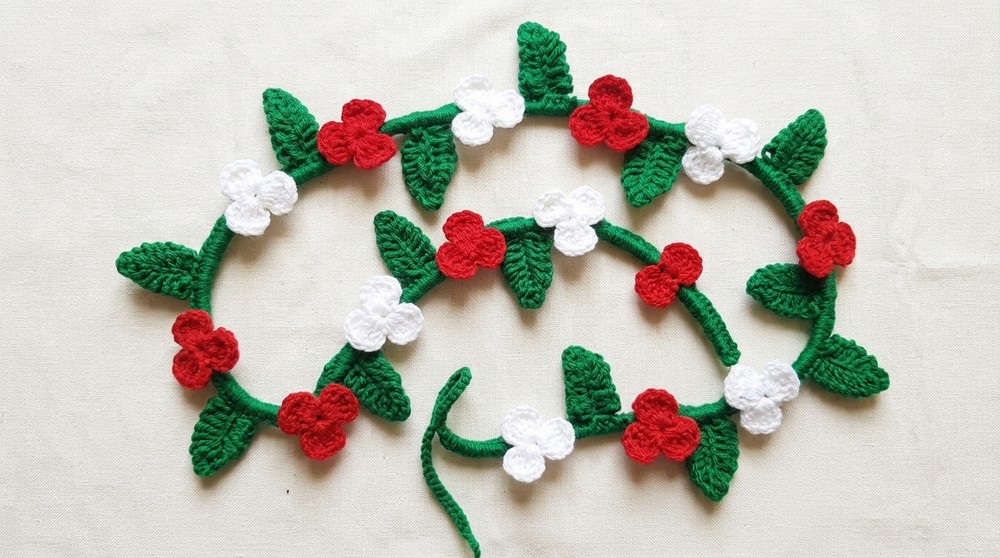
About the Pattern
Decorating a USB cable can transform a simple, everyday item into a personalized and attractive accessory. This project utilizes Tunisian crochet leaves and small flower appliqués to wrap and embellish the cable. The pattern combines both basic and Tunisian crochet techniques, forming alternating leaves along the cable and finishing with vibrant flowers glued between each leaf segment. The resulting cable cover is both charming and functional, offering creative flair and protection to your USB cable.
Pattern at a Glance
- Cable cover worked in single crochet around the cable
- Alternating Tunisian crochet leaves for a botanical touch
- Flower appliqués (red and white) glued between leaves for extra color and texture
- Pattern easily adapts to cables of any length
Important Notes
- Work single crochet stitches snugly to fully cover and secure the cable.
- Shape the leaves naturally by progressively loosening your loops as you form the leaf.
- Keep consistent spacing by counting stitches carefully between leaves.
- Use flexible and strong silicone glue for flower attachment to ensure durable decoration.
Difficulty Level
- Intermediate: Requires basic crochet and Tunisian crochet skills, plus careful assembly.
Supplies Needed
- Green yarn (base and leaves)
- Red and white yarn (for flower appliqués)
- Crochet hook suited to your yarn and cable size
- USB cable
- Scissors
- Silicone glue (for attaching flowers)
- Yarn needle (for weaving ends, optional)
Size & Measurements
- Adjustable to any USB cable length
- Each leaf: approximately 2–3 cm
- Each flower: approximately 1–2 cm
- Cable fully encased and embellished throughout
Gauge & Stitch Details
- Gauge is not critical; focus on tight, even coverage.
- The key stitches: single crochet, chain, double crochet, slip stitch
- Incorporates Tunisian crochet and basic flower construction
Crochet Abbreviations
- ch: chain
- sc: single crochet
- dc: double crochet
- sl st: slip stitch
Special Stitch Guide
- Tunisian Crochet Loop: Insert hook in chain, yarn over, pull up a loop, keep all loops on hook.
- Tunisian Return Pass: Yarn over, pull through 2 loops, then (yarn over, pull through 3 loops) repeatedly until 1 loop remains.
- Flower Petal: ch 3, 3 dc, ch 3, sl st into ring.
Complete Crochet Patter 1: Base Coverage
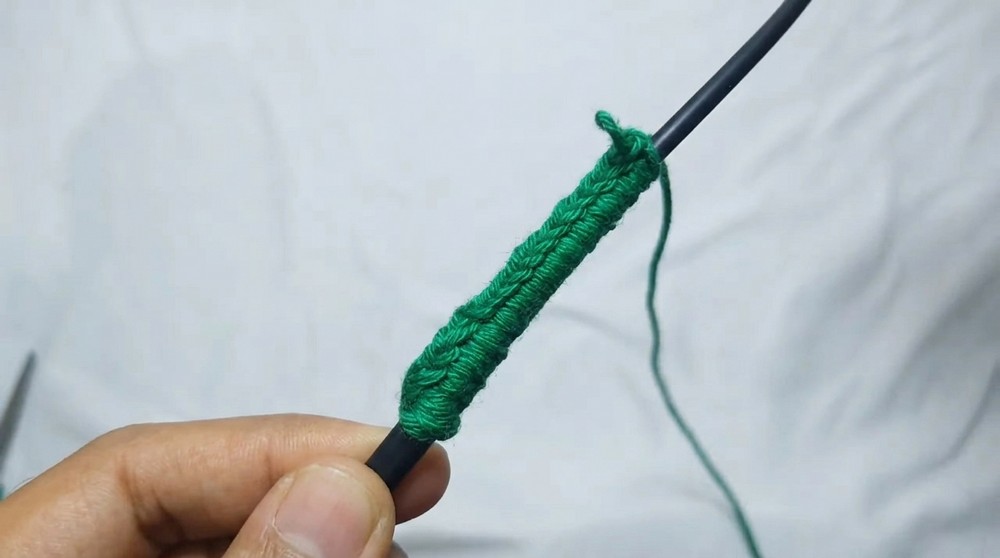
- Attach green yarn to the cable with a slip knot.
- Work 18 sc snugly around the cable, hiding the tail as you go.
2: Tunisian Crochet Leaf Pattern
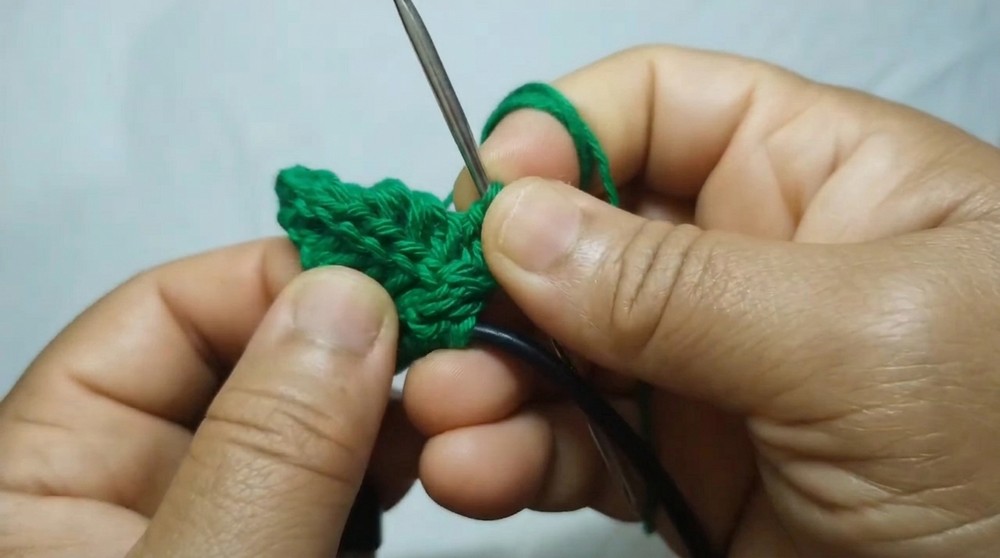
- For each leaf: ch 7.
- Starting in the second chain from the hook:
- Yarn over, pull up a loop in each of the next 6 chains, making each loop a bit looser for a wider leaf form.
- Return Pass:
- Yarn over and pull through 2 loops, then yarn over and pull through 3 loops consecutively until 1 loop remains.
- Second Side:
- Rotate to work along other side of the starting chain, repeat process to create a symmetrical leaf.
- Finish Leaf:
- ch 1, then work a line of sl st down the leaf’s center (this creates the stem).
3: Connecting Leaves
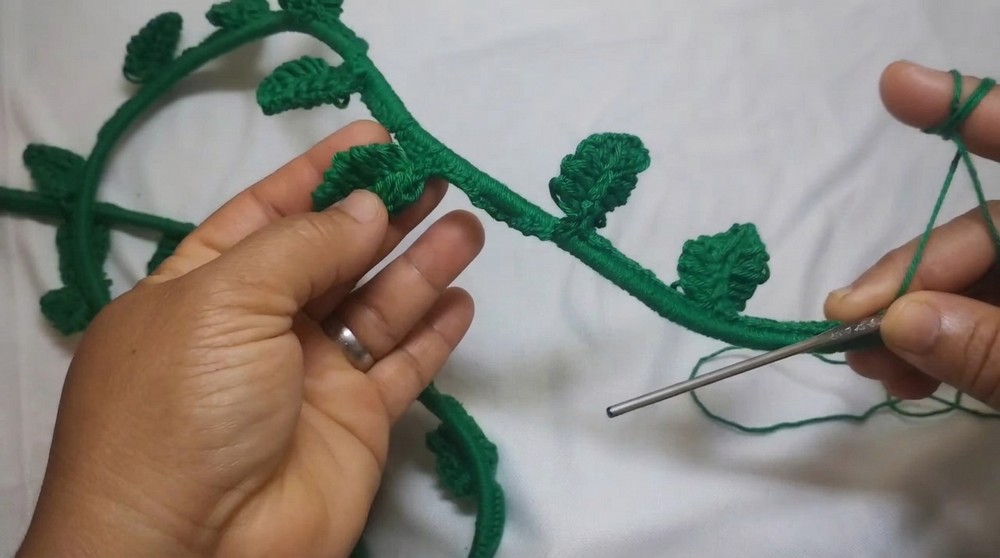
- Resume wrapping the cable with 20 sc to cover the next segment between leaves.
- Repeat the full leaf pattern process as before.
- Continue alternating 20 sc and leaf until the cable length is covered.
- Finish final segment with 18 sc.
4: Flower Appliqué
- For each flower (make 22, alternating red and white):
- ch 5, sl st into first chain to form a ring.
- For each petal (repeat 3 times):
- ch 3, 3 dc into ring, ch 3, sl st into ring.
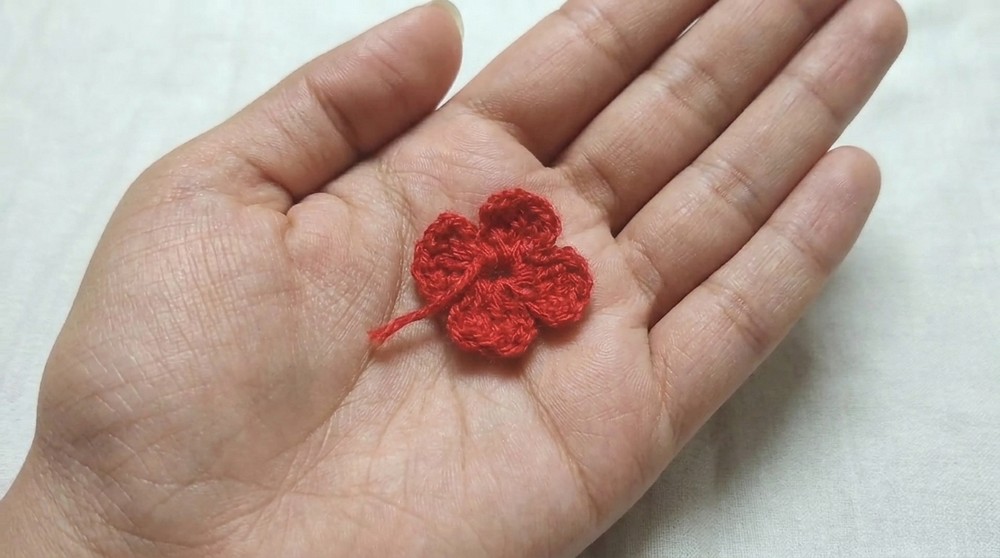
Assembly & Finished Size
- Twist the leaves so they alternate in direction along the cable (one left, one right).
- Using silicone glue, attach one flower between each pair of leaves, holding until set.
- Allow all glued areas to dry fully before using the cable again.
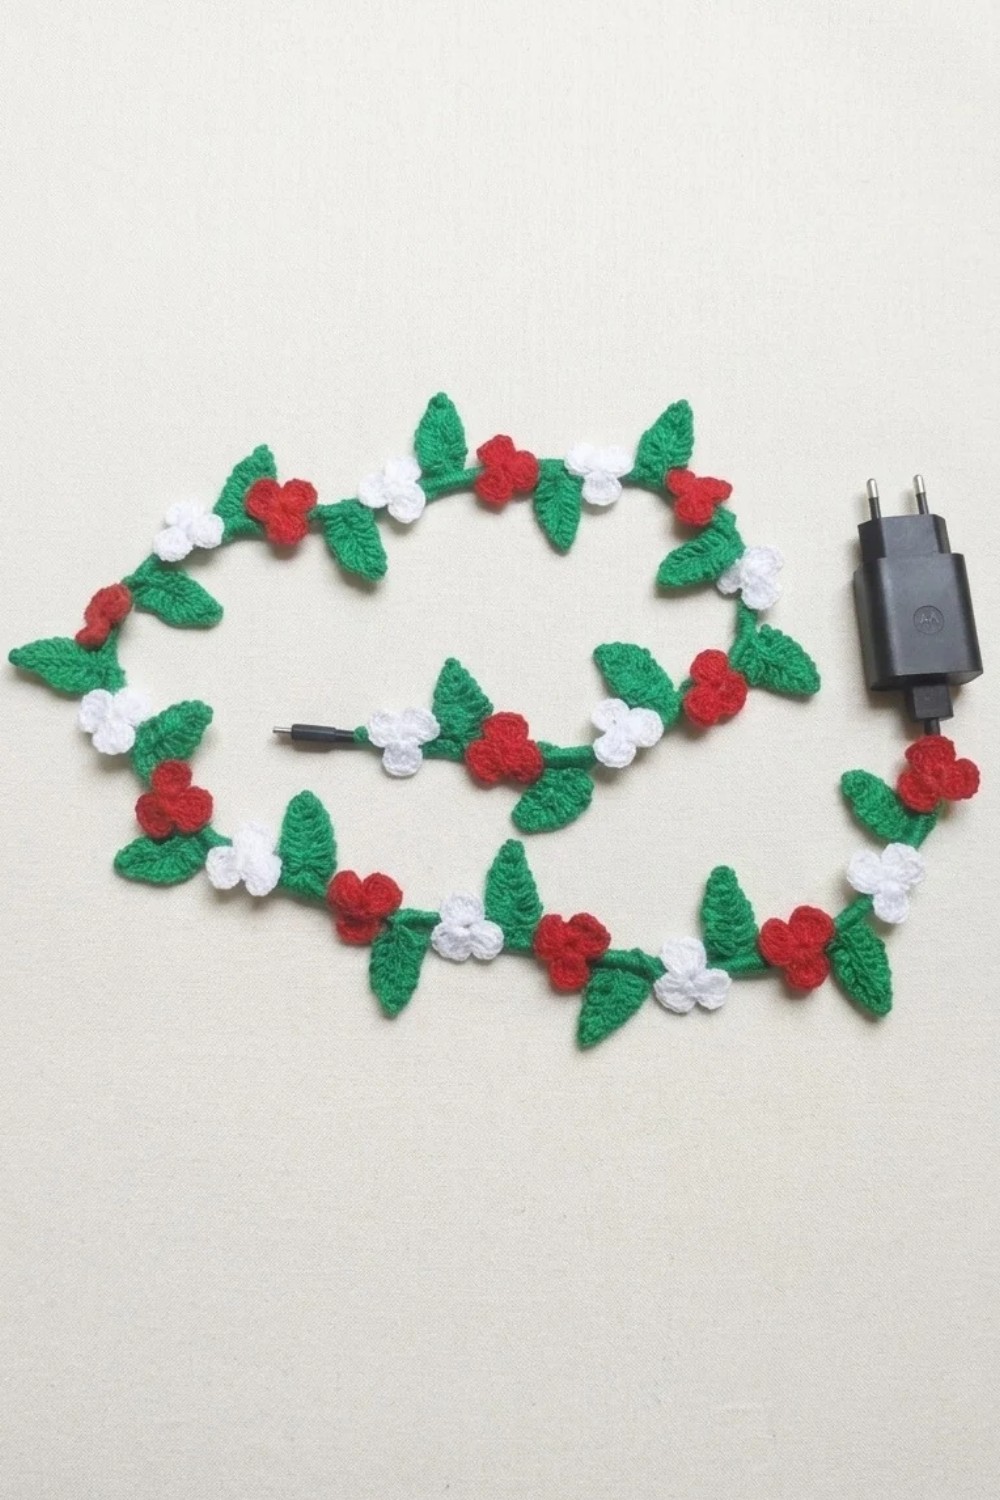
Conclusion
This decorative cable cover uses single crochet, Tunisian crochet leaves, and small flower appliqués to create a cheerful, nature-inspired look for any USB cable. By combining careful stitchwork, alternating leaf placement, and colorful flowers, the project ensures both durability and visual appeal. With flexible instructions and basic supplies, the result is a lively cable wrap that’s both protective and eye-catching.