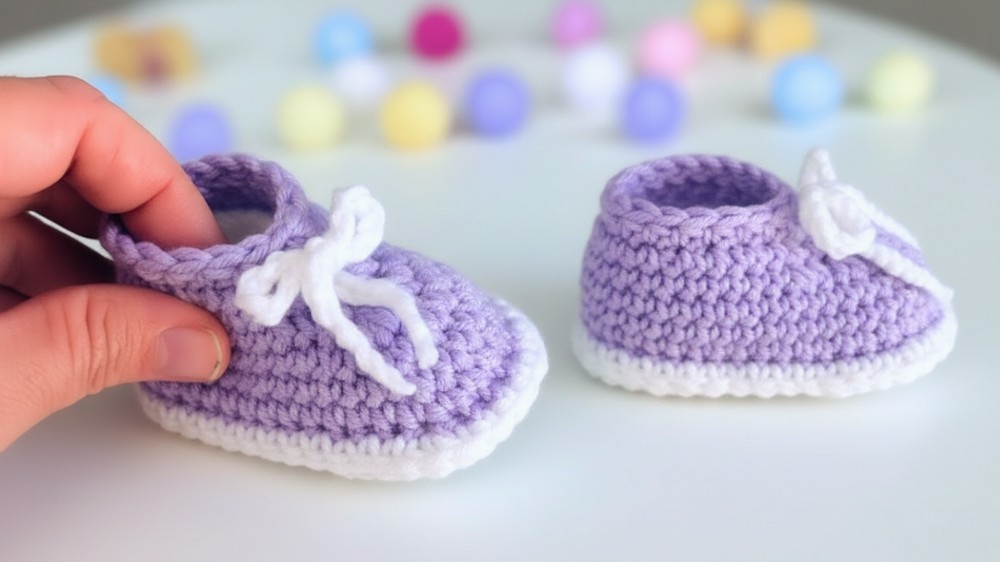
Tiny feet deserve tiny treasures, and nothing is sweeter than handmade baby booties. With a crochet baby booties pattern, you can create adorable, cozy footwear designed to keep those little toes warm while adding a touch of charm to any outfit. Perfect for newborns or baby shower gifts, these booties can be customized with soft, breathable yarns in colors that match outfits or seasonal themes.
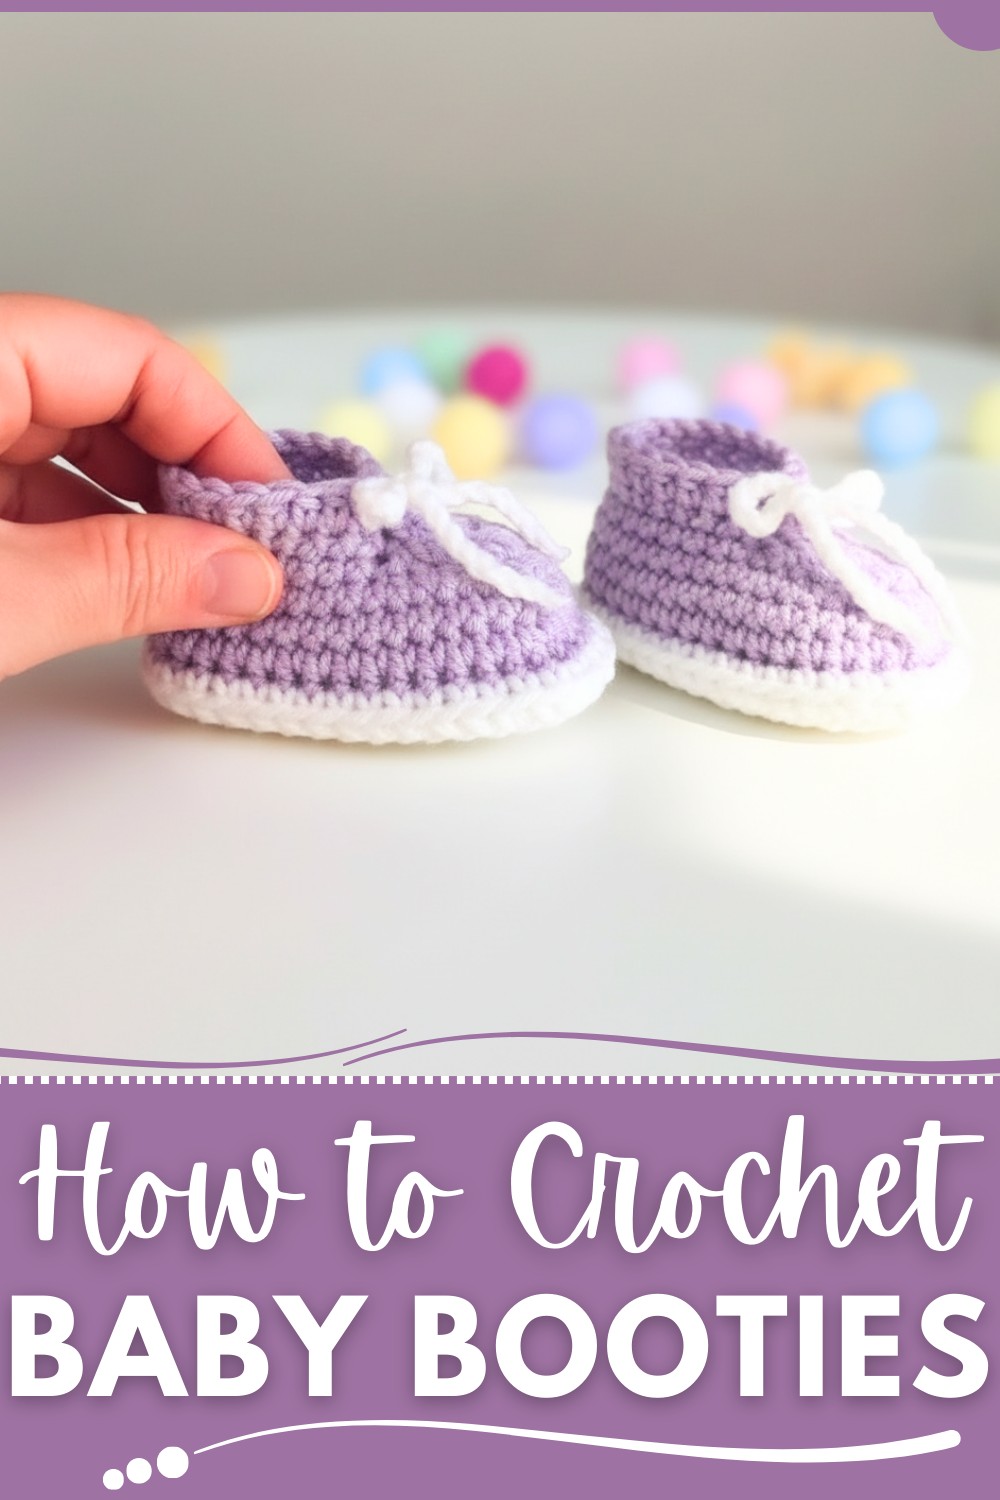
Whether styled with a cute romper for photoshoots or paired with snuggly pajamas, they’re both fashionable and functional. Beyond their cuteness, crocheting baby booties offers a rewarding way to make something meaningful, practical, and memorable. Lightweight and easy to stitch, this pattern is beginner-friendly and an ideal choice for crocheting thoughtful, personalized keepsakes.
Perfect Crochet Baby Booties Pattern for Baby Showers
Materials Needed
- Yarn:
- Hobby Lilac Mist Baby Kids Yarn or similar lightweight, soft yarn suitable for baby projects.
- Yarn weight: Lightweight (3 or DK).
- Hook Size:
- 4 mm crochet hook.
- Additional Tools:
- Stitch Markers: To help mark sections, such as for decreases.
- Scissors: For cutting the yarn.
- Tapestry Needle: For weaving in ends.
Gauge
- 5 double crochet and 2 rows = 2.5 cm (approximate gauge).
- Gauge is important to ensure the shoe measures correctly, especially the sole. Adjust your hook size if necessary.
Crochet Baby Shoe Pattern
This crochet baby shoe pattern provides step-by-step instructions to craft elegant and functional shoes for babies aged 0–3 months. The baby shoes are stylish, perfect as gifts, and relatively quick to make.
Special Techniques
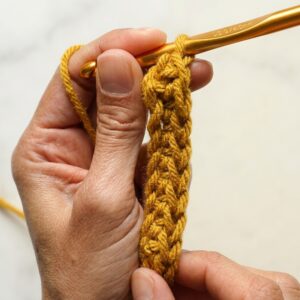
- Decreasing Single Crochet: Insert hook into a stitch, yarn over and pull up a loop, insert hook into the next stitch, yarn over, pull up a loop, yarn over, and pull through all three loops. This creates one stitch out of two.
- Back Loop Only (BLO): Insert hook into the back loop of the stitch only (not both loops) to create a ridge.
Pattern Instructions
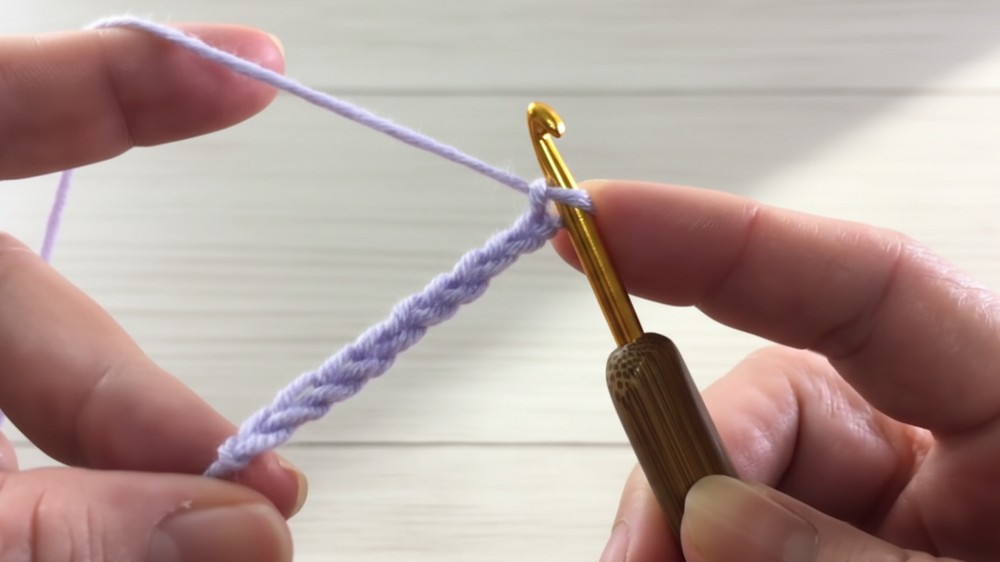
Step 1: Sole
- Foundation Row (Chain Stitch):
- Chain 10.
- Starting from the third chain from the hook, make 2 double crochets (DC) into the same chain.
- Continue making 1 DC in each chain until the second-to-last stitch.
- In the last chain, work 6 DC into the same space. (This forms the curve at the end of the sole.)
- Opposite Side of the Chain:
- Work 1 DC in each chain on the opposite side, covering the foundation chain.
- At the first chain where the row began, make 3 DC in the same stitch (matching the other curve).
- Join with a slip stitch to close the round.
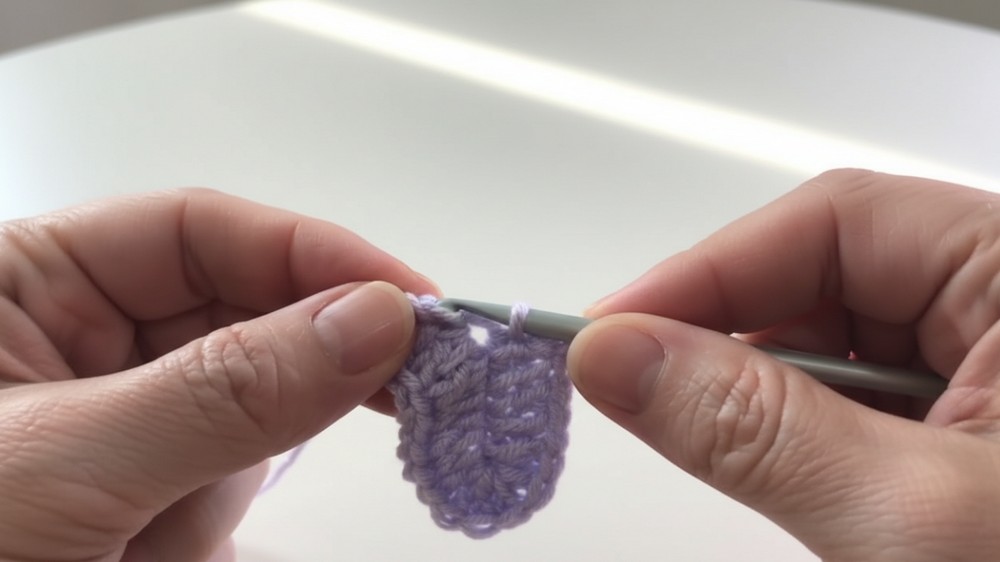
Step 2: Rounding the Sole
- Round 2: Increasing the Curves
- Chain 2 (counts as the first DC). In the same stitch, make 1 DC (first increase).
- Chain 1, then work 1 DC in the next stitch, 1 increase (2 DC in the same stitch).
- Repeat this for the first curve, making 3 increases in total before reaching the body of the sole.
- Continue making 1 DC in each stitch until you are 1 stitch before the 6 DC curve.
- At the 6 DC curve: Work 1 increase (2 DC in the same stitch) into each of the 6 stitches (12 DC total).
- Continue making 1 DC in each stitch until you reach a point before the next 3-DP cluster. Here, make 1 increase (2 DC in the same stitch) for each of the 3 previous increases.
- Join with a slip stitch to close the round.
The second round will now have a finished length of 9 cm.
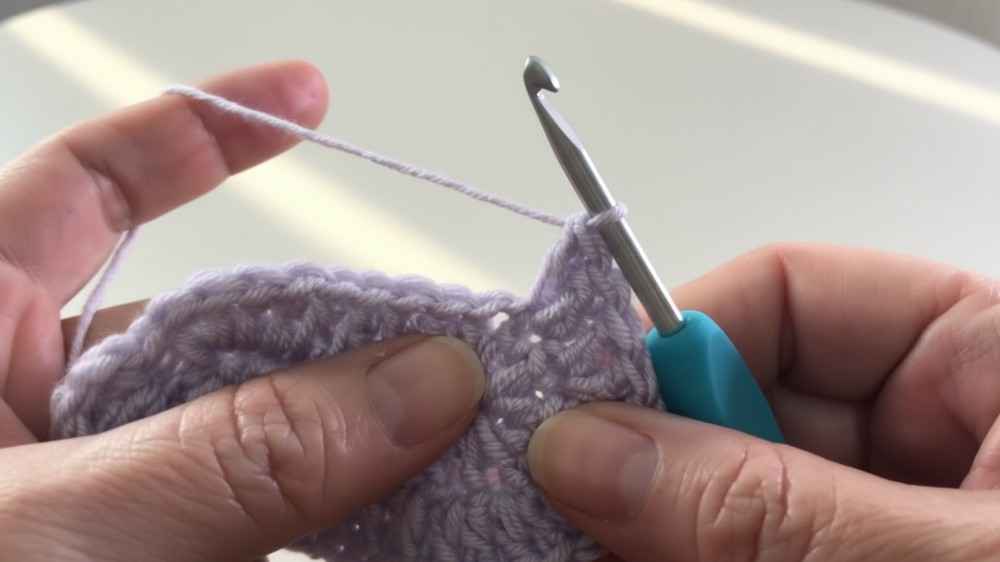
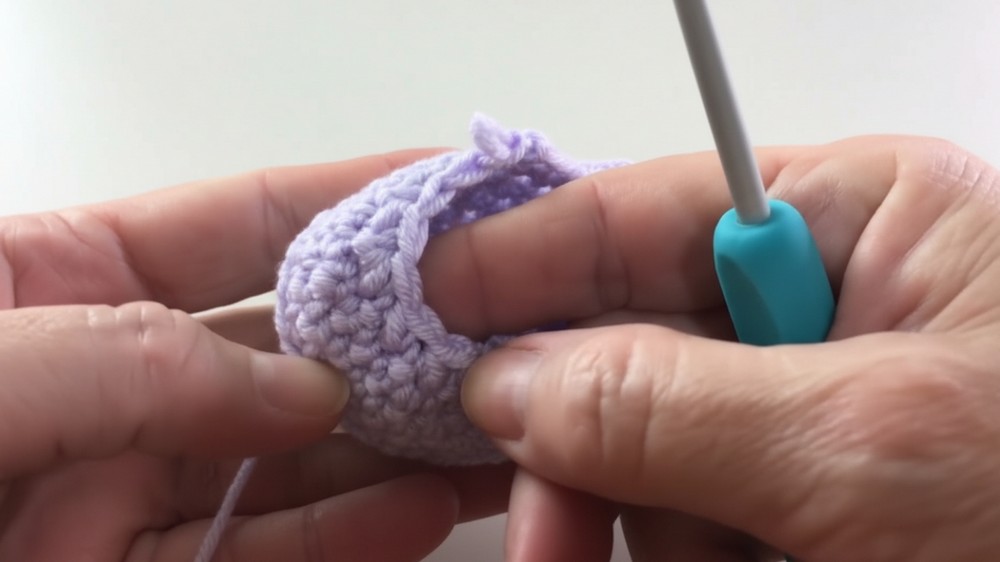
Step 3: Defining the Ridges (Walls of the Shoe)
- Round 3: BLO Single Crochet (SC):
- Chain 1. Work an SC while picking up only the back loop of each stitch for the entire round.
- Join with a slip stitch to close the row.
- Rounds 4 & 5:
- Chain 1. Work a single crochet (SC) normally (through both loops) for two additional rounds.
Step 4: Toe Decrease
- Mark the Toe Area:
- Fold the shoe in half lengthwise, matching the edges. Place stitch markers 8 stitches apart on either side of the fold (8 stitches will form the shoe's toe).
- Round 6: First Decrease Row:
- Chain 1. SC in each stitch up to the first marker.
- Start decreasing: Work 8 decreases (SC2tog) across the marked stitches.
- Continue with normal SC stitches to complete the round.
- Round 7: Second Decrease Row:
- Chain 1. Work SC in each stitch up to the start of the previous decrease zone. Work 4 decreases (SC2tog) at the toe.
- Finish with SC stitches for the remaining stitches in the round.
- Round 8: Third Decrease Row:
- Repeat the previous row but reduce to 3 decreases (SC2tog) at the toe.
- Round 9: Final Shaping:
- Work 2 decreases at the toe to refine the shape.
Step 5: Heel and Finishing Touch
- Round 10: Cleaning the Edges:
- SC evenly across the edge to create a smooth finish.
- Optional Final Row (Decorative Edge):
- Add a crab stitch (reverse single crochet) around the edge for a decorative touch.
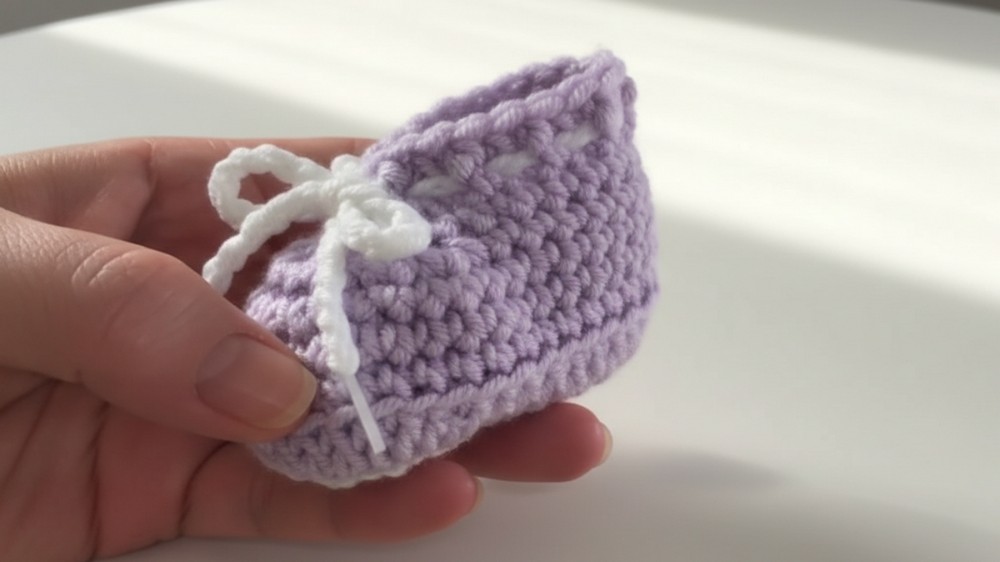
Finished Size
- Sole length: Approximately 9 cm, suitable for babies aged 0–3 months.
Tips for Success
- Tension: Maintain consistent tension, especially during the sole and decrease rows. Tight stitches result in a structured shoe.
- Stitch Markers: Use them to evenly identify areas for decreases and help maintain symmetry.
- Customization:
- For a larger size: Use a larger hook (e.g., 4.5 mm) or thicker yarn.
- For added personalization: Create small embellishments like bows or buttons to sew onto the shoe.
Optional Add-Ons
- Straps:
- Add a chain strap across the top of the shoe for a Mary Jane style. Attach one end to the edge and use a small button for closure.
- Double Sole:
- Add an extra sole for thickness and durability by attaching a second sole with slip stitches or sewing.
- Color Variations:
- Create stripes by switching yarn colors during the rounds or decorate edges with contrasting colors.
Conclusion
The crochet baby shoe is a timeless project that highlights skill, creativity, and utility. Its small size makes it quick to craft while allowing room for customization and personal flair.
The finished look reveals a structured, stylish baby shoe with a clean and cozy design. Whether for gifting, donating, or selling, these shoes bring joy to both maker and recipient.