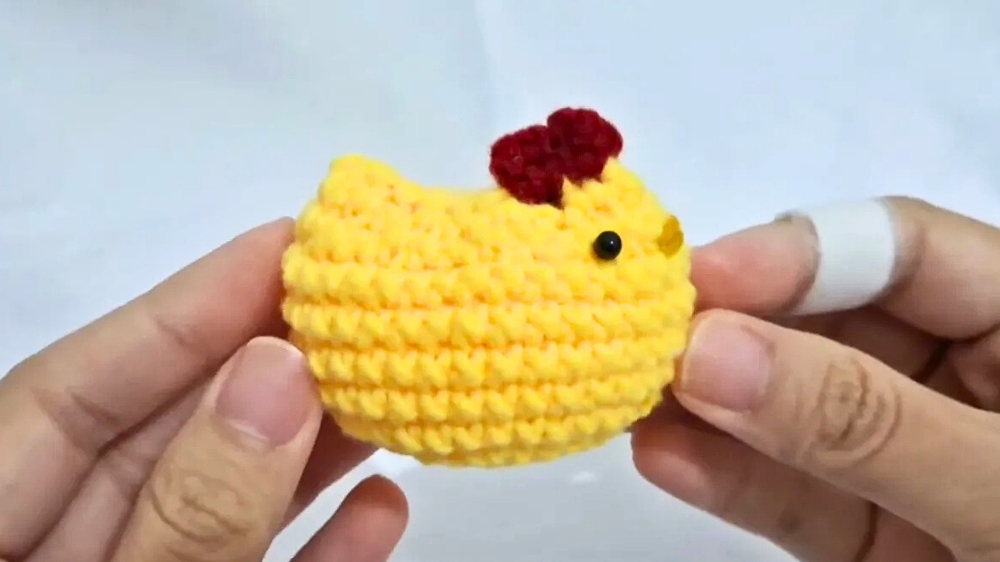
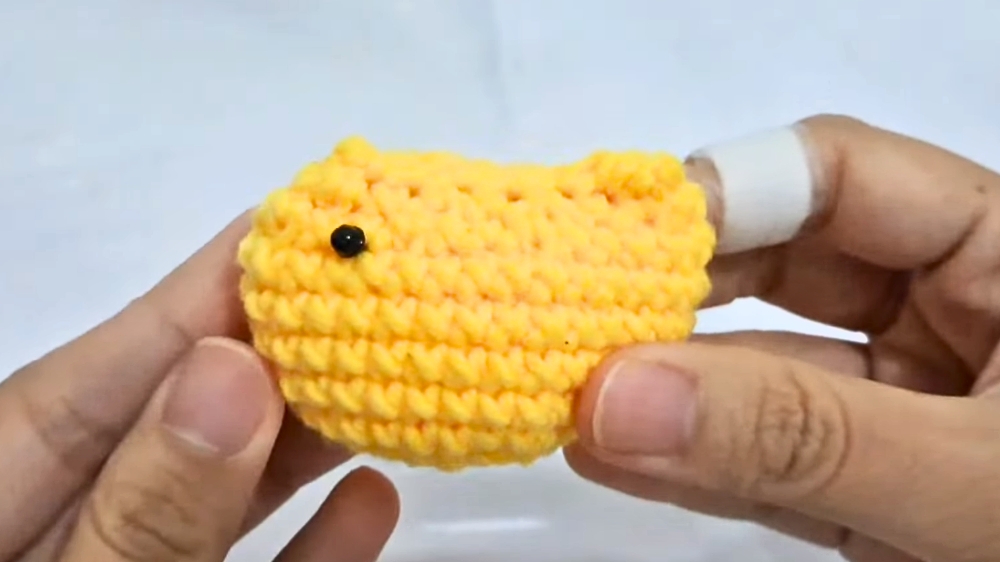
Carry cheerful charm everywhere with this Free Crochet Mini Chicken Keychain Pattern, adding a cute, handmade accent to keys, bags, or everyday essentials.
A bright morning on a small farm often begins with the soft clucking of hens and the cheerful pecking of tiny chicks. That same sense of playfulness and charm can be captured in a miniature crochet chicken keychain, offering a whimsical companion that brings personality to everyday items. Compact and lightweight, this keychain easily attaches to bags, backpacks, or keys, ensuring that a touch of handmade joy is always close at hand. Its cheerful appearance adds a fun accent while serving a practical purpose: keeping keys organized and easily accessible.
Cozy Crochet Mini Chicken Keychain Pattern for Handmade Gifts

The mini chicken’s features include a plump body, tiny wings, and a delicate beak, all proportioned to maintain a soft, friendly look. Its durable construction ensures it withstands daily use, while the keyring attachment provides convenience for on-the-go lifestyles. Beyond utility, this accessory makes a thoughtful gift, perfect for friends, family, or anyone who appreciates small, playful details.
Versatile in function and charming in form, the mini chicken keychain combines practicality with a hint of whimsy. Its handmade appeal encourages smiles and adds a personalized touch to everyday essentials, transforming ordinary keys or bags into cheerful, eye-catching statements that brighten both daily routines and special occasions.
Special Features
- Compact and Playful Design: The mini chicken kit is adorably small, making it suitable for decorations or toys.
- Detailed Comb and Eyes: Features a carefully designed comb and safety eyes that enhance the overall appeal.
- Ease of Construction: Uses foundational crochet techniques, ensuring accessibility for beginners while still being fun for advanced crocheters.
- Quick Project: Can be made in a short time, making it ideal for markets or last-minute gifts.
- Customizable Details: You can adjust the colors and add personalized touches to make it unique.
Level of Difficulty
Beginner-Friendly
- This project features simple stitches—magic ring, single crochet, increases, and decreases—which are clear and repetitive.
- While the comb is slightly more intricate, the tutorial provides step-by-step clarity, making it achievable for both beginners and intermediate crocheters.
Materials Needed
To create the mini chicken kit, you will need:
- Yarn: Specific yarn type and colors weren’t mentioned, but you’ll want soft, medium-weight yarn in desired shades for the chicken body, comb, and beak.
- Crochet Hook: Recommended hook size wasn’t clearly outlined, but you can likely use a 3-4 mm hook for similar results.
- Stuffing Material: Polyfill or any suitable stuffing for shaping the chicken.
- Safety Eyes: 4 mm plastic safety eyes (or alternative plastic eyes).
- Darning Needle: For sewing and weaving in yarn ends.
- Scissors: Needed to cut the yarn.
Step-by-Step Instructions
1. Crocheting the Chicken Body
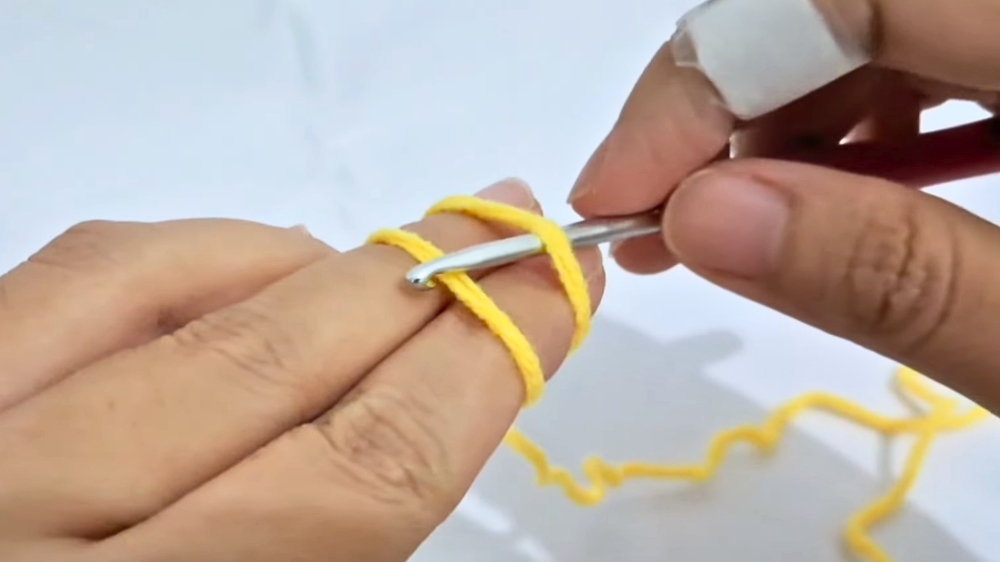
- Start with a Magic Ring:
- Wrap the yarn around your fingers, hook under the first yarn strand, and hook into the second strand. Pull through to form the magic ring, securing it with a chain.
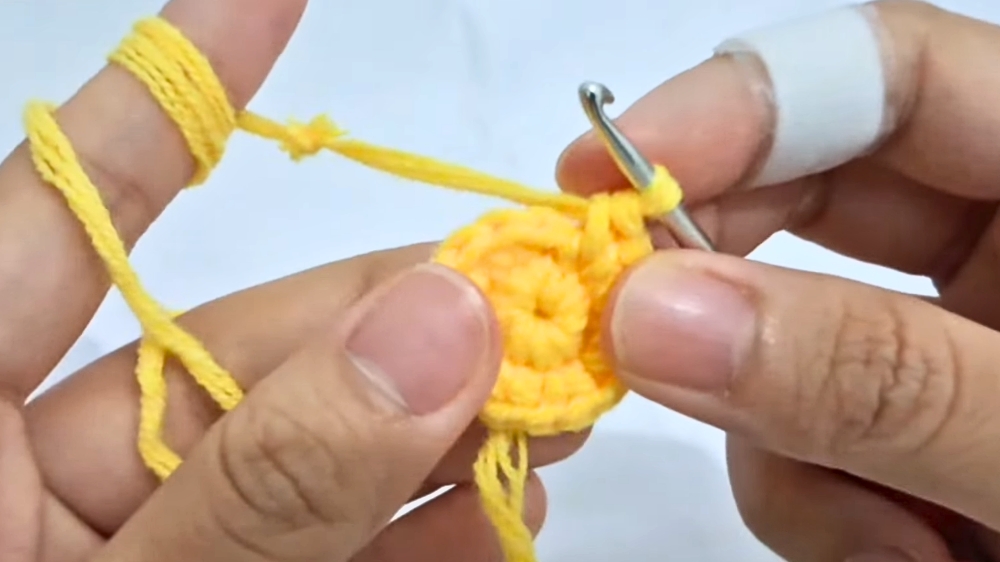
- Round 1 - Single Crochet:
- Insert the hook into the ring, yarn over, pull through, yarn over again, and pull through both loops. Make 8 single crochets total into the ring.
- Pull the tail to close the ring.
- Round 2 - Increase:
- Begin with a single crochet, then add another single crochet into the same stitch to create an increase. Repeat this process for each stitch in the round (resulting in 16 stitches).
- Round 3 - Alternate Single Crochets and Increases:
- Start with one single crochet, then perform an increase in the next stitch. Repeat this pattern (single crochet + increase) until the round is complete.
- Round 4 - Two Single Crochets + Increase:
- Begin with two single crochets, then perform an increase on the following stitch. Repeat this pattern (two single crochets + increase) until the round is done.
- Rounds 5-9 - Single Crochet Only:
- For these rounds, make one single crochet in every stitch to build the shape of the chicken body.
- Round 10 - Two Single Crochets + Decrease:
- Perform two single crochets, then create a decrease. For the decrease: insert the hook into the front loops of two consecutive stitches, yarn over, pull up a loop, yarn over again, and pull through all loops. Repeat this sequence (two single crochets + decrease) until the end.
- Round 11 - Single Crochet + Decrease:
- Begin with one single crochet, followed by a decrease. Continue alternating between single crochet and decrease until the round is complete.
Stuffing & Eyes Installation
- Stuffing: Add polyfill stuffing to shape the chicken body, ensuring the body is firm but still squishy.
- Adding Eyes: Place 4 mm plastic eyes between rounds 9 and 10. If using safety eyes, install them before closing the body entirely.
Closing the Body:
- Cut the yarn, leaving a long tail for sewing. Use the tail to sew the chicken opening closed, securing it neatly. Weave in the tail to finish.
2. Making the Chicken Comb
- Slip Knot:
- Wrap the yarn around your fingers and hook under the first strand, pulling through the second strand. Tighten into a slip knot.
- Chain Base:
- Insert the hook into the second hole from the left and create 2 chains on the base.
- Half Double Crochet:
- Yarn over the hook, insert into the stitch, yarn over, pull up a loop (3 loops now on the hook), yarn over again, and pull through all loops.
- Two Chains + Slip Stitch:
- After completing the half double crochet, make two chains, then slip stitch into the same stitch.
- Repeat for Next Stitch:
- Move to the next stitch and repeat the sequence (half double crochet + chains + slip stitch).
- Finish the Comb:
- Cut the yarn and weave in the ends.

3. Adding Mouth & Final Details
- Add Beak: Crochet a mouth detail using yarn and place it beneath the eyes. Specific steps for the beak aren’t fully outlined but can be creatively modified to suit your needs.
- Secure with Final Weaving: Ensure all yarn tails are sewn and tucked in neatly for a polished finish.
Tutor's Suggestions
- Install Eyes After Shaping: While safety eyes may need early installation, adding eyes at the end (if possible) allows better placement based on the chicken’s final form.
- Perfect for Beginners: The project focuses on techniques that beginners often practice (magic ring, single crochet, and simple increases/decreases).
- Fast Completion: This crochet chicken can be completed quickly, making it ideal for markets or gifts.
Uses
- Crochet Market Item: These mini chickens are small, quick, and popular at craft sales.
- Gifts: Perfect for kids, home decor, or themed gifts for animal lovers.
- Decor: Use it as a quirky addition to your workspace, living room, or kitchen.
Tip
When working decreases, always insert into the front loops only. This ensures the stitches tighten neatly, resulting in smoother shaping for the chicken’s body.
Conclusion
The mini crochet chicken kit is a delightful project for beginner and experienced crocheters alike. Featuring simple construction techniques, creative details like a comb and safety eyes, and opportunities for customization, it quickly becomes a fun and fulfilling project.