
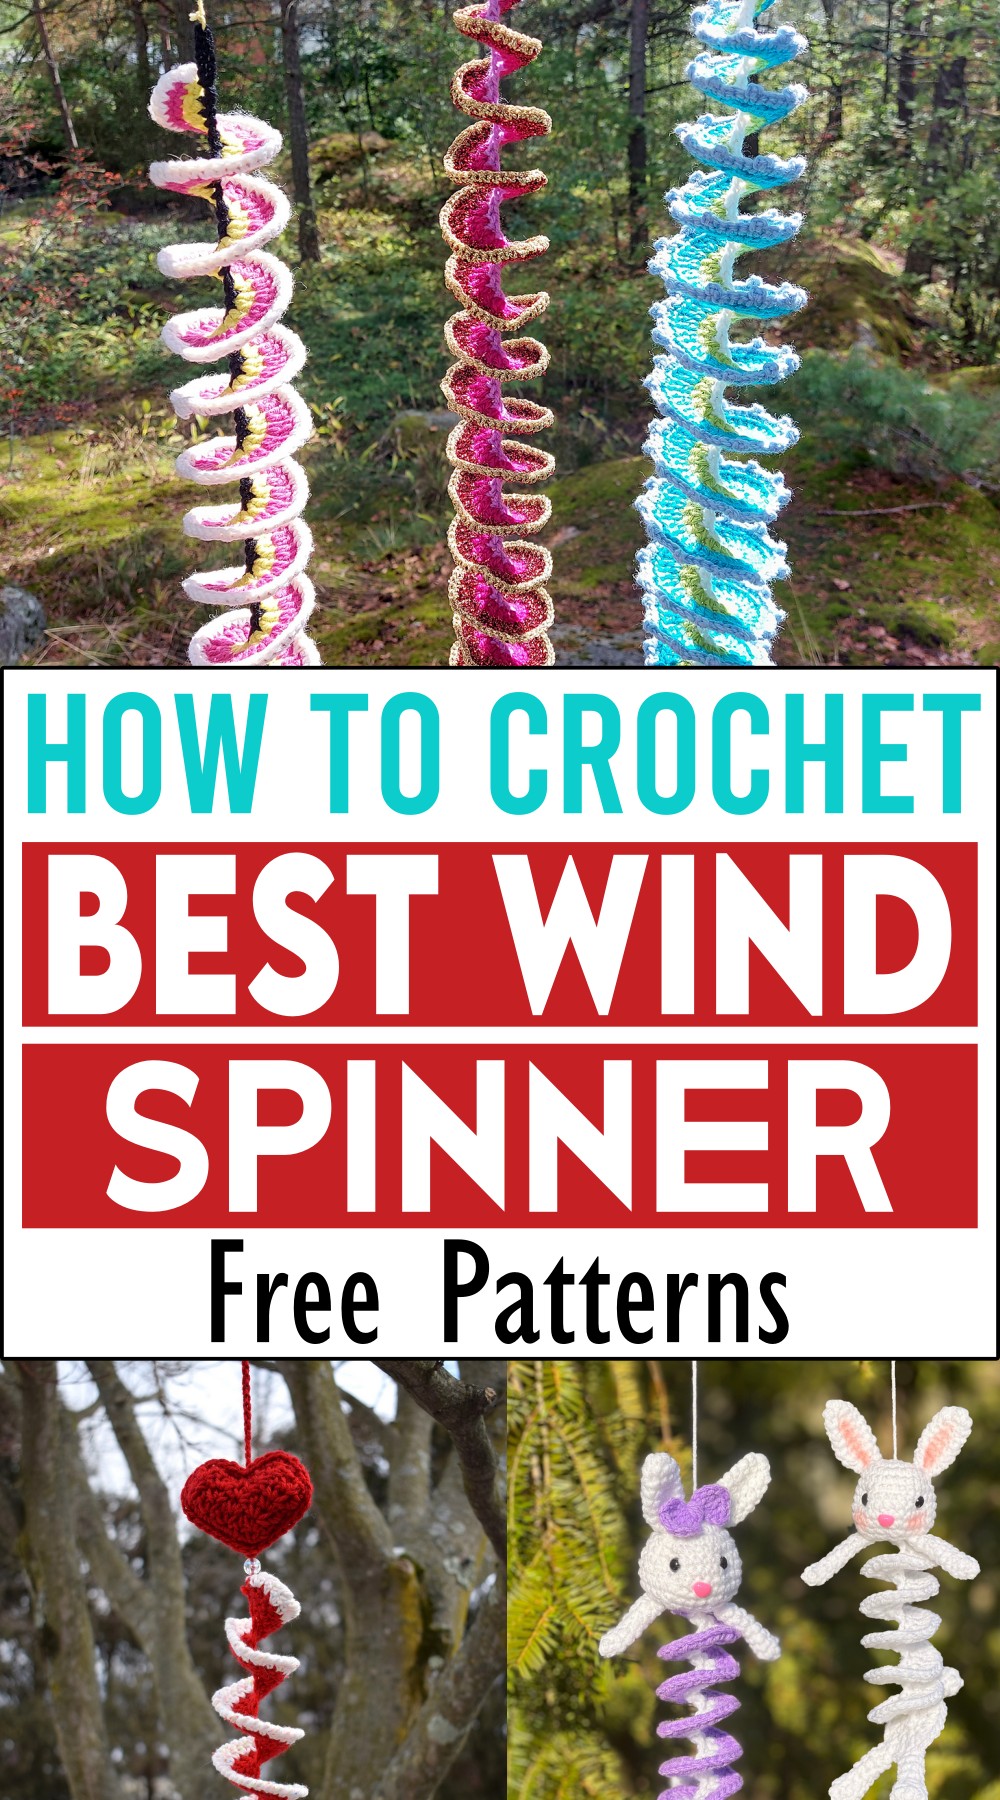
Let's make a super adorable Crochet Wind Spinner following the simplest list of patterns we are providing. It's usually a soft, fluffy little bunny that spins charmingly in the breeze. It's got big, cute ears and a sweet little face that just makes you smile. We've got some really easy patterns for you to follow so you can make your own and add a touch of magic to your room or garden. They are not only a fun project to work on but also incredibly satisfying to see your cute bunny spinner come to life. With just a bit of yarn and some simple crochet moves, you'll have a beautiful spinner that looks amazing wherever you decide to hang it.
Crochet Wind Spinner
Wind Spinner
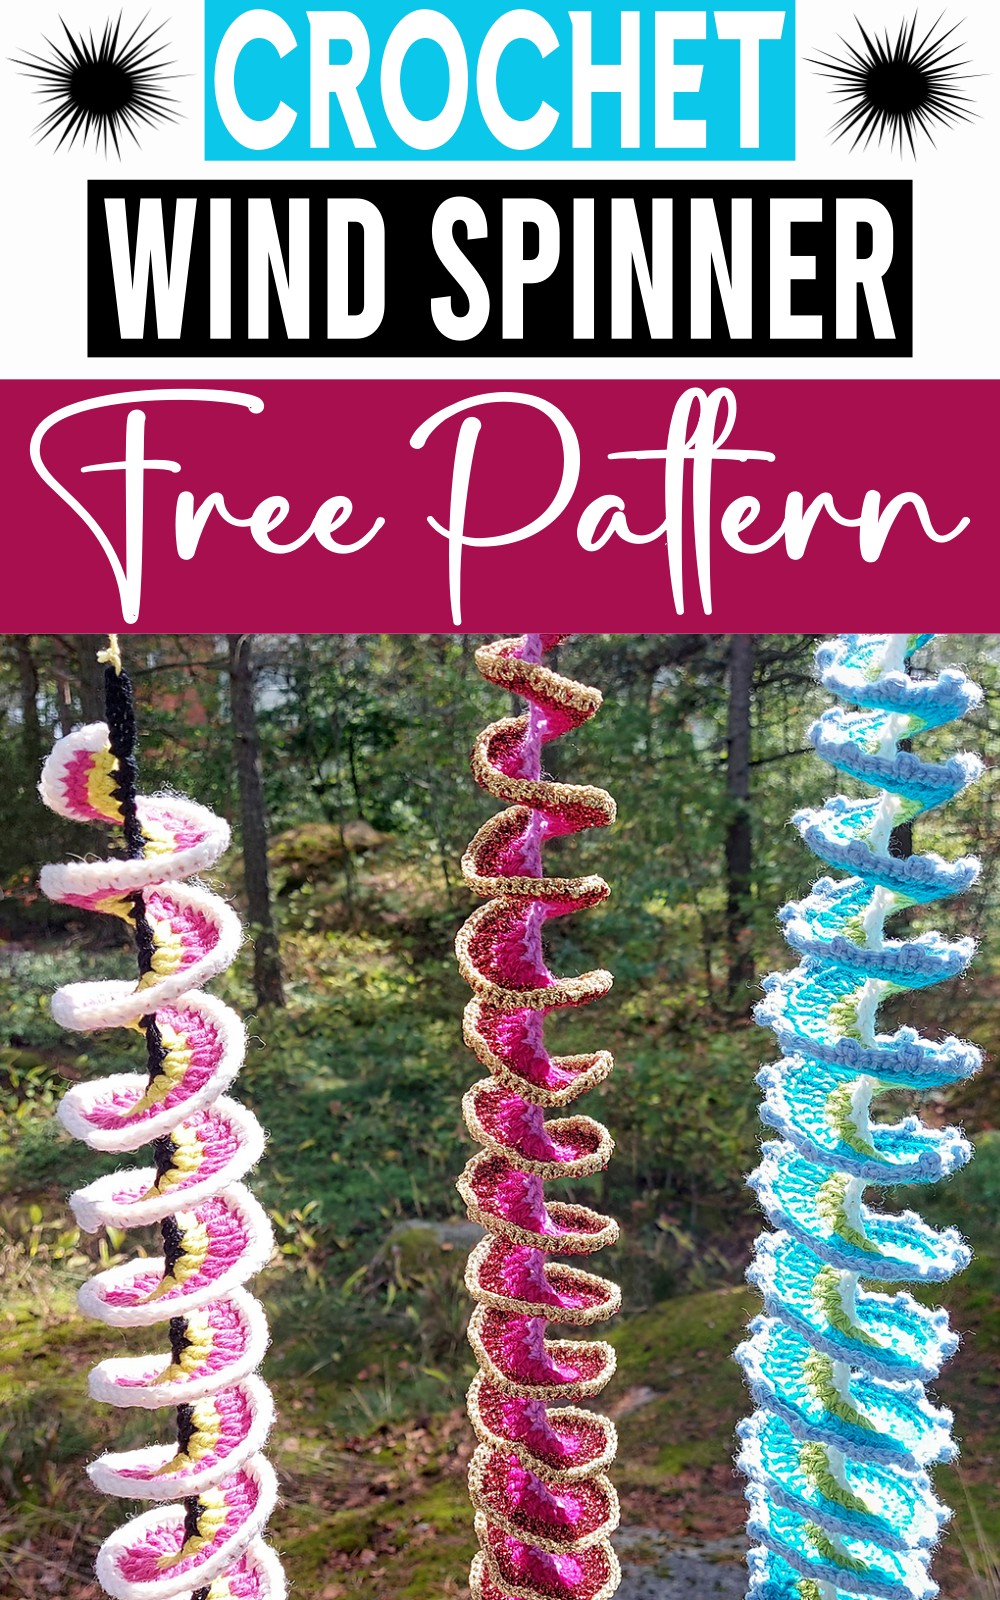
Give your home a cool twist with this crochet wind spinner pattern! Made with colorful yarns of your choice, this pattern guides you to create an enchanting spiral that pirouettes gracefully in the wind. The hypnotic twirling movement, coupled with a striking blend of colors, is bound to captivate anyone who sees it.
You can adorn your outdoor patio or even your interior spaces with this DIY ornament. Not to mention, beyond the joy of creation, this engaging pattern is an excellent way to practice and upgrade your crochet skills. Give it a shot, and marvel at the captivating charm that your crafted wind-spinner brings!
Materials Needed
- Up to 4 colors of yarn, similar weight.
- A crochet hook compatible with your yarn.
- Stitch marker (or piece of yarn).
- Thread or fine cord for hanging the spinner.
Abbreviations (US crochet terms)
- Ch – Chain
- Yo – Yarn over
- St, Sts – Stitch, stitches
- Fsc – Foundation single crochet
- Sc – Single crochet
- Hdc – Half double crochet
- Dc – Double crochet
Crochet Wind Spinner Pattern
Start, Row 1:
- Fsc the length you want your spinner to be.
- Cut off yarn.
- Add stitch marker to the start of the piece.
Row 2:
- Start at stitch marker. Join new color yarn.
- 2 sc in 1st st, (2 sc in next st), repeat 8 more times.
- (2 hdc in next st), repeat 9 more times.
- Repeat (2 dc in next st) until you have 20 sts left in the foundation chain.
- (2 hdc in next st), repeat 9 more times.
- (2 sc in next st), repeat 9 more times.
- Cut off yarn.
For Row 3:
- Start at stitch marker. Skip 1st st.
- Join new color yarn.
- (2 sc in next st, ch1), repeat 6 more times.
- (2 hdc in next st, ch1), repeat 6 more times.
- Repeat (2 dc in next st, ch1) until you have 14 sts left in the foundation chain.
- (2 hdc in next st, ch1), repeat 6 more times.
- (2 sc in next st, ch1), repeat 6 more times.
- Cut off yarn.
Row 4, Edging:
- Start at the stitch marker.
- Join new color yarn.
- Sc in the back loop of every st of the previous row (including chain stitches).
- Fasten off, and weave in yarn ends.
Finishing:
- Shape the spiral.
- Add a piece of thread or cord for hanging to the end that has the stitch marker.
- Remove stitch marker.
- Hang the wind spinner.
Additional Tips:
- You can also add embellishments like tassels, beads, pompoms, crystals, bells, battery-operated LED lights, or ribbons to decorate your wind spinner.
- The pattern is designed to be repeated, enabling customization for the desired length of the spinner.
Heart Wind Spinner
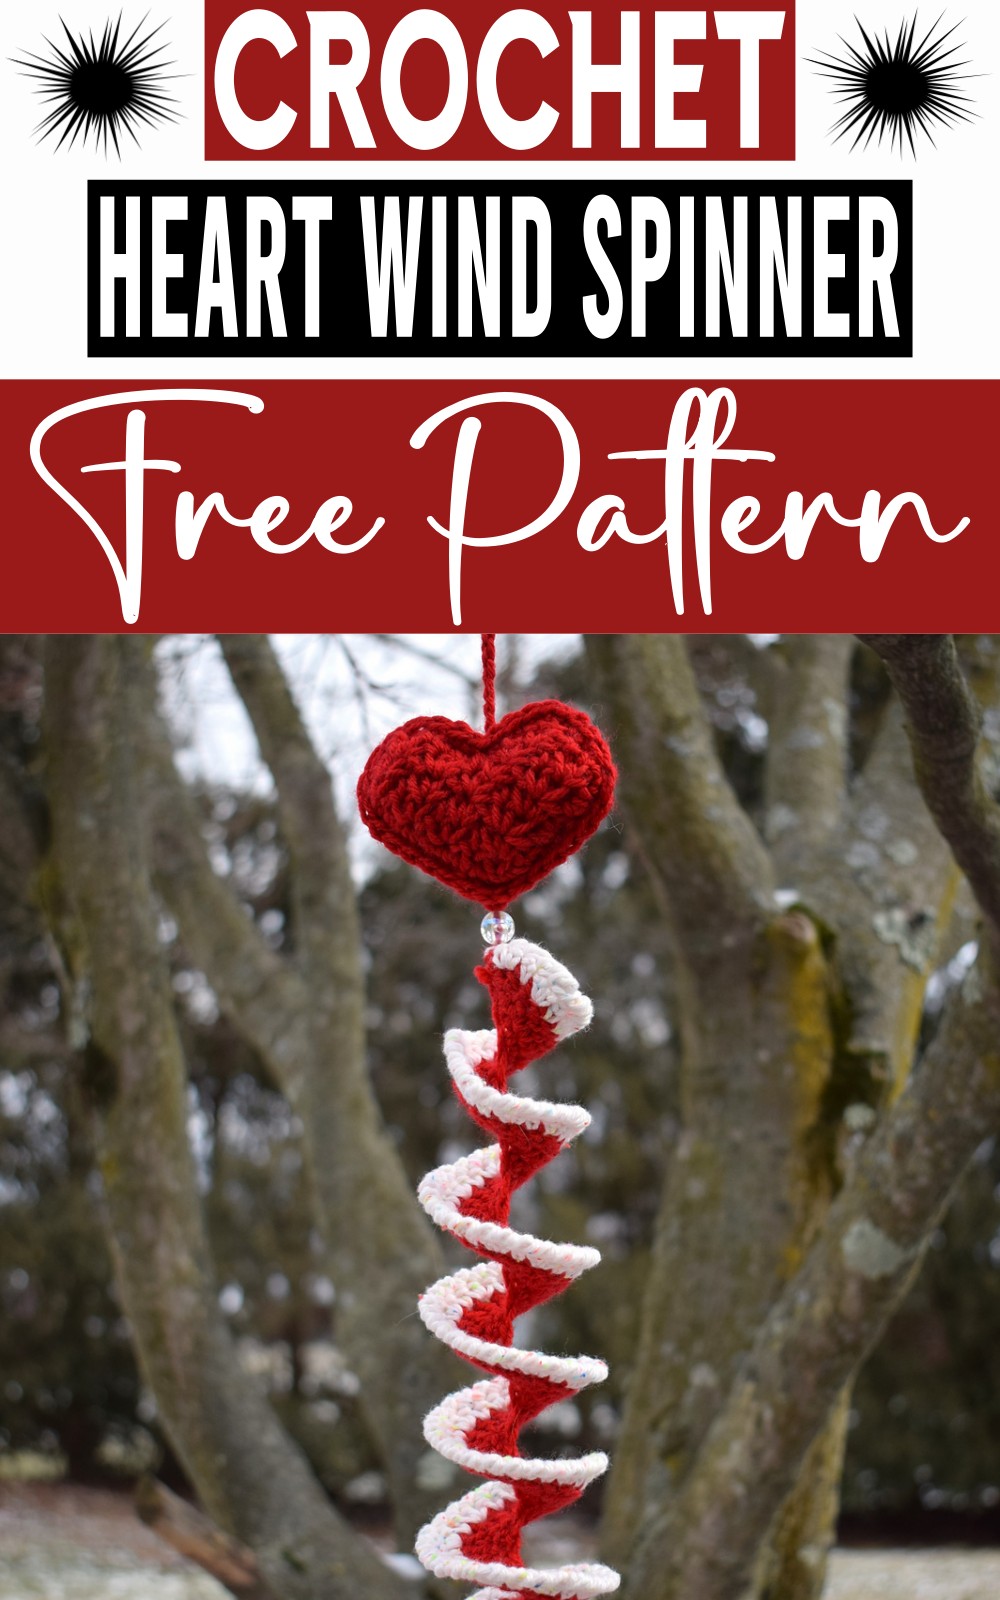
This crochet heart wind spinner is truly a delightful creation; that harmonious blend of colors combined with the lovable heart shape and the twirling motion creates a truly dazzling visual spectacle. As you watch it pirouette in a gentle breeze, it's bound to bring joy and warmth into your day. It's the perfect accessory to animate any space, serving as a symbol of stylization and comfort.
Materials Needed
- 40 Yards (Main Color, referred to A) and 35 Yards (Accent Color, referred to B) of #4 Worsted Weight yarn (like Lion Brand Vanna’s Choice or Red Heart Super Saver, or others of similar thickness and stiffness)
- (G) 4.5 mm crochet hook
- Yarn needle
- Scissors
- 12mm beads
- Poly-fil
- Glue
Abbreviations (US crochet terms)
- Ch – Chain
- St, Sts – Stitch, stitches
- Sl st – Slip stitch
- Sc – Single crochet
- Esc – Extended single crochet
- DC – Double crochet
- Yo – Yarn over
Special Stitches
- Reverse Sc (aka – crab stitch): sc across the row working from left to right rather than from right to left. It’ll be like you are working backward across the row.
- Extended Single Crochet (Esc): insert hook in st, yo, pull through, yo, pull through 1 loop, yo, pull through 2 loops.
Crochet Heart Wind Spinner Pattern
Puffy Heart (Make 2):
Starting with yarn color A, ch 8. Leave a 7-inch tail.
- Row 1: In the second ch from hook, (Sc, ch 1, sc). Repeat from *across, turn - 8 sc, 4 ch sps.
- Rows 2-3: Ch 1, (sc, ch 1, sc) in each ch-1 sp across, turn - 8 sc, 4 ch sps.
- Row 4: Ch 1, (sc, ch 1, sc) in the first two ch-1 sp. Leave the rest of the row unworked - 4 sc, 2 ch sps.
- Rows 5-6: Ch 1, (sc, ch 1, sc) in each ch-1 sp across, turn - 4 sc, 2 ch sps.
- Border Round: Sc evenly around the heart, adding (sc, ch 1, sc) at the bottom and a sl st at the top.
After finishing one puffy heart, repeat to make the second one. But don't fasten off after the second border round.
Join Hearts:
Place the second heart over the first and with the yarn still attached to the second heart, sc evenly in both layers around the hearts, using 3 sc at the bottom and a sl st at the top. Leave a few stitches unworked at the top, stuff with Poly-fil, then close the heart with sc stitches, finishing with a sl st to join. Fasten off.
Spinner:
Now you'll work on the spinner. With yarn color A, ch 41.
- Row 1: 2 sc in the second ch from hook, 2 sc in each ch across - 80 sts.
- Row 2: Ch 2, 2 dc in first, dc in next. Repeat from *across - 120 sts. Then join with yarn color B.
- Row 3: With yarn color B, 2 esc in first, esc in next. Repeat from *across - 180 sts.
- Row 4: Working from left to right, ch 1, reverse sc in each st across to last, turn, sl st in last.
Fasten off. Use the tail from yarn color B to add a bead to the bottom of the spinner.
Top Beads & Joining Heart to Spinner:
With the 7-inch tails from the puffy heart, tie a knot at the base as close to the heart as possible, add 2 beads, and attach the strands to the short edge of the spinner at Row 3.
Hanging Strand:
Cut a 16-inch strand of color A. Attach it to the top center of the puffy heart, bringing the ends together evenly and tie a knot to keep the strand about 5-6 inches long. Position the knot against the puffy heart fabric and weave the ends into the heart. Finally, twist the spinner evenly in one direction.
Following these steps will help you create an adorable heart-shaped spinner, a perfect decoration to add a touch of charm to your home.
Bunny Wind Spinner
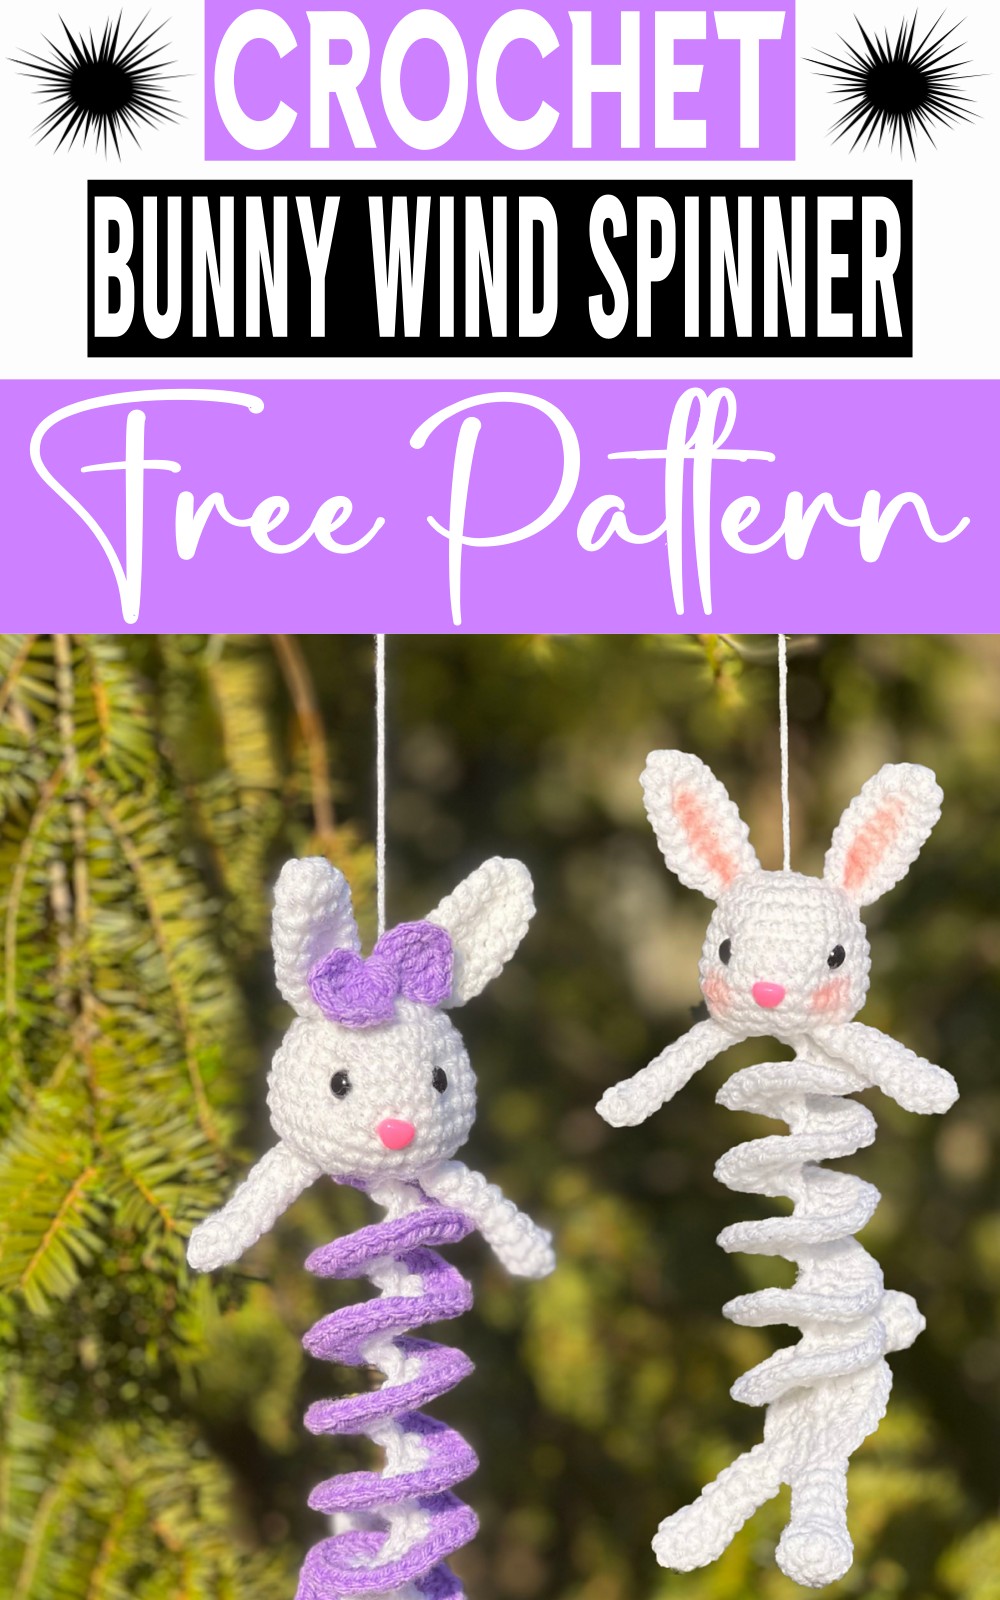
This is a lovable crochet Bunny Wind Spinner project that can be used as a decor piece at your home or as a charming gift.
Materials:
- Worsted weight yarn (white and other colors for highlights)
- 4.5mm crochet hook
- Scissors
- Yarn needle
- Stitch markers
- Safety eyes and safety nose (or alternative: yarn and needle to embroider these features)
- Polyfill stuffing
- Optional: blush or eyeshadow, fabric markers for coloring
Head:
- Magic circle, 8sc in the ring (Round 1)
- 2sc in each stitch around (Round 2)
- (2sc in next, 1sc in next) around (Round 3)
- 1sc in each stitch around (Round 4)
- (2sc in next, 1sc in next 3 stitches) around (Round 5)
- For the next 3 rounds - 1sc in every stitch around (Rounds 6-8)
Decrease pattern:
- (Sc2 together, 1sc in next 3 stitches) around (Round 9)
- (Sc2 together, 1sc in next 2 stitches) around (Round 10)
- (Sc2 together, 1sc in next stitch) around (Round 11)
After Round 11, attach safety eyes and safety nose, then stuff the head with polyfill.
- (Sc2 together) around for the final round of the head (Round 12)
Ears:
- Magic circle, 6sc in the ring (Round 1)
- (2sc in next, 1sc in next 2 stitches) around (Round 2)
- 1 sc in each stitch around, then perform 3 rounds of 10sc each (Rounds 3-5)
Decrease pattern:
- (Sc2 together, 1sc in next 3 stitches) around (Round 7)
- (Sc2 together, 1sc in next 2 stitches) around for the final round of the ears (Round 8)
Spinner Body:
- 31 chain stitches, starting with a slipknot
- Sc in the second chain from the hook, then sc in the rest of the chains for the first row (Row 1)
- Chain 1 (counts as 1st sc), then 2sc in the rest of the stitches across for the second row (Row 2)
- Chain 2 (counts as 1st hdc), then 3hdc in the same stitch, and then 3hdc in the rest of the stitches across (Row 3)
Hands:
- Magic circle, 4sc in the ring (Round 1)
- (2sc in next, 1sc in next stitch) around (Round 2)
- 1sc in each stitch around for the next 6 rounds (Rounds 3-8)
Legs:
- Magic circle, 6sc in the ring (Round 1)
- (2sc in next 3 stitches, 1sc in next 3 stitches) around (Round 2)
- 1sc in each stitch around for the next round (Round 3)
Decrease pattern:
- (Sc2 together, 1sc in next 3 stitches) around (Round 4)
- 1sc in each stitch around for the next 4 rounds (Rounds 5-8)
Tail:
- Magic circle, 6sc in the ring (Round 1)
- 2sc in each stitch around (Round 2)
- (Sc2 together) around for the final round of the tail (Round 3)
Final Assembly:
- Stitch the head, ears, tail, spinner body, hands, and legs together as per the video reference.
This is a lovable crochet project that can be used as a decor piece at your home or as a charming gift.


