Having a little husky puppy, not one that jumps or barks, but one that's always ready for a cuddle. This isn't just any puppy; it's a crochet husky puppy amigurumi, made with love from yarn. It has the fluffiest yarn body, big, bright button eyes, and a nose that's always in the mood for a gentle boop.
Crochet Husky Puppy Amigurumi Pattern
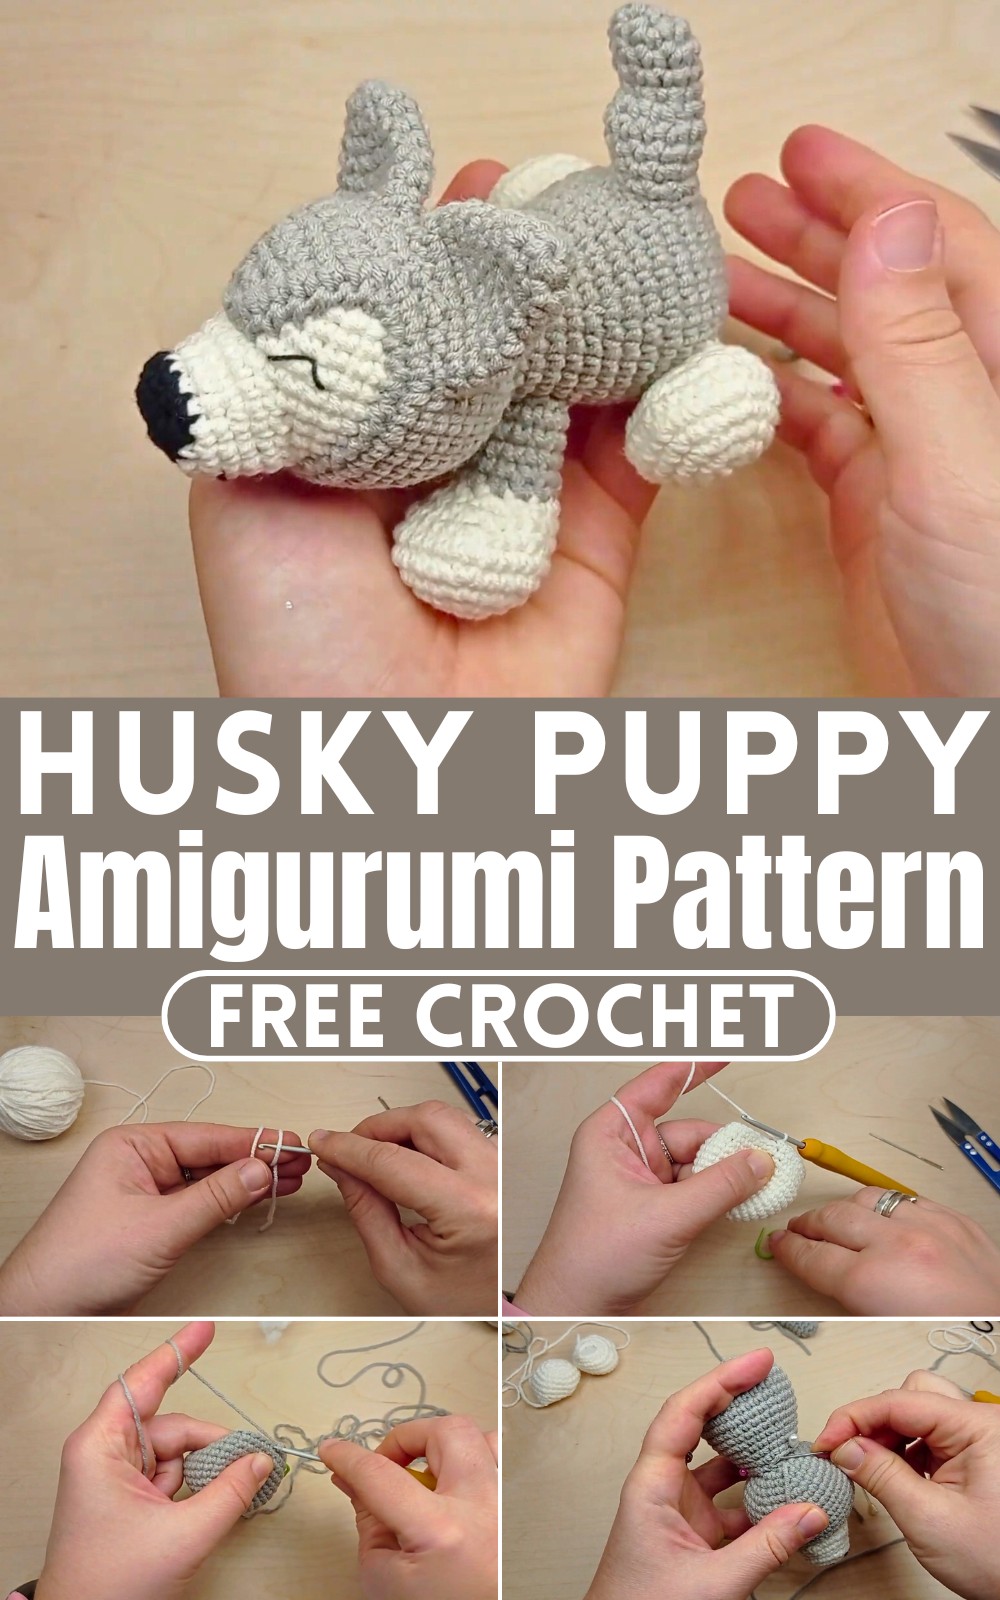
This handmade amigurumi friend is waiting for you to bring it home and share all your secrets and stories. Whether it sits by your bedside or joins you on adventures, this crochet husky puppy promises to be your soft, silent, and ever-smiling companion, bringing cozy warmth and a dash of joy into your days.
Materials Needed:
- Beige and gray yarn (white can be substituted for beige)
- Black yarn for the nose and embroidering details
- Crochet hook according to your yarn's recommendation
- Darning needle
- Fiberfill for stuffing
- Scissors
- Stitch markers (optional)
Head (Make 2 Parts):
Start with beige or white yarn:
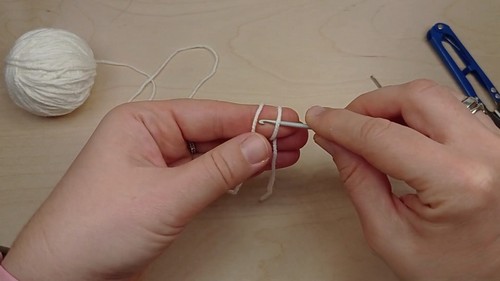
- Round 1: Make a magic ring and crochet 6 single crochets into it.
- Round 2: Crochet 2 single crochets in each stitch around (12 stitches).
- Round 3: Single crochet in the next stitch, then 2 single crochets in the following stitch. Repeat from * to * around (18 stitches).
- Round 4: Single crochet in the next 2 stitches, then 2 single crochets in the following stitch. Repeat from * to * around (24 stitches).
- Round 5: Single crochet in the next 3 stitches, then 2 single crochets in the following stitch. Repeat from * to * around (30 stitches).
- Round 6: Single crochet in the next 4 stitches, then 2 single crochets in the following stitch. Repeat from * to * around (36 stitches).
- Rounds 7-11: Single crochet in each stitch around.
Switch to gray yarn for the second part of the head and follow the same steps as above through Round 11, then:
- Rounds 12-13: Single crochet in each stitch around (36 stitches).
- For the next round, start crocheting a triangle pattern for the detail on the Husky's forehead.
Small Triangle on Head:
- Crochet single crochet in the first 22 stitches, then turn your work to start the triangle.
- Follow a pattern of decreasing each row to form a triangle, ending with a slip stitch.
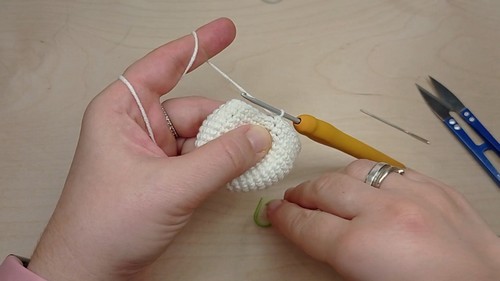
Nose:
- With black yarn, chain 2. In the first chain from the hook, work an increase (2 single crochets in one chain), chain 1 and turn.
- Follow the pattern to create a small, rounded nose shape and finish with a slip stitch, leaving a long tail for sewing.
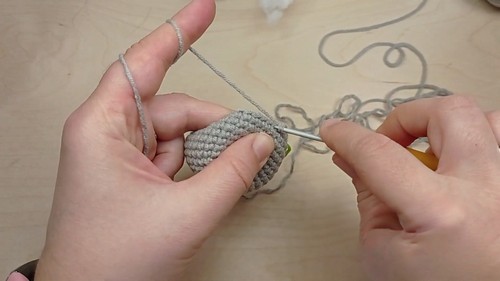
Body:
- The body follows a similar starting pattern to the head, beginning with a magic ring and increasing in rounds until you reach 36 single crochets.
- You then work several rounds without increases followed by decrease rounds to shape the body.
Legs (Front and Back):
- Both the front and back legs start similarly with a magic ring.
- Increase rounds are followed until you achieve the desired width, then work even (without increases) for several rounds.
- Finally, decrease to shape the legs, remembering that the front legs switch from beige/white to gray yarn partway through to simulate the Husky's coloring.
Tail:
- Start with a magic ring and follow a pattern of increases and working even to create a curved tail, finishing with a slip stitch.
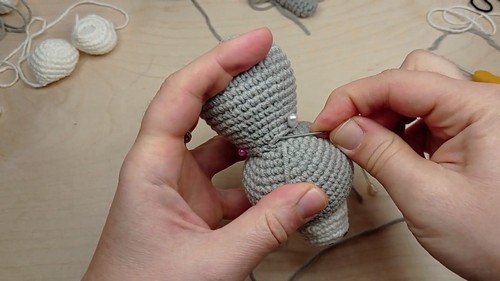
Assembly:
- Sew the two head parts together.
- Add the muzzle and nose.
- Attach the head to the body.
- Sew on the ears, legs, and tail.
- Use black yarn to embroider the eyes and additional facial details.