Crochet Herringbone Stitch Blanket For Winter Nights
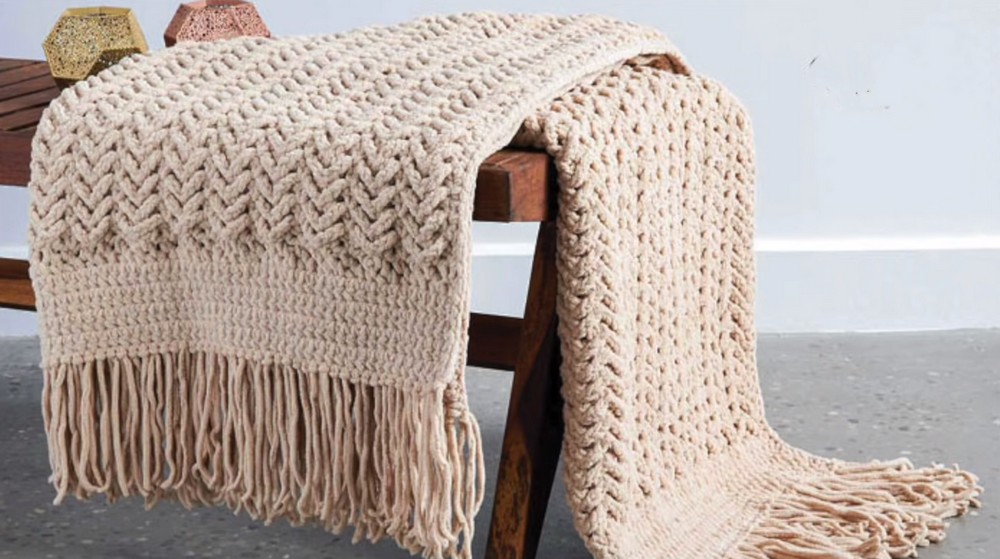
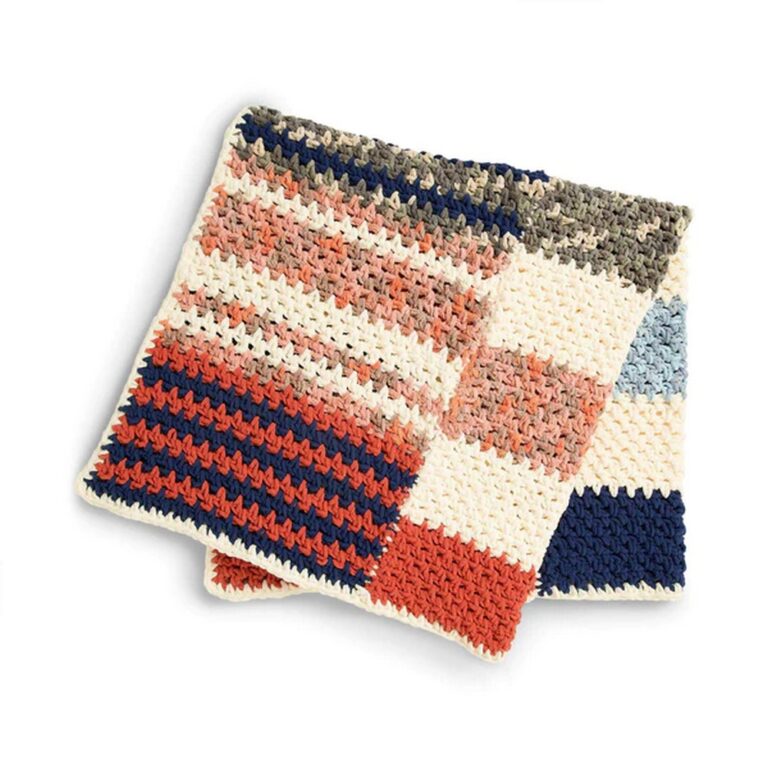
A good blanket adds comfort and style to any room, making relaxation a true delight. What could be better than a blanket crafted with the classic Herringbone Stitch? Introducing the Crochet Herringbone Stitch Blanket, designed to pamper you with the utmost comfort and coziness using lightweight worsted yarn. Not only does it promise warmth, but it also enhances your space with effortless elegance. Get your crochet hooks ready and dive into this home accessory pattern to create a cozy masterpiece for your home!
Making Your Crochet Herringbone Stitch Blanket
Materials Needed:
- Bernat Blanket yarn
- Crochet hook suitable for the yarn
- Tapestry needle (for weaving in ends)
Pattern Overview:
This blanket has a herringbone texture and is worked up in rows, with the large bands added on afterward. You can also add a fringe if desired.
Step by step Pattern
Foundation Chain:
Start by creating a slip knot.
Chain in multiples of six plus eight for the desired width or chain 110 for the sample size.
Row 1 (Right Side):
Start in the second chain from the hook with a single crochet.
Chain one, skip the next chain, and then single crochet in the following chain.
Repeat this across.
Row 2 (Wrong Side):
Chain one, single crochet in the first stitch.
Match the stitches below – chain one, skip the chain-one space, single crochet in the next single crochet.
Repeat this across.
Row 3 (Right Side):
Chain one, single crochet in the first stitch.
Chain three, slip stitch into the designated space that is second from where you are (visualize the grid format).
Chain three, skip the next space, single crochet in the following single crochet. Repeat across.
Row 4 (Wrong Side):
Chain one, single crochet in the first stitch.
Chain one, look for the next single crochet down (for the Herringbone section).
Do a double crochet, chain one between each, and alternate with single crochets at the tops.
Row 5 (Right Side):
Repeat the pattern of row three.
Row 6 (Wrong Side):
Repeat the pattern of row four.
Repeat:
Repeat rows 5 and 6 until the project reaches the desired length, ending on the wrong side row.
Band (Beginning/End of Blanket):
Fasten the yarn at the corner, start with a standing single crochet, and work single crochets evenly along the edge.
Work until the band is 4″ tall, matching the opposite edge.
Final Edging:
Work one round of single crochet around the entire edge of the blanket, placing three single crochets in each corner stitch to maintain the shape.
Weave in all ends securely.
Fringe (Optional):
Cut yarn strands to 14″ in length.
Fold a strand in half and, using a crochet hook, attach the fringe to the blanket’s edges by inserting the hook from the back to the front so the loop is on the hook side.
Pull the loop through, and then pull the tails through the loop. Adjust to create a neat appearance.
Do this across the edges where the fringe is desired and trim evenly at the end.
Finishing:
Block your blanket if desired to shape and size.
Make sure all ends are woven in, and trim any excess yarn on the fringe to ensure evenness.

Video Tutorial:

