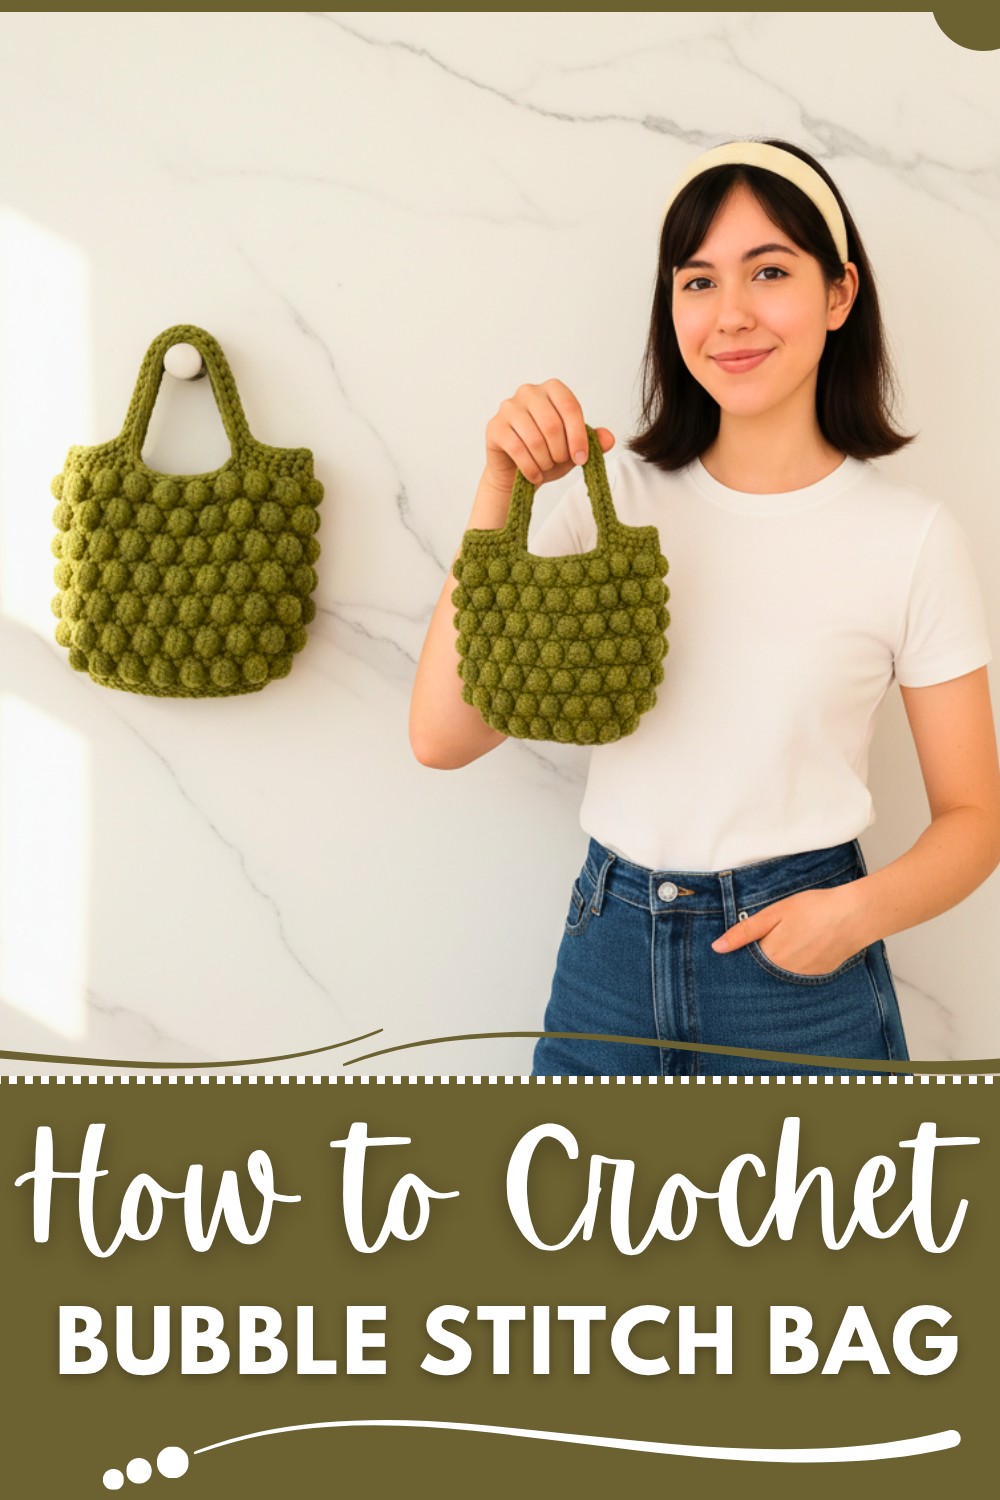
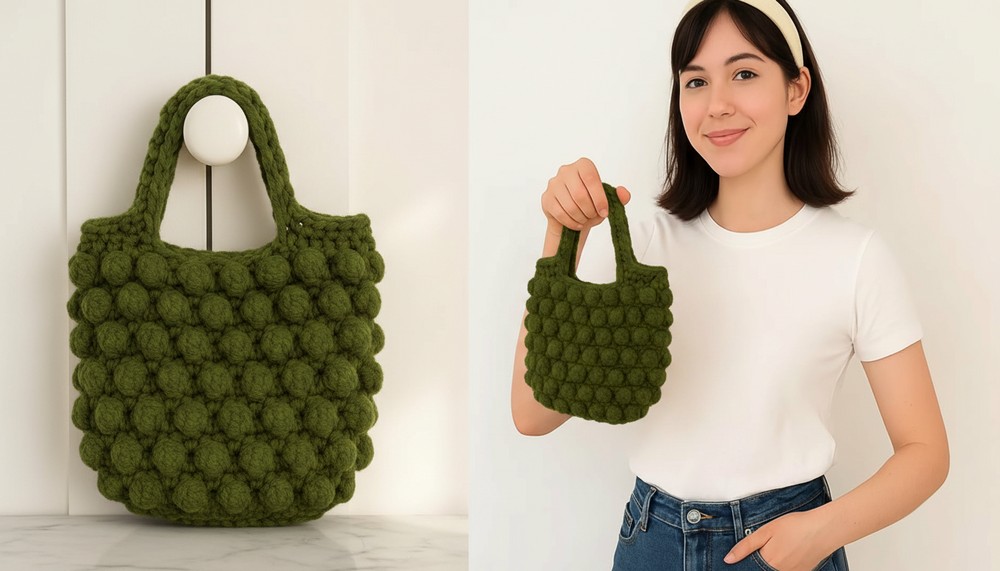
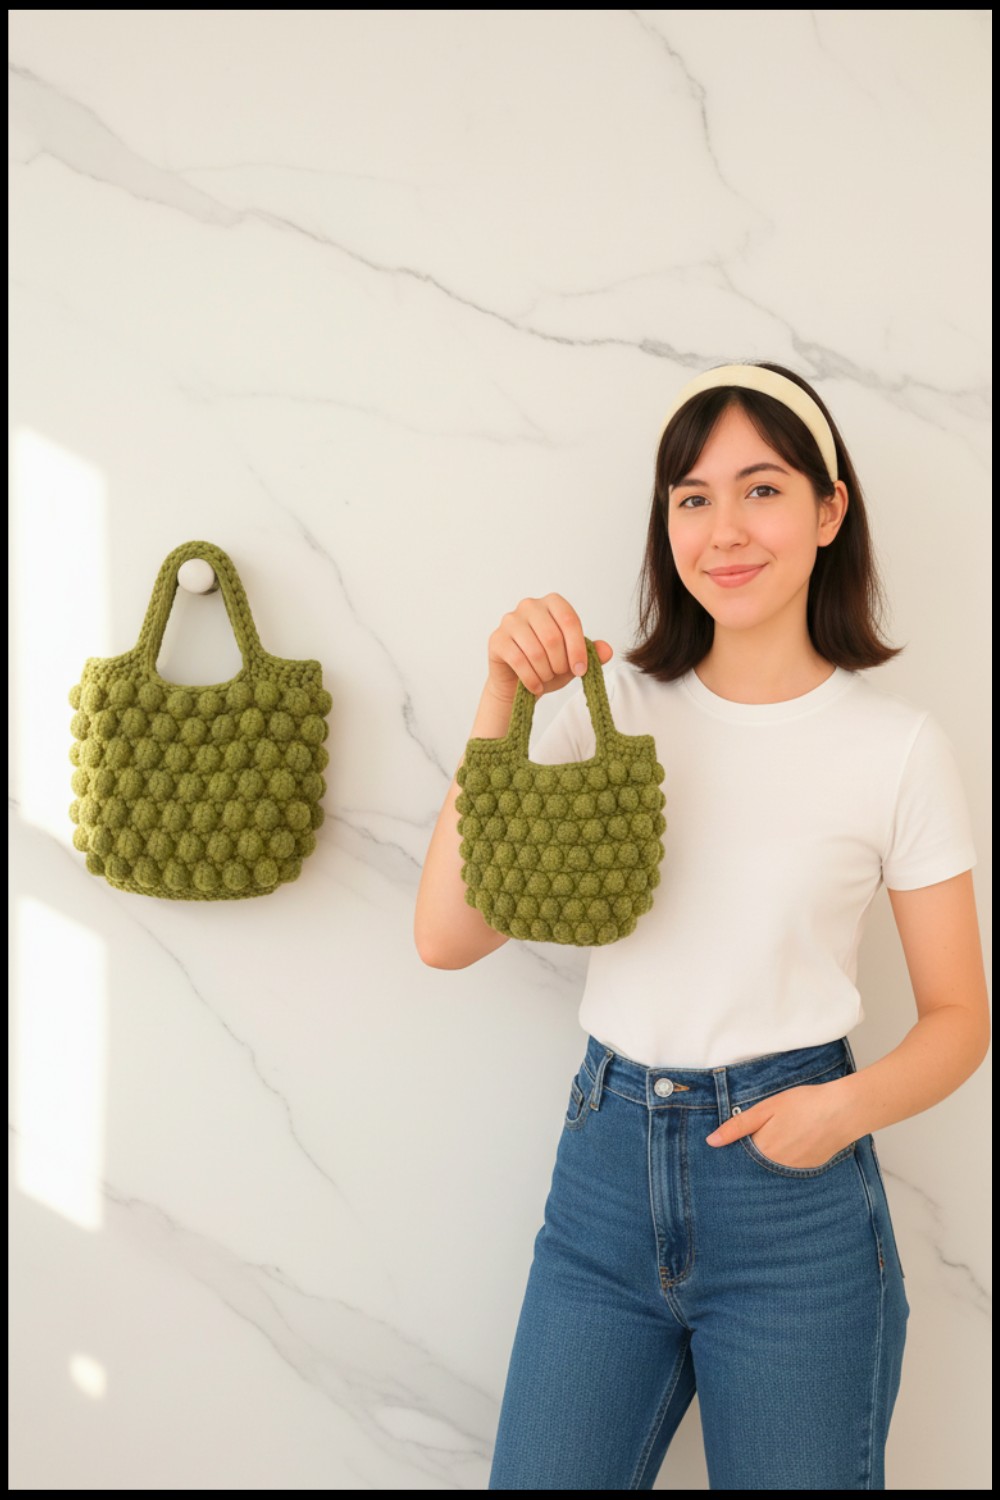
Add texture and flair with Crochet Bubble Stitch Bag Pattern featuring plush raised stitches and bold design that turns simple yarn into a fun standout carryall piece.
A bag with a soft, puffy texture can instantly catch the eye and feel fun to carry every day. A Crochet Bubble Stitch Bag Pattern is a design that uses raised stitches to form small bubble-like shapes across the surface, giving the bag a rich and textured look. This project is enjoyable because the bubble stitch adds a playful twist to basic crochet, turning simple yarn into something that feels unique and satisfying with every row. It may look detailed, but it follows a repeating pattern that becomes easy once you get the rhythm.
Free Crochet Bubble Stitch Bag Pattern for Easy Everyday Bag
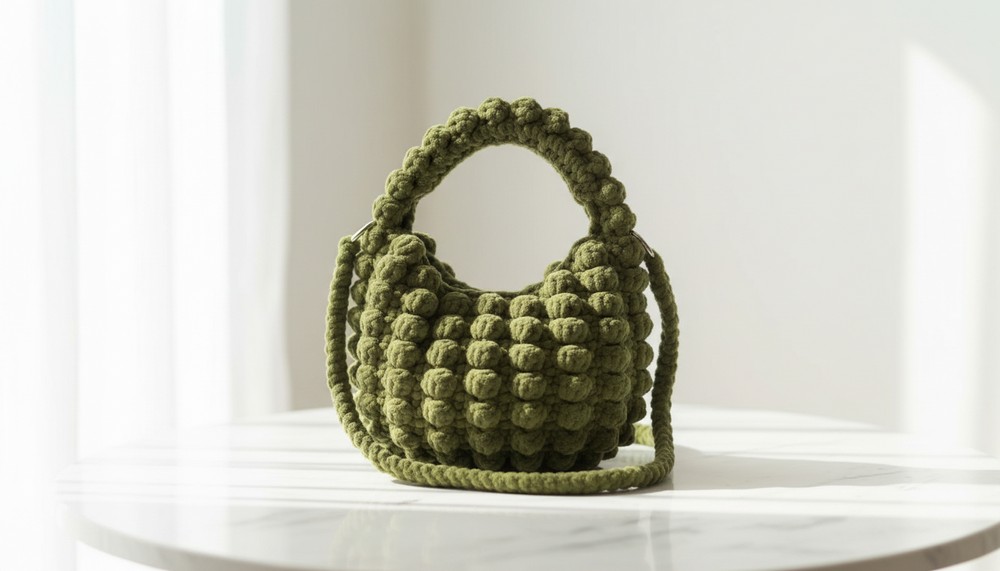
The bag stands out with its bumpy texture, soft structure, and stylish appearance that looks both modern and cozy. Different yarn colors can highlight the bubbles in creative ways, making the texture pop even more. It can be made in bold shades for a statement piece or soft tones for a calm and elegant look.
It is useful for carrying daily essentials like phones, small books, or accessories, and also works well as a handmade gift or trendy fashion item. A fun idea is to use two colors to make the bubbles stand out or add a simple lining inside for extra strength and a neat finish.
Bubble Bag Crochet Pattern
Materials Needed
- Yarn: 4 mm yarn
- Color: Olive Green
- Hook: 5 mm crochet hook
- Optional: Crochet bubble embellishments for closure, as well as inner lining fabric for added durability and charm.
Gauge
Ensure even tension throughout the project to achieve consistent stitches. Maintaining neat tension is crucial for the final texture and structure of your bubble bag.
Finished Size
The finished size depends on personal preferences, but you can adjust the strap length and overall height by adding or reducing rounds. Try the bag on your shoulder to confirm the desired strap size before joining.
Step-by-Step Pattern
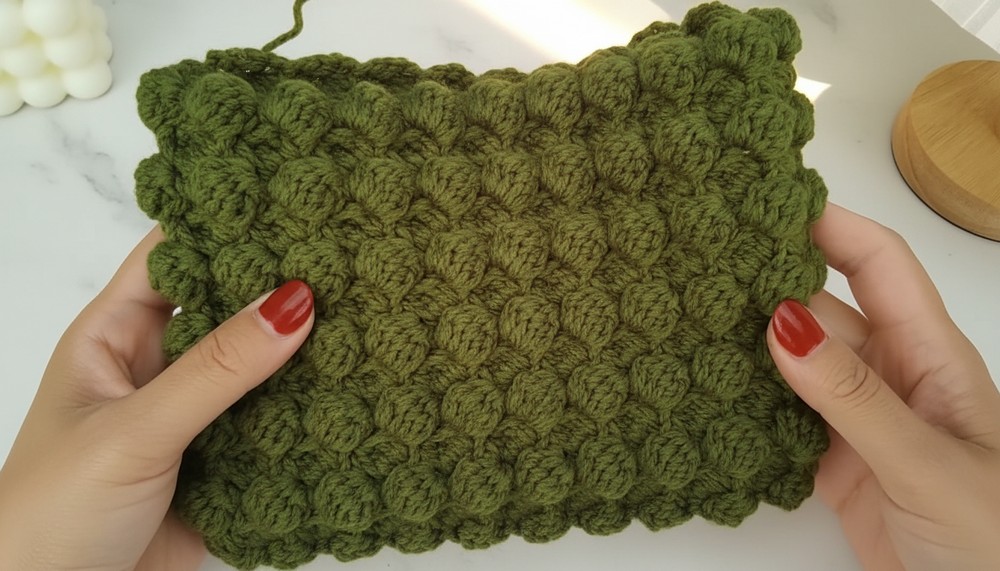
Bag Base
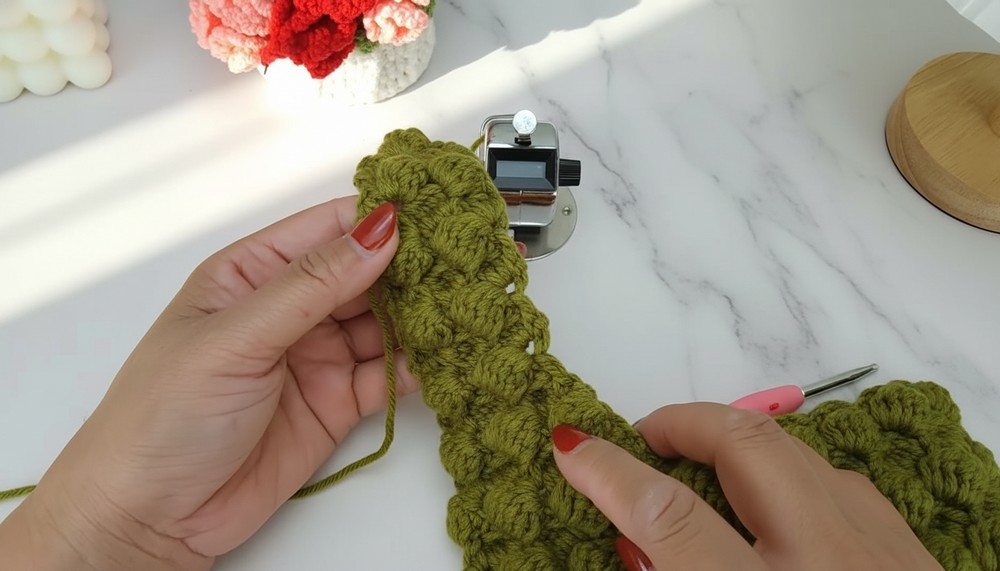
- Round 1:
- Chain 26.
- Skip the first two chains, then work 25 single crochets across.
- Turn your work. This forms the base of the bag. Keep your tension uniform for a clean foundation.
- Rounds 2-4:
- Chain 1. Repeat the pattern: single crochet, chain two, and six double crochets.
- Skip two stitches and repeat the sequence eight times before turning your work. These rounds add a lovely petal-like texture.
- Round 5:
- Chain 1. Repeat the pattern (single crochet, chain two, six double crochets) eight times. Then, repeat the sequence two additional times to extend the pattern.
- Slip stitch to finish the round. Your work may curl slightly, but it will flatten naturally as you continue.
- Rounds 6-16:
- Chain 1 and continue with the same pattern (single crochet, chain two, six double crochets) for 20 times around.
- Slip stitch to close each round. These rounds gradually build up the height of the bag, creating a textured and elegant look.
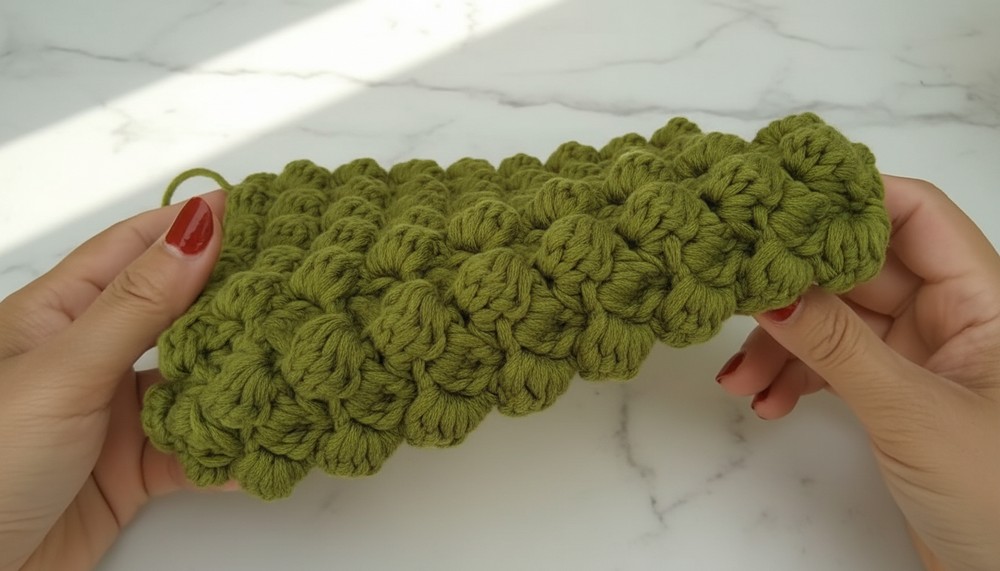
Strap
- Row 1:
- Chain 1. Repeat the sequence (single crochet, chain two, six double crochets) five times. End with one single crochet and turn your work. The strap begins wide, so keep the stitches neat and consistent.
- Row 2:
- Chain 1. Repeat the sequence (single crochet, chain two, six double crochets) four times, and then finish with a single crochet. Turn your work. The strap starts gently tapering for shape.
- Row 3:
- Chain 1. Repeat the sequence (single crochet, chain two, six double crochets) three times and end with a single crochet. Turn your work. Ensure all loops lie flat for a polished finish.
- Row 4:
- Chain 1. Repeat the sequence (single crochet, chain two, six double crochets) twice, followed by a single crochet. Turn your work. This section shapes the slim end of the strap.
- Row 5:
- Chain 1. Work as follows:
- (Single crochet + chain two + three double crochets) once.
- (Single crochet + chain two + six double crochets) once.
- (Single crochet + chain two + three double crochets) once.
- Turn your work. This row adds a gentle curve to the strap. Maintain relaxed tension for smooth shaping.
- Chain 1. Work as follows:
- Row 6:
- Chain 1. Repeat the sequence (single crochet, chain two, six double crochets) twice and finish with a single crochet. Turn your work. By now, the strap's shape is coming together beautifully!
- Rows 7-12:
- Alternate rows 5 and 6 as needed until you achieve the desired strap length.
- Try the strap on your shoulder to check for a comfortable fit before fastening off.
Adding the Bubble Closure
- Bubble Crochet Technique:
- To make a bubble: Yarn over, insert hook into stitch, pull up a loop, yarn over and pull through two loops (repeat this three times in the same stitch).
- Yarn over and pull through all loops on the hook. This forms a bubble.
- Securing the Bubble:
- After making the bubble stitch, fasten it off and tie securely to ensure it holds its shape.
- Use it as a decorative crocheted closure for your bag.
Joining Straps
- Place both finished straps together and carefully sew their ends to join. Focus on neat, consistent stitching for a sturdy and balanced bag design.
Customization Ideas
- Bubble Color: Crochet the bubble using contrasting colors to make it stand out.
- Multiple Bubbles: Create multiple smaller bubbles for additional decorative flair or use them as buttons.
- Inner Lining: Sew a fabric lining to reinforce the bag and prevent small items from slipping through.
- Embroidery: Add stitched designs around the bag to complement the bubble closure.
Special Techniques
- Bubble Crochet: Adds texture and charm to the bag while acting as a closure.
- Petal Texture: Six double crochets create a rounded petal texture, giving the bag a floral-inspired look.
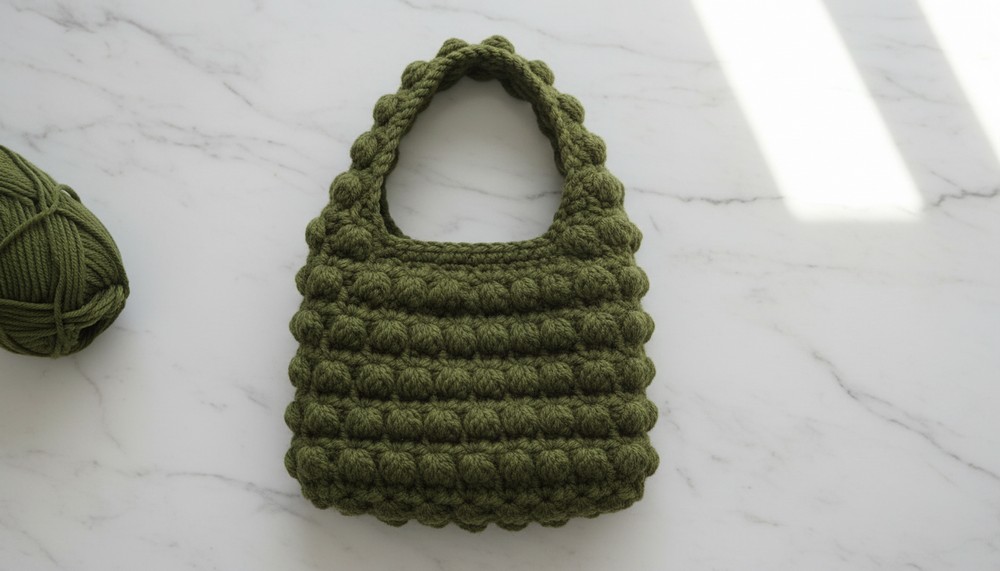
Final Look
Your completed bubble bag will be a stunning combination of elegance and playfulness. With a lovely petal-like texture, slim tapered straps, and unique bubble closure, this bag is both practical and charming—perfect for everyday use or gifting!
Conclusion & Important Remarks
This bubble bag is a satisfying project for crochet enthusiasts of all skill levels. The rhythmic pattern reinforces relaxation, and the bubble stitch adds a creative touch. Keep your tension even, follow the instructions carefully, and enjoy every moment of crafting this adorable design. Share it proudly, gift it to loved ones, or enjoy using it yourself. Every stitch reflects your patience and creativity.