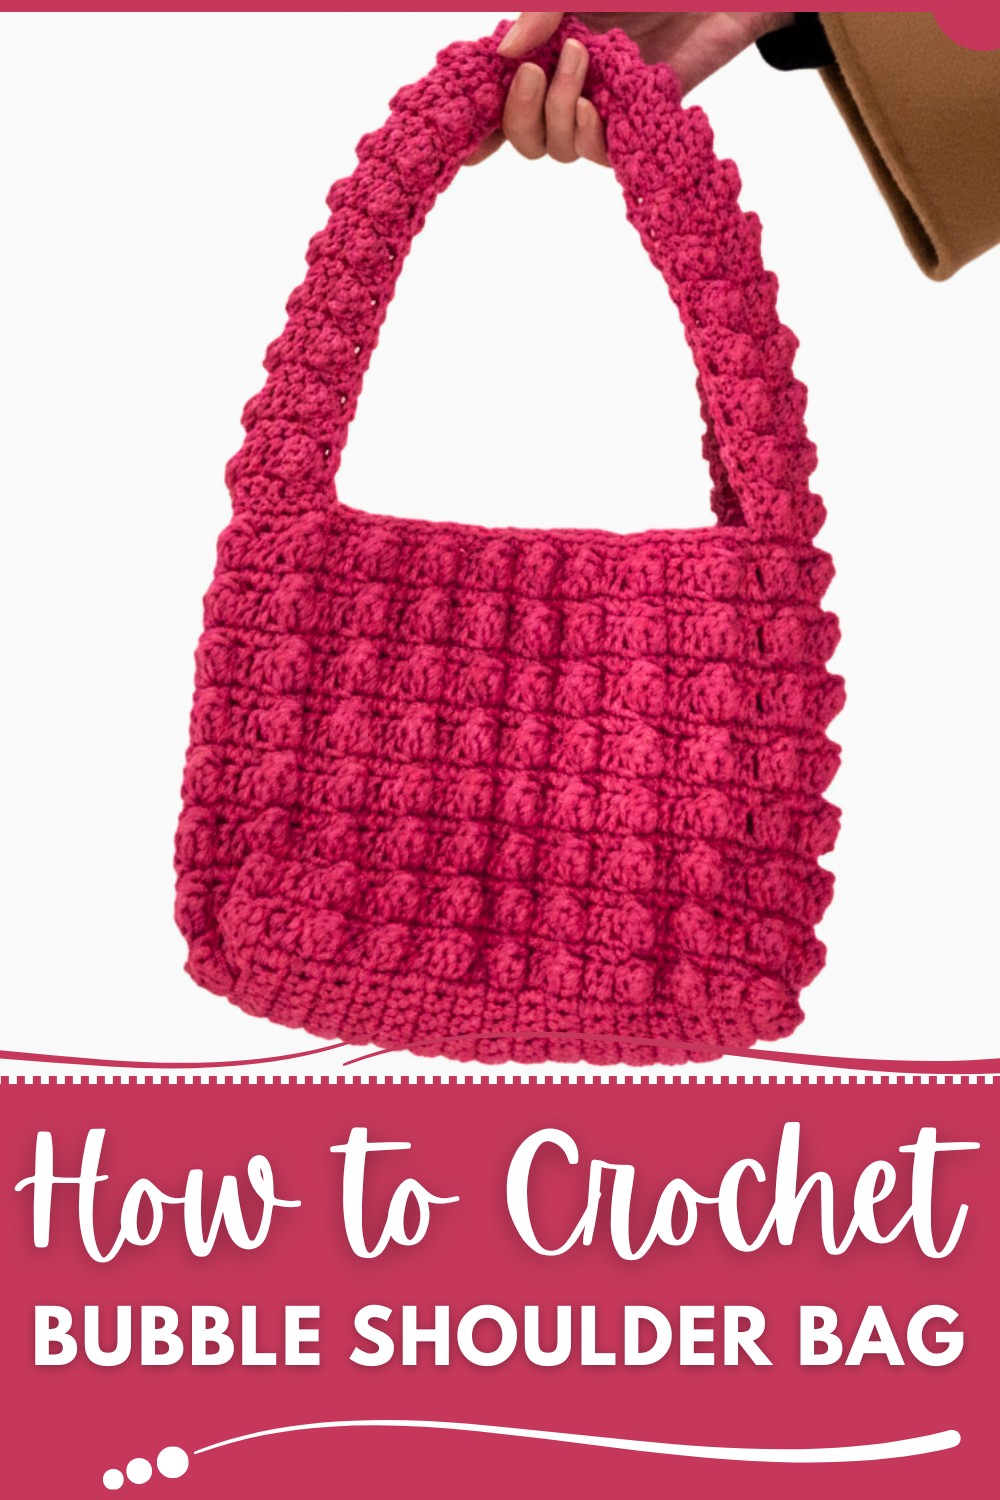
Create a chic and textured accessory with a Crochet Bubble Shoulder Bag Pattern, blending playful charm and creativity into a stylish handmade masterpiece.
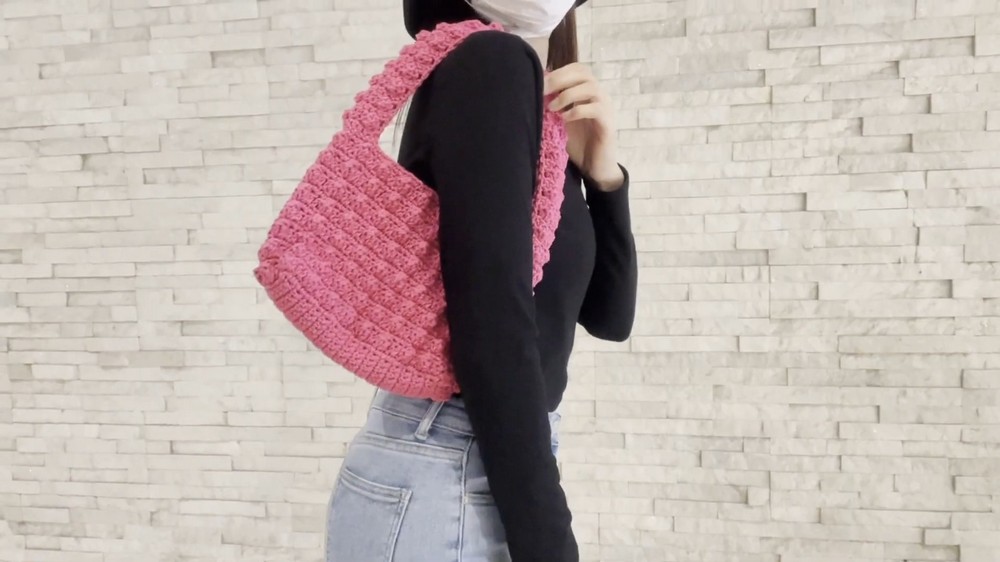
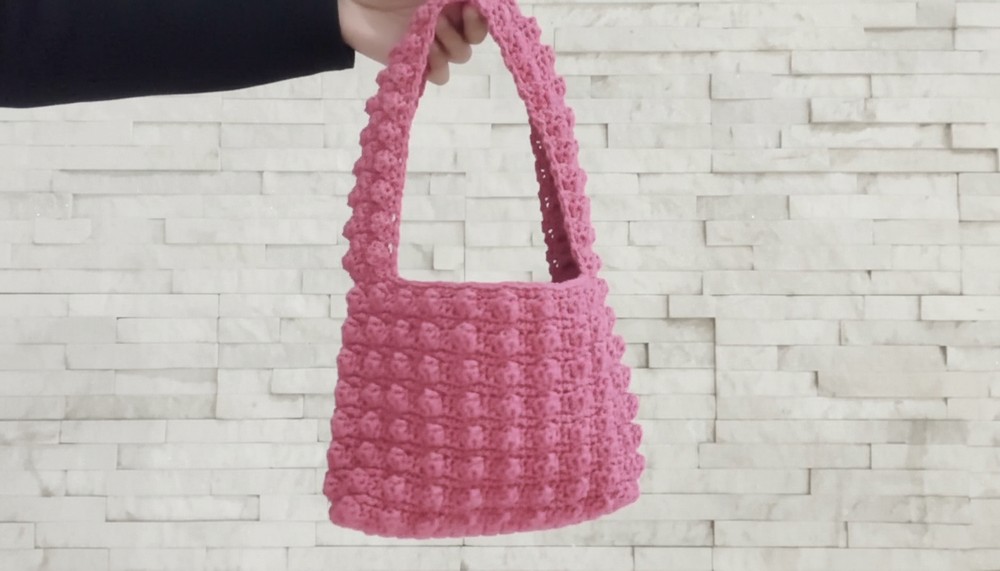
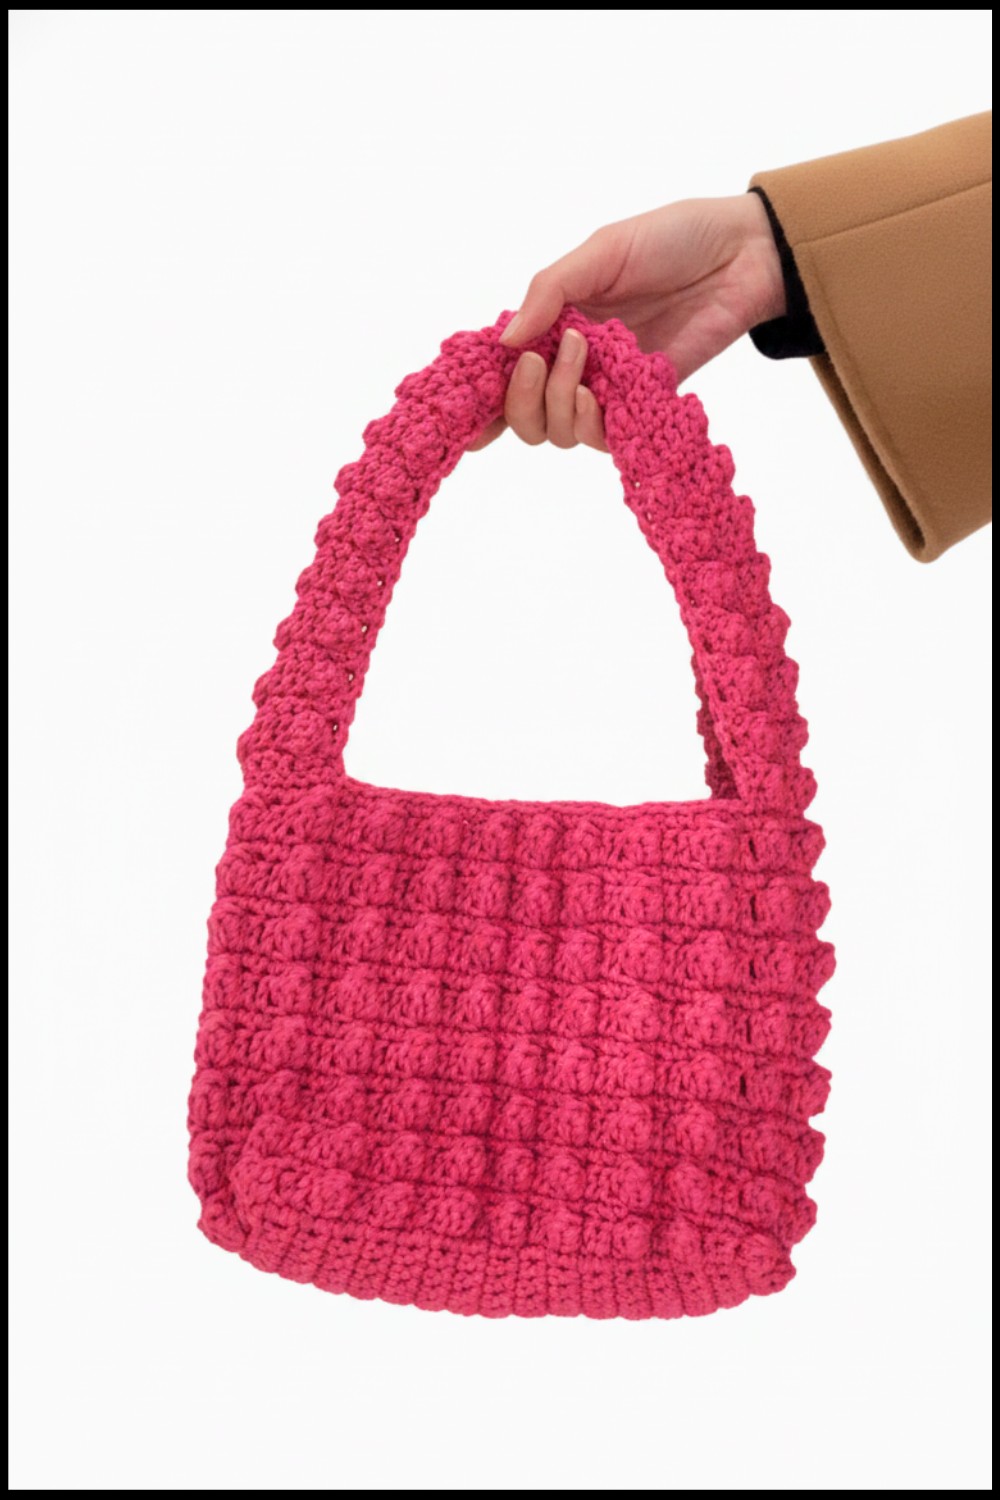
Not all crochet bags have the personality to make a statement, but the bubble shoulder bag pattern is here to change that! With its playful raised "bubbles" and unique texture, this design transforms a simple accessory into a vibrant conversation piece that’s both stylish and practical. The bag’s soft yet sturdy structure is perfect for carrying your essentials while showing off your crochet skills.
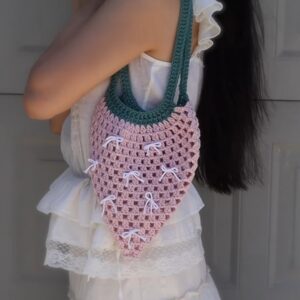
Free Crochet Bubble Shoulder Bag for a Unique Statement
Whether you’re working with bold colors for a modern, striking effect or opting for a dreamy pastel palette, the possibilities are endless. It’s an ideal project for exploring 3D crochet techniques and discovering just how far your creativity can go. Perfect for casual days, beach outings, or even a quick dash to the market, the bubble shoulder bag proves that practical doesn’t have to mean boring, this bag is the ultimate fusion of function with flair.
Crochet Bubble Bag Pattern with Printed Wind Eyebrow Pink Flower Shape
Materials Needed
- Yarn: Cotton or medium-weight yarn in pink or desired color (ensure durability and flexibility for structured designs).
- Crochet Hook: Appropriate hook size for your yarn; commonly 4 mm to 5 mm.
- Additional Tools:
- Stitch markers
- Yarn needle
- Scissors
- Measuring tape (optional)
Special Techniques
- Popcorn Stitch:
- Yarn over, insert hook into designated stitch, pull up a loop.
- Work 4 double crochets (DC) in the same stitch.
- Enlargen the loop, remove the hook, and insert it into the first DC stitch.
- Pull the large loop through the first stitch and close tightly with a chain stitch.
- Single Crochet in Back Loops:
- Work into back loops of stitches instead of the full V for a textured finish.
- Symmetrical Strap Attachment:
- Use stitch markers to align and fix the handle before sewing.
Step-by-Step Instructions
Part 1: Create the Base
- Foundation Chain
- Create a slip knot on your finger and place it on the crochet hook.
- Chain 10 stitches to form the base.
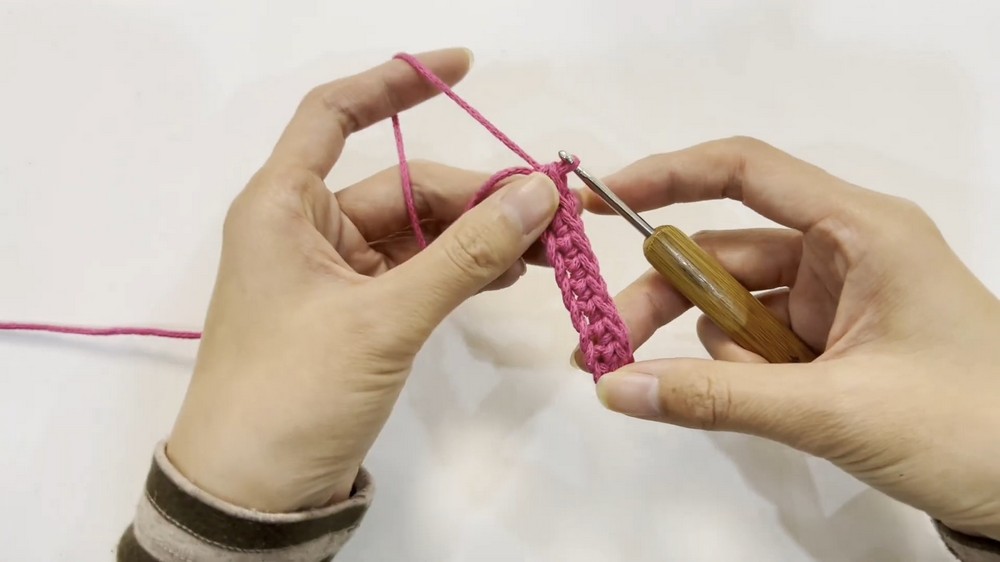
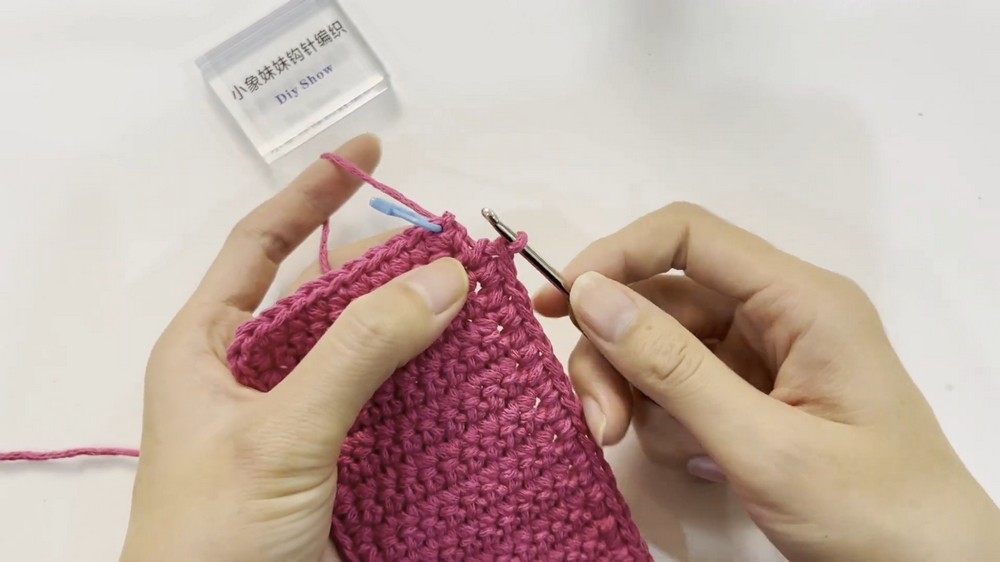
- Row 1: Single Crochet in Back Loop
- Insert hook into the second chain from the hook, working only in the back loop.
- Yarn over, pull through loop (2 loops on hook), yarn over and pull through both loops (create SC).
- Continue SC in the back loops across the row (total of 10 SC).
- Rows 2–29: Build the Base
- At the end of each row, chain 1 and turn your work.
- Repeat 10 SC in each row to create a rectangular piece.
- After completing 29 rows, your base is complete. It will measure approximately 6 cm x 20 cm, but ensure it fits your intended bag size.
Part 2: Crochet Around the Base
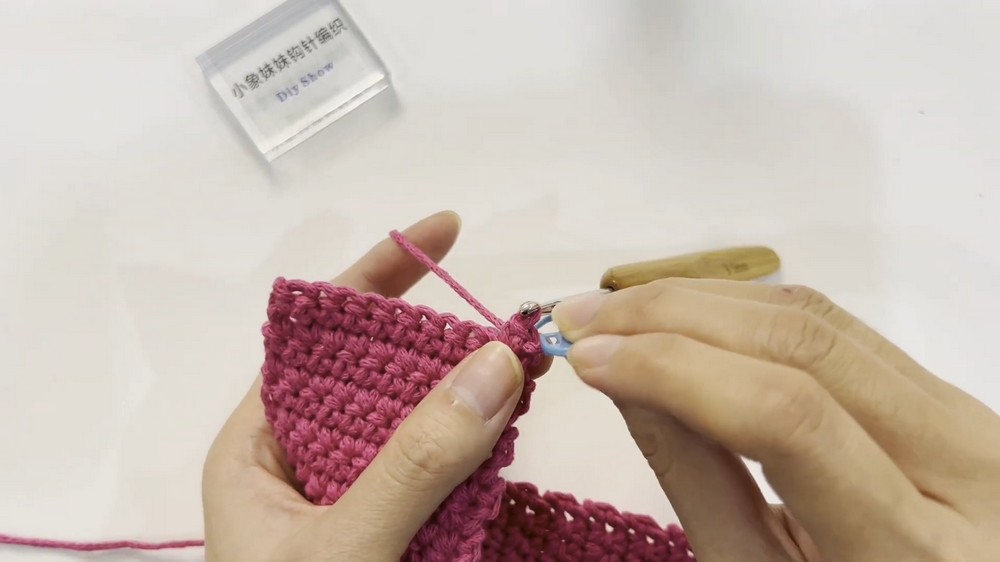
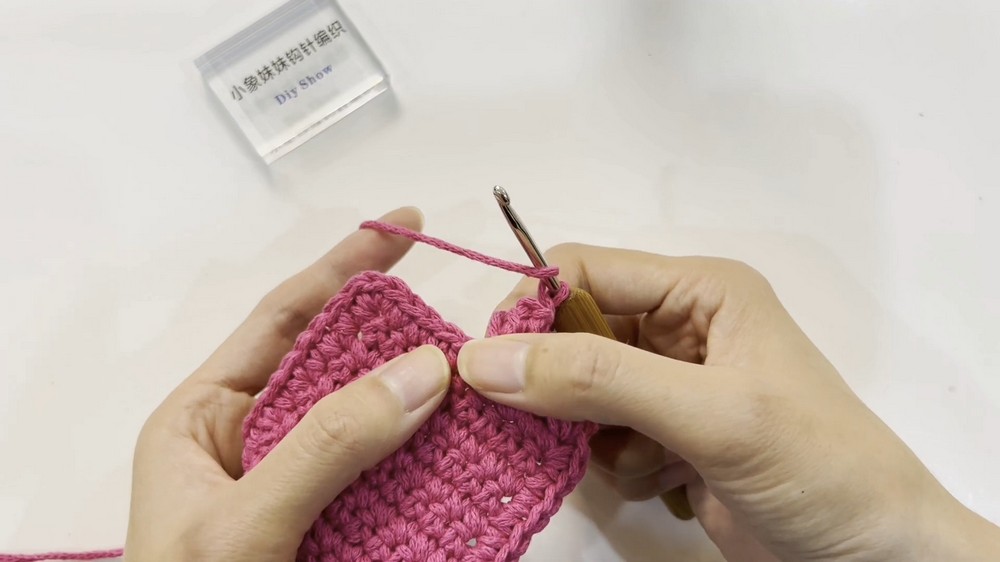
- Single Crochet Around Edges
- After completing the base, chain 1 and turn your work.
- Insert your hook into the first stitch and place 1 SC in each stitch along the sides.
- At corner stitches, place 3 SC in the same stitch to ensure the corners curve evenly.
- Continue SC evenly across all four sides of the rectangle.
- Slip Stitch to Finish Edging
- Connect your last stitch to the first stitch with a slip stitch.
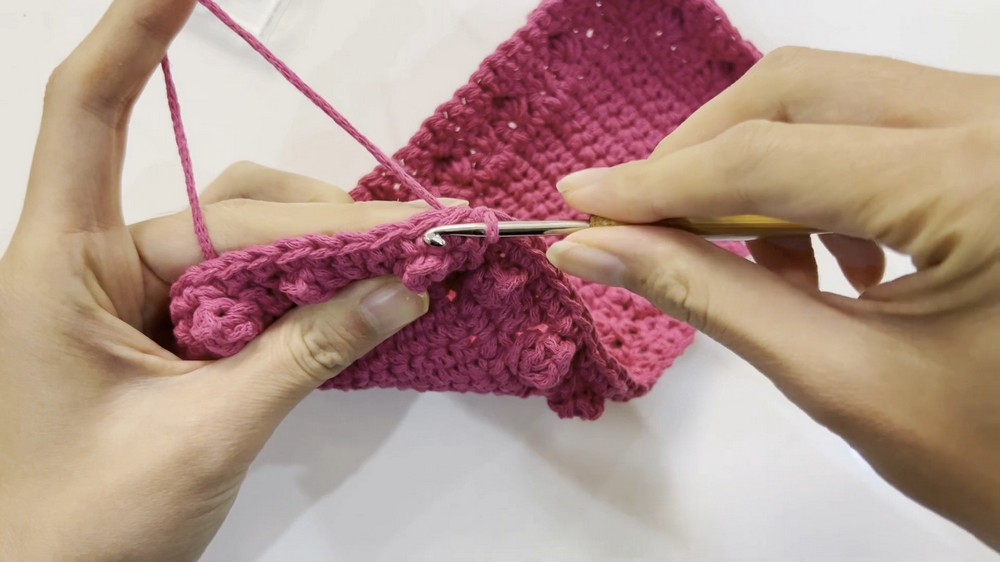
Part 3: Create the Bubble Flower Pattern
- Foundation for First Round of Flowers:
- Chain 3, making it the starting stitch of the next round.
- Place a stitch marker in the third chain for reference.
- Bubble Flowers (Popcorn Stitches):
- Skip the next stitch and start the popcorn stitch in the following stitch.
- Make 4 DC in the same stitch. Enlargen the loop and insert the hook into the first DC. Pull the enlargened loop through the first stitch and close with a chain stitch.
- Double Crochet Between Flowers:
- Chain 1 after completing the popcorn stitch. Skip one stitch.
- In the next stitch, make 2 DC.
- Repeat Row:
- Continue creating bubble flower shapes and double crochets following the pattern’s repetition until you complete the round.
- Use stitch markers to align popcorn textures across rows.
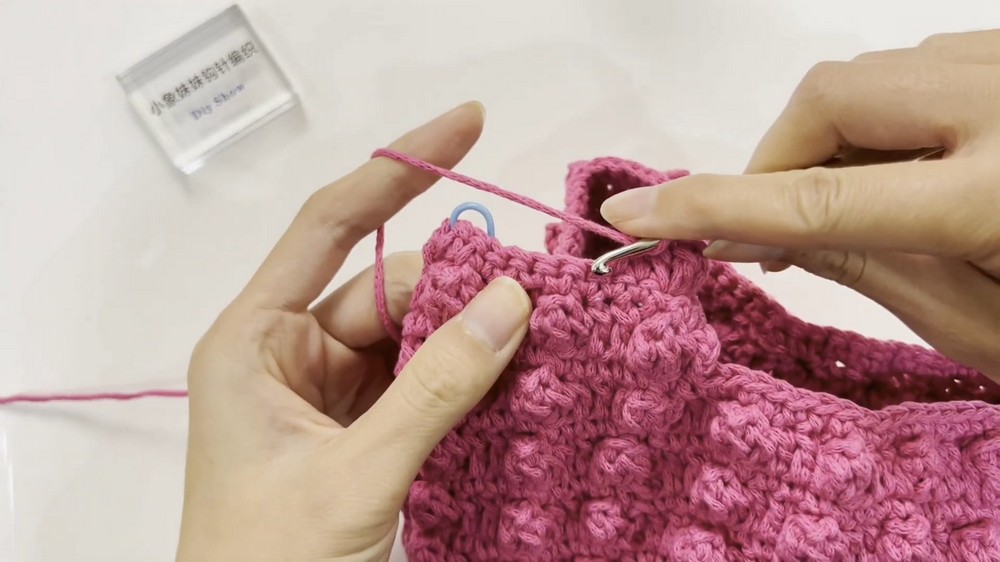
Part 4: Build the Bag Body
- Alternate Rows:
- Repeat the bubble flower row (row 3) and the single crochet row (row 4) alternately.
- Continue crocheting bubble flowers and SC rows until the bag body measures 16 rounds in height, creating 8 rows of bubble flowers.
Part 5: Create the Handles
- Adjust the Floral Pattern:
- Chain 3 for the foundation of the handles.
- Begin a row with 3 popcorn stitches, spaced with chain stitches and 2 DC between each popcorn stitch.
- Build Handle Length:
- Repeat the popcorn stitch and single crochet rows until the handle reaches desirable length (approximately 42 rows or 21 flower rows).
- End with single crochet for a finished look.

Finishing
- Attach Handles to Bag:
- Position the handles symmetrically on both sides of the bag using stitch markers.
- Sew securely using a yarn needle, ensuring durability at attachment points.
- Weave in Ends:
- Use a yarn needle to weave in all loose threads on the inside of the bag for a clean finish.
- Ensure extra yarn tails are secured to prevent unraveling with use.
Final Words
This bubble bag is an intricate yet rewarding project that combines simple stitches with fun popcorn textures. Carefully follow stitch counts to ensure symmetry and alignment, especially while creating the bubble flowers and attaching the straps. The bag is versatile—use the bubble pattern to customize additional accessories like matching coin purses or cell phone holders.
Tips for Success
- Count Carefully: Regularly count stitches and use markers to ensure correct placement and prevent uneven rows.
- Test Fit: Measure handle length and width during crocheting to ensure a snug and symmetrical attachment to the bag.
- Keep Tension Consistent: Maintain even tension for all stitches to ensure clean and professional finishing.
- Customization: Use different yarn colors, alternating rows for visual interest.